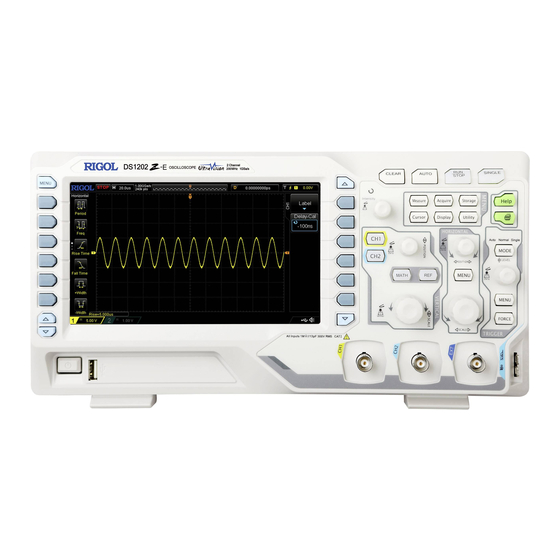
Rigol DS1202Z-E Quick Manual
Digital oscilloscope
Hide thumbs
Also See for DS1202Z-E:
- User manual (224 pages) ,
- Performance verification manual (26 pages) ,
- User manual (211 pages)

Related Manuals for Rigol DS1202Z-E


Summary of Contents for Rigol DS1202Z-E
- Page 1 Quick Guide DS1000Z-E Series Digital Oscilloscope Aug. 2019 RIGOL (SUZHOU) TECHNOLOGIES INC.
- Page 3 Notices RIGOL products are covered by P.R.C. and foreign patents, issued and pending. RIGOL reserves the right to modify or change parts of or all the specifications and pricing policies at the company’s sole decision. Information in this publication replaces all previously released materials.
-
Page 4: Safety Requirement
RIGOL Safety Requirement General Safety Summary Only the exclusive power cord Use the proper fuse. designed for the instrument and Avoid circuit or wire exposure. authorized for use within the local 10. Do not operate the instrument with country could be used. -
Page 5: Measurement Category
RIGOL Measurement Category Measurement Category DS1000Z-E series digital oscilloscopes can make measurements in Measurement Category I. WARNING This oscilloscope can only be used for measurements within its specified measurement categories. Measurement Category Definitions Measurement category I is for measurements performed on circuits not directly connected to MAINS. -
Page 6: Working Environment
RIGOL Working Environment Temperature Operating: 0℃ to +50℃ Non-operating: -40℃ to +70℃ Humidity 0℃ to +30℃: ≤95% relative humidity +30℃ to +40℃: ≤75% relative humidity +40℃ to +50℃: ≤45% relative humility WARNING To avoid short circuit inside the instrument or electric shock, please do not operate in humid environment. -
Page 7: Care And Cleaning
RIGOL Pollution degree 2: Normally only dry, non-conductive pollution occurs. Occasionally a temporary conductivity caused by condensation may occur. For example: general indoor environment. Pollution degree 3: Conductive pollution occurs, or dry, non-conductive pollution occurs which becomes conductive due to condensation which is expected. For example: Sheltered outdoor environment. -
Page 8: Environmental Considerations
This manual is used to guide users to quickly get familiar with the front panel, rear panel, user interface and basic operation method of DS1000Z-E series digital oscilloscope. You can download the newest version of the manual from RIGOL official website (www.rigol.com). - Page 9 LEVEL Content Conventions in this Manual: DS1000Z-E series includes the following models. Unless otherwise noted, this manual takes DS1202Z-E as an example to illustrate the front panel, rear panel, user interface and basic operation methods of DS1000Z-E series. Model Analog Bandwidth...
-
Page 10: Table Of Contents
RIGOL Contents Guaranty and Declaration ....................I Safety Requirement ....................... II General Safety Summary ....................II Safety Notices and Symbols ..................II Measurement Category ....................III Ventilation Requirement ....................III Working Environment ....................IV Care and Cleaning ......................V Environmental Considerations ..................VI Document Overview ....................... -
Page 11: Quick Start
The consigner or carrier shall be liable for the damage to the instrument resulting from shipment. RIGOL would not be responsible for free maintenance/rework or replacement of the instrument. 2. Inspect the instrument In case of any mechanical damage, missing parts, or failure in passing the electrical and mechanical tests, contact your RIGOL sales representative. -
Page 12: Appearance And Dimensions
RIGOL Appearance and Dimensions Figure 1 Front View Unit: mm Figure 2 Top View Unit: mm DS1000Z-E Quick Guide... -
Page 13: To Prepare For Operation
RIGOL To Prepare for Operation To Adjust the Supporting Legs Adjust the supporting legs properly to use them as stands to tilt the oscilloscope upwards for stable placement of the oscilloscope as well as better operation and observation. Figure 3 To Adjust the Supporting Legs To Connect to AC Power Supply This oscilloscope can accept 100-240 V, 45-440 Hz AC power supply. -
Page 14: Turn-On Checkout
From this dialog box you can view the name, detail, version and remaining trial time of the option currently installed. To Connect the Probe RIGOL provides passive probe for DS1000Z-E series. For the model of the probes, DS1000Z-E Series Datasheet please refer to . -
Page 15: Function Inspection
RIGOL Function Inspection 1. Press Storage Default to restore the oscilloscope to its default configuration. 2. Connect the ground alligator clip of the probe to the "Ground Terminal" as shown in the figure below. 3. Use the probe to connect the input terminal of CH1 and the "Compensation Signal Output Terminal"... -
Page 16: Probe Compensation
RIGOL Probe Compensation When the probes are used for the first time, you should compensate the probes to match the input channels of the oscilloscope. Non-compensated or poorly compensated probes may cause measurement inaccuracy or errors. The probe compensation procedures are as follows: 1. -
Page 17: Front Panel Overview
RIGOL Front Panel Overview 9 10 11 12 15 16 17 18 Figure 9 Front Panel Overview Table 1 Front Panel Description Description Description Measurement Menu Softkeys Help/Print Power Key Function Menu Softkeys USB Host Interface Multifunction Knob Analog Channel Input... -
Page 18: Rear Panel Overview
RIGOL Rear Panel Overview Figure 10 Rear Panel Overview 1. Handle Pull up the handle vertically for easy carrying of the instrument. When you do not need the handle, press it down. 2. LAN Connect the instrument to the network via this interface for remote control. This oscilloscope conforms to the LXI CORE 2011 DEVICE class instrument standards and can quickly build test system with other instruments. - Page 19 RIGOL Pass/Fail: The instrument will output a negative pulse via this connector when a failed waveform is detected during the pass/fail test. The instrument continuously outputs a low level via this connector when no failed waveform is detected. 5. Lock Hole You can lock the instrument to a fixed location by using the security lock (please purchase it yourself) via the lock hole.
-
Page 20: Front Panel Function Overview
RIGOL Front Panel Function Overview VERTICAL CH1, CH2: analog channel setting keys. The 2 channels are marked by different colors which are also used to mark both the corresponding waveforms on the screen and the channel input connectors. Press any key to open the corresponding channel menu and press again to turn off the channel. -
Page 21: Horizontal
RIGOL HORIZONTAL HORIZONTAL POSITION: modify the horizontal position. The trigger point would move left or right relative to the center of the screen when you rotate the knob. During the modification, waveforms of all the channels would move left or right and the horizontal position message (e.g. -
Page 22: Clear
RIGOL CLEAR Press this key to clear all the waveforms on the screen. If the oscilloscope is in "RUN" state, new waveforms will still be displayed. AUTO Press this key to enable the waveform auto setting function. The oscilloscope will automatically adjust the vertical scale, horizontal time base and trigger mode according to the input signal to realize optimum waveform display. -
Page 23: Multifunction Knob
RIGOL Multifunction Knob Adjust waveform brightness: In non-menu-operation mode, turn this knob to adjust the brightness of waveform display. The adjustable range is from 0% to 100%. Turn clockwise to increase the brightness and counterclockwise to reduce. Press down this knob to reset the brightness to 60%. -
Page 24: Print
RIGOL Display: press this key to enter display setting menu to set the display type, persistence time, wave intensity, grid type and grid brightness. Utility: press this key to enter the system function setting menu to set the system-related functions or parameters, such as the I/O, sound and language. -
Page 25: User Interface
RIGOL User Interface DS1000Z-E provides 7.0 inch WVGA (800*480) TFT LCD. 15 16 Figure 11 User Interface 1. Auto Measurement Items Provide 20 horizontal (HORIZONTAL) and 17 vertical (VERTICAL) measurement parameters. Press the softkey at the left of the screen to activate the corresponding measurement item. - Page 26 RIGOL horizontal time base. 5. Waveform Memory Provide the schematic diagram of the memory position of the waveform currently on the screen. waveform in the memory waveform on the screen 6. Trigger Position Display the trigger position of the waveform in the waveform memory and on the screen.
- Page 27 RIGOL 12. Analog Channel Label/Waveform Different channels are marked with different colors and the colors of the channel label and waveform are the same. 13. CH2 Vertical Scale Display the voltage value per grid of CH2 waveform vertically. Use VERTICAL SCALE to modify this parameter.
-
Page 28: Parameter Setting Method
RIGOL Parameter Setting Method This oscilloscope provides two methods to set the basic parameters. Method 1: When is displayed on the menu, you can rotate to set the desired value directly. Method 2: When is displayed, press down and the numeric keyboard is displayed, as shown below. -
Page 29: To Use The Built-In Help System
RIGOL To Use the Built-in Help System The help system of this oscilloscope provides instructions for all the function keys (including menu keys) on the front panel. Press Help to open the help interface and press again to close the interface. The help interface mainly consists of two parts. -
Page 30: Troubleshooting
The commonly encountered failures and their solutions are listed below. When you encounter those failures, please solve them following the corresponding steps. If the problem remains still, please contact RIGOL and provide your device information (acquisition method: Utility System System Info). - Page 31 RIGOL 6. The display of waveform is ladder-like. (1) The horizontal time base might be too low. Increase the horizontal time base to increase the horizontal resolution and improve the display. (2) If the display type is "Vectors", the lines between the sample points may cause ladder-like display.
Need help?
Do you have a question about the DS1202Z-E and is the answer not in the manual?
Questions and answers