
Related Manuals for Marantz SACD 30n


Summary of Contents for Marantz SACD 30n
- Page 1 Contents Connections Playback Settings Tips Appendix Network SACD Player SACD 30n Owner’s Manual Remote control Front panel Rear panel Index unit...
- Page 2 Contents Connections Playback Settings Tips Appendix Connections Accessories Inserting the batteries Connecting an amplifier Operating range of the remote control unit Connecting to a device with digital audio input connectors Part names and functions Connecting to a device with digital audio output connectors Front panel Connecting a PC or Mac Rear panel...
- Page 3 Contents Connections Playback Settings Tips Appendix Playback Playing CDs/Super Audio CDs Playing CDs and Super Audio CDs Basic operation Setting the top priority playback layer for Super Audio CDs Turning the power on Playing tracks in a specific order (Program playback) Switching the power to standby Playing Data CDs and Data DVDs Selecting the input source...
- Page 4 Contents Connections Playback Settings Tips Appendix Settings Network Network Information Menu map Network & USB-A Menu operation Wi-Fi Inputting characters Bluetooth Using the number buttons Network Control Using the cursor buttons Friendly Name Audio Connection Filter Settings Variable Out Diagnostics Volume Limit HEOS Account Digital Out...
- Page 5 Contents Connections Playback Settings Tips Appendix Tips Appendix Contents Playing back Discs Tips Playback order of music files Troubleshooting About discs and files Power does not turn on / Power is turned off Playing back a USB memory devices Operations cannot be performed through the remote control unit Cautions on using media Display on this unit shows nothing Inserting a disc...
- Page 6 Playback Settings Tips Appendix Thank you for purchasing this Marantz product. To ensure proper operation, please read this owner’s manual carefully before using the product. After reading this manual, be sure to keep it for future reference. Accessories Check that the following parts are supplied with the product.
- Page 7 Contents Connections Playback Settings Tips Appendix Inserting the batteries NOTE 0 To prevent damage or leakage of battery fluid: 0 Do not use a new battery together with an old one. Remove the rear lid in the direction of the arrow and 0 Do not use two different types of batteries.
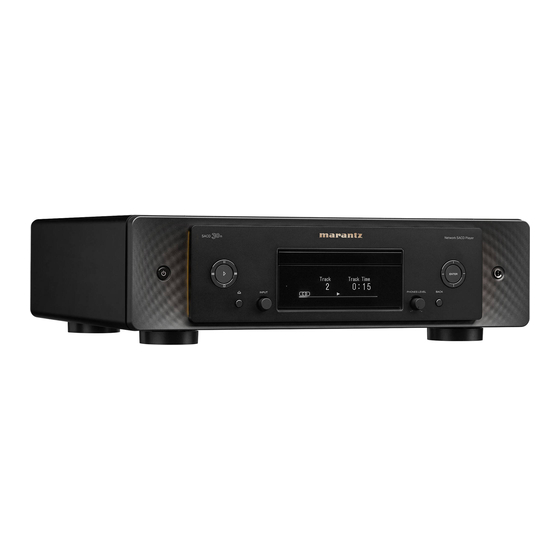
- Page 8 Contents Connections Playback Settings Tips Appendix Part names and functions Front panel For details, see the next page. Remote control Front panel Rear panel Index unit...
- Page 9 Contents Connections Playback Settings Tips Appendix H Cursor buttons These select items. I ENTER button This determines the selection. J Headphones jack Used to connect headphones. NOTE 0 To prevent hearing loss, do not raise the volume level excessively when using headphones.
-
Page 10: Rear Panel
Contents Connections Playback Settings Tips Appendix Rear panel For details, see the next page. Remote control Front panel Rear panel Index unit... - Page 11 Contents Connections Playback Settings Tips Appendix B AUDIO OUT connectors Used to connect devices equipped with analog audio inputs connectors or an external power amplifier. (v p. 18) C USB port (T) This is used to connect USB storages (such as USB memory devices). (v p.
- Page 12 Tips Appendix I REMOTE CONTROL connectors Used to connect to a Marantz audio device that is compatible with the remote control function. (v p. 26) J EXTERNAL/INTERNAL switch Turn this switch to “EXTERNAL” to operate the unit by pointing the remote control at the amplifier connected to this unit using the remote control connection.
-
Page 13: Remote Control Unit
Settings Tips Appendix Remote control unit The remote control provided with this unit can control a Marantz amplifier. “Amplifier operations” (v p. 16) o Operating this unit A Remote control signal transmitter This transmits signals from the remote control unit. (v p. 7) B Disc tray open/close button (q) Opens and closes the disc tray. - Page 14 Contents Connections Playback Settings Tips Appendix F QUEUE button This displays the queue. “Playing back files stored on PC or NAS” (v p. 34) “Playing a USB memory device” (v p. 37) PROGRAM button This sets program playback. (v p. 57) G ENTER button This determines the selection.
- Page 15 Contents Connections Playback Settings Tips Appendix N VOLUME buttons (no) These adjust the volume of the audio signal output from the analog audio output terminals (VARIABLE) of this unit. This function is enabled when the volume control mode of the remote control is network SACD player control mode.
- Page 16 Connections Playback Settings Tips Appendix o Amplifier operations A Marantz amplifier can be operated. A INPUT buttons (ml) B Mute button (:) C Power operation button (AMP X) D TONE/BALANCE button E VOLUME buttons (no) 0 The remote control may not operate some products.
- Page 17 Contents Connections Playback Settings Tips Appendix o Contents o Cables used for connections Provide necessary cables according to the devices you want to Connecting an amplifier connect. Connecting to a device with digital audio input connectors Connecting to a device with digital audio output connectors Audio cable (supplied) Connecting a PC or Mac Connecting a USB memory device to the USB port...
- Page 18 Contents Connections Playback Settings Tips Appendix Connecting an amplifier In addition to the normal analog audio output connectors (FIXED) this unit has analog audio output connectors (VARIABLE) that allow you to adjust the volume of the audio signal output from this unit. Connect the power amplifier to the analog audio output connectors (VARIABLE) and press the VOLUME no buttons on the remote control to adjust the volume of the audio signal output from this unit.
- Page 19 Contents Connections Playback Settings Tips Appendix Connecting to a device with digital audio input connectors You can enjoy digital audio playback by connecting an AV receiver or D/A converter that has a digital audio connector to this unit. AV receiver / D/A converter COAXIAL OPTICAL...
- Page 20 Contents Connections Playback Settings Tips Appendix Connecting to a device with digital audio output connectors Use this connection to input digital audio signals to this unit, and convert the signals for playback using the D/A converter of this unit. (v p. 61) CD transport / Digital device COAXIAL...
- Page 21 0 Before USB connecting this unit to your computer, install the driver software in your computer. (v p. 62) 0 Download the driver software from the SACD 30n page of the Marantz website. 0 Use a cable that is 10 ft (3 m) or less to connect to the computer.
- Page 22 USB memory device 0 Marantz does not guarantee that all USB memory devices will operate or receive power. When using a portable USB hard disk drive (HDD) which came with an AC adapter, use that device’s supplied AC adapter. NOTE 0 USB memory devices will not work via a USB hub.
- Page 23 Contents Connections Playback Settings Tips Appendix Connecting to a home network (LAN) This unit can connect to a network using a wired LAN or wireless LAN. Wired LAN You can connect this unit to your home network (LAN) to enable various types of playback and operations as described below.
- Page 24 Contents Connections Playback Settings Tips Appendix Wireless LAN 0 When using this unit, we recommend you use a router equipped with the following When connecting to the network via wireless LAN, connect the external functions: antennas for Bluetooth/wireless connectivity connection to the rear panel 0 Built-in DHCP server and stand them upright.
- Page 25 Contents Connections Playback Settings Tips Appendix Connecting an external control device FLASHER IN jack This unit can be controlled by connecting a control box or other control device to this unit. Control box control device Signal Monaural mini-plug cable (Sold separately) 0 To use the FLASHER IN jack, set the EXTERNAL/INTERNAL switch to “INTERNAL”.
- Page 26 Next, configure the “Connection” and “Setting”. 0 To use this unit by itself without connecting an amplifier, turn the switch to “INTERNAL”. 0 Some operations may not be possible on some Marantz amplifiers. Remote control Front panel Rear panel...
- Page 27 Contents Connections Playback Settings Tips Appendix This unit Set to Remote “EXTERNAL”. connector cable (supplied) Amplifier SPEAKERS RDER RECORDER AUDIO OUT PRE OUT POWER AMP IN Remote control Front panel Rear panel Index unit...
- Page 28 Contents Connections Playback Settings Tips Appendix Connecting the power cord After completing all the connections, insert the power plug into the power outlet. To household power outlet (AC 120 V, 60 Hz) Power cord (supplied) Remote control Front panel Rear panel Index unit...
- Page 29 Contents Connections Playback Settings Tips Appendix o Contents Playback a device Basic operation Playing a USB memory device Turning the power on Listening to music on a Bluetooth device Switching the power to standby Playing CDs/Super Audio CDs Selecting the input source Playing Data CDs and Data DVDs Using as a D/A converter Playback network audio/service...
- Page 30 Contents Connections Playback Settings Tips Appendix Basic operation Turning the power on Press CD X to turn on power to the unit. Input source select buttons 0 You can also press X on the main unit to turn on power from standby mode. 0 You can also press p to turn on power from standby mode.
- Page 31 Contents Connections Playback Settings Tips Appendix Selecting the input source Press the input source select button to be played back. The selected input source appears on the display. 0 You can also select the input source by turning INPUT selector on the main unit. Remote control Front panel Rear panel...
- Page 32 Contents Connections Playback Settings Tips Appendix Listening to Internet Radio Internet Radio refers to radio broadcasts distributed over the Internet. Internet Radio stations from around the world can be received. The Internet Radio station list on this unit the database service provided by TuneIn Radio service.
- Page 33 Contents Connections Playback Settings Tips Appendix Listening to Internet Radio 0 Any characters that cannot be displayed are replaced with “.” (period). Press INTERNET RADIO. NOTE Select the station you want to play. 0 The radio station database service may be suspended or be otherwise unavailable without notice.
- Page 34 Contents Connections Playback Settings Tips Appendix Playing back files stored on PC or NAS This unit can play back music files and playlists (m3u, wpl) from DLNA compatible servers including PCs and NAS devices on your network. The audio format types and specifications supported by this unit for playback are as follows.
- Page 35 Contents Connections Playback Settings Tips Appendix Playing back files stored on PC or NAS Browse the music on your PC/NAS and select something to play. Use this procedure to play music files or playlists stored on DLNA files servers on your local network. Press MUSIC SERVERS to switch the input source to 0 When you select something to play you will be asked how you want to queue up your music.
- Page 36 Contents Connections Playback Settings Tips Appendix Use Cursor Up/Down buttons to select the “Play Now” NOTE or “Play Now & Replace Queue”, then press ENTER. 0 When playing back music files with your PC or NAS connected through wireless Playback starts. LAN, audio may be interrupted depending on your wireless LAN environment.
- Page 37 Contents Connections Playback Settings Tips Appendix Playing a USB memory device Playing back music files stored on a USB memory device. Only USB memory devices conforming to mass storage class standards can be played on this unit. This unit is compatible with USB memory devices in “FAT32” or “NTFS” format.
- Page 38 Contents Connections Playback Settings Tips Appendix Playing files stored on USB memory Browse the music on your USB memory device and devices select something to play. Insert a USB memory device into the rear panel’s USB 0 When you select something to play you will be asked how you want to port.
- Page 39 QUEUE This displays the queue NOTE 0 Note that Marantz will accept no responsibility whatsoever for any problems arising with the data on a USB memory device when using this unit in conjunction with the USB memory device. 0 When a USB memory device is connected to this unit, the unit loads all of the files on the USB memory device.
- Page 40 Contents Connections Playback Settings Tips Appendix Listening to music on a Bluetooth device Music files stored on Bluetooth devices such as smartphones, digital music players, etc. can be enjoyed on this unit by pairing and connecting this unit with the Bluetooth device. Communication is possible up to a range of about 98.4 ft/30 m.
- Page 41 Contents Connections Playback Settings Tips Appendix Listening to music on a Bluetooth Select this unit when its name appears in the list of device devices displayed on the screen of the Bluetooth device. In order to enjoy music from a Bluetooth device on this unit, the Bluetooth Connect to the Bluetooth device while “Bluetooth Pairing Mode”...
- Page 42 Contents Connections Playback Settings Tips Appendix Pairing with other Bluetooth devices NOTE 0 To operate the Bluetooth device with the remote control of this unit, the Bluetooth Pair a Bluetooth device with this unit. device needs to support the AVRCP profile. 0 The remote control of this unit is not guaranteed to work with all Bluetooth devices.
- Page 43 Contents Connections Playback Settings Tips Appendix Reconnecting to this unit from a Bluetooth device After pairing is completed, the Bluetooth device can be connected without performing any operations on this unit. This operation also needs to be performed when switching the Bluetooth device for playback.
- Page 44 Contents Connections Playback Settings Tips Appendix Getting the HEOS App You can use many online music streaming services from the HEOS App. Depending upon your geographical location, there are several options to choose from. Download the HEOS App for iOS or Android by searching App Store, Google Play store or Amazon Appstore for “HEOS”. 0 Specifications of the HEOS App may be changed without prior notice for improvement purposes.
- Page 45 Contents Connections Playback Settings Tips Appendix o Changing your HEOS Account HEOS Account HEOS Accounts can be registered in “HEOS Account” (v p. 101) in the Tap the “Music” tab. menu of this unit or by tapping “Music” tab - “Settings” icon a in the HEOS App.
- Page 46 Some services may be added or discontinued from time to time based on decisions of the music service providers or others. o Selecting a room/device Tap the “Rooms” tab, and select “Marantz SACD30n” if there are multiple HEOS devices. Rooms...
- Page 47 Contents Connections Playback Settings Tips Appendix o Selecting the music track or station from music sources Music Tap the “Music” tab and select a music source. 0 All music services displayed may not be available in your location. This Phone Music Servers USB Music Playlists...
- Page 48 Contents Connections Playback Settings Tips Appendix Browse the music to play. Album Now Playing After selecting a music track or radio station the app will Artist Album automatically change to the “Now Playing” screen. 10 Tracks,60 Mins.,2014 Track 01 0 When you select a music track to play you will be asked how you want to Rooms queue up your music.
- Page 49 Contents Connections Playback Settings Tips Appendix Listening to the same music in multiple Rooms Rooms rooms Drag one room into another to group them Drag one room into another to group them Dining Dining The HEOS system is a true multi-room audio system that automatically Song Name 1 Song Name 1 synchronizes audio playback between multiple HEOS devices so that the...
- Page 50 Contents Connections Playback Settings Tips Appendix o Ungrouping rooms Rooms Rooms Press and hold your finger on room that you want to Drag one room into another to group them Drag one room into another to group them remove from the group. Dining Dining Song Name 1...
- Page 51 Contents Connections Playback Settings Tips Appendix o Grouping all rooms (party mode) Rooms Rooms You can easily group 16 rooms together into Party Mode by using a Drag one room into another to group them Drag one room into another to group them “pinch”...
- Page 52 Contents Connections Playback Settings Tips Appendix o Ungrouping all rooms Rooms Rooms You can easily ungroup all of your rooms and exit Party Mode by using Drag one room into another to group them Drag one room into another to group them a “spread”...
- Page 53 Contents Connections Playback Settings Tips Appendix Playing CDs/Super Audio CDs Playing CDs and Super Audio CDs Press CD to switch the input source to “CD”. Press q to insert a disc. (v p. 132) 0 You can also open/close the disc tray by pressing q on the unit. 0 You can also close the disc tray by pressing p.
- Page 54 Contents Connections Playback Settings Tips Appendix Press p. Operation buttons Function The 1 indicator lights on the display. Playback starts. Playback / Pause Stop NOTE Skip to previous track / Skip to next track 0 Do not place any foreign objects in the disc tray. Doing so could damage the unit. (Press and hold) Fast-reverse / Fast- 0 Do not push the disc tray in by hand when the power is turned off.
- Page 55 Contents Connections Playback Settings Tips Appendix o Switching the display o Playing a specific track (Direct searching) Press INFO. Use 0 – 9 to select the tracks. Displays text and time information stored on media. The text information is only displayed for Super Audio CD. The player can display the following characters: GExampleH Track 4 : Press number 4 to select track 4.
- Page 56 Contents Connections Playback Settings Tips Appendix Setting the top priority playback layer for Super Audio CDs 0 When a disc is loaded after the setting has been made, the contents recorded on the set layer are displayed. 0 If a disc that does not contain the layer set for top priority playback is loaded, the The layer that is played with priority when the disc is loaded can be set.
- Page 57 Contents Connections Playback Settings Tips Appendix o Checking the order of the programmed tracks Playing tracks in a specific order (Program playback) In the stop mode, press j. The tracks are shown in the programmed order in the display each Up to 20 tracks can be programmed.
- Page 58 Contents Connections Playback Settings Tips Appendix Playing Data CDs and Data DVDs This section explains how to playback music files that are recorded onto a CD-R/-RW or DVD-R/-RW/+R/+RW. There are many music distribution sites on the Internet allowing you to download music files in MP3 or WMA (Windows Media ®...
- Page 59 Contents Connections Playback Settings Tips Appendix Playing files Operation buttons Function Playback / Pause Press CD to switch the input source to “CD”. Stop Skip to previous track / Skip to next track Load a CD-R/-RW or DVD-R/-RW/+R/+RW disc (Press and hold) Fast-reverse / Fast- containing music files into the disc tray.
- Page 60 Contents Connections Playback Settings Tips Appendix o Switching the display o Files that can be played back During playback, press INFO. See “Playable files” (v p. 127). Switch the display between the album name and the file format. o Switching the playback range If a file does not support text information or no track information is recorded, the file name is displayed.
- Page 61 Contents Connections Playback Settings Tips Appendix Using as a D/A converter Digital audio signals input from an external device or computer into this unit can be converted and output as analog signals using this unit’s D/A converter. (D/A converter function) DSD is a registered trademark.
- Page 62 USB 2.0: USB High speed/USB Audio Class Ver. 2.0 Download the dedicated driver from the “Download” section of the SACD 30n page of the Marantz website 0 This unit was checked the operation using the system requirements by us, but onto your PC.
- Page 63 Contents Connections Playback Settings Tips Appendix Install the driver. C The wizard menu is displayed. Click “Next”. A Select the language to use for the installation. B Click “OK”. Remote control Front panel Rear panel Index unit...
- Page 64 Contents Connections Playback Settings Tips Appendix D Read the Software Licensing Agreement, and click “I accept the F Click “Install” on the installation start dialog. terms of the License Agreement”. The installation starts. Do not perform any operation on the PC E Click “Next”.
- Page 65 Contents Connections Playback Settings Tips Appendix G Click “Next”. H When the installation is completed, click “Finish”. Remote control Front panel Rear panel Index unit...
- Page 66 For the connection procedure, refer to the “Connecting a PC or C Check that there is a checkmark next to “Default Device” under in Mac” section. (v p. 21) “SACD 30n” of the “Playback” tab. When there is a checkmark for a different device, click SACD 30n and “Set Default”.
- Page 67 C Select the sampling rate and bit rate to be applied to the D/A from the USB-DAC function. converter. A Select “SACD 30n” and click “Properties”. It is recommended that “2 channel, 32 bit, 192000 Hz (Studio Quality)” is selected.
- Page 68 0 Operation may fail in some PC hardware and software configurations. 0 Please see the FAQ at www.marantz.com if you experience any issues getting audio to play from your computer through the this unit. You may also want to check the support pages for your audio player application.
- Page 69 F Check that “Use this device for sound output” is checked in “SACD 30n”. If a different device is checked, select and “Secondary click” on “SACD 30n”, and then select “Use this device for sound output”. Remote control Front panel...
- Page 70 Connections Playback Settings Tips Appendix G Select the “SACD 30n” format. o Playback It is normally recommended to set the format to “384000.0 Hz” and “2ch-32 bit Interger”. Install the desired player software on your computer beforehand. Use the rear panel USB-DAC port to connect this unit to a computer.
- Page 71 Contents Connections Playback Settings Tips Appendix Connect and playback from a digital 0 Perform operations such as playback and pause on the computer. At this time, you device (Coaxial/Optical 1/Optical 2) cannot perform operations with buttons on this unit or the remote control. 0 When this unit is functioning as a D/A converter, sound is not output from the computer’s speakers.
- Page 72 Contents Connections Playback Settings Tips Appendix AirPlay function Music files stored on your iPhone, iPod touch, iPad or iTunes can be Router This unit played on this unit via the network. 0 Input source will be switched to “AirPlay” when AirPlay playback is started. 0 You can stop AirPlay playback by choosing other input source.
- Page 73 Contents Connections Playback Settings Tips Appendix Playing songs from your iPhone, iPod Playing iTunes music with this unit touch or iPad Install iTunes 10, or later, on a Mac or Windows PC that If you update your “iPhone/iPod touch/iPad” to iOS 4.2.1 or later, you can is connected to the same network as this unit.
- Page 74 Songs from an iPhone, iPod touch or iPad operating iOS 11.4 or later can be synced with multiple AirPlay 2 supported devices for simultaneous iPhone playback. Marantz xxxxxxxx Speakers Play the song on your iPhone, iPod touch or iPad. AirPlay icon is displayed on the iPhone, iPod touch or iPad screen.
- Page 75 Contents Connections Playback Settings Tips Appendix Spotify Connect function Spotify is all the music you’ll ever need. Millions of songs available Playing Spotify music with this unit instantly. Just search for the music you love, or let Spotify play you something great.
- Page 76 Contents Connections Playback Settings Tips Appendix Convenience functions This section explains how to use convenient functions that can be used for each input source. Control of “HEOS Favorites” operations is optimized for the app. For SLEEP more information on acquiring the app, see “Getting the HEOS App”...
- Page 77 0 The display brightness is set to most brightly by default. pressing 0-9. 0 DIMMER also works with the Marantz amplifier MODEL 30 (sold separately) and the brightness can be adjusted simultaneously when used in conjunction with this unit. If the brightness settings differ, set the brightness of each to the brightest Deleting a HEOS Favorites setting by pressing DIMMER for 5 seconds or more before adjusting.
-
Page 78: Sleep Timer
Contents Connections Playback Settings Tips Appendix Using the sleep timer You can have the power automatically switched to standby once a set time has elapsed. This is convenient for listening while going to sleep. Press SLEEP during playback and select the setting time. - Page 79 Contents Connections Playback Settings Tips Appendix Menu map For menu operations, see the following page. By default, this unit has recommended settings defined. You can customize this unit based on your existing system and your preferences. Setting items Detailed items Description Page Audio...
- Page 80 Sets the unit power to standby when the unit is not in use. Usage Data Selects whether or not to send anonymous usage data to Marantz. Firmware Set whether or not to check for firmware update, update the firmware, and display update and upgrade notifications.
- Page 81 Contents Connections Playback Settings Tips Appendix Setting items Detailed items Description/Detailed items Page Network Network Information Displays various information about the network. Network & USB-A The network and USB memory playback (USB-A) functions can be stopped to prevent noise that affects the sound quality.
- Page 82 Contents Connections Playback Settings Tips Appendix Setting items Detailed items Description/Detailed items Page Network Settings Used for manually setting the IP address. DHCP IP Address Subnet Mask Gateway Save Diagnostics Used to check the network connection. Physical Connection Router Access Internet Access z1 Displayed when the “DHCP”...
- Page 83 Contents Connections Playback Settings Tips Appendix Setting items Detailed items Description Page HEOS Account 【When the user is signed out the HEOS Account】 I have a HEOS Account Selects to sign in. Create Account Creates new HEOS Account. Forgot Password If you have forgotten the password, an email explaining how to reset the password will be sent.
- Page 84 Contents Connections Playback Settings Tips Appendix Menu operation Press SETUP. The menu is displayed on the display. Use Cursor Up/Down buttons to select the menu to be set or operated, then press ENTER. Use Cursor Up/Down buttons to change to desired setting.
- Page 85 Contents Connections Playback Settings Tips Appendix Inputting characters On this unit, you can change the name displayed on the following screens Use 0 – 9 until the desired character is displayed. to the names that you prefer. Friendly Name (v p. 95) The types of characters that can be input are as shown in the following table.
- Page 86 Contents Connections Playback Settings Tips Appendix Repeat step 2 to input characters then press ENTER to Using the cursor buttons register it. Display the screen for inputting characters. 0 Press CLEAR to erase the character that is currently selected. To change a character, use Cursor Left/Right buttons to align the 0 Press and hold CLEAR for 3 seconds or more to erase all characters.
- Page 87 Contents Connections Playback Settings Tips Appendix Audio Make audio-related settings. Filter Variable Out This unit is equipped with a sound quality adjusting function which allows You can stop the circuit that outputs audio from the analog audio output users to enjoy the desired playback sound quality. The unit supports PCM terminals (VARIABLE) of this unit.
- Page 88 Contents Connections Playback Settings Tips Appendix Digital Out H/P Amplifier Gain Stopping digital audio output reduces a source of noise that affects sound Set the gain of the headphone amplifier. Set this according to the quality, enabling higher sound quality playback. impedance of the connected headphones.
- Page 89 Contents Connections Playback Settings Tips Appendix General Lighting Auto-Standby The brightness of the lighting LED can be adjusted between 4 levels. The Sets the amount of time that must elapse without unit operation or an input brightness can also be synchronized to the brightness of the display. signal before the unit goes into standby automatically.
- Page 90 Information provided by customers will be used as reference material for o Check for Update product development purposes in the future. Marantz will never provide any information we collect to third parties. Check for firmware updates. Provide information on the operating status The firmware can be updated if a firmware update has been released.
- Page 91 Contents Connections Playback Settings Tips Appendix o Auto-Update o Allow Update This unit will automatically update to the newest firmware when in Enable or disable updates and upgrades for this unit. standby mode. Enables this unit to receive updates and (Default): upgrades.
- Page 92 If the error continues, check the network environment. 0 Information regarding the “Update” function and “Add New Feature” will be announced on the Marantz website each time related plans are defined. See the Marantz website for details about upgrades.
- Page 93 Contents Connections Playback Settings Tips Appendix Information Reset o Notification Alerts Perform this procedure if the display is abnormal or if operations cannot be performed. Restores the contents of each setting to the factory settings. Sets whether or not to display the notification when the power is turned Make settings again.
- Page 94 Contents Connections Playback Settings Tips Appendix Network To use this unit by connecting it to a home network (LAN), you must configure network settings. If you set up your home network (LAN) via DHCP, set “DHCP” to “On”. (Use the default setting.) This allows this unit to use your home network (LAN). When assigning an IP address to each device manually, you need to assign an IP address to this unit using the “IP Address”...
- Page 95 0 When “Network Control” is set to “On”, the unit consumes more standby power. 0 Up to 30 characters can be input. 0 For character input, see “Inputting characters” (v p. 85). 0 The default Friendly Name on first use is “Marantz SACD30n”. Remote control Front panel...
- Page 96 Contents Connections Playback Settings Tips Appendix o Wi-Fi Setup Connection Connect to a wireless LAN (Wi-Fi) router. Choose whether to connect the home network to a wireless LAN or a The router can be connected in the following ways. Select the wired LAN.
- Page 97 2. Check that your iOS device is connected to the wireless LAN (Wi- The time for pressing the button varies depending on the router. Fi) router and select “Marantz SACD30n” from “SET UP NEW 3. Press ENTER within 2 minutes.
- Page 98 3 seconds when the power of the unit is on. Input the name of the wireless network SSID: 2. Connect the wireless LAN of the PC or tablet used to “Marantz (SSID). SACD30n” when the message “Connect your Wi-Fi device to Wi-Fi network called “Marantz SACD30n””...
- Page 99 Contents Connections Playback Settings Tips Appendix o Subnet Mask Settings When connecting an xDSL modem or connector adapter directly to Configure the IP address. this unit, input the subnet mask indicated in the documentation If you are using a broadband router (DHCP function), the information supplied by your provider.
- Page 100 Contents Connections Playback Settings Tips Appendix o Internet Access Diagnostics Checks whether this unit has access to the Internet (WAN). Used to check the network connection. o Physical Connection Failed to connect to the Internet. Check Error: the Internet connection environment or Checks the physical LAN port connection.
- Page 101 Contents Connections Playback Settings Tips Appendix HEOS Account Make HEOS Account-related settings. HEOS Account is needed in order to use HEOS Favorites. The menu displayed differs depending on the status of the HEOS Account. You have not signed in You have already signed in o I have a HEOS Account o Signed in As If you already have a HEOS Account, enter the current account name...
- Page 102 There are two remote control operation modes: amplifier operation mode and network SACD player operation mode. Amplifier operation mode adjusts the volume of a Marantz amplifier and network SACD player operation mode adjusts the volume of the audio signal output from the analog audio output terminals (VARIABLE) of this unit.
- Page 103 Contents Connections Playback Settings Tips Appendix Setting the remote control operation mode to network SACD player operation mode Press and hold the ENTER and number 2 button on the remote control unit down together for more than 5 seconds. 0 “Variable Out” in the menu must also be set to “On” to adjust the volume of the audio signal output from the analog audio output connectors (VARIABLE).
- Page 104 Contents Connections Playback Settings Tips Appendix Contents o Tips o Troubleshooting I want to switch the filter to change the desired sound quality Power does not turn on/Power is turned off I want to enjoy analog output audio at higher quality Operations cannot be performed through the remote control unit I want to listen to high sound performance playback Display on this unit shows nothing...
-
Page 105: Tips
Contents Connections Playback Settings Tips Appendix Tips I want to switch the filter to change the desired sound quality Switch the filter characteristics. (v p. 87) I want to enjoy analog output audio at higher quality Set “Digital Out” on the menu to “Off”. (v p. 88) Press the DIMMER button to turn the display off. - Page 106 Contents Connections Playback Settings Tips Appendix Simple operations in the power off state Press the p button to automatically turn the unit’s power supply on and start playback of the last selected input source. When the “Network Control” function is set to “On”, you can perform playback, or other operations through AirPlay or HEOS App. (v p. 95) I want to connect a power amplifier to this unit A power amplifier can be connected to the analog audio output connectors (VARIABLE) on the rear panel.
-
Page 107: Troubleshooting
Contents Connections Playback Settings Tips Appendix Troubleshooting If a problem should arise, first check the following: 1. Are the connections correct? 2. Is the set being operated as described in the owner’s manual? 3. Are the other devices operating properly? 0 If steps 1 to 3 above do not improve the problem, restarting the device may improve the problem. - Page 108 Contents Connections Playback Settings Tips Appendix Power does not turn on / Power is turned off Power is not turned on. Check whether the power plug is correctly inserted into the power outlet. (v p. 28) This unit is in standby mode. Press the X button on the unit or the CD X button on the remote control. (v p. 30) Power automatically turns off.
- Page 109 Contents Connections Playback Settings Tips Appendix Operations cannot be performed through the remote control unit Operations cannot be performed through the remote control unit. Batteries are worn out. Replace with new batteries. (v p. 7) Operate the remote control unit within a distance of about 23 ft/7 m from this unit and at an angle of within 30°. (v p. 7) Remove any obstacle between this unit and the remote control unit.
- Page 110 Contents Connections Playback Settings Tips Appendix No sound comes out No sound is produced. Or sound is distorted. Check the connections for all devices. (v p. 17) Insert connection cables all the way in. Check that input connectors and output connectors are not reversely connected. Check cables for damage.
- Page 111 Contents Connections Playback Settings Tips Appendix Sound is interrupted or noise occurs During playback from the Internet radio or USB memory device, sound is occasionally interrupted. When the transfer speed of the USB memory device is slow, sound may occasionally be interrupted. The network communication speed is slow or the radio station is busy.
- Page 112 Contents Connections Playback Settings Tips Appendix Sound cuts out when using Wi-Fi connection. The frequency band used by the wireless LAN is also used by microwave ovens, cordless telephones, wireless game controllers and other wireless LAN devices. Using such devices at the same time as this unit may cause sound to cut out due to electronic interference. Sound cut out can be improved using the following methods.
- Page 113 Contents Connections Playback Settings Tips Appendix Desired sound does not come out The volume does not increase. The maximum volume of the audio signal output from the analog audio output terminals (VARIABLE) is set too low. Set the maximum volume using “Volume Limit”...
- Page 114 Contents Connections Playback Settings Tips Appendix Audio is interrupted during the AirPlay playback on iPhone / iPod touch / iPad. Quit the application running in the background of the iPhone/iPod touch/iPad, and then play using AirPlay. Some external factors may be affecting the wireless connection. Modify the network environment by taking measures such as shortening the distance from the wireless LAN access point.
- Page 115 Contents Connections Playback Settings Tips Appendix USB memory devices cannot be played back USB memory device is not recognized. Disconnect and reconnect the USB memory device. (v p. 22) Mass storage class compatible USB memory devices are supported. This unit does not support a connection through a USB hub. Connect the USB memory device directly to the USB port. The USB memory device must be formatted to FAT32 or NTFS.
- Page 116 Contents Connections Playback Settings Tips Appendix Bluetooth cannot be played back Bluetooth devices cannot be connected to this unit. The Bluetooth function in the Bluetooth device has not been enabled. See the Owner’s Manual of the Bluetooth device to enable the Bluetooth function. Bring the Bluetooth device near to this unit.
- Page 117 Contents Connections Playback Settings Tips Appendix The Internet radio cannot be played back A list of broadcasting stations is not displayed. The LAN cable is not properly connected, or the network is disconnected. Check the connection status. (v p. 23) Perform the network diagnostic mode.
- Page 118 Contents Connections Playback Settings Tips Appendix Music files on PC or NAS cannot be played back (Music server) Files stored on a computer cannot be played. Files are stored in a non-compatible format. Record in a compatible format. (v p. 135) Files that are copyright protected cannot be played on this unit.
- Page 119 Contents Connections Playback Settings Tips Appendix Various online services cannot be played Various online services cannot be played. The online service may have been discontinued. Cannot connect to a wireless LAN network Cannot connect to the network. The network name (SSID), password and encryption setting have not been set up correctly. Configure the network settings according to the setting details of this unit.
- Page 120 Contents Connections Playback Settings Tips Appendix Cannot connect to a WPS Router. Check that the WPS mode of the router is operating. Press the WPS button on the router and then press the ENTER button within 2 minutes. A router/settings that are compatible with WPS 2.0 standards are required. Set the encryption time to “None”, WPA-PSK (AES) or WPA2-PSK (AES). (v p.
- Page 121 Contents Connections Playback Settings Tips Appendix Cannot playback Discs Cannot playback when the play button is pressed, or cannot correctly play back a specific part of the disc. The disc is dirty or scratched. Either clean the disc, or insert a different disc. (v p. 133) Cannot playback CD-R/-RW or DVD-R/-RW/+R/+RW.
- Page 122 “Unsupported” is displayed when audio signals that are not supported by this unit are input. Check the settings on your computer or player software. (v p. 70) If the computer you use is macOS, please check if the SACD 30n format is set below 384000.0 Hz using the Audio MIDI Setup. (v p. 70) Remote control...
- Page 123 Contents Connections Playback Settings Tips Appendix Audio from digital devices cannot be played back (Coaxial/Optical) “Signal Unlock” is displayed. When digital audio signals cannot be detected properly, “Signal Unlock” is displayed. (v p. 71) “Unsupported” is displayed. “Unsupported” is displayed when audio signals that are not supported by this unit are input. Check the audio output signal format from your digital device.
- Page 124 Contents Connections Playback Settings Tips Appendix Update/upgrade error messages If an update/upgrade is interrupted or fails, an error message appears. Display Description Connection failed. Please check your network, then try The network connection is unstable. again. Connection to the server failed. Check your network environment and try the update again.
- Page 125 Contents Connections Playback Settings Tips Appendix Resetting network settings If network contents cannot be played or the unit cannot connect to the network, restarting the unit may improve the problem. We recommend restarting the unit before returning the settings to the default settings. (v p. 107) If the operations are not improved by restarting the unit, follow the steps below.
- Page 126 Contents Connections Playback Settings Tips Appendix Playing back Discs o Super Audio CD Playable media There are three types of Super Audio CDs: Super Audio CD A Single layer disc Single layer Super Audio CD with just an HD layer. B Dual layer disc Super Audio CD with two HD layers.
- Page 127 Contents Connections Playback Settings Tips Appendix o Playable files Playable discs Sampling frequency Bit rate Bit length Extension CD-R/-RW DVD-R/-RW DVD+R/+RW 44.1/48 kHz 32 – 320 kbps .mp3 44.1/48 kHz 48 – 320 kbps .wma .aac/ 44.1/48 kHz 16 – 320 kbps .m4a 44.1/48/88.2/ 16/24 bits...
- Page 128 Contents Connections Playback Settings Tips Appendix Playback order of music files NOTE 0 Be sure to give files the extension. Files with any other extensions or files with When there are multiple folders containing music files, the playback order no extensions cannot be played. of folders is automatically set when this unit reads the media.
- Page 129 Contents Connections Playback Settings Tips Appendix About discs and files Music files recorded on CD-R/-RW and DVD-R/-RW/+R/+RW are divided into large segments (folders) and small segments (files). Files are stored in folders, and folders can be placed for storage in a hierarchy.
- Page 130 Contents Connections Playback Settings Tips Appendix Playing back a USB memory devices This unit is compatible with MP3 ID3-Tag (Ver. 2) standard. This unit is compatible with WMA META tags. If the image size (pixels) of an album artwork exceeds 500 × 500 (WMA/MP3/Apple Lossless/DSD) or 349 × 349 (MPEG-4 AAC), then music may not be played back properly.
-
Page 131: Usb Memory Device
Contents Connections Playback Settings Tips Appendix o Maximum number of playable files and folder The limits on the number of folders and files that can be displayed by this unit are as follows. Media USB memory device Item Number of folder directory levels 8 levels Number of folders 5000... - Page 132 Contents Connections Playback Settings Tips Appendix Cautions on using media Inserting a disc NOTE Set the disc in the tray label side up. 0 Only load one disc at a time. Loading two or more discs can damage the unit or scratch the discs.
- Page 133 Contents Connections Playback Settings Tips Appendix How to handle media Cleaning discs Do not get fingerprints, oil or dirt on discs. If there are fingerprints or dirt on a disc, wipe them off before using the disc. Take special care not to scratch discs when removing them from their cases.
-
Page 134: Usb-Dac
Contents Connections Playback Settings Tips Appendix D/A converter Playing back a Bluetooth device This unit supports the following Bluetooth profile. o Specifications of supported audio formats A2DP (Advanced Audio Distribution Profile) : When a Bluetooth device that supports this standard is connected, USB-DAC monaural and stereo sound data can be streamed at a high quality. - Page 135 Contents Connections Playback Settings Tips Appendix Playing back files stored on a PC and NAS This unit is compatible with MP3 ID3-Tag (Ver. 2) standard. This unit is compatible with WMA META tags. If the image size (pixels) of an album artwork exceeds 500 × 500 (WMA/MP3/WAV/FLAC) or 349 × 349 (MPEG-4 AAC), then music may not be played back properly.
- Page 136 Contents Connections Playback Settings Tips Appendix Playing back Internet Radio o Playable broadcast station specifications Sampling frequency Bit rate Extension 32/44.1/48 kHz 48 – 192 kbps .wma 32/44.1/48 kHz 32 – 320 kbps .mp3 .aac/ MPEG-4 AAC 32/44.1/48 kHz 48 – 320 kbps .m4a Remote control Front panel...
- Page 137 Contents Connections Playback Settings Tips Appendix Explanation of terms o Audio FLAC (Free Lossless Audio Codec) FLAC stands for Free lossless Audio Codec, and is a lossless free audio AIFF (Audio Interchange File Format) file format. Lossless means that the audio is compressed without any loss This is an uncompressed and lossless format for digital audio.
- Page 138 Contents Connections Playback Settings Tips Appendix THIS SOFTWARE IS PROVIDED BY THE COPYRIGHT HOLDERS AND MPEG (Moving Picture Experts Group), MPEG-2, MPEG-4 CONTRIBUTORS “AS IS” AND ANY EXPRESS OR IMPLIED These are the names for digital compression format standards used for WARRANTIES, INCLUDING, BUT NOT LIMITED TO, THE IMPLIED the encoding of video and audio.
- Page 139 Contents Connections Playback Settings Tips Appendix o Network Dynamic range The difference between the maximum undistorted sound level and the AirPlay minimum discernible level above the noise emitted by the device. AirPlay sends (plays) contents recorded in iTunes or on an iPhone/iPod Downmix touch to a compatible device via the network.
- Page 140 Contents Connections Playback Settings Tips Appendix WPA-PSK/WPA2-PSK (Pre-shared Key) This is a simple authentication system for mutual authentication when a preset character string matches on the wireless LAN access point and client. Network Names (SSID: Service Set Identifier) When forming wireless LAN networks, groups are formed to prevent interference, data theft, etc.
- Page 141 Contents Connections Playback Settings Tips Appendix Trademark information Apple, AirPlay, iPad, iPad Air, iPad Pro and iPhone are trademarks of The Wi-Fi CERTIFIED logo is a registered trademark of the Wi-Fi Apple Inc., registered in the U.S. and other countries. Alliance.
- Page 142 Contents Connections Playback Settings Tips Appendix Specifications o Audio section Analog output [Super Audio CD] [CD] Channels: 2-channels 2-channels Playable frequency range: 2 Hz – 100 kHz 2 Hz – 20 kHz Playable frequency response: 2 Hz – 50 kHz (-3 dB) 2 Hz –...
-
Page 143: Wireless Lan
Contents Connections Playback Settings Tips Appendix o Wireless LAN section Network type (wireless LAN standard): Conforming to IEEE 802.11a/b/g/n (Wi-Fi ® compliant) Security: WEP 64 bit, WEP 128 bit WPA/WPA2-PSK (AES) WPA/WPA2-PSK (TKIP) Used frequency range: 2.4 GHz, 5 GHz z1 The Wi-Fi ®... - Page 144 Contents Connections Playback Settings Tips Appendix o General Operating temperature: +5 ℃ - +35 ℃ Power supply voltage/frequency: AC120 V, 60 Hz Power consumption: 48 W Power consumption in standby mode: 0.4 W For the purpose of improvement, the specifications and design are subject to change without notice. Remote control Front panel Rear panel...
- Page 145 Contents Connections Playback Settings Tips Appendix o Dimensions (Unit : in. (mm)) 5 3/8 (135) 17 1/2 (443) 2 3/8 (60) 2 1/2 2 1/2 (61) 12 3/4 (321) (61) Weight : 30 lbs 3 oz (13.7 kg) Remote control Front panel Rear panel Index...
- Page 146 Contents Connections Playback Settings Tips Appendix Index External control device ........25 Menu map ............79 AirPlay ............72 Firmware update ..........90 NAS ............34, 135 Amplifier ............18 Front panel ............8 Network settings ..........94 Auto Standby ..........89 HEOS Account ........
-
Page 147: Table Of Contents
Contents Connections Playback Settings Tips Appendix Rear panel ............10 USB memory device ........ 22, 37 Remote control unit ........13 USB-DAC ......... 21, 61, 134 Resetting network settings ......125 Wi-Fi settings ..........96 Sleep timer ............. 78 Wired LAN ..........23, 96 Spotify ............ - Page 148 GPL/LGPL software that is used in the product. ntfs-3g_ntfsprogs 2011.4.12 Marantz provides the source code based on the GPL and LPGL ntpclient 2007 licenses at the actual cost upon your request to our customer service u-boot 2015.01...
- Page 149 Contents Connections Playback Settings Tips Appendix n LGPL n e2fsprogs-libs-1.40.8/lib/uuid Redistribution and use in source and binary forms, with or without Open Source Used Version modification, are permitted provided that the following conditions are ffmpeg 0.8.3 met: glibc 1. Redistributions of source code must retain the above copyright libmms 0.6.2 notice, and the entire permission notice in its entirety, including the...
- Page 150 Contents Connections Playback Settings Tips Appendix n expat-2.0.1 n getopt Copyright (c) 1998, 1999, 2000 Thai Open Source Software Center http://cvsweb.netbsd.org/bsdweb.cgi/src/lib/libc/stdlib/ Ltd and Clark Cooper Copyright (c) 1987, 1993, 1994 The Regents of the University of Copyright (c) 2001, 2002, 2003, 2004, 2005, 2006 Expat maintainers. California.
- Page 151 Contents Connections Playback Settings Tips Appendix n jQuery n libpcap-1.4.0 Copyright 2014 jQuery Foundation and other contributors License: BSD http://jquery.com/ Redistribution and use in source and binary forms, with or without modification, are permitted provided that the following conditions are Permission is hereby granted, free of charge, to any person obtaining a met: copy of this software and associated documentation files (the...
- Page 152 Contents Connections Playback Settings Tips Appendix n libtar-1.2.11 n mDNS 320.10.80 Copyright (c) 1998-2003 University of Illinois Board of Trustees The majority of the source code in the mDNSResponder project is licensed under the terms of the Apache License, Version 2.0, available from: Copyright (c)...
- Page 153 Contents Connections Playback Settings Tips Appendix n mongoose n openssl-1.0.0d https://github.com/cesanta/mongoose/ Copyright (c) 1998-2011 The OpenSSL Project. All rights reserved. Copyright (c) 2004-2013 Sergey Lyubka Redistribution and use in source and binary forms, with or without Permission is hereby granted, free of charge, to any person obtaining a modification, are permitted provided that the following conditions are copy of this software and associated documentation files (the met:...
- Page 154 Contents Connections Playback Settings Tips Appendix n portmap-6.0 THIS SOFTWARE IS PROVIDED BY THE OpenSSL PROJECT “AS IS” AND ANY EXPRESSED OR IMPLIED WARRANTIES, Copyright (c) 1990 The Regents of the University of California. INCLUDING, BUT NOT LIMITED TO, THE IMPLIED WARRANTIES All rights reserved.
- Page 155 Contents Connections Playback Settings Tips Appendix n pstdint.h-0.1.12 n rl78flash 2000.3.1 BSD License: License Copyright (c) 2005-2011 Paul Hsieh ======= All rights reserved. The MIT License (MIT) Redistribution and use in source and binary forms, with or without Copyright (c) 2012 Maxim Salov modification, are permitted provided that the following conditions Permission is hereby granted, free of charge, to any person obtaining a are met:...
- Page 156 Contents Connections Playback Settings Tips Appendix n sqlite 2003.5.7 n strlcpy.c , v1.11 SQLite Copyright Copyright (c) 1998 Todd C. Miller <Todd.Miller@courtesan.com> SQLite is in the Permission to use, copy, modify, and distribute this software for any Public Domain purpose with or without fee is hereby granted, provided that the above copyright notice and this permission notice appear in all All of the code and documentation in SQLite has been dedicated to the copies.
- Page 157 Contents Connections Playback Settings Tips Appendix n tinyxml 2002.4.3 n Tremor www.sourceforge.net/projects/tinyxml http://wiki.xiph.org/index.php/Tremor This software is provided ’as-is’, without any express or implied Copyright (c) 2002, Xiph.org Foundation warranty. In no event will the authors be held liable for any damages Redistribution and use in source and binary forms, with or without arising from the use of this software.
- Page 158 Contents Connections Playback Settings Tips Appendix n zlib http://www.zlib.net/ zlib.h -- interface of the ‘zlib’ general purpose compression library version 1.2.3, July 18th, 2005 Copyright (C) 1995-2004 Jean-loup Gailly and Mark Adler This software is provided ‘as-is’, without any express or implied warranty.
- Page 159 3520 10774 00AM © 2020 Sound United. All Rights Reserved.
Need help?
Do you have a question about the SACD 30n and is the answer not in the manual?
Questions and answers
bar graph on screen appears sometimes, partially lit, to right side of display what does it indicate; appears occasionally?