Audiovox D1210 Operating Instructions Manual
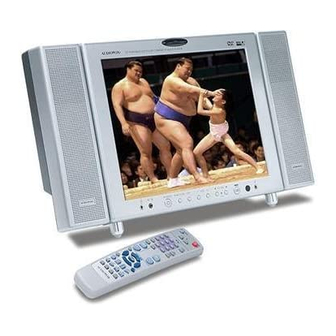
12" lcd tv with dvd player
Hide thumbs
Also See for D1210:
- Operating instructions manual (43 pages) ,
- Owner's manual (29 pages) ,
- Operating instructions manual (20 pages)
Table of Contents
Advertisement
Quick Links
12 MONTH LIMITED WARRANTY
Applies to Audiovox Mobile Video Products
12" LCD TV with DVD Player
Operating Instructions
AUDIOVOX ELECTRONICS CORP. (the Company) warrants to the original retail purchaser of
this product that should this product or any part thereof, under normal use and conditions, be
proven defective in material or workmanship within 12 months from the date of original
purchase, such defect(s) will be repaired or replaced with reconditioned product (at the
D1210
Company's option) without charge for parts and repair labor.
Model No.
To obtain repair or replacement within the terms of this Warranty, the product is to be delivered
with proof of warranty coverage (e.g. dated
bill of sale), specification of defect(s),
transportation prepaid, to the Company at the address shown below.
This Warranty does not extend to the elimination of externally generated static or noise, to
correction of antenna problems, to costs incurred for installation, removal or reinstallation of
the product, or to damage to tapes, discs, speakers, accessories, or vehicle electrical systems.
This Warranty does not apply to any product or part thereof which, in the opinion of the Company,
has suffered or been damaged through alteration, improper installation, mishandling, misuse,
neglect, accident, or by removal or defacement of the factory serial number/bar code label(s).
THE EXTENT OF THE COMPANY'S LIABILITY UNDER THIS WARRANTY IS LIMITED TO THE
REPAIR OR REPLACEMENT PROVIDED ABOVE AND, IN NO EVENT, SHALL THE COMPANY'S
LIABILITY EXCEED THE PURCHASE PRICE PAID BY PURCHASER FOR THE PRODUCT.
This Warranty is in lieu of all other express warranties or liabilities. ANY IMPLIED WARRANTIES,
INCLUDING ANY IMPLIED WARRANTY OF MERCHANTABILITY, SHALL BE LIMITED TO THE
DURATION OF THIS WRITTEN WARRANTY. ANY ACTION FOR BREACH OF ANY WARRANTY
HEREUNDER INCLUDING ANY IMPLIED WARRANTY OF MERCHANTABILITY MUST BE BROUGHT
WITHIN A PERIOD OF 24 MONTHS FROM DATE OF ORIGINAL PURCHASE. IN NO CASE SHALL
THE COMPANY BE LIABLE FOR ANY CONSEQUENTIAL OR INCIDENTAL DAMAGES FOR
BREACH OF THIS OR ANY OTHER WARRANTY, EXPRESS OR IMPLIED, WHATSOEVER. No
person or representative is authorized to assume for the Company any liability other than
expressed herein in connection with the sale of this product.
Some states do not allow limitations on how long an implied warranty lasts or the exclusion or
limitation of incidental or consequential damage so the above limitations or exclusions may not
apply to you. This Warranty gives you specific legal rights and you may also have other rights
which vary from state to state.
U.S.A. : AEC 150 MARCUS BLVD., HAUPPAUGE, NEW YORK 11788
!
1-800-645-4994
CANADA : CALL 1-800-645-4994 FOR LOCATION OF WARRANTY STATION SERVING
For assistance, please call: 1-800-645-4994
YOUR AREA
Or visit us at
Before connecting, operating or adjusting this product, please read these instructions completely.
128-5495C
© 2002 Audiovox Electronics Corp., 150 Marcus Blvd., Hauppauge, N.Y. 11788
Please keep this manual for future reference
128-6524A
Advertisement
Table of Contents

Related Manuals for Audiovox D1210


Summary of Contents for Audiovox D1210
-
Page 1: Operating Instructions
12" LCD TV with DVD Player Operating Instructions AUDIOVOX ELECTRONICS CORP. (the Company) warrants to the original retail purchaser of this product that should this product or any part thereof, under normal use and conditions, be proven defective in material or workmanship within 12 months from the date of original... -
Page 2: Important Safety Instructions
Important Safety Instructions CAUTION RISK OF ELECTRIC SHOCK DO NOT OPEN The Lightning flash with the arrowhead symbol within an equilateral triangle is intended to alert the user to the presence of uninsulated "DANGEROUS VOLTAGE" within the product's enclosure that may be of sufficient magnitude to constitude a risk or electric shock to persons. -
Page 3: Safety Cautions
Safety Cautions Users are advised to read this user's guide before operating the product. Keep product away from Avoid dropping the Remote other heat sources. Such as Control at any time. heat generating electrical appliances, heaters, gas stoves. This LCD TV will break if drop Never attempt to repair the or hit;... -
Page 4: Package Contents
Cautions Macrovision This product incorporates copyright protection technology that is protected by method claims of certain U.S patents and other intellectual property rights owned by Macrovision Corporation and other rights owners. Use of this copyright protection technology must be authorized by Macrovision Corporation. -
Page 5: Power Connection
TV Setup Antenna Installation Using a good quality TV antenna accessories is essential to LCD TV reception. of antenna systems on the market: below are connectors and the different types 1. The 75£[ system with connonly seen F type round head connectors which requires no tools for easy installation. - Page 6 Start Up Remote Control - Put batteries into the remote Remote Operation 1 Aim remote directly at LCD TV monitor for clear signal. 2 Remote range is at approx. within 20 feet with angles of approx. 30 degrees. 3 Do not have obstructions between remote and TV reception. 4 Battery life span is between 6 months to one year depending on usage.
- Page 7 Recognizing buttons and controls 1. DVD Previous 2. DVD Play 3. DVD Next 4. DVD Eject 5. DVD Stop 6. IR Headphone Sensor 7. TV Antenna Input 8. Headphone Input #1 9. AV Input 10. Power On/Off 11. DVD/TV/AV Switch 12.
- Page 8 DVD Basic Control DVD Player Basic Operation Turn the unit ON or OFF POWER Eject and withdraw the disc EJECT Resume play mode PLAY Go into the standby mode PAUSE STOP (1 time) Stops at the present playing point / (2 times) Stops playing Go to the next chapter, track or scene NEXT during playback...
-
Page 9: Basic Control
Basic Control c. Press DISPLAY the 3rd time to display the elapsed time for the chapter. The heading will disappear automatically in about 3 seconds. d. Press DISPLAY the 4th time to display the remaining time for the chapter. The heading will disappear automatically in about 3 seconds. - Page 10 Basic Control 3) Audio During playback, press AUDIO to select the audio language you desire, with the current audio channel number (1) and the total number of audio channels (2) displayed. Press AUDIO again to select another audio language. The audio display will disappear automatically if the AUDIO button isn’t pressed again for 3 sec- onds.
- Page 11 SETUP Basic Control 5. Setup Press SETUP to display the main page of the setup menu on the screen. Press SETUP again to exit the SETUP menu and the unit will resume playback or stop mode. 1) Select GENERAL SETUP using UP/DOWN and then press ENTER to enter the general page.
- Page 12 SETUP Basic Control b. Select ANGLE MARK using UP/DOWN, and then press RIGHT to enter the submenu. Choose to show an angle mark on the screen using UP/DOWN and then press ENTER to confirm the setting. Press LEFT to return. * ON: The screen will show an angle mark.
- Page 13 SETUP Basic Control b. Select SUBTITLE using UP/DOWN, and then press RIGHT to enter the submenu. Select the subtitle language or SUBTITLE OFF you desire using UP/DOWN and then press ENTER to confirm the setting. Press LEFT to return. c. Select DISC MENU using UP/DOWN and then press RIGHT to enter the submenu.
- Page 14 SETUP Basic Control e. Select PASSWORD using UP/DOWN and then press RIGHT to enter the submenu. Press ENTER to enter the password change page. Input the old password or the default password, the new password, and the confirmed new password. Press ENTER to confirm the change.
-
Page 15: System Operation
System Operation System Operation 1. Press POWER to switch the unit on or off. The switch indica- tor will light red and the unit will go to the mode last used and stored in memory. 2. Press DVD/TV/AV to select your desired mode. When switch- ing the mode, the DVD player can memorize the present play ing point. -
Page 16: Car Installation
CAR Installation Figure 1 Top Rings Mounting Lower Rings Figure 2 Note: Detach the two speakers from the main unit, only use headphones. 1) Car installation on the back seat (Figure 1) 1. Take the unit and the mounting bag from the storage bag. Slide the unit into the mounting bag, fasten the buckle and tighten the straps on the side of the mounting bag. - Page 17 CAR Installation Figure 1 Top Rings Mounting Lower Rings Figure 2 Note: Detach the two speakers from the main unit, only use headphones. 2) Car installation between two seats (Figure 2) Figure 2 1. Take one of the supplied straps from the storage bag and connect the latch to the top metal ring on the mounting bag.
-
Page 18: Troubleshooting
Note Playing a Video Game Plug the AV output from your game system into the AV IN jack on the front of the unit. You can use the attached AV cable to convert the 3.5mm AV jack on the unit to RCA type AV jacks, and match the color-coded jacks to the appropriate plugs: Yellow (VIDEO) to Yellow, white (AUDIO L) to White, and Red (AUDIO R) to Red. - Page 19 Troubleshooting You may have problems that can be fixed with a few minor adjustments. Look for the type of problem you are having below and then apply the suggestions to get your TV going again. Picture with no sound Check if you have accidentally pressed the "mute" button Check other channels if the same problem exist.
-
Page 20: Product Specifications
Troubleshooting Before calling our serviceman, please refer to the following chart to see if you can adjust the problems yourself. Trouble Checks and Adjustments TV will not turn on Plug TV in. Plug something else into the outlet to make sure it is working. Make sure batteries in the remote are not dead.
Need help?
Do you have a question about the D1210 and is the answer not in the manual?
Questions and answers