
Related Manuals for Daikin RXJ20M3V1B


Summary of Contents for Daikin RXJ20M3V1B
- Page 1 Installer reference guide R32 split series ARXM25N2V1B9 ARXM35N2V1B9 RXM20N2V1B9 RXM25N2V1B9 RXM35N2V1B9 RXJ20M3V1B RXJ25M3V1B RXJ35M3V1B RXA20A3V1B Installer reference guide RXA25A3V1B English R32 split series RXA35A3V1B...
-
Page 2: Table Of Contents
Table of contents 6.6.2 About the refrigerant ............ 16 Table of contents 6.6.3 Precautions when charging refrigerant ......16 6.6.4 To determine the additional refrigerant amount ... 16 6.6.5 To determine the complete recharge amount ....17 6.6.6 To charge additional refrigerant ........17 1 General safety precautions 6.6.7 To fix the fluorinated greenhouse gases label ..... -
Page 3: Meaning Of Warnings And Symbols
Make sure installation, testing and applied materials ▪ In potentially explosive atmospheres. comply with applicable legislation (on top of the instructions described in the Daikin documentation). ▪ In places where there is machinery that emits electromagnetic waves. Electromagnetic waves may disturb the control system, and cause malfunction of the equipment. - Page 4 ▪ Joints made in installation between parts of refrigerant system shall be accessible for maintenance purposes. WARNING Make sure installation, servicing, maintenance and repair comply with instructions from Daikin and with applicable legislation (for example national gas regulation) and are executed only by authorised persons. Installation space requirements NOTICE ▪...
-
Page 5: Refrigerant
1 General safety precautions Ceiling-mounted Wall-mounted Floor-standing DANGER: RISK OF EXPLOSION unit unit unit Pump down – Refrigerant leakage. If you want to pump m (kg) m (kg) m (kg) down the system, and there is a leak in the refrigerant ≤1.842 —... -
Page 6: Brine
1 General safety precautions CAUTION WARNING When the refrigerant charging procedure is done or when ▪ ONLY use copper wires. pausing, close valve refrigerant tank ▪ Make sure the field wiring complies with the applicable immediately. If the valve is NOT closed immediately, legislation. -
Page 7: About The Documentation
Technical engineering data ▪ A subset of the latest technical data is available on the regional Daikin website (publicly accessible). ▪ The full set of latest technical data is available on the Daikin extranet (authentication required). Installer reference guide at a... -
Page 8: To Remove The Accessories From The Outdoor Unit
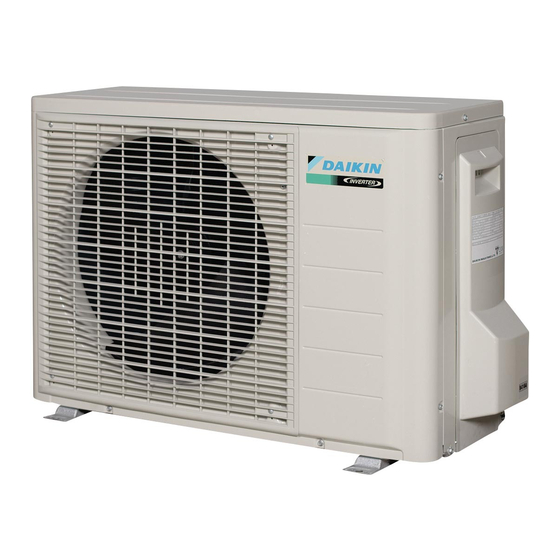
4 About the unit About the unit WARNING: FLAMMABLE MATERIAL The refrigerant inside this unit is mildly flammable. Overview: About the unit This chapter contains information about: ▪ Identification of the outdoor unit Identification NOTICE When installing or servicing several units at the same time, make sure NOT to switch the service panels between different models. -
Page 9: Installation Site Requirements Of The Outdoor Unit
5 Preparation CAUTION NOTICE ▪ Check if the installation location can support the unit's ▪ Do NOT stack the units on each other. weight. Poor installation is hazardous. It can also cause ▪ Do NOT hang the unit on a ceiling. vibrations or unusual operating noise. -
Page 10: Additional Installation Site Requirements Of The Outdoor Unit In Cold Climates
5 Preparation In any case, provide at least 300 mm of free space below the unit. Install the outdoor unit away from direct sea winds. Additionally, make sure the unit is positioned at least 100 mm above Example: Behind the building. the maximum expected level of snow. -
Page 11: Preparing Electrical Wiring
6 Installation Preparing electrical wiring Opening the unit 5.4.1 About preparing electrical wiring 6.2.1 About opening the unit At certain times, you have to open the unit. Example: INFORMATION ▪ When connecting the refrigerant piping Also read the precautions and requirements in the "General safety precautions"... -
Page 12: To Install The Outdoor Unit
6 Installation Fix the unit securely by means of foundation bolts in accordance with the foundation drawing. Prepare 4 sets of M8 or M10 anchor bolts, nuts and washers (field supply). NOTICE If the unit is installed in a cold climate, take adequate measures so that the evacuated condensate CANNOT freeze. -
Page 13: Precautions When Connecting The Refrigerant Piping
6 Installation ▪ Connecting the refrigerant piping to the indoor unit INFORMATION ▪ Connecting the refrigerant piping to the outdoor unit Do NOT open the refrigerant stop valve before checking the refrigerant piping. When you need to charge additional ▪ Insulating the refrigerant piping refrigerant it is recommended to open the refrigerant stop ▪... -
Page 14: Using The Stop Valve And Service Port
6 Installation ▪ When it is expected that the operating pressure will be low (e.g. when cooling will be performed while the outside air temperature is low), sufficiently seal the flare nut in the stop valve on the gas line with silicon sealant to prevent freezing. Cut exactly at right angles. -
Page 15: Checking The Refrigerant Piping
6 Installation 6.5.3 To check for leaks NOTICE Do NOT exceed the unit's maximum working pressure (see "PS High" on the unit name plate). Liquid stop valve NOTICE Gas stop valve Service port Make sure to use a recommended bubble test solution 2 Connect the gas refrigerant connection from the indoor unit to from your wholesaler. -
Page 16: Charging Refrigerant
6 Installation ▪ Check for leaks again. 6.6.2 About the refrigerant ▪ Perform vacuum drying again. This product contains fluorinated greenhouse gases. Do NOT vent gases into the atmosphere. NOTICE Refrigerant type: R32 Make sure to open the stop valves after installing the refrigerant piping and performing vacuum drying. -
Page 17: To Determine The Complete Recharge Amount
6 Installation 6.6.5 To determine the complete recharge Connecting the electrical wiring amount 6.7.1 About connecting the electrical wiring INFORMATION Before connecting the electrical wiring If a complete recharge is necessary, the total refrigerant charge is: the factory refrigerant charge (see unit name Make sure: plate) + the determined additional amount. -
Page 18: Guidelines When Connecting The Electrical Wiring
6 Installation Tightening torques DANGER: RISK OF ELECTROCUTION Item Tightening torque (N•m) Disconnect the power supply for more than 10 minutes, and measure the voltage at the terminals of main circuit M4 (X1M) 1.5~1.6 capacitors or electrical components before servicing. The M4 (earth) 1.4~1.5 voltage MUST be less than 50 V DC before you can touch... -
Page 19: Finishing The Outdoor Unit Installation
7 Commissioning About the compressor DANGER: RISK OF EXPLOSION ▪ Use a pipe cutter to remove the compressor. ▪ Do NOT use the brazing torch. ▪ Use approved refrigerants and lubricants only. DANGER: RISK OF BURNING Do NOT touch the compressor with bare hands. 3×... -
Page 20: Checklist During Commissioning
8 Configuration There are NO refrigerant leaks. Configuration The refrigerant pipes (gas and liquid) are thermally Facility setting insulated. The correct pipe size is installed and the pipes are Use this function for cooling at low outdoor temperature. This properly insulated. function is designed for facilities such as equipment of computer The stop valves (gas and liquid) on the outdoor unit are rooms. -
Page 21: Overview: Maintenance And Service
11 Troubleshooting NOTICE 11.2 Precautions when troubleshooting Applicable legislation on fluorinated greenhouse gases WARNING requires that the refrigerant charge of the unit is indicated both in weight and CO equivalent. ▪ When carrying out an inspection on the switch box of the unit, ALWAYS make sure that the unit is Formula to calculate the quantity in CO equivalent... -
Page 22: Fault Diagnosis Using Led On Outdoor Unit Pcb
12 Disposal NOTICE 11.4 Fault diagnosis using LED on outdoor unit PCB During pump down operation, stop the compressor before removing the refrigerant piping. If the compressor is still running and the stop valve is open during pump down, air LED is…... -
Page 23: 13 Technical Data
13 Technical data Technical data A subset of the latest technical data is available on the regional Daikin website (publicly accessible). The full set of latest technical data is available on the Daikin extranet (authentication required). 13.1 Wiring diagram Unified Wiring Diagram Legend For applied parts and numbering, refer to the wiring diagram on the unit. -
Page 24: 14 Glossary
Optional equipment Equipment made or approved by Daikin that can be combined with the product according to the instructions in the accompanying documentation. Field supply Equipment NOT made by Daikin that can be combined with product according instructions accompanying documentation. - Page 28 4P518023-5D 2019.04...
Need help?
Do you have a question about the RXJ20M3V1B and is the answer not in the manual?
Questions and answers