Advertisement

Quick Links

P P P P P P
P P
P
P P
PECO
PECO
PECO
PECO
PECO
MANUAL PART#: Q0547
COLLECTION SYSTEM
R
R R
& UTILITY TRAILER
Model# 5920, 5920U & 7930
OPERATOR'S MANUAL
ASSEMBLY
OPERATION
6.5 HP Briggs & Stratton Vanguard
Unassembled 6.5 HP B&S Vanguard
6.5 HP Briggs & Stratton Vanguard
MAINTENANCE
5920
5920U
7930
Rev 4.1 - March 2022

Advertisement

Table of Contents
loading

Summary of Contents for Peco 5920

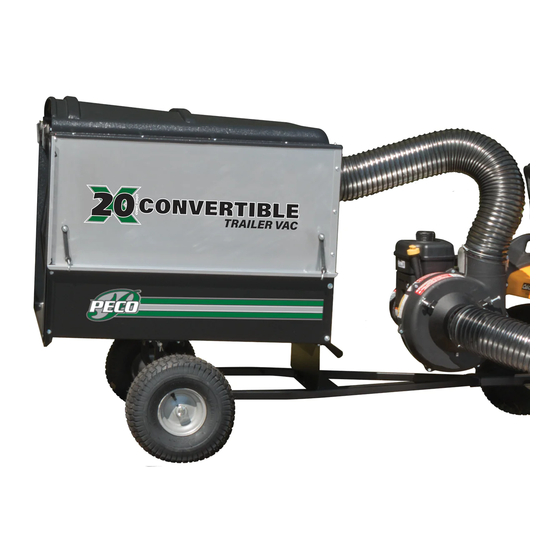
  • Page 1 P P P P P P COLLECTION SYSTEM PECO PECO PECO PECO PECO & UTILITY TRAILER Model# 5920, 5920U & 7930 5920 6.5 HP Briggs & Stratton Vanguard 5920U Unassembled 6.5 HP B&S Vanguard 7930 6.5 HP Briggs & Stratton Vanguard OPERATOR’S MANUAL...
  • Page 2: Table Of Contents

    GRASS COLLECTION SYSTEM TABLE OF CONTENTS SECTION PAGE SECTION PAGE Safety - - - - - - - - - - - - - - - - - - - - - - - - - - - - - - 2 Engine Stay Adjustments - - - - - - - - - - - - - - - - 14-17 Safety Alert Symbols - - - - - - - - - - - - - - - - - - - - - - 3 Universal Boot Installation - - - - - - - - - - - - - - - - 18-20...
  • Page 3: Safety Alert Symbols

    SAFETY WARNING! NEVER operate the mower unless the discharge guard and either the deflector assembly or the vacuum collector adapter are fastened securely in place. WARNING! Do not work around the mower deck boot or the blower area until you are certain that the mower blades and the blower impeller have stopped rotating.
  • Page 4: Warranty

    6. REMEDIED EXCLUSIVE: The only remedies the purchaser has in connection with the breach or performance of any warranty on New PECO, Inc. consumer products are set forth above. In no event will New PECO, Inc. be liable for special incidental or consequential damages.
  • Page 5: Introduction And Description

    Section I - INTRODUCTION AND DESCRIPTION Introduction Description We are pleased to have you as a PECO customer. Your The grass collection system is designed for turf collection system has been designed to give you a low maintenance where there is a need to collect the grass maintenance, simple, and effective way to collect the clippings as the mower cuts the turf.
  • Page 6: Installation For Use

    Section II - INSTALLATION FOR USE Preparation Of Parts PECO Trailer Vacs are shipped as shown in Figure A. Remove the hoses as shown in Figure D. Figure D Note: The following instructions are used in the installation of both the X20 Trailer Vac & X30 Trailer Vac.
  • Page 7: Removing Trailer Pan

    Remove all parts from trailer pan as shown in Figure G. Lift the trailer pan off of the chassis and set the trailer pan upside down as shown in Figure D. Figure G Figure D Set Trailer Pan Upside Down In Preparation Removing Trailer Pan Remove the (2) shipping screws from the front trailer...
  • Page 8: Removing Trailer From Pallet

    Removing Trailer From Pallet Attaching Trailer to Trailer Pan Cut and remove the remaining retaining wires as shown Flip the trailer over and place on the trailer pan as shown in Figure A. Then lift and remove the trailer from the in Figure A.
  • Page 9: Wheel Installation

    Insert the dump handle through the slot in the trailer pan Wheel Installation and through the handle spring P#(J0310) as shown in Figure B. Remove the tape from both axles. Refer to Figure A and Figure B for reference. Figure B Figure A Dump Handle Remove Tape...
  • Page 10: Trailer Top Installation

    Trailer Top Installation Figure D Lift the trailer top and place onto the trailer pan as shown (1) Flat Washer in Figure A. (1) Cotter Pin PER WHEEL Figure A Place Trailer Top Onto The Trailer Pan Flip the trailer over onto the wheels in preparation for the trailer top installation.
  • Page 11: Engine/Blower/Blade Assembly Installation

    Engine/Blower/Blade Assembly Blower Cone Installation Installation Loosen the blower cone hardware just enough so that Remove the engine/blower/blade assembly from the you can remove the plastic cover from the blower box. Place the engine on top of the engine mount arm as housing shown in Figure A.
  • Page 12: Upper Hose Installation

    Upper Hose Installation Attaching Trailer To Tractor Before attaching the Upper Hose, place a Hose Clamp Back the tractor up to the trailer tongue. Lift the trailer P#(J0060) relatively loose on both ends of the Upper tongue and slide onto the tractor hitch as shown in Hose.
  • Page 13: Engine Stay Assembly Installation

    Attach the ball clevis clamp assembly P#(A0336) to the Engine Stay Assembly Installation ball clevis using (1) 5/16”-18 x 2” hex bolt P#(K1159) and (1) 5/16”-18 locknut P#(K2516). Thread the adjusting rod Note: Depending on the manufacturer and style of your P#(B4311) into the ball clevis clamp assembly as shown tractor, the engine stay assembly mounting procedure in Figure D.
  • Page 14: Engine Stay Adjustments

    Engine Stay Adjustments With your Engine Stay mounted it is recommended to position the Engine so that it sits between the rear tires and is angled about 35° to the right from the center of your tractor. This will keep the Engine stationary at the same position when the Trailer Vac swings left or right.
  • Page 15 Figure B View of Collection Unit sitting to the Right of Operator Figure C View of Collection Unit sitting to the Left of Operator...
  • Page 16 Figure D - Figure F are views showing the Engine Positioning on a Zero Turn Mower. Figure D Position from Center < 35°...
  • Page 17 Figure E View of Collection Unit sitting to the Right of Operator Figure F View of Collection Unit sitting to the Left of Operator...
  • Page 18: Universal Boot Installation

    Universal Boot Installation Figure C Remove the discharge chute from the mowing deck as shown in Figure A. Drill Here Figure A Deck Opening Outline Using a jigsaw, cut along the traced outline and the Remove bottom edge of the plastic boot. Discard the cutout Discharge portion of the boot.
  • Page 19 If necessary, cut out the traced underside of the plastic Center the upper clamp plate P#(B2308) over the slide boot to allow for blade clearance. Refer to Figure F. plate and trace the (2) holes onto the plastic boot. Refer to Figure I.
  • Page 20: Lower Hose Installation

    Insert (2) 1/4”-20 x 1” carriage bolts into the lower clamp Lower Hose Installation plate P#(B2039). Insert the lower clamp plate through the cutout in the plastic boot. Push the carriage bolts in the lower clamp plate up through the holes drilled in the Attach one end of the 7”...
  • Page 21: Impeller Blade Removal/Replacement

    Impeller Blade Removal/Replacement To Remove: First remove the 3/8”-24 x 1” GR8 HHCS P#(K0003) (#1), 3/8” Double Indented Washer P#(K0284) (#2) and (1) Tapered Washer P#(K0277) (#3) from the Taper-Lock Bushing P#(S4302) (#5). Next remove the (2) 1/4”-20 x 1” HHCS P#(K1225) (#4) and place them into the threaded holes of the Taper-Lock Bushing (#5). Gradually thread each bolt evenly into the Taper-Lock Bushing, forcing the blade to break-away from the Taper-Lock Bushing.
  • Page 22: Jack Stand Assembly Installation

    Jack Stand Assembly Installation Jack Stand options are available ONLY for the X30 Trailer Vac. To instlal the Jack Stand Assembly, first position the Jack Stand Mount / Gusset (Item #1) behind the Pan Support and align the bolt holes of the Jack Stand Mount / Gusset to the bolt holes of the Pan Support and Frame Brace of the Trailer Vac (Item #2).
  • Page 23 Jack Stand Assembly Installation (Cont.) Next, position the Jack (Item #2) in front of the Pan Support and slide the Mount tube of the Jack through the Pan Support. Refer to Figure B. Finally, secure the Jack to the Jack Stand Mount / Gusset (Item #1) by using (1) Detent Pin (Item #3) and (1) Hair Pin Clip (Item #4).
  • Page 24 5920 X20 Trailer Vac Explosion...
  • Page 25: Exploded Views & Parts List

    A1115 X20 Trailer Sub-Assy Explosion...
  • Page 26 A2268 Top & Pan Sub-Assy / X20 Trailer Vac Explosion...
  • Page 27 A1864 Top Assy / X20 Trailer Vac Explosion...
  • Page 28 A1864 Top Assy / X20 Trailer Vac Explosion (Continued)
  • Page 29 A1865 Pan Assy / X20 Trailer Vac Explosion...
  • Page 30 A1865 Pan Assy / X20 Trailer Vac Explosion (Continued)
  • Page 31 A2269 Chassis & Engine Mount Sub-Assy / X20 Trailer Vac Explosion...
  • Page 32 A0025 Engine Stay Assembly Kit Explosion...
  • Page 33 7930 X30 Trailer Vac Explosion...
  • Page 34 A1116 X30 Trailer Sub-Assy Explosion...
  • Page 35 A2271 Top & Pan Sub-Assy / X30 Trailer Explosion...
  • Page 36 A2112 Top Assy / X30 Trailer Explosion...
  • Page 37 A2112 Top Assy / X30 Trailer BOM...
  • Page 38 A2113 Pan Assy / X30 Trailer Explosion...
  • Page 39 A2114 Door Assy / X30 Trailer Explosion...
  • Page 40 A2115 Chassis & Engine Mount Sub-Assy / X30 Trailer Explosion...
  • Page 41 A2200 Jack Stand Assembly w/ Jack Foot Explosion...
  • Page 42 A2201 Jack Stand Assembly w/ Caster Wheel Explosion...
  • Page 46: Safety Decals

    SAFETY DECALS To promote safe operation, New PECO, Inc. supplies safety decals on all products manufactured. Damage can occur to safety decals either through shipment, use or reconditioning. Contact your local Service Center for replacement decals. P P P PECO...
  • Page 47: Operating Instructions

    D. Once the parking brake has been engaged, then and SECTION III only then, walk back and turn off the collection OPERATING INSTRUCTIONS system blower. E. Detach the upper hose from the inlet mount. General Safety F. Remove the trailer door. Only qualified people familiar with this operator’s manual G.
  • Page 48: Parts And Service

    If for any reason your Service Center is unable to service your collection system or supply replacement parts, contact New PECO, Inc. and include the following information on the chart below. DOCUMENT THE FOLLOWING INFORMATION FOR FUTURE REFERENCE...
  • Page 50: Troubleshooting

    Troubleshooting 2017 (v1.0) Collection System Performance Problem Possible Cause Corrective Action — Cutting blades are bent or — Install new cutting blade unbalanced — Loose blower pulley or pulley Abnormal Vibration — Tighten the pulley assembly — Contact dealer to replace —...
  • Page 51 Notes...
  • Page 52 P P P P P P PECO PECO PECO PECO PECO New PECO, Inc. 10 Walden Dr | Arden, North Carolina 28704 Phone: 1-800-438-5823 | 828-684-1234 Fax: 828-684-0858 Email: peco@lawnvac.com Website: www.lawnvac.com...

This manual is also suitable for:

5920u7930

Table of Contents