Table of Contents
Advertisement
Quick Links
Advertisement
Table of Contents

Subscribe to Our Youtube Channel
Related Manuals for AEG HK654250FB


Summary of Contents for AEG HK654250FB
- Page 1 EN INDUCTION HOB HK654250FB USER MANUAL...
- Page 2 FOR PERFECT RESULTS Thank you for choosing this AEG product. We have created it to give you impeccable performance for many years, with innovative technologies that help make life simpler – features you might not find on ordinary appliances. Please spend a few minutes reading to get the very best from it.
-
Page 3: Table Of Contents
Contents CONTENTS 4 Safety information 5 Installation instructions 7 Product description 9 Operating instructions 13 Helpful hints and tips 14 Care and cleaning 15 What to do if… 16 Environment concerns 17 ISRAEL - Customer Service The following symbols are used in this user manual: Important information concerning your personal safety and information on how to... -
Page 4: Safety Information
Safety information SAFETY INFORMATION For your safety and correct operation of the appliance, read this manual carefully before the installation and use. Always keep these instructions with the appliance also if you move or sell it. The users must fully know the operation and safety functions of the appliance. Children and vulnerable people safety WARNING! Do not let persons, children included, with reduced physical sensory, reduced mental func-... -
Page 5: Installation Instructions
INSTALLATION INSTRUCTIONS Before the installation, note down the serial number (Ser. Nr.) from the rating plate.The rating plate of the appliance is on its lower casing. HK654250FB 949 595 002 00 58 GAD C8 AU 220-240 V 50-60-Hz Induction 7,4 kW... - Page 6 Installation instructions WARNING! Risk of injury from electrical current. Carefully obey the instructions for electrical connec- tions. • The electrical mains terminal is live. • Make electrical mains terminal free of voltage. • Install correctly to give shock protection. • Loose and incorrect plug and socket connections can make the terminal become too hot. •...
-
Page 7: Product Description
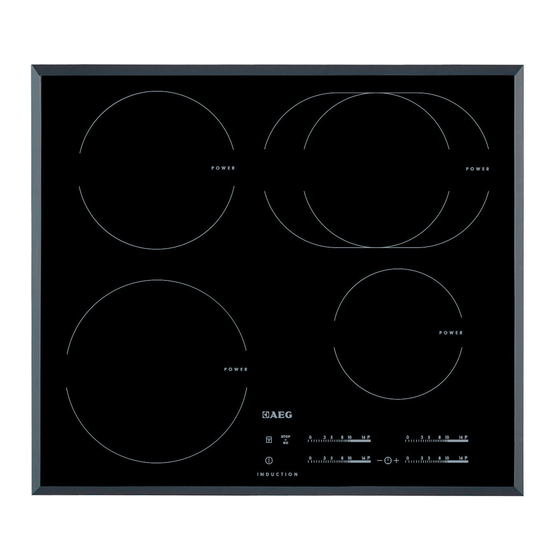
Product description min. min. 38 mm 25 mm min. min. min. 5 mm 5 mm 20 mm If you use a protection box (the additional acces- sory ), the front airflow space of 5 mm and pro- tective floor directly below the appliance are not necessary. - Page 8 Product description Control panel layout Use the sensor fields to operate the appliance The displays, indicators and sounds tell which function operate. sensor field function It activates and deactivates the appliance. It locks/unlocks the control panel. cooking zones' indicators of timer It shows for which cooking zone you set the time.
-
Page 9: Operating Instructions
Operating instructions Display Description The Automatic Switch Off function operates. OptiHeat Control (3 step Residual heat indicator) WARNING! The risk of burns from residual heat! OptiHeat Control shows the level of the residual heat. The induction cooking zones make the heat necessary for cooking directly in the bottom of the cookware. The glass ceramic is hot from the heat of the cookware. - Page 10 Operating instructions Automatic Heat Up 2 3 4 5 6 7 8 9 10 11 12 13 14 You can get a necessary heat setting in a shorter time if you activate the Automatic Heat Up function. This function sets the highest heat setting for some time (see the illustration), and then decreases to the necessary heat setting.
- Page 11 Operating instructions Timer Count Down Timer Use the Count Down Timer to set how long the cooking zone operates for only this one time. Set the Count Down Timer after the selection of the cooking zone. You can set the heat setting before or after you set the timer. •...
- Page 12 Operating instructions • To deactivate this function touch . The heat setting that you set before comes on. Lock When the cooking zones operate, you can lock the control panel, but not . It prevents an accidental change of the heat setting. First set the heat setting.
-
Page 13: Helpful Hints And Tips
Helpful hints and tips HELPFUL HINTS AND TIPS Use the induction cooking zones with correct cookware. Cookware for induction cooking zones For induction cooking zones a strong electro-magnetic field creates the heat in the cook- ware very quickly. Cookware material •... -
Page 14: Care And Cleaning
Care and cleaning Heat Use to: Time Hints setting Keep cooked foods warm as nec- Put a lid on a cookware. essary Hollandaise sauce, melt: butter, choco- 5-25 Mix from time to time. late, gelatine Solidify: fluffy omelettes, baked eggs 10-40 Cook with a lid on. -
Page 15: What To Do If
What to do if… To remove the dirt: – Remove immediately: melted plastic, plastic foil, and food with sugar. If not, the dirt can cause damage to the appliance. Use a special scraper for the glass . Put the scraper on the glass surface at an acute angle and move the blade on the surface . –... -
Page 16: Environment Concerns
Environment concerns Problem Possible cause and remedy • No cookware on the cooking zone. Put cookware on the cook- comes on ing zone. • Not correct cookware. Use the correct cookware. • The diameter of the bottom of the cookware is too small for the cooking zone. -
Page 17: Israel - Customer Service
ISRAEL - Customer Service ISRAEL - CUSTOMER SERVICE Further after-sales service agencies overseas In these countries our respective agents’ own guarantee conditions are applicable. Please obtain further details directly. Customer Service Centres Israel ELECTRICITY & ELECTRONIC SERVICES-EVIS LTD. 19 Hataasia st. Raanana, Industrial area 43654 Tel: 972-9-7448112 Fax: 972-9-7603618... - Page 20 892951905-A-412011...
Need help?
Do you have a question about the HK654250FB and is the answer not in the manual?
Questions and answers