
Related Manuals for Sena PS110W


Summary of Contents for Sena PS110W
- Page 1 메모 [..1]: Universal Device Servers HelloDevice Pro Series (PS110W/210W) User Guide 삭제됨: 삭제됨: Version 1.0.1 삭제됨: 2007-12-21 삭제됨: 삭제됨: 삭제됨:...
- Page 2 This device is not approved for use as a life-support or medical system. 삭제됨: Any changes or modifications made to this device without the explicit approval or consent of Sena Technologies will void Sena Technologies of any liability or responsibility of injury or loss caused by any malfunction.
- Page 3 Revision history Revision Date Name Description V1.0.0 2007-09-09 Y. Moon First release A.1.2, A.1.4 V1.0.1 2007-12-21 Y. Moon...
-
Page 4: Table Of Contents
1.3. Product Specification........................9 1.4. Terminologies and acronyms ....................10 2. Getting Started 2.1. Panel Layout ..........................12 2.1.1. PS110W Panel Layout....................12 2.1.2. PS210W Panel Layout....................13 2.2. Connecting the Hardware ......................14 2.2.1. Connecting to the network .....................14 2.2.2. Connecting to the device ....................15 2.2.3. - Page 5 3.7. SYSLOG server configuration....................37 3.8. Locating server.........................38 3.8.1. Overview ........................38 3.8.2. Locating server configuration..................38 3.8.3. Locating server communication protocol ...............39 3.9. NFS server configuration ......................40 3.10. TCP service configuration ......................40 4. Serial Port Configuration 4.1. Overview ..........................42 4.2. Serial Port Configuration ......................44 4.2.1.
- Page 6 7.1. Introduction..........................90 7.2. Flash partition...........................90 7.3. Supported Linux Utilities ......................90 7.3.1. Shell & shell utilities: ......................90 7.3.2. File and disk utils: ......................90 7.3.3. System utilities: ......................90 7.3.4. Network utilities:......................90 7.4. Accessing CLI...........................91 Appendix 1. Connections A 1.1. Ethernet Pin outs........................92 A 1.2.
-
Page 7: Introduction
1. Introduction 1.1. Overview This document is intended for the HelloDevice Pro Series, PS110W/210W. 삭제됨: The HelloDevice Pro Series is a Universal terminal server (or device server) that makes your legacy serial devices manageable by an industry-standard Ethernet network. Based on open network protocols such as TCP/IP and UDP, it gives you ultimate flexibility to your serial devices. -
Page 8: Package Check List
서식 있음: 글머리 기호 및 번호 매기기 - PS110W/210W external box - External 110V (or 230V) power supply or power cord(PS110W / PS210W) - Serial cable kit - Quick Start Guide - CD-ROM, including the Serial/IP, HelloDevice Manager and manuals... -
Page 9: Product Specification
1.3. Product Specification PS210W PS110W Serial Interface 1-port 2-port Serial speeds 75bps to 230Kbps Flow Control: Hardware RTS/CTS, Software Xon/Xoff RJ45 connector Signals: RS232 Rx, Tx, RTS, CTS, DTR, DSR, DCD, GND Modem controls: DTR, DSR and DCD Network Interface... -
Page 10: Terminologies And Acronyms
1.4. Terminologies and acronyms This section will define commonly used terms in this manual. These terms are related to Internetworking, and defined in regards to their use with Pro Series. 삭제됨: MAC address On a local area network or other network, the MAC (Media Access Control) address is the computer’s 삭제됨: ' unique hardware number. - Page 11 Table 1-1 Acronym Table Internet Service Provider Personal Computer Network Interface Card Media Access Control Local Area Network Unshielded Twisted Pair ADSL Asymmetric Digital Subscriber Line Address Resolution Protocol Internet Protocol ICMP Internet Control Message Protocol User Datagram Protocol Transmission Control Protocol DHCP Dynamic Host Configuration Protocol SMTP...
-
Page 12: Getting Started
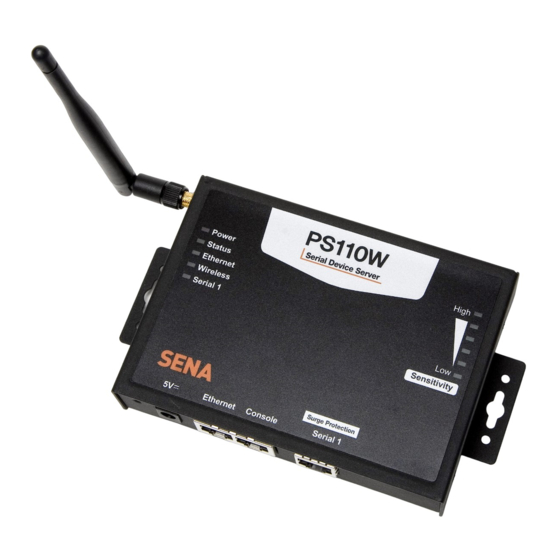
2.1.1. PS110W Panel Layout The PS110W has 5 LED indicator lamps for status display and 6 LED indicator lamps for sensitivity. There is a factory reset switch front panel of PS110W and the user can use this switch to restore factory default configuration. -
Page 13: Ps210W Panel Layout
Figure 2-1 The panel layout of the PS110W 삭제됨: 2.1.2. PS210W Panel Layout The PS210W has 6 LED indicator lamps for status display and 6 LED indicator lamps for sensitivity. There is a factory reset switch front panel of PS210W and the user can use this switch to restore factory default configuration. -
Page 14: Connecting The Hardware
Figure 2-2 The panel layout of the PS210W 삭제됨: 2.2. Connecting the Hardware This section describes how to connect the Pro Series to your equipment for initial testing. - Connect the Pro Series to an Ethernet hub or switch - Connect the device - Connect the provided power source to the Pro Series 2.2.1. -
Page 15: Connecting To The Device
Figure 2-3 Connecting a network cable to the PSx10W 삭제됨: 2.2.2. Connecting to the device Connect the console cable to the Pro Series serial port. To connect to the console port of the device, the user needs to consider the type of console port provided by the device itself. Please refer to the Appendix 1 Connections for details. -
Page 16: Connecting The Power
Figure 2-4 Connecting a equipment to the PSx10W 2.2.3. Connecting the power Connect the power cable to the Pro Series. If the power is properly supplied, the [Power] lamp will light up solid red. Figure 2-5 Connecting the power to the PSx10W 삭제됨: 2.2.4. -
Page 17: Using The System Console
Local users can connect directly to the system console port of the Pro Series using the serial console cable. 삭제됨: Remote console: Remote users who require a menu-driven interface can utilize Telnet (port 23) or SSH (port 22) connections to the Pro Series using Telnet or SSH client. NOTE : Please note that Pro Series supports only the SSH v2, so user must use the SSH client which is able to support SSH v2. - Page 18 Stop bits 1 No flow control Press the [ENTER] key. Enter your username and password to log into the Pro Series. The factory default user settings are as follows. Login: root Password: root ProSeries login: root 삭제됨: Password: After login, user can use various shell commands in the CLI(Command Line interface). For details on the CLI, refer to the chapter 7 CLI guide.
-
Page 19: Using Remote Console
# editconf _] / [________________________________________________________________________ 1. Network configuration 2. Serial port configuration 3. System administration ________________________________________________________________________________ COMMAND (Display HELP : help)>save COMMAND (Display HELP : help)>apply COMMAND (Display HELP : help)>help _] HELP [_____________________________________________________________________ [Enter] refresh [ESC] cancel or go to upper go to root go to upper clear... -
Page 20: Accessing The Web Browser Management Interface
삭제됨: ]Run either a Telnet program or a program that supports Telnet functions (i.e. TeraTerm-Pro or HyperTerminal). The target IP address and the port number must match the Pro Series. If required, specify the port number as 23. Type the following command in the command line interface of user’s computer. - Page 21 삭제됨: Note: Before accessing the Pro Series Web management page, the user must check the IP address (or resolvable Hostname) of the Pro Series and Subnet mask settings. Figure 2-9 Login screen of the Pro Series web management 삭제됨: Figure 2-10 shows the configuration homepage of the Pro Series Web management interface. A menu bar is provided on the left side of the screen.
- Page 22 Figure 2-10 The Pro Series web management screen 삭제됨: 서식 있음: 글머리 기호 및 번호 매기기...
-
Page 23: Network Configuration
3. Network Configuration 3.1. IP Configuration The Pro Series requires a valid IP address to operate within the user’s network environment. If the IP address is not readily available, contact the system administrator to obtain a valid IP address for the Pro Series. -
Page 24: Interfaces
3.1.1. Interfaces The PSx10W has two network interfaces: one is Ethernet interface and the other is WiFi interface. The 삭제됨: two network interfaces don’t work together. Please select a network interface to operate. 서식 있음: 글머리 기호 및 3.1.2. Using a Static IP Address 번호... -
Page 25: Using Dhcp
address. 삭제됨: Primary and Secondary DNS The DNS (Domain Name System) server is used to locate and translate the correct IP address for a requested web site address. A domain name is the web address (i.e. www.yahoo.com) and is usually easier to remember. The DNS server is the host that can translate such text-based domain names into the numeric IP addresses for a TCP/IP connection. -
Page 26: Wifi Configuration
삭제됨: A DHCP sever assigns IP addresses dynamically from an IP address pool, which is managed by the network administrator. This means that the DHCP client, i.e. the Pro Series, receives a different IP address each time it boots up. The IP address should be reserved on the DHCP server side to assure that the user always knows the newly assigned Pro Series address. -
Page 27: List Of Aps
Figure 3-3 Operation mode configuration Connect to any The PSx10W attempts to connect to any nearby AP regardless of the List of APs. PSx10W tries to connect to AP in the order searched. Connect in the order of registraion The PSx10W attempts to connect to AP in the order of the registered APs. Connect in the order of signal strength The PSx10W attempts to connect to AP in the order of signal strength of the registered APs. -
Page 28: Neighborhood Aps
Figure 3-4 Lis of APs ESSID The ESSID of the AP to register Auth-Encryption PSx10W supports Open System, Open System-WEP, Shared Key-WEP, WPA-PSK-TKIP, WPA-PSK- AES, WPA2-PSK-TKIP, WPA2-PSK-AES. Please select the authentication and the encryption method of the AP to register. The key string of the AP to register Use this except Open System case. - Page 29 to which the PSx10W and the PSx10W should share channel number, security configuration (Auth- Encryption) and key. (When DHCP server is not running, you must use Static IP.) Figure 3-6 Adhoc configuration Country Select country that is used now. Channel Select a channel for Adhoc connection Network ID (SSID) The SSID of the device to which the PSx10w connect...
-
Page 30: Snmp Configurations
3.3. SNMP Configurations 삭제됨: 서식 있음: 글머리 기호 및 번호 매기기 The Pro Series has the SNMP (Simple Network Management Protocol) agent supporting SNMP v1 and v2 protocols. Network managers like NMS or SNMP Browser can exchange information with Pro Series, as well as access required functionality. -
Page 31: Mib-Ii System Objects Configuration
EnableLoginTrap: Indicates whether the SNMP agent process is permitted to generate system login traps for console, telnet and Web access. If users need support for adding or modifying MIBs, please contact Sena technical support. For more information about the MIBs and SNMP, see the RFCs 1066, 1067, 1098, 1317, 1318 and 1213. -
Page 32: Management Using Snmp
3.3.4. Management using SNMP 삭제됨: 서식 있음: 글머리 기호 및 번호 매기기 The Pro Series can be managed through the SNMP protocol using NMS (Network Management System) or SNMP Browser. Before using the NMS or SNMP Browser, the user must set the access control configuration properly so that the Pro Series permits host access where the NMS or SNMP Browser is executed. -
Page 33: Dynamic Dns Configuration
Dynamic DNS Server regardless of any IP address change. By default, the Pro Series only supports Dynamic DNS service offered at Dynamic DNS Network Services, LLC (www.dyndns.org). Contact Sena technical support for issues regarding other Dynamic DNS service providers. -
Page 34: Smtp Configuration
Consequently, the email address set for the device can use an arbitrary username with a registered hostname (i.e. arbitrary_user@yahoo.com or anybody@sena.com). The SMTP user name and SMTP user password are required when either SMTP with authentication or POP-before-SMTP mode is selected. -
Page 35: Ip Filtering
Figure 3-31 SMTP mode selection in SMTP configuration 삭제됨: 3.6. IP Filtering 서식 있음: 글머리 기호 및 번호 매기기 The Pro Series prevents unauthorized access using an IP address based filtering method. The users can allow one of the following scenarios by changing the parameter settings: - Any host cannot access a specific service of the Pro Series - Only one host of a specific IP address can access a specific service of the Pro Series - Hosts on a specific subnet can access a specific service of the Pro Series... - Page 36 Service Service to which will be applied to the IP filtering rule. User can select one of Telnet, SSH, NFS, HTTP, HTTPS or each serial port Chain rule Set the basic rule for the host to access the Pro Series as one of Accept, Drop or Reject. Figure 3-42 IP filtering Configuration 삭제됨: The Pro Series provides a policy option.
-
Page 37: Syslog Server Configuration
Figure 3-64 IP filtering Configuration for each service and serial port 삭제됨: Table 3-2 Input examples of Option and IP address/mask combination Input format Allowable Hosts Option IP address/mask Any host 0.0.0.0/0.0.0.0 Normal 192.168.1.120 192.168.1.120/255.255.255.255 Normal Any host except 192.168.1.120/255.255.255.255 Invert 192.168.1.120 192.168.1.1 ~... -
Page 38: Locating Server
Figure 3-75 SYSLOG server configuration 삭제됨: To receive log messages from the Pro Series, the SYSLOG server must be configured as “remote reception allowed”. If there is a firewall between the Pro Series and the SYSLOG server, there must be a rule that allows all outgoing and incoming UDP packets to travel across the firewall. The Pro Series supports SYSLOG facilities from local0 to local7. -
Page 39: Locating Server Communication Protocol
0. 삭제됨: Example of the PS110W: If port number = 7001 (1B59h), Local ports data = 1Bh, 59h If serial port is disabled, Local port data = 00h, 00h... -
Page 40: Nfs Server Configuration
서식 있음: 글머리 기호 및 3.9. NFS server configuration 번호 매기기 The Pro Series supports NFS (Network File System) service for system or port data logging functions. To use this service, the user must specify the IP address of a NFS server and the mounting path on the NFS server. - Page 41 submissions by the Pro Series. These “keep-alive” messages are sent to the remote host to confirm that the session is still open. The default time value is 15 sec. TCP “keep-alive” probes: This represents how many “keep-alive” probes will be sent to the remote host, until it decides that the connection is dead.
-
Page 42: Serial Port Configuration
4. Serial Port Configuration 4.1. Overview The serial port configuration capability allows the user to configure the host mode of each port, serial communication parameters, cryptography, port logging parameters and other related parameters. 삭제됨: The serial port’s host mode can be set as any of the following: 삭제됨: TCP : The Pro Series operates as a TCP server and client. - Page 43 Inactivity timeout (0 for unlimited) Socket ID (for outgoing connection) Accept unlisted Send unlisted Modem emulation Add or Edit a remote host Host IP address Host port Remote host Backup host IP address Backup host port Remove a remote host Cryptography SSLv3 Baud rate...
-
Page 44: Serial Port Configuration
Figure 4-1 Serial port configuration main screen 4.2. Serial Port Configuration 삭제됨: 서식 있음: 글머리 기호 및 번호 매기기 Individual Port Configurations of the Pro Series are classified into eight groups: 1. Port enable/disable 2. Port title 3. Host mode 4. -
Page 45: Host Mode Configuration
include the device type, vendor, and/or location. Figure 4-3 Port title configuration 삭제됨: 4.2.3. Host Mode Configuration The Pro Series operating mode is called the “host mode.” Three host modes are available: TCP mode, UDP mode, Modem emulation mode. 삭제됨: TCP mode The Pro Series works as both TCP server and client. - Page 46 삭제됨: Figure 4-4 Host mode configuration (TCP mode) 삭제됨: 4.2.3.1. TCP mode 서식 있음: 글머리 기호 및 번호 매기기 For easier understanding of TCP modes, a simplified State Transition Diagram is often used. And to help users understand the diagram, the TCP state of the Pro Series is briefly described as follows. 삭제됨: [Listen] It represents “a waiting for a connection request from any registered remote host”.
- Page 47 request. [Established] It represents “an open connection”. If one of the hosts, the remote host or the Pro Series, accepts a connection request from the other, the connection is opened and state is changed into [Established]. [Data] When it is in [Established] state, data from a host will be transferred to the other one. For easier understanding of the TCP session operation, we called the state as [Data] state when actual data transfer is performed.
- Page 48 Pro Series using his serial port application program. For this purpose, SENA OEM version of Serial/IP from Tactical Software, LLC is bundled with Pro Series. Please refer to documentations of Serial/IP for more detail information about using the COM port redirector.
- Page 49 for remote host list configuration, please refer to 4.2.4 Remote host configuration section. 삭제됨: Cyclic Connection If Cyclic Connection function is enabled, the Pro Series will make an attempt to connect to the user-defined remote host(s) at a given interval even if there’s no incoming serial data from the device connected to that serial port.
- Page 50 TCP connection request rejected Or internal TCP time-out Sync-Sent In-coming TCP Close request TCP connection request accepted Inactivity time-out Incoming data via serial port Data Established Incoming data Closed from remote host Accept Reject Listen Sync-Recvd Incoming TCP connection request Incoming data via serial port Figure 4-5 State Transition Diagram of TCP mode 삭제됨:...
- Page 51 Figure 4-6 Host mode configuration (UDP mode) 삭제됨: 삭제됨: 1) Operations If a remote host sends a UDP datagram to the one of UDP Local port of the Pro Series, Pro Series first checks whether it is from one of the hosts configured on remote host configuration. If the remote host is one of the hosts configured on remote host configuration, then Pro Series transfers the data through the serial port.
- Page 52 Accept UDP datagram from unlisted remote host If Accept unlisted (Accept UDP datagram from unlisted remote host) function is set as ‘No’, Pro Series will accept only incoming UDP datagram from the remote host(s) configured on remote host configuration. On the contrary if Accept unlisted function is set as ‘Yes’, Pro Series will accept all incoming UDP datagram regardless remote host configuration.
- Page 53 [remote IP][remote port] (Port Number is permitted from 1 to 65534) CONNECT [CR][LF] [CR][LF] e.g. atdtps.sena.com:1002 Connect to domain address ps.sena.com, port 1002 If failure in connection, NO CARRIER [CR][LF] ATDR This command is similar to ATD(T). The difference is that...
- Page 54 H, H0: Disconnect current TCP connection ATHn [CR][LF] All the data will be cleared 연결합니다.. H1: Keep the current TCP connection 삭제됨: I, I0 : display “Sena Technologies, Inc.” If successful, ATIn [CR][LF] I3 : display model number <= OK [CR][LF] Others : display “OK”...
- Page 55 Factory default response is ERROR. ERROR [CR][LF] AT&Cn, AT&Wn, AT&Zn=x This can be changed to OK by user configuration. (Figure 4-8) OK [CR][LF] If n=1 OK [CR][LF] ATFn [CR][LF] None Else ERROR [CR][LF] If n=0 OK [CR][LF] ATWn None Else ERROR [CR][LF] 삭제됨: ERROR [CR][LF] Set the system data and time...
- Page 56 삭제됨: Figure 4-7 Typical case of command/data flow of modem emulation mode 삭제됨: In modem emulation mode, user can also set specific phone number to host address/port mapping table. If user set the phone number to host address/port mapping table as shown on Figure 4-8, Pro Series will try to connect to port 7001 of 192.168.1.1 host by the ‘atdt5737772’...
- Page 57 삭제됨: 삭제됨: 삭제됨: TCP 연결이 이루어 지고 나서 Data를 주고 is set) response for this case, he can get the required result after setting CONNECT strings as 받을 때, 어떤 형식으로 shown on Figure 4-8. 주고 받을지를 Respond to AT&Cn, AT&Wn and AT&Zn with 지정할수있습니다.
-
Page 58: Remote Host Configuration
4.2.4. Remote host configuration 삭제됨: 서식 있음: 글머리 기호 및 번호 매기기 Remote host configuration is the list of hosts that will receive data from serial port of Pro Series when there is data transmission from the serial port of the Pro Series. In TCP mode, user can also configure secondary remote host (Backup host) that will receive data from serial port if Pro Series fails to connect to primary remote host. -
Page 59: Cryptography Configuration
4.2.5. Cryptography configuration 삭제됨: 서식 있음: 글머리 기호 및 번호 매기기 The Pro Series supports encrypted sessions for only the TCP mode including modem emulation mode 삭제됨: (not UDP mode). 삭제됨: Figure 4-10 Cryptography configuration 삭제됨: 삭제됨: 4.2.5.1. Secure Sockets Layer(SSL) cryptography method 서식... - Page 60 encryption provides better authentication techniques. The handshake allows the server to authenticate itself to the client using public-key techniques, and then allows the client and the server to cooperate in the creation of symmetric keys used for rapid encryption, decryption, and tamper detection during the session that follows.
- Page 61 be encrypted with the session key. It then sends a separate (encrypted) message indicating that the server portion of the handshake is finished. 10. The SSL handshake is now complete, and the SSL session has begun. The client and the server use the session keys to encrypt and decrypt the data they send to each other and to validate its integrity.
- Page 62 The Pro Series can communicate with another device or another Pro Series that supports RC4 삭제됨: Pro series에서는 cryptography mode with same Key string. PEM형식의 인증서만 사용 For the sample application programs of SSL/RC4 cryptography method, please contact the Sena 할수 있습니다. Technical support. 삭제됨: 서식...
-
Page 63: Serial Port Parameters
삭제됨: Figure 4-13 RC4 Cryptography configuration 4.2.6. Serial port parameters 삭제됨: 서식 있음: 글머리 기호 및 번호 매기기 To connect the serial device to the Pro Series serial port, the serial port parameters of the Pro Series should match exactly to that of the serial device attached. The serial port parameters are required to match this serial communication. - Page 64 삭제됨: Parity Parity can be none, even or odd. The factory default setting is none. 삭제됨: Stop bits Stop bits can be between 1 bit and 2 bits. The factory default setting is 1 bit. Figure 4-14 Serial parameter configuration 삭제됨: Flow control The factory default setting of the flow control is None.
-
Page 65: Modem Configuration
The DTR option can be set to one of three types: always high, always low or high when TCP/UDP is opened. If the DTR behavior is set to high when TCP/UDP is opened, the state of the DTR pin will be maintained high if the TCP/UDP connection is established. The DSR input behavior can be set to one of two types: none or allow TCP/UDP connection only by high. - Page 66 configuration page. The Pro Series supports modem connection only when host mode is set as TCP mode. 삭제됨: Enable/Disable modem By enabling this menu, user can attach a modem directly to the serial port of Pro Series. If this parameter is enabled, Pro Series considers this port will be used for modem use exclusively. 삭제됨: Modem init-string User can specify modem initialization string for his modem in Modem init-string parameter.
-
Page 67: Port Logging
삭제됨: Figure 4-15 Modem configuration 4.2.8. Port Logging 삭제됨: 서식 있음: 글머리 기호 및 번호 매기기 With the port logging feature, the data sent through the serial port is stored to MEMORY or a mounting point on an NFS server. 삭제됨: Enable/disable port logging This parameter defines whether to enable or disable the port-logging feature. -
Page 68: Port Event Handling Configurations
the section 3.9 NFS server configuration for details of NFS server configuration. 삭제됨: Port log buffer size This parameter defines the maximum amount of port log data to be logged. When using internal memory to store the log data, the total size of the port buffer cannot exceed 10 Kbytes. When using an NFS server to store log data, the maximum port buffer size is unlimited. - Page 69 삭제됨: Notification interval To prevent Pro Series from being trapped in handling port event, there is a Notification interval parameter. Pro Series will send notification email or SNMP trap every Notification interval even it detects predefined keyword within Notification interval. The smaller value of this parameter will result in immediate response for predefined keyword and heavy usage of system resources.
- Page 70 Port event-handling configurations Figure 4-17 삭제됨: SNMP trap receiver’s IP address This parameter sets the IP address of SNMP trap receiver that will receive SNMP trap notification when pre-defined keyword is detected. 삭제됨: SNMP trap community This parameter sets a community that will be included in SNMP trap message when pre-defined keyword is detected.
-
Page 71: Copy Port Configuration
Event keywords The user can assign event keywords so that the Pro Series takes actions such as sending e-mail notification, sending SNMP trap notification or sending pre-defined command to a serial port if the keyword is detected at the serial port. 삭제됨: Event keyword User can specify any words, which he/she wants to set as a keyword. -
Page 72: System Administration
5. System Administration The Pro Series displays the system status and the log data via a Status Display Screen. This screen is used for management purposes. System status data includes the model name, serial number, firmware version and the network configuration of the Pro Series. The Pro Series can also be configured to deliver log data automatically via email to a specified recipient with the system-logging feature. -
Page 73: Change Password
NFS server or the SYSLOG server. If the internal memory is used to store system log data, the log data will be cleared when the Pro Series is turned off. To preserve the system log data, set the storage location to be SYSLOG server or NFS server. To do this, the user must configure the corresponding media in advance. -
Page 74: Device Name Configuration
5.4. Device Name Configuration 삭제됨: 서식 있음: 글머리 기호 및 번호 매기기 The Pro Series has its own name for administrative purposes. Figure 5-4 shows the device name configuration screen. When user changes Device name, hostname of Pro Series will be also changed. Figure 5-4 Device name configuration 삭제됨: Please note that user cannot set space character as a device name. -
Page 75: Factory Reset
Figure 5-6 NTP configuration 5.6. Factory Reset 삭제됨: 서식 있음: 글머리 기호 및 번호 매기기 The user may restore the factory default settings at any time using this menu. (User can also restore the factory default settings using the reset switch.) Figure 5-7 Factory Reset 서식... - Page 76 Figure Configuration Management To export the current configurations, follow this: 서식 있음: 글머리 기호 및 1. Select the encrypting option 번호 매기기 2. Type the file name. 3. Click the [Export] button. To import the exported configurations, follow this: 서식 있음: 글머리 기호 및 1.
-
Page 77: Firmware Upgrade
5.8. Firmware Upgrade 번호 매기기 Firmware upgrades are available via serial, remote console or web interface. The latest upgrades are available on the Sena web site at http://www.sena.com/support/downloads/. 삭제됨: Figure 5-9 shows the firmware upgrade web interface. 삭제됨: To upgrade firmware via the web: 1. - Page 78 _] System administration [____________________________________________________ 1. System status 2. System logging 3. Device Name : PSx10W 4. Date and time 5. Change password 6. User Administration 7. Factory reset 8. Firmware upgrade ________________________________________________________________________________ COMMAND (Display HELP : help)>8 _] Firmware upgrade [_________________________________________________________ Do you want to upgrade firmware? [yes/no] yes Transfer firmware by zmodem using your terminal application.
- Page 79 login: root Password: # editconf _] / [________________________________________________________________________ 1. Network configuration 2. Serial port configuration 3. System administration ________________________________________________________________________________ COMMAND (Display HELP : help)>3 _] System administration [____________________________________________________ 1. System status 2. System logging 3. Device Name : PSx10W 4. Date and time 5.
-
Page 80: User Administration
삭제됨: _] Firmware upgrade [_________________________________________________________ Do you want to upgrade firmware? [yes/no] yes Transfer firmware by zmodem using your terminal application. To escape, press Ctrl+X **B0ff000005b157 **B0ff000005b157 **B0ff000005b157 **B0ff000005b157 Firmware upgrade failed ! Now reboot ... 삭제됨: Figure 5-12 Firmware upgrade failure message 5.9. - Page 81 Figure 5-14 Port user configuration 삭제됨: 서식 있음: 글머리 기호 및 번호 매기기...
-
Page 82: System Statistics
6. System Statistics The Pro Series Web interface provides system statistics menus. The user can use these menus to access statistical data and tables stored in the Pro Series memory. Network interfaces statistics and serial ports statistics display statistical usage of the link layer, lo, eth and serial ports. IP, ICMP, TCP and UDP statistics display usages of four primary components in the TCP/IP protocol suite. -
Page 83: Ip Statistics
Figure 6-2 Serial ports status 6.3. IP Statistics The IP Statistics screen provides statistical information about packets/connections using an IP protocol. Definitions and descriptions of each parameter are described below: 삭제됨: Forwarding : Specifies whether IP forwarding is enabled or disabled. DefaultTTL : Specifies the default initial time to live (TTL) for datagrams originating on a particular computer. - Page 84 counter does not include any datagrams discarded while awaiting reassembly. InDelivers : Specifies the number of received datagrams delivered. OutRequests : Specifies the number of outgoing datagrams that an IP is requested to transmit. This number does not include forwarded datagrams. OutDiscards : Specifies the number of transmitted datagrams discarded.
-
Page 85: Icmp Statistics
Figure 6-3 IP statistics 6.4. ICMP Statistics The ICMP Statistics screen provides statistical information about packets/connections using an ICMP protocol. Definitions and descriptions of each parameter are described below: 삭제됨: InMsgs, OutMsgs : Specifies the number of messages received or sent. InErrors, OutErrors : Specifies the number of errors received or sent. - Page 86 Specifies the number of parameter-problem messages received or sent. A parameter-problem message is sent to the originating computer when a router or host detects an error in a 삭제됨: ' datagram’s IP header. InSrcQuenchs, OutSrcQuenchs : Specifies the number of source quench messages received or sent. A source quench request is sent to a computer to request that it reduces its rate of packet transmission.
-
Page 87: Tcp Statistics
Figure 6-4 ICMP statistics 6.5. TCP Statistics 삭제됨: 서식 있음: 글머리 기호 및 번호 매기기 The TCP Statistics screen provides statistical information about packets/connections using a TCP protocol. Definitions and descriptions of each parameter are described below: RtoAlgorithm : Specifies the retransmission time-out (RTO) algorithm in use. The Retransmission Algorithm can have one of the following values. - Page 88 RtoMin : Specifies the minimum retransmission time-out value in milliseconds. RtoMax : Specifies the maximum retransmission time-out value in milliseconds. MaxConn : Specifies the maximum number of connections. If is the maximum number is set to -1, the maximum number of connections are dynamic. ActiveOpens : Specifies the number of active opens.
-
Page 89: Udp Statistics
Figure 6-5 TCP statistics 6.6. UDP Statistics 삭제됨: The UDP Statistics screen provides statistical information about packets/connections using a UDP protocol. Definitions and descriptions of each parameter are described below: InDatagrams : Specifies the number of datagrams received. NoPorts : Specifies the number of received datagrams that were discarded because the specified port was invalid. -
Page 90: Cli Guide
7. CLI guide 7.1. Introduction The root user can access the Linux console command line interface (CLI) of the Pro Series via the serial console or TELENT/SSH. In the CLI, the user can perform standard Linux commands to view the status of the Pro Series, edit the configuration, apply configuration changes. 삭제됨: 7.2. -
Page 91: Accessing Cli
7.4. Accessing CLI Serial console: 1) ]Connect the console port of the Pro Series with the PC serial port 2) Run a PC terminal emulation program 3) Configure the PC serial port to: 9600-8-N-1 No flow control 4) Press <enter> 5) Login with the Pro Series root account Telnet console: 1) telnet Pro_Series_ip_address... -
Page 92: Appendix 1. Connections
Appendix 1. Connections A 1.1. Ethernet Pin outs 삭제됨: The Pro Series uses a standard Ethernet connector, which is a shielded connector that is compliant with the AT&T258 specifications. Table A-1 shows the pin assignment and wire color. Figure A-1 Pin layout of the RJ45 connector 삭제됨: Table A-1 Pin assignment of the RJ45 connector for Ethernet Description... -
Page 93: A 1.3. Ethernet Wiring Diagram
삭제됨: Table A-2 Pin assignment of RJ-45 connector for console and serial port Signal 삭제됨: A 1.3. Ethernet Wiring Diagram Figure A-3 Ethernet direct connection using crossover Ethernet cable Figure A-4 Ethernet connection using straight through Ethernet cable... -
Page 94: A 1.4. Serial Wiring Diagram
A 1.4. Serial Wiring Diagram 삭제됨: 서식 있음: 글머리 기호 및 번호 매기기 A 1.4.1. RS232 Serial Wiring Diagram 삭제됨: 서식 있음: 글머리 기호 및 번호 매기기 Figure A-5 RS232 wiring diagram 삭제됨: 삭제됨:... -
Page 95: Appendix 2. Pro Series Configuration Files
Appendix 2. Pro Series Configuration files A 2.1. port1.conf /serial/*1/parameter/baudrate=9600 /serial/*1/parameter/databit=0 /serial/*1/parameter/stopbit=0 /serial/*1/parameter/parity=0 /serial/*1/parameter/flowcontrol=0 /serial/*1/parameter/interchar_to=0 /serial/*1/parameter/dtr_option=0 /serial/*1/parameter/dsr_option=0 /serial/*1/modem/modem_init_string=q1e0s0=2 /serial/*1/modem/modem_dcd_option=0 /serial/*1/modem/modem_auto_disconnection_enable=0 /serial/*1/modem/modem_enable=0 /serial/*1/event/event_email_enable=0 /serial/*1/event/event_snmp_enable=0 /serial/*1/event/event_notification_interval=30 /serial/*1/event/event_enable=0 /serial/*1/hostmode/accept_unlisted=1 /serial/*1/hostmode/send_unlisted=1 /serial/*1/enable=1 /serial/*1/title=Port #1 /serial/*1/hostmode/mode=0 /serial/*1/hostmode/port=7001 /serial/*1/hostmode/userauth=0 /serial/*1/hostmode/telnet=0 /serial/*1/hostmode/max_connection=8 /serial/*1/hostmode/cyclic_time=0 /serial/*1/hostmode/inactive_time=0 A 2.2. filter.conf /network/filter/specification/telnet=1 /network/filter/specification/ssh=1 /network/filter/specification/http=1... -
Page 96: A 2.3. Snmp.conf
A 2.3. snmp.conf /network/snmp/syscontact=administrator /network/snmp/sysname=ProSeries /network/snmp/syslocation=my location /network/snmp/sysservice=7 /network/snmp/powerontrapenable=0 /network/snmp/authtrapenable=1 /network/snmp/linkuptrapenable=0 /network/snmp/logintrapenable=0 /network/snmp/nms/*1=0.0.0.0 public 0 /network/snmp/nms/*2=0.0.0.0 public 0 /network/snmp/nms/*3=0.0.0.0 public 0 /network/snmp/nms/*4=0.0.0.0 public 0 /network/snmp/trap/*1=0.0.0.0 public 0 /network/snmp/trap/*2=0.0.0.0 public 0 /network/snmp/trap/*3=0.0.0.0 public 0 /network/snmp/trap/*4=0.0.0.0 public 0... -
Page 97: Appendix 3. Well-Known Port Numbers
Appendix 3. Well-known port numbers Port numbers are divided into three ranges: Well Known Ports, Registered Ports, and Dynamic and/or Private Ports. Well Known Ports are those from 0 through 1023. Registered Ports are those from 1024 through 49151. Dynamic and/or Private Ports are those from 49152 through 65535. 삭제됨: Well Known Ports are assigned by IANA, and on most systems, can only be used by system processes or by programs executed by privileged users. -
Page 98: Appendix 4. Guide To The Bios Menu Program
서식 있음: 글머리 기호 및 번호 매기기 After entering the bios menu program, the user will see following main menu page: ----------------------------------------------------------------------------- 삭제됨: BIOS v1.0.0 (c) 1998-2005 Sena Technologies, Inc. ----------------------------------------------------------------------------- ----------------------------------------------------------------------------- Welcome to Boot Loader Configuration page ----------------------------------------------------------------------------- Select menu 1. -
Page 99: A 4.4. Hardware Test Menu
----------------------------------------------------------------------------- 삭제됨: --------------- RTC Configuration --------------------- ----------------------------------------------------------------------------- --------------------- Select Menu -------------------- 1. Data(mm/dd/yy) : 05/19/05 2. Time(hh:mm:ss) : 15:02:28 <ESC> Back, <ENTER> Refresh ----->1 Enter Current Data(mm/dd/yy) : 05/20/05 Press the ENTER key to continue!! ----------------------------------------------------------------------------- RTC Configuration ----------------------------------------------------------------------------- Select Menu 1. - Page 100 the Ethernet port of the Pro Series and must plug the loopback connector to all the serial ports of the Pro Series. There must exist a remote host with a valid IP address. The default server IP address is 192.168.0.128 and it can be changed using the [Firmware Upgrade] menu. Otherwise, the test may not be performed properly.
- Page 101 ******* Hardware auto-detect and auto-test ******* 삭제됨: [DRAM] DRAM Test ---------------------------------------------[ PASSED] 삭제됨: [FLASH] FLASH Test ---------------------------------------------[ PASSED] 삭제됨: [EEPROM] 삭제됨: EEPROM Test ---------------------------------------------[ PASSED] [ETHERNET] 삭제됨: ETHERNET Test ---------------------------------------------[ PASSED] [UART] 삭제됨: <--Internal Loop Test--> Port # 1 test in progressing(MODE)------------------------[ RS232] (Read/WRite)------------------[ SUCCESS] Port # 2 test in progressing(MODE)------------------------[...
-
Page 102: A 4.5. Firmware Upgrade Menu
------------------------------------------------------------------------------- 삭제됨: --------------- Hardware Test --------------------- ------------------------------------------------------------------------------- --------------------- Select menu --------------------- 0. Test Mode - One Time 1. Auto test 2. DRAM test 3. FLASH test 4. EEPROM test 5. Ethernet test 6. UART Mode test <ESC> Back, <ENTER> Refresh ----->... - Page 103 ----------------------------------------------------------------------------- 삭제됨: --------------- Firmware upgrade --------------------- ----------------------------------------------------------------------------- --------------------- Select menu -------------------- 1. Protocol [TFTP] 삭제됨: --------------- 2. IP address assigned to Ethernet interface [192.168.6.6] --------------------- 3. Server’s IP address [192.168.6.1] --------------------- 4. Firmware File Name [psx10W.img] -------------------- 5. Start firmware upgrade <ESC>...
-
Page 104: Appendix 5. Using Pro Series With Serial/Ip
Appendix 5. Using Pro Series with Serial/IP A 5.1. Pro Series vs. Serial/IP options 삭제됨: 서식 있음: 글머리 기호 및 번호 매기기 Table A-4 Pro Series vs. Serial/IP option compatibility matrix table Serial Port Configuration of Pro Series Serial/IP Configuration Cryptography Host mode Configuration Connection... - Page 105 삭제됨: Figure A-13 Host mode configuration 삭제됨: Step 2. Set Cryptography configuration of serial port #1 of Pro Series as follows, 삭제됨: SSL enable = Enable 삭제됨: Figure A-14 Cryptography configuration...
- Page 106 삭제됨: Step 3. Open Serial/IP Control Panel and check the COM port you want to use to communicate with serial port #1 of Pro Series by pressing “Select Ports” button. Figure A-15 Select Ports on Serial/IP Control Panel Step 4. Enter IP address of Server (IP address of Pro Series) and Port number (port number of serial port #1) correctly.
- Page 107 Figure A-16 Set parameters on Serial/IP Control Panel 삭제됨: Step 5. Open the terminal emulation program and select the corresponding COM port. Then user can use the serial port of Pro series using his local terminal emulation program as if it is one of COM ports on his PC.
- Page 108 Figure A-17 Connect to serial port of Pro series via Serial/IP 삭제됨: Step 6. User can monitor or trace the connection status using Serial/IP Port Monitor or Trace window. Figure A-18 Serial/IP Trace Window...
-
Page 109: Appendix 6. Appendix D: Warranty
(a) any misapplication or misuse of the Product; (b) failure of Customer to adhere to any of SENA’s specifications or instructions; (c) neglect of, abuse of, or accident to, the Product; or (d) any associated or complementary equipment or software not furnished by SENA. -
Page 110: A 6.3. Hardware Product Warranty Details
Product will be furnished on an exchange basis and will be either reconditioned or new. All replaced Product and parts become the property of SENA. If SENA determines that the Product is not under warranty, it will, at the Customers option, repair the Product using current SENA standard rates for parts and labor, and return the Product at no charge in or out of warranty. - Page 111 Cautions Modifications not expressly approved by the party responsible for compliance could void the user’s authority to operate the equipment. FCC compliance Information This device complies with part 15 of FCC Rules. Operation is subject to the following two conditions: 1. This device may not cause harmful interference, and 2.
- Page 112 페이지 57: [1] 삭제됨 염한준 2007-01-04 PM 3:54:00 TCP 연결이 이루어 지고 나서 Data를 주고 받을 때, 어떤 형식으로 주고 받을지를 지정할수있습니다. Default data mode가 ‘Raw TCP’로 설정되어 있을시에는 데이터에 아무런 가공을 하지 않은 상태로 데이터를 주고 받습니다. 페이지 57: [2] 삭제됨 염한준...
Need help?
Do you have a question about the PS110W and is the answer not in the manual?
Questions and answers