
Related Manuals for Marvel MO15CRS1XS


Summary of Contents for Marvel MO15CRS1XS
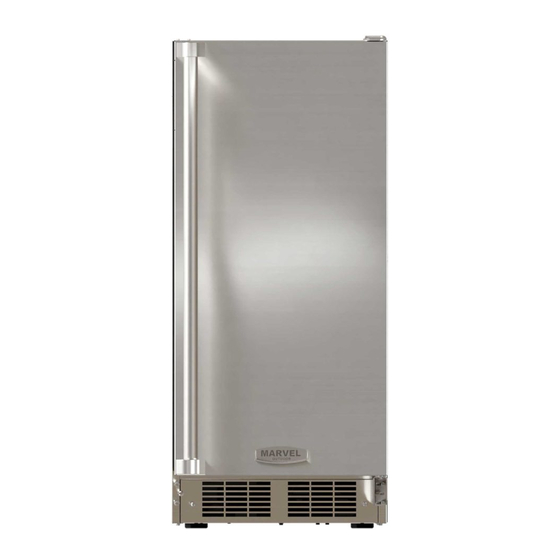
- Page 1 Installation Operation and Maintenance Instructions Ice Machine MO15CRS1XS (Outdoor)
-
Page 2: Table Of Contents
Installation Operation and Maintenance Instructions Contents Service Intro Troubleshooting Warranty Safety Obtaining Service Safety and Warning Disposal and Recycling Installation Environmental Requirements Electrical Cutout Dimensions Product Dimensions Side by Side Installation Water Hookup Anti-Tip Bracket General Installation Grille Installation Door Swing Door Adjust Operating Instructions First Use... - Page 3 Marvel owners, who trust in our products and our support. The information in this guide is intended to help you install and maintain your new Marvel crescent ice maker to protect and prolong the lifetime of your unit. We encourage you to contact our Technical Support team at (800) 223-3900 with any questions.
-
Page 4: Disposal And Recycling
Installation Operation and Maintenance Instructions Disposal and Recycling Safety and Warning DANGER NOTICE Please read all instructions before installing, operating, or servicing the appliance. RISK OF CHILD ENTRAPMENT. Before you throw away your old refrigerator or freezer, take off the doors and leave shelves in place so children may not easily climb Use this appliance for its intended purpose only and inside. -
Page 5: Electrical
Electrical Cutout Dimensions PREPARE SITE WARNING Your Marvel product has been designed for either free- standing or built-in installation. When built-in, your unit does SHOCK HAZARD — Electrical Grounding Required. not require additional air space for top, sides, or rear. -
Page 6: Product Dimensions
Installation Operation and Maintenance Instructions Product Dimensions Not Including Handle *Add 3/4" To Depth For Water Line Clearance... -
Page 7: Side By Side Installation
Installation Operation and Maintenance Instructions Side-by-Side Installation 3. Place bracket over holes and attach to unit with two screws removed in step 2 using a T-25 Torx driver. Two units may be installed side-by-side. Tighten screws fully. Cutout width for a side-by-side installation is the 4. -
Page 8: Water Hookup
Installation Operation and Maintenance Instructions Water Hookup CAUTION PREPARE PLUMBING Do not use any plastic water supply line. The line is under The water valve uses a standard 1/4" (6.35 mm) pressure at all times. Plastic may crack or rupture with compression fitting. -
Page 9: Anti-Tip Bracket
Installation Operation and Maintenance Instructions Anti-Tip Bracket 3. Locate water valve inlet. 1. Slide unit out so screws on top of unit are easily accessible. 2. Remove the two screws from the opposite side of the hinge assembly using a T-25 Torx driver (see below). 4. -
Page 10: General Installation
Installation Operation and Maintenance Instructions General Installation INSTALLATION 1. Plug in the power/electrical cord. LEVELING INFORMATION 1. Use a level to 2. Gently push the unit into position. Be careful not to kink confirm the unit is the water supply line or entangle the cord. level. -
Page 11: Grille Installation
Installation Operation and Maintenance Instructions Door Swing Grille Installation REMOVING AND INSTALLING GRILLE Wall Wall 1/4" Min. 2-1/8" Min. WARNING (6 mm) (54 mm) Disconnect electric power to the unit before removing the grille. When using the unit, the grille must be installed. Removing the grille Door Swing Door Swing... -
Page 12: Door Adjust
Installation Operation and Maintenance Instructions Door Adjust Tighten bottom hinge screws. Tighten top hinge screws and replace hinge cover. HINGE COVER Hinge cover included with black and stainless models is Location of the unit may make it desirable to mount the door optional. - Page 13 Installation Operation and Maintenance Instructions Install top hinge and door: 1. Install the top hinge. Do not tighten. 2. Rotate door 180° to reverse and set the door onto the bottom hinge. Remove door by tilting forward and lifting door off bottom hinge.
-
Page 14: First Use
(see above). Failure to raise the bin arm may result in damage to the water valve. NOTICE Marvel recommends discarding the ice produced Certain sounds are normal during the unit’s operation. You may hear the compressor or fan motor, the water valve, or during the first two to three hours of operation to avoid ice dropping into the ice bucket. -
Page 15: Airflow And Product Loading
Installation Operation and Maintenance Instructions 3. Turn the adjusting screw toward the minus (-) sign ICE MAKER ADJUSTMENT (clockwise) for smaller cubes or toward the plus (+) sign Ice Cube Thickness Adjustment (counterclockwise) for larger cubes. Interval - As Required On ice maker equipped models, adjust the cube size by 4. -
Page 16: Cleaning
Installation Operation and Maintenance Instructions Cleaning If any surface discoloring or rusting appears, clean it quickly ® ® with Bon-Ami or Barkeepers Friend Cleanser and a EXTERIOR CLEANING nonabrasive cloth. Always clean with the grain. Always finish ® with Claire Stainless Steel Polish and Cleaner or Stainless door panels, handles and frames can discolor when comparable product to prevent further problems. - Page 17 Installation Operation and Maintenance Instructions DEFROSTING NOTICE Manual Defrost Models DO NOT clean ice bucket using a dishwasher. The bucket is not dishwasher safe and will be damaged. This unit is a manual defrost model and will require occasional defrosting. When there is build-up of 1/4"...
-
Page 18: Cleaning Condenser
Installation Operation and Maintenance Instructions Cleaning Condenser Condenser INTERVAL - EVERY SIX MONTHS To maintain operational efficiency, keep the front grille free of dust and lint, and clean the condenser when necessary. Depending on environmental conditions, more or less frequent cleaning may be necessary. WARNING Disconnect electric power to the unit before cleaning the condenser. -
Page 19: Extended Non-Use
Installation Operation and Maintenance Instructions Extended Non-Use VACATION/HOLIDAY, PROLONGED SHUTDOWN For questions regarding extended non-use, please call Marvel at 800.223.3900. The following steps are recommended for periods of extended non-use or if the unit will be exposed to temperatures of 40°F (5°C) or less: CAUTION 1. - Page 20 IF SERVICE IS REQUIRED If you do not understand a troubleshooting remedy, or your Troubleshooting - What to check when problems occur: product needs service, contact Marvel directly at Problem Possible Cause and Remedy 800.223.3900. Unit Develops If there is excessive build-up of 1/4"...
- Page 21 Not Supplied or Designated by Marvel The above Limited One Year Parts and Labor Warranty Marvel warrants that it will supply all necessary parts and labor warranties also do not apply if: to repair or replace in the end user’s home or office, any component which proves to be defective in material or •...
- Page 22 800.223.3900 for directions on how to obtain warranty coverage in your area. • If the product is outside the first year warranty period, Marvel Customer Service can provide recommendations of service centers in your area. A listing of authorized service centers is also available at www.marvelrefrigeration.com under the...
- Page 24 www.marvelrefrigeration.com 1260 E. VanDeinse St. Greenville, MI 48838 800.223.3900 02/01/19 30604 Rev_B...
Need help?
Do you have a question about the MO15CRS1XS and is the answer not in the manual?
Questions and answers