Table of Contents
Advertisement
Quick Links
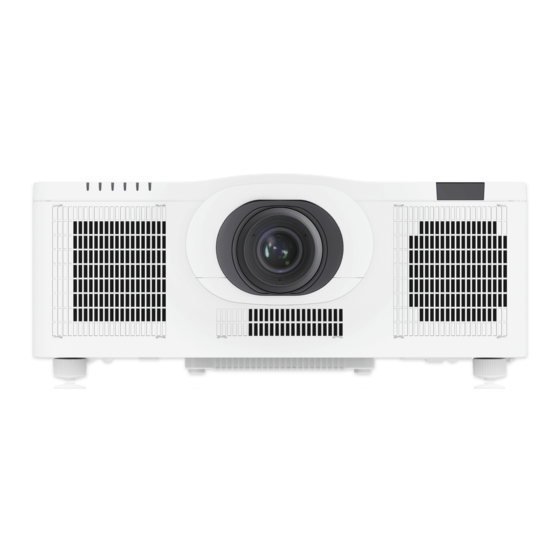
LCD Projector
MP-WU8101W/MP-WU8101B
User's Manual (concise)
Thank you for purchasing this product.
This product is supplied without a lens unit. You can select some optional lens
units to meet your requirements.
This is the basic manual on the product. Visit our website to get the detailed
manuals (Safety Guide, Operating Guide, Network Guide, Instant
Stack Guide) and the latest information on the product.
Check them before using the product, for safe use and utilization of the product.
For our website, see the attached sheet.
►Before using this product be sure to read all manuals for this product. After
reading them, store them in a safe place for future reference.
►Heed all the warnings and cautions in the manuals or on the product.
►Follow all the instructions in the manuals or on the product.
NOTE • In this manual, unless any comments are accompanied, "the manuals" means
all the documents provided with this product, and "the product" means this projector and
all the accessories came with the projector.
Contents
First of all ...........................................2
Graphical symbols explanation .......2
Important safety instructions ...........2
Electro-magnetic interference .........4
Laser precautions ............................5
with recycling systems ...................7
Contents of package..........................8
About the lens unit .............................8
Preparing for the remote control ........9
Arrangement ....................................10
Connecting with your devices ..........12
Connecting to a power supply .........13
Turning on the power .......................14
WARNING
Adjusting the lens position ...............15
Displaying the picture ......................16
Turning off the power .......................17
the air filter .....................................18
the internal clock battery ...............20
Specifications ..................................21
for the product software ................23
Warranty and after-service ..........24
1
Advertisement
Table of Contents

Related Manuals for Maxell MP-WU8101W


Summary of Contents for Maxell MP-WU8101W
-
Page 1: Table Of Contents
LCD Projector MP-WU8101W/MP-WU8101B User's Manual (concise) Thank you for purchasing this product. This product is supplied without a lens unit. You can select some optional lens units to meet your requirements. This is the basic manual on the product. Visit our website to get the detailed manuals (Safety Guide, Operating Guide, Network Guide, Instant Stack Guide) and the latest information on the product. -
Page 2: First Of All
First of all Graphical symbols explanation The following entries and graphical symbols are used for the manuals and the product as follows, for safety purpose. Know their meanings beforehand and heed them. WARNING This entry warns of a risk of serious personal injury or even death. CAUTION This entry warns of a risk of personal injury or physical damage. - Page 3 Important safety instructions (continued) WARNING ►Use only the accessories specified or recommended by the manufacturer. ►Do not modify the projector or accessories. ►Do not let any things or any liquids enter to the inside of the product. ►Do not get the product wet. ►Do not place the projector in the following place where oils or chemicals are used: - near the kitchen which oil smoke comes from...
-
Page 4: Electro-Magnetic Interference
Electro-magnetic interference This is a Class A product. In a domestic environment, this product may cause radio interference in which case the user may be required to take adequate measures. This product may cause interference if used in residential areas. Such use must be avoided unless the user takes special measures to reduce electromagnetic emissions to prevent interference to the reception of radio and television broadcasts. -
Page 5: Laser Precautions
Laser precautions “No direct exposure to the beam shall be permitted” As with any bright source, do not stare into the direct beam, RG2 IEC 62471-5:2015. Hazard distance Refer to the table T-1 in Supplement (at the back of this manual). The table shows the hazard distance in which the beam strength described in IEC 62471 - 5 (Photobiological safety of lamps and lamp systems –... - Page 6 Laser precautions (continued) • This projector is classified as a class 1 laser product that complies with IEC60825-1:2014 and JIS C 6802:2014, and as a class 3R laser product that complies with IEC60825-1:2007. Improper handling may cause injury. Be careful of the following. •...
-
Page 7: Disposal Of Old Equipment And Batteries Only For European Union And Countries With Recycling Systems
Disposal of old equipment and batteries only for European Union and countries with recycling systems The above mark is in compliance with the Waste Electrical and Electronic Equipment Directive 2012/19/EU (WEEE). The mark indicates the requirement NOT to dispose the equipment including any spent or discarded batteries as unsorted municipal waste, but use the return and collection systems available. -
Page 8: Contents Of Package
Contents of package Your projector should come with the items shown below. Check that all the items are included. Contact your dealer immediately if any items are missing. (1) Remote control with two AA batteries (2) Power cord (3) Terminal cover 2 types (4) Lens hole cover NETWORK INTERACTIVE... -
Page 9: Preparing For The Remote Control
Preparing for the remote control Insert the batteries into the remote control before using it. Use the appropriate AA carbon-zinc or alkaline batteries (non-rechargeable) in accordance with laws and regulations. If the remote control starts to malfunction, try to replace the batteries. If you will not use the remote control for long period, remove the batteries from the remote control and store them in a safe place. -
Page 10: Arrangement
Arrangement Refer to the table T-2 in Supplement (at the back of this manual) to determine the screen size and projection distance. The values shown in the table are calculated for a full size screen. This projector will perform in a free tilt angle, as shown in the figures below. Tilt 360°... - Page 11 Arrangement (continued) WARNING ►Install the projector where you can access the power outlet easily. ►Install the projector in a stable horizontal position. - Do not use any mounting accessories except the accessories specified by the manufacturer. Read and keep the manuals of the accessories used. - For special installation such as ceiling mounting, be sure to consult your dealer beforehand.
-
Page 12: Connecting With Your Devices
Connecting with your devices Before connecting the projector to a device, consult the manual of the device to confirm that the device is suitable for connecting with this product and prepare the required accessories, such as a cable in accord with the signal of the device. Consult your dealer when the required accessory did not come with the product or the accessory is damaged. -
Page 13: Connecting To A Power Supply
Connecting to a power supply POWER indicator Put the connector of the power cord into the AC (AC inlet) of the product. Firmly plug the power cord’s plug into the outlet. In a couple of seconds after the power supply connection, the POWER indicator lights up in steady orange. -
Page 14: Turning On The Power
Turning on the power Make sure that the power cord is firmly and correctly connected to the projector and the outlet. POWER indicator Make sure that the POWER indicator is steady orange. Then remove the lens cover. Press the STANDBY/ON button on the projector or the ON button on the remote control. -
Page 15: Adjusting The Projector's Elevator
Adjusting the projector's elevator Lengthening or shortening the length of the elevator feet shifts the projection position and the projection angle. Turn the elevator feet each to adjust their length. Elevator feet WARNING ► Do not lengthen the elevator feet exceeding 30 mm. max. -
Page 16: Displaying The Picture
Displaying the picture Activate your signal source. Turn the signal source on, and make it send the signal to the projector. Use the VOLUME + / - buttons to adjust the volume. Cursor buttons Press the button of the desirable input on the remote INPUT button control. -
Page 17: Turning Off The Power
Turning off the power Press the STANDBY/ON button on the projector POWER indicator or the STANDBY button on the remote control. The message “Power off?” appears on the screen for about 5 seconds. Press the STANDBY/ON or STANDBY button again while the message appears. -
Page 18: Cleaning And Replacing The Air Filter
Cleaning and replacing the air filter Check and clean the air filter periodically. When the indicators or a message prompts you to clean the air filter, comply with it as soon as possible. Turn the projector off, and unplug the power cord. - Page 19 Cleaning and replacing the air filter (continued) WARNING ► Before taking care of the air filter, make sure the power cord is not plugged in, then allow the projector to cool sufficiently. ► Use only the air filter of the specified type. Do not use the projector without the air filter or the filter cover.
-
Page 20: Inserting Or Replacing The Internal Clock Battery
Scheduling" in the Network Guide), install a new battery according to the following procedure. Use the following type of battery. MAXELL, Part No. CR2032 or CR2032H Turn the projector off , and unplug the power cord. Allow the projector to cool suffi ciently. -
Page 21: Specifications
Specifications Item Specification Product name Liquid crystal projector Liquid Crystal 2,304,000 pixels (1920 horizontal x 1200 vertical) Panel Light source Laser diode Power supply/ 7.3A (AC100V-120V), 3.6A (AC220V-240V) Rated current Power 720W (AC100V-120V), 680W (AC220V-240V) consumption 0 ~ under 1,600m NORMAL 0 ~ 45 °C (Operating) 35 ~ 45 °C ( The... - Page 22 Specifications (continued) Item Specification COMPUTER IN ......D-sub 15 pin mini jack x1 HDMI 1 ........... HDMI connector x1 HDMI 2 ........... HDMI connector x1 HDMI OUT ..........HDMI connector x1 HDBaseT ............RJ45 jack x1 3G-SDI ............... BNC jack x1 DisplayPort ........
-
Page 23: End User License Agreement For The Product Software
End user license agreement for the product software Software in the product consists of the plural number of independent software modules and there exist our copyright and/or third party copyrights for each of such software modules. The product also uses software modules that we have developed and/or produced. -
Page 24: Troubleshooting - Warranty And After-Service
Troubleshooting - Warranty and after-service If an abnormal operation (such as smoke, strange odor or excessive sound) should occur, stop using the projector immediately. Otherwise if a problem occurs with the projector, first refer to “Troubleshooting” of the Operating Guide, Network Guide and Instant Stack Guide, and follow the suggested checks.
Need help?
Do you have a question about the MP-WU8101W and is the answer not in the manual?
Questions and answers