Table of Contents
Advertisement
Advertisement
Table of Contents

Related Manuals for Coway Airmega 400


Summary of Contents for Coway Airmega 400
- Page 1 USER MANUAL Air Purifier 400S/400/300S/300...
- Page 2 Feature Highlights The following features are available for our Airmega Air Purifier. Real-time Air Quality Monitoring Airmega’s pollution sensor tells you the indoor air quality in real-time. The brightly colored LED ring lets you know if your indoor air is fresh or unhealthy every minute of the day.
- Page 3 Quick Start Guide Before operating the product, you must remove the plastic wrapping of the inserted Max2 filters on both sides. For details, see page 14. Do not operate the product until completing these steps first.
- Page 4 Connecting the Air Purifier to the Wi‐Fi Network (400S/300S only) Before connecting the air purifier and your smart phone, you must first download the Airmega App from Apple App Store or Google Play Store. For more details, see page 16. AIRMEGA * Advanced Settings to enter the static IP address...
-
Page 5: Table Of Contents
Table of Contents BEFORE USING THE PRODUCT______________________________________ Symbols Used in This Manual Illustrations Used in This Manual Safety Instructions PREPARATION______________________________________________________ Checking the Product Parts Diagram INSTALLATION_____________________________________________________ Setting Up the Product Connecting the Power and Turning On the Air Purifier (400S/300S only) Connecting the Air Purifier to the Wi‐Fi Network OPERATION_ _ ______________________________________________________ Smart Mode - Auto Smart Mode - Sleep... -
Page 6: Before Using The Product
01 BEFORE USING THE PRODUCT Symbols Used in This Manual The following symbols are used in this manual to explain procedures, restrictions, handling precautions, and instructions that should be observed for safety. WARNING Warning indicates a potentially hazardous situation that may result in death or severe injury to the user or others. CAUTION Caution indicates a potentially hazardous situation that may result in injury to the user or others, or the loss of property. - Page 7 • Remove the power plug from the electric outlet by • Do not use an adapter or extension cord, as it may grasping the power plug and pulling it gently. Never cause fire, shock, or personal injury. pull the cord to remove the power plug. •...
-
Page 8: Preparation
02 PREPARATION Checking the product Before installing the air purifier, make sure all of the components are present. If any items are missing or damaged, contact the customer service center. Max2 Filter* Main Unit Pre-filter* Max2 Filter* Pre-filter* User Manual Certificate of Performance * These are installed in the main unit. -
Page 9: Parts Diagram
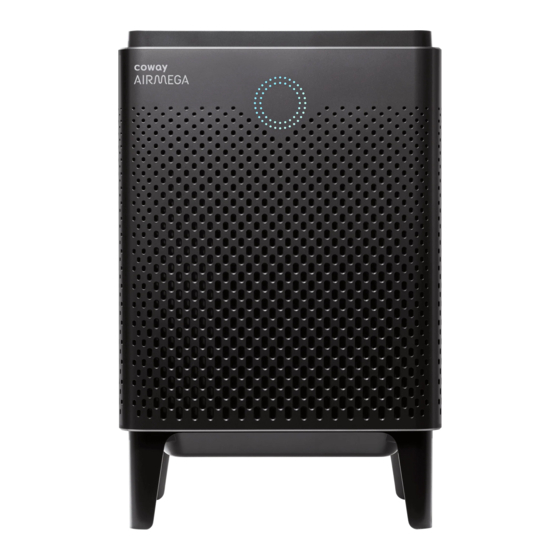
Parts Diagram Check the parts of the product (exterior in the front and top view and control panel) and how they function. Exterior Check the parts and functions of the exterior of the product. Air quality indicator This shows the air pollution level around the product in real time. - Page 10 02 PREPARATION Checking the product Control Panel (400S/400) 400S [Light] button [Wi-Fi] button/indicator Touch this button to turn the air quality indicator and light on or off. Touch this button to connect to a Wi-Fi network. When the Wi-Fi connection is completed, the indicator is turned on.
- Page 11 [Power] button Touch this button to turn the product on. Touch and hold this button for 2~3 seconds to turn the product off. Air speed/mode selection control Icon Description Touch the sensor to select the air speed or set Air speed the product to Smart mode or Sleep mode.
- Page 12 02 PREPARATION Checking the product Control Panel (300S/300) [Light] button 300S [Wi-Fi] button/indicator Touch this button to turn the air quality indicator and light on or off. Touch this button to connect to a Wi-Fi network. When the Wi-Fi connection is completed, the indicator is turned on.
- Page 13 [Power] button Touch this button to turn the product on. Touch and hold this button for 2~3 seconds to turn the product off. [Air speed/mode] button Icon Description Touch this button to select the air speed Air speed or set the product to Smart mode or Sleep mode.
-
Page 14: Installation
03 INSTALLATION Setting Up the Product Before using the product, you must remove the plastic wrapping of the inserted Max2 filters on both sides. CAUTION Make sure that the power cord is unplugged before opening the covers. Remove the both sides of covers and filters in the following order. -
Page 15: Connecting The Power And Turning On The Air Purifier
Connecting the Power and Turning On the Air Purifier When your filters are prepared, connect the power and turn on the air purifier. CAUTION This product is for 120 V~ 60 Hz use only. Make sure your power supply meets these requirements. Insert the power plug into a power outlet. -
Page 16: Connecting The Air Purifier To The Wi-Fi Network (400S/300S Only)
03 INSTALLATION Connecting the Air Purifier to the Wi‐Fi Network (400S/300S only) If your product is a Wi-Fi enabled models you can connect the product to your Wi-Fi network for monitoring air quality and remotely operating the product using your smart phone application. Downloading the Airmega Application To use the Wi‐Fi function, you must first download and install the Airmega application to your smart phone. - Page 17 Enter the password of Wi-Fi connection you are currently using, and then tap Next. If there is no password, tap Next without entering the password. NOTE Tap Advanced Settings to enter the static IP address. Enter your purifier’s serial number (=barcode number) on the back side of your product, and then tap Next.
- Page 18 03 INSTALLATION Connecting the Air Purifier to the Wi‐Fi Network (400S/300S only) Move to the Wi-Fi setting window and select Airmega 400S or 300S from the Wi-Fi options, and then return to the app. For Android users The Airmega selection window appears automatically.
- Page 19 Enter a name for your product, and then tap Finish. When the connection of the air purifier and your smart phone is completed successfully, [Wi-Fi] indicator is on. NOTE If you encounter trouble and cannot proceed to the next, repeat the steps from the first one or verify your network environment.
- Page 20 Screen Layout of Airmega App Air purifier name The name of product (This Setting can be changed in Setting.) Moves to the setting section. Indoor AQI report Pre-filter Wash Frequency/ Smart Mode Sensitivity/ Moves to the indoor Air Name/Time Zone/Warranty Quality Indicator report options are available. (24 hours, 7 days, 30 days, 12 months).
-
Page 21: Operation
04 OPERATION Smart Mode - Auto If the product is set to Smart mode, it automatically adjusts the air speed according to the current air quality around the product. The air speed is adjusted as shown in the table below: Air Quality Good Moderate/unhealthy... -
Page 22: Smart Mode - Eco
Smart Mode - ECO If the pollution level remains Good for more than 10 minutes when the product is set to Smart mode, the fan stops automatically to conserve energy. If the product detects air pollution, the fan will automatically restart. If the pollution level remains Good for more than 10 minutes in the smart mode, the fan stops automatically to save energy. -
Page 23: Checking The Air Quality
04 OPERATION Checking the Air Quality You can easily check the current air quality around the product using the air quality indicator on the front of the product. NOTE For 400S/300S users, you can also check the current air quality in the smart phone application. The color of the air quality indicator changes as follows: Air quality indicator Model... -
Page 24: Maintenance
05 MAINTENANCE Filter Maintenance and Cleaning Parts Clean the pre-filters and each part of the main unit and replace the Max2 filters regularly for optimum performance. The following tables show the recommended maintenance cycle for filters and cleaning cycle for each part. Maintenance Filter Maintenance Cycle Pre-filters*... - Page 25 05 MAINTENANCE Filter Maintenance and Cleaning Parts Pre-filter When the [Pre Wash] indicator is on, clean your pre-filters on both sides. Follow these instructions below to clean the filters. Remove the both sides of covers and pre-filters. Press two tabs at the top of the pre-filters and pull them outward to remove them from the product.
- Page 26 How to replace the Max2 Filter When the [Max2 Change] indicator is on, replace your Max2 filters on both sides. Follow these instructions below to replace the filters. Remove the both sides of covers and filters in the following order. Covers ▶...
- Page 27 05 MAINTENANCE Filter Maintenance and Cleaning Parts Front, Right, and Left Covers Clean the front, right, and left covers frequently for optimum performance. Follow these instructions below to clean the covers. Remove the front, right, and left covers. · Lift and pull the upper part of front cover to remove it.
- Page 28 Air Outlet Clean the air outlet frequently for optimum performance. Follow these instructions below to clean it. Turn the air outlet cover counterclockwise and lift it. Remove dust or any foreign objects from the air outlet. CAUTION Be careful not to allow any foreign objects and liquid to enter into the air purifier.
- Page 29 05 MAINTENANCE Filter Maintenance and Cleaning Parts Pollution Sensor Clean the pollution sensor approximately every 2 months for optimum performance. Follow these instructions below to clean it. Lift and pull the upper part of front cover to remove it. Hold the upper part of the pollution sensor cover and remove it.
-
Page 30: Appendix
06 APPENDIX Troubleshooting Before contacting the customer service center, please attempt the following solutions. All other servicing should be done by a Airmega authorized service center. No air comes out from air outlet. Check Is the power plug connected? Solution Connect the power plug to an AC power outlet (120 V~ 60 Hz). -
Page 31: Specification
06 APPENDIX Specification The specification is subject to minor changes to improve the product performance. Item Specification Model Name 400S (AP-2015E) 400 (AP-2015F) 300S (AP-1515G) 300 (AP-1515H) 1,560 ft (145 m 1,256 ft (117 m Coverage 780 ft (72 m 628 ft (58 m Filter Washable Pre‐Filter + Max2 filter set (Activated Carbon + Green True HEPA) -
Page 32: Limited Warranty
Friday, to speak with an authorized representative What Will Manufacturer Do? of Coway. A claim file will be opened, and you will be If the motor or electronic parts of the product prove to instructed where to send proof of purchase and the defective product. - Page 33 MEMO...
- Page 34 MEMO...
- Page 35 MEMO MEMO...
- Page 36 1216776 www.airmega.com 4221, Wilshire Blvd. #210, Los Angeles, CA 90010 Made in Korea 1- 800-285-0982...
Need help?
Do you have a question about the Airmega 400 and is the answer not in the manual?
Questions and answers