
Related Manuals for Siemens WM14T69XZA


Summary of Contents for Siemens WM14T69XZA
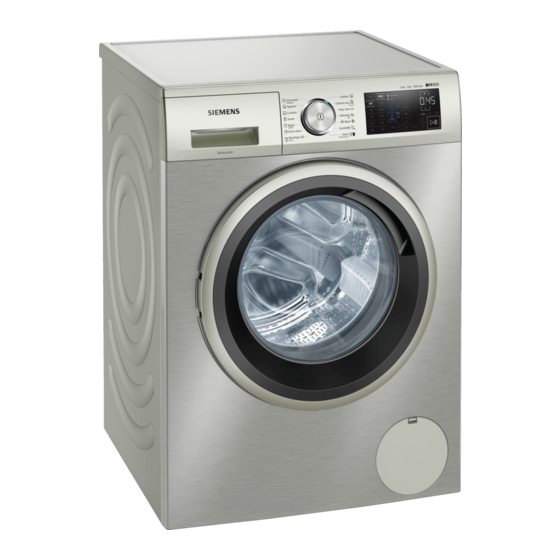
- Page 1 Washing machine WM..T... siemens-home.bsh-group.com/welcome Register your product online...
- Page 2 Your new washing machine Note/tip Information about the optimum use of You have chosen a Siemens washing the appliance/any other useful machine. information. Please take a few minutes to read and 1. 2. 3. / a) b) c) become familiar with the advantages of your washing machine.
-
Page 3: Table Of Contents
Contents e n I n s t r u c t i o n M a n u a l a n d I n s t a l l a t i o n I n s t r u c t i o n s Saving energy and detergent . -
Page 4: Intended Use
Intended use Filling the dispensers... . 33 Intended use Manual dosing ....34 Emptying the i-Dos detergent drawer, This appliance is intended for private cleaning the i-Dos detergent drawer and ■... -
Page 5: Safety Instructions
Safety instructions Do not allow children to Safety instructions ■ clean or maintain this appliance unsupervised. T he following safety information Keep children under 3 years S a f e t y i n s t r u c t i o n s and warnings are provided to ■... -
Page 6: Installation
Safety instructions Keep packaging, plastic film dangerous situation. Ensure and packing components away the following: from children. The mains voltage on your ■ power socket must match Warning the rated voltage specified Risk of poisoning! on the appliance Detergents and care products (identification plate). - Page 7 Safety instructions If you take hold of any of the Warning ■ appliance's protruding parts Risk of electric shock/fire/ (e.g. the appliance door) in material damage/damage to order to lift or move it, these the appliance! parts may break off and If the appliance's mains cable is cause injury.
-
Page 8: Operation
Safety instructions The appliance is secured for Caution! ■ transportation by transport Material damage/damage to locking devices. If the the appliance transport locking devices are If the water pressure is too ■ not removed before the high or too low, the appliance is operated, this appliance may not be able to may result in damage to the... - Page 9 Safety instructions Do not use cleaning agents that drawer is opened while the contain solvents. appliance is in operation. Rinse eyes/skin thoroughly if Warning they/it come(s) into contact Risk of injury! with detergents or care If you support your weight/sit products.
-
Page 10: Cleaning/Maintenance
Safety instructions Do not use cleaning agents that Cleaning/Maintenance contain solvents. Warning Warning Risk of death! Risk of electric shock/material The appliance is powered by damage/damage to the electricity. There is a risk of appliance! electric shock if you come into If moisture penetrates the contact with live components. -
Page 11: Environmental Protection
Environmental protection Clean the appliance with The selectable temperatures apply ■ ■ to the care labels on the textiles. The nothing but water and a soft, temperatures in the machine may damp cloth. deviate from this so that you get the Remove any detergent, optimum mix of energy-saving and ■... -
Page 12: Positioning And Connecting
Positioning and connecting Water supply hose on aquaStop Positioning and models connecting Water drain hose Elbow for securing the water I ncluded with the appliance drain hose* P o s i t i o n i n g a n d c o n n e c t i n g Water supply hose on standard/ Check that the machine has not Note:... -
Page 13: Installation Surface
Positioning and connecting Installation on a platform with Caution! Water damage drawer The connection points for the water Platform order no.: WMZ 20490, WZ supply hose and water drain hose are 20490, WZ 20510, WZ 20520 under high water pressure. To prevent leaks and water damage, you must follow the instructions in this section. -
Page 14: Hose And Cable Lengths
Positioning and connecting Take the hoses out of the holders. Right-hand connection ■ Unscrew and remove all four transport brace screws. Remove the sleeves. To do this, remove the mains cable from the holders. The following are available from Tip: specialist dealers/the after-sales service: Fit the covers. -
Page 15: Water Outlet
Positioning and connecting appliance (not necessary for Aqua-Stop Notes models as this is permanently installed): Only operate the washing machine ■ using cold mains water. Model: Standard ■ Do not connect the machine to the ■ mixer tap of an unpressurised hot- water boiler. -
Page 16: Levelling
Positioning and connecting Caution! Water damage When water is being pumped away, the outlet hose is under water pressure and may slip out of the wash basin or connection point. Secure the outlet hose so that it cannot slip out. Drainage into a plastic pipe with ■... -
Page 17: Electrical Connection
Positioning and connecting Electrical connection The mains plug must be freely ■ accessible at all times. If this is not possible, in order to comply with the Warning relevant safety regulations, a switch Danger of death! (2-pole switch-off) must be built into There is a risk of electric shock if you the permanent installation in touch live components. -
Page 18: Transportation
Positioning and connecting To prevent foaming, only use Note: half the amount of detergent recommended by the detergent manufacturer.Do not use detergents intended for woollens or delicates. Close the detergent drawer. Start the program. Switch off the appliance once the Insert all four sleeves. -
Page 19: Familiarising Yourself With Your
Familiarising yourself with your appliance Familiarising yourself with your appliance Washing machine F a m i l i a r i s i n g y o u r s e l f w i t h y o u r a p p l i a n c e Service flap Detergent drawer ~ Page 28 Controls... -
Page 20: Controls
Familiarising yourself with your appliance Controls sharp object on the display or exert ( Main switch excessive pressure on it. You can use the # button to switch the appliance on and off. 0 Programme selector You can turn the programme selector in both directions (clockwise and anti-clockwise). - Page 21 Familiarising yourself with your appliance Indicators, symbols and buttons Indicators and Setting on the control panel symbols for set- ting values 90°, 60° ü, 40° ü, 30°, 20°, Ž Temperature in °C; Ž = cold 1400*, 1200, 800, 600, 400, 2 Spin speed;...
-
Page 22: Laundry
Laundry Indicators, symbols and buttons Indicators and Setting on the control panel symbols for set- ting values Start/Pause Ü For changing the setting values N, M Where there are multiple setting values, pressing and holding Note: N, M will allow you to automatically scroll through all the setting val- ues to the last value. -
Page 23: Sorting Laundry
Detergent Sorting laundry Starching Sort your laundry according to the care Laundry should not be treated Note: instructions and manufacturer's with fabric softener. information on the care labels, Switch on the appliance. depending on: Select the Rinse program. Type of fabric/fibre ■... -
Page 24: Saving Energy And Detergent
Programme default settings Programme: Cottons/ Saving Soiling/note cold - max. 60 °C Reduced temper- Light Detergent for colours/delicates ■ ature and deter- No visible dirt or stains. Cloth- without optical brighteners Suitable for coloured laundry made gent quantity as ing has taken on some body from easy-care fibres, synthetic per the recom- odour, e.g.:... -
Page 25: Temperature
Programme default settings touch display after the programme is programme starts. The duration of the selected. programme is then displayed. You can find an overview of all possible The programme duration is Note: program settings on the supplementary automatically adjusted when the sheet for the installation and operating programme is running. -
Page 26: Additional Programme Settings26
Additional programme settings The washing's residual moisture Note: Additional programme is increased. settings Prewash You can find an overview of all of the A d d i t i o n a l p r o g r a m m e s e t t i n g s additional settings that can be selected Ç... -
Page 27: Rinse Hold
Operating the appliance Press the Ü button after approx. 10 Operating the minutes.The laundry will soak in the water. appliance Leave the laundry to soak for as long as required, then either press the Ü P reparing the washing button again to resume the program O p e r a t i n g t h e a p p l i a n c e machine or change the program. -
Page 28: Change The Programme Default Settings
Operating the appliance In appliances with a drum light: Placing laundry into the drum The drum is lit after switching on the Warning appliance, after opening and closing the Danger of death! door and after starting a programme. Items of laundry pretreated with The light switches off automatically. -
Page 29: Start The Programme
Operating the appliance For programmes in which automatic Childlock/operation lock dosing is not possible or not desired (in w 3 sec which case, intelligent dosing is deactivated), you can add suitable You can lock the washing machine to detergent to the compartment in the prevent the functions you have set from detergent drawer for manual dosing. -
Page 30: Changing The Programme
Operating the appliance Selecting the Less iron S setting Notes ■ and then touching Ü or Do not leave the door open for too ■ Turning the programme selector to long when adding laundry as water ■ Drain and then touching Ü. from the laundry may leak out. -
Page 31: Intelligent Dosing System
Intelligent dosing system Before setting up i-Dos Intelligent dosing Follow the manufacturer's instructions system when choosing your detergent and care product. We recommend using easy- F amiliarising yourself with i- pour, all-purpose, universal and colour I n t e l l i g e n t d o s i n g s y s t e m liquid detergents for all machine- washable, coloured items made of i-Dos Intelligent dosing system... -
Page 32: I-Dossetting The Content Of The M/¨ Dispenser
Intelligent dosing system Automatic dosing can be activated or If both dispensers are filled with Note: deactivated for each of the designated liquid detergent, only the dispenser that wash programmes separately. was activated by choosing the i-Dos button is used during the wash cycle. Automatic dosing can also be activated or deactivated once the programme has i-Dos Setting the dosage... -
Page 33: Filling The Dispensers
Intelligent dosing system detergent/care product you are using, the water hardness and/or the degree of soiling. Adjusting the basic dosage Press and hold ‰ i-Dos and/or  i- Dos for approx. 3 seconds. The basic dosage setting will be displayed. Change the setting using: ˜/~ Pour liquid detergent and fabric To exit setting mode, press and hold... -
Page 34: Manual Dosing
Intelligent dosing system When refilling the dispensers, Note: always use the same type of liquid detergent or fabric softener. Do not mix different types of liquid detergent or fabric softener, as this can form lumps that may block the i-Dos pump unit. - Page 35 Intelligent dosing system Press down the insert and remove Clean the pump unit with a damp the drawer completely. cloth. Caution! Press the pump unit insert and The pump unit contains electrical components.These may be remove it. damaged if they come into contact with water.
-
Page 36: Appliance Settings
Appliance settings Appliance settings Y ou can change the following settings A p p l i a n c e s e t t i n g s in the control and display panel: The volume of the information signal ■... -
Page 37: Changing The Brightness Of The Touch Display
Sensors Changing the brightness of Unbalanced load detection the touch display system Touch à again. The display for the The automatic unbalanced load touch display's brightness Å and the detection system detects imbalances preset brightness light up. and ensures even distribution of the laundry by repeatedly starting and Change the adjustment value by stopping drum spinning. -
Page 38: Machine Housing/Control Panel
Cleaning and maintenance Descaling Warning Risk of poisoning! Descaling should not be necessary if Toxic vapours can be produced by the detergent is measured out correctly. cleaning agents that contain solvents, However, if it is required, follow the e.g. cleaning solvent. manufacturer's instructions for the Do not use cleaning agents that contain descaling agent. -
Page 39: The Drain Hose At The Siphon Is Blocked
Cleaning and maintenance Carefully unscrew the pump cover, as residual water may leak out. Clean the inside and the thread on the pump cover and pump housing. The impeller in the drain pump must be able to rotate. Refit the pump cover and screw it on tightly.The handle must be Re-attach the drain hose and secure positioned vertically. -
Page 40: Faults And What To Do About Them
Faults and what to do about them. c) Connect the hose and check for Wait until the drum has stopped turning. leaks. Caution! Water damage Any escaping water may cause water damage. Do not open the door if water can be Faults and what to do seen through the glass. - Page 41 Faults and what to do about them. Display Cause/remedy Ü off At the end of the programme, while the door is open Ü is continuously lit After the programme has started Ü is flashing Before the programme starts, paused | is continuously lit Water pressure too low, may increase the programme duration.
-
Page 42: Faults And What To Do About Them
Faults and what to do about them. Display Cause/remedy E:36 alternating with The drain pump is blocked. Clean the drain pump. ~ Page 38 ■ - 10 The drain hose/drain pipe is blocked. Clean the drain hose at the siphon. ■... - Page 43 Faults and what to do about them. Faults Cause/remedy Detergent/fabric softener Empty the dispenser(s), clean it/them and pour in the correct product. has congealed in the dis- ~ "Emptying the i-Dos detergent drawer, cleaning the i-Dos detergent drawer pensers. and its housing, cleaning the i-Dos pump unit" on page 34 ~ "Filling the dispensers"...
- Page 44 Faults and what to do about them. Faults Cause/remedy Spin results not satisfac- Not a fault – the unbalanced load detection system has interrupted the spin ■ tory. cycle because the laundry is unevenly distributed. Distribute small and large items of laundry evenly in the drum. Laundry wet/too damp.
-
Page 45: Technical Data
Technical data On the inside of the door*/in the Technical data opened service flap* and on the rear of the appliance. D imensions: Trust the expertise of the T e c h n i c a l d a t a 850 x 600 x 590 mm manufacturer. - Page 46 01450 2655 (0.03 € per minute at peak. Off peak 0.0088 € per minute.) You can find the contact information for all countries in the attached after-sales service directory. BSH Hausgeräte GmbH Carl-Wery-Straße 34 81739 München GERMANY siemens-home.bsh-group.com *9001384242* 9001384242 (9910)
Need help?
Do you have a question about the WM14T69XZA and is the answer not in the manual?
Questions and answers