Table of Contents
Advertisement
Quick Links
Advertisement
Table of Contents
Troubleshooting

Related Manuals for Contec VPC-1600


Summary of Contents for Contec VPC-1600
- Page 1 FA Computer Space-Saving Model VPC-1600 User’s Manual CONTEC CO., LTD.
- Page 2 Check Your Package Thank you for purchasing the CONTEC product. The product consists of the items listed below. Check, with the following list, that your package is complete. If you discover damaged or missing items, contact your retailer. Product Configuration List...
-
Page 3: Copyright
All relevant issues have been considered in the preparation of this document. Should you notice an omission or any questionable item in this document, please feel free to notify CONTEC CO., LTD. Regardless of the foregoing statement, CONTEC assumes no responsibility for any errors that may appear in this document or for results obtained by the user as a result of using this product. -
Page 4: Table Of Contents
SYSTEM REFERENCE Specification ............................9 Physical dimensions.......................... 11 HARDWARE SETUP Before Using the VPC-1600 for the First Time ................15 Installation requirements ......................16 Hardware Setup..........................17 Removing the top cover and drive bay ..................17 Attaching the extension board ....................20 Attach the hard disk ........................ - Page 5 Power Control Configuration ....................57 Super IO Configuration ......................58 H/W Monitor ..........................59 Serial Port Console Redirection ....................59 Boot ..............................60 Hard Disk Drive BBS Priorities ....................60 CDROM/DVD Drive BBS Priorities ..................60 Security ............................. 61 VPC-1600 Series...
- Page 6 Save & Exit ............................61 EACH COMPONENT FUNCTION Component name ..........................63 VPC-1600 front view ......................... 63 VPC-1600 rear view ........................64 Each component function ......................... 65 Keyboard interface ........................65 Mouse interface.......................... 65 Serial port interface ........................66 DVI-I Interface .......................... 67 DisplayPort Interface .........................
- Page 7 Hot-swap ............................ 98 OS recovery setting ........................... 99 FAQ/Troubleshooting ........................100 FAQ ............................100 Troubleshooting ........................101 APPENDIX Battery specifications........................105 Removing the battery when disposing the product ................ 105 Disposing the battrey ........................105 LIST OF OPTIONS VPC-1600 Series...
-
Page 8: Before Using The Product
4 USB3.0 ports (rear: 4), 4 USB2.0 ports (front:2, rear:2), 2 1000BASE-T ports, 1 RS-232 port, and 1 parallel port. The following models are lined up for the VPC-1600 series. <BTO Model> Model... -
Page 9: Features
Mirroring that matches the given application enables the construction of redundant systems. [Software RAID], [Hardware RAID] Supports high-speed high-capacity memory The VPC-1600 series supports DDR3 SDRAM DIMM modules (4GB to 16GB in total) designed for high-speed transfer speed, flexibly addressing memory-consuming applications such as image processing. -
Page 10: Commodity Model
1. Before Using the Product Commodity model VPC-1600 Model rules ・Model Name VPC-1600 ・Type Name S C2 B 0 W 0 (1) (2) (3) (4) (5) (6) (7) (8) (9) (10) (11) (12) (13) (14) (15) (1) Chassis (8) Optical system... -
Page 11: Customer Support
You can download updated driver software and differential files as well as sample programs available in several languages. Note! For product information Contact your retailer if you have any technical question about a CONTEC product or need its price, delivery time, or estimate information. How to Obtain Service For replacement or repair, return the device freight prepaid, with a copy of the original invoice. -
Page 12: Safety Precautions
If the battery needs to be replaced, the product will have to be repaired. In this situation, contact your retailer. When disposing of used batteries, do so properly as instructed by the local government. For instructions on how to remove the battery, see the appendix. VPC-1600 User’s Manual... - Page 13 In order to prevent file corruption, be sure to shut down the OS before turning off the product. CONTEC reserves the right to refuse to service a product modified by the user. In the event of failure or abnormality (foul smells or excessive heat generation), unplug the power cord immediately and contact your retailer.
-
Page 14: Fcc Part15 Class A Notice
Operation of the this equipment in a residential area is likely to cause harmful interference at his own expense. WARNING TO USER Any changes or modifications not expressly approved by the party responsible for compliance could result in the user's authority to operate the equipment. VPC-1600 User’s Manual... - Page 15 1. Before Using the Product VPC-1600 User’s Manual...
-
Page 16: System Reference
Only the weight of the main unit. It weighs about 9.2kg in RAID configuration. Front LED x 2 are used by option of hardware raid utility. You can not be used PCI bus extension chassis made by CONTEC. When the number of COM ports is increased, one of these open slots is used. - Page 17 Host interface Max. data transfer rate : 3Gbps S-ATA interface Drive interface Max. data transfer rate : 3Gbps Range of power-supply voltage 4.75VDC to 5.25VDC Current consumption 1.1A to 1.5A Physical dimensions (L×W) 96mm(L) x 98.2mm(W) Weight VPC-1600 User’s Manual...
-
Page 18: Physical Dimensions
2. System reference Physical dimensions VPC-1600 (Horizontal putting) [mm] *16mm is the height including the protrucsion for attaching rubber feet. Figure 2.1 Physical dimensions VPC-1600 User’s Manual... - Page 19 2. System reference VPC-1600 (At installation the wall mount stand) [mm] Figure 2.2 At installation the wall mount stand of VPC-1600 VPC-1600 User’s Manual...
- Page 20 2. System reference VPC-1600 (At installation the vertical stand) 17.2 199.4 Mounting hole [mm] Figure 2.3 At installation the vertical stand of VPC-1600 VPC-1600 User’s Manual...
- Page 21 2. System reference VPC-1600 User’s Manual...
-
Page 22: Hardware Setup
Before Using the VPC-1600 for the First Time Follow the next steps to set up the VPC-1600. STEP1 By referring to the information in this chapter, set the VPC-1600. STEP2 Connect cables. Connect the cable of necessary external devices, such as Keyboard, mouse and Display, to this product using appropriate cables. -
Page 23: Installation Requirements
Space between the main unit and its surroundings The main unit of the VPC-1600 series is equipped with air vents and fans for regulating temperature. In order to secure room around the air vents and to facilitate the connecting of cables, install the main unit with a space of 100 mm or more between the front and rear surfaces of the main unit and other items such as the surrounding devices and walls. -
Page 24: Hardware Setup
Removing the top cover and drive bay Remove the top cover. The for screws Slide the case cover horizontally as far as it will go, and then pull it up vertically. Figure 3.2 Removing the top cover VPC-1600 User’s Manual... - Page 25 3. Hardware setup Open the front cover. Push on the latch and remove the front cover horizonally. Figure 3.3 Opening the front cover VPC-1600 User’s Manual...
- Page 26 3. Hardware setup Remove the bracket for the riser card. Remove three screws Figure 3.4 Removing the riser card bracket VPC-1600 User’s Manual...
-
Page 27: Attaching The Extension Board
3. Hardware setup Attaching the extension board After unscrew the screw, remove the slot cover in the back of the chassis. Screws Figure 3.5 Removing the slot cover VPC-1600 User’s Manual... - Page 28 Depending on the dimensions of the expansion board being installed, it may interfere with the bending of the cables within the chassis during the installation, so exercise sufficient caution when installing the expansion board. Maximum dimensions of installable boards 174 mm (L) x 106 mm (H) VPC-1600 User’s Manual...
-
Page 29: Attach The Hard Disk
3. Hardware setup Attach the hard disk 1. Remove the 3.5inch bay from the drive bay. Screws Figure 3.7 Remove the 3.5inch drive bay VPC-1600 User’s Manual... - Page 30 Figure 3.8 Attach the 3.5inch HDD in the bay How to attach the 2.5inch HDD Use the included one-inch countersunk screws in the four locations on the bottom of the HDD to secure it in place. Figure 3.9 Attach the 2.5inch HDD in the bay VPC-1600 User’s Manual...
-
Page 31: Replacing The Front Fan Unit And Filter
1. Loosen the screws holding the fan unit in place, and then open the fan unit toward you. Loosen these two screws. Open the fan unit toward you. While pressing the location indicated by the arrow, remove the clamp. Figure 3.10 Remove the front filter clamp VPC-1600 User’s Manual... - Page 32 2. Remove the fan filter unit from the fan unit. Figure 3.11 Remove the fan filter unit 3. Remove the fan filter. Fan filters Figure 3.12 Remove the fan filter 4. Prepare the replacement fan filter and attach it by reversing the removal procedure. VPC-1600 User’s Manual...
-
Page 33: Replacing The Front Fan
3. Hardware setup Replacing the front fan 1. Open the fan unit on top. 2. Disconnect the fan cable. Remove Figure 3.13 Disconnect the fan cable 3. Disconnect the fan connector. Figure 3.14 Disconnect the fan connector VPC-1600 User’s Manual... -
Page 34: Attach The Horizontal Installation Bracket
5. Prepare the replacement fan and attach it by reversing the removal procedure. Attach the horizontal installation bracket Place the horizontal installation bracket on the chassis base, and then use the included truss head screws to fix the bracket in place. Screws Figure 3.16 Attach the horizontal installation bracket VPC-1600 User’s Manual... -
Page 35: Attach The Vertical Stand
1. Place the vertical stand on the chassis side (where the rubber feet for vertical installation are located), and then use the included truss head screws to fix the stand in place. Screws Figure 3.17 Attach the vertical stand VPC-1600 User’s Manual... -
Page 36: List Of Motherboard Connector And Jumper Settings
List of motherboard connector and jumper settings Remove the top cover, riser card bracket, and drive bay to access the connectors and jumpers on the motherboard. J26 J27 JP3 JP4 Figure 3.18 Main board connector and jumper position VPC-1600 User’s Manual... - Page 37 SATA2 connector Internal USB2.0 connector SATA0 connector CPU fan connector System fan connector Internal USB2.0 connector Case open Internal USB2.0 connector COM1 connector COM6 connector COM2 connector COM5 connector Parallelport connector SATA1 connector SATA3 connector SATA4 connector VPC-1600 User’s Manual...
-
Page 38: Jumper Setting
Clearing the CMOS while the power is connected may damage the board. ATX/AT mode setting : JP2 Use the factory default settings. Table 3.4 ATX/AT mode setting Function ATX mode(Factory default setting) Open AT mode 1-2 Short VPC-1600 User’s Manual... -
Page 39: Com2 Ri Mode Setting : Jp3
COM1 RI mode setting : JP4 This enables the setting of the RI function of the COM1 port. RI is set in the factory settings. Table 3.6 COM1 RI setting Function (1-3 Short) RI Signal (Factory default setting) +12V (3-5 Short) VPC-1600 User’s Manual... -
Page 40: Mainborad Connector
3. Hardware setup Mainborad connector ATX power connector : J13/J10 Figure 3.19 ATX power connector Table 3.7 J13 Signal Signal -12V PS_ON PW_OK 5V_SB +12V +12V Table 3.8 J10 Signal +12V +12V VPC-1600 User’s Manual... -
Page 41: Fun Power Connector : J17/J33
3. Hardware setup Fun power connector : J17/J33 Connectors for connecting a cooling fan. Figure 3.20 Fun power connector Table 3.9 J17 Signal +12V SENEOR CONTROL Table 3.10 J33 Signal +12V SENEOR VPC-1600 User’s Manual... -
Page 42: General Purpose I/O Connector : J30
3. Hardware setup General purpose I/O connector : J30 Figure 3.21 General purpose I/O connector Table 3.11 J30 Signal Signal GPIO +12V GPIO GPIO GPIO GPIO RSTBTN GPIO GPIO PWRBTN GPIO VPC-1600 User’s Manual... -
Page 43: Internal Usb Connector : J16, J20, J21
Connectors for connecting the USB connector on the front panel of the case with an USB extension bracket. Figure 3.22 Internal USB connector Table 3.12 J16,J20,J21 Signal Signal USB + Ground USB - Ground USB - Key (No Pin) USB + VPC-1600 User’s Manual... -
Page 44: Front Panel Connector : J11
VPC-3000 series, they are already connected on the front panel by a special cable. Figure 3.23 Front panel connector Table 3.13 J11 Signal Signal PWR_LED(+) LAN2_LINK Speaker(+) Power On(-) PWR_LED(-) LAN2_ACT Power On(+) LAN1_ACT HDD_LED(+) Reset(+) LAN1_LINK HDD_LED(-) Speaker(-) Reset(-) VPC-1600 User’s Manual... -
Page 45: Com Port Connector : J24, J25, J28, J29, J36, J37
COM port connector : J24, J25, J28, J29, J36, J37 These are connected to the COM1, COM2, and COM3 connectors at the rear of the main unit. Figure 3.24 COM port connector Table 3.14 J24,J25,J28,J29,J36,J37 RS-232C Signal Signal Ground VPC-1600 User’s Manual... -
Page 46: Audio Connector : J6
Audio connector : J6 This connector connects the front-face audio connector and the audio extension bracket. Figure 3.25 Audio connector Table 3.15 J6 Signal Signal MIC2-L MIC2 Sense resistor GNDAU SENSE-B Mic2-R_Conn Pull-high resistor Line2-L_Conn Line2-R_Conn Line2 Sense resistor VPC-1600 User’s Manual... -
Page 47: Parallel Port Connector : J38
3. Hardware setup Parallel port connector : J38 This is connected to the printer port connector on the rear of the VPC-1600. Figure 3.26 Parallel port connector Table 3.16 J38 Signal Signal Strobe# Auto Form Feed# Data0 Error# Data1 Initialization#... -
Page 48: Case Open Connector : J34
J34 connect nothing in factry setting. Figure 3.27 Case open connector Table 3.17 J34 Signal Ground Signal Serial ATA Interface The product is equipped with a Serial ATA interface (six ports). Table 3.18 Serial ATA connector Signal Signal VPC-1600 User’s Manual... - Page 49 3. Hardware setup VPC-1600 User’s Manual...
-
Page 50: Bios Setup
BIOS setup screen will be displayed in the graphic setting Primary, Secondary IGFX Boot Display set to the screen Factory setting Primary IGFX Boot Display :CRT(Analog RGB(DVI Connversion connector used)) Secondary IGFX Boot Display :DVI To appear in the Displayport, please change the settings. VPC-1600 User’s Manual... -
Page 51: Setup Operations
Decrease the numeric value or make changes F1 key General help on Setup navigation keys F2 key Load previous values from settings F3 key Load the fail-safe defaults from BIOS default table F4 key Save all the FLASH ROM changes and exit VPC-1600 User’s Manual... -
Page 52: Main Menu
2. Select date (Date:) items by pressing the <Page Up> and <Page Down> keys. You can navigate ← through items by pressing the cursor keys < >, <→>. 3. Save setup changes with “Save Changes and Reset” (pressing the <F4> key) and exit. VPC-1600 User’s Manual... -
Page 53: Setting Of The Start Password
Table 4.2. Setting of the password Setting of the Operating at the Setup utility password Administrator You can change all settings. User You can access all settings, but you cannot modify any setting other than removing your password. VPC-1600 User’s Manual... -
Page 54: Administrator Password
#1” item and change the setting to “CD/DVD:…”. (Confirm your choice and setting by pressing the <Enter> key.) 4. After setting the desired order, press the <Esc> key and move to “Exit” tab. 5. Save setup changes with “Save Changes and reset” and exit. VPC-1600 User’s Manual... -
Page 55: Selection Of Sata Devices
3. Change the setting for “SATA Mode Selection”. (Options are “IDE”, “RAID”, “AHCI”) 4. After setting the desired order, press the <Esc> key and move to “Exit” tab. 5. Save setup changes with “Save Changes and Reset” and exit. VPC-1600 User’s Manual... -
Page 56: Setting For The Power On (At Power Operation) By The Ac Power-Supply Turning On
Do not change settings other than the CMOS Setup Utility settings specifically described in this document. The OS may not function normally otherwise. We assume no responsibility for trouble caused by changing settings other than the CMOS Setup Utility settings specified. VPC-1600 User’s Manual... -
Page 57: Main
ME FW Version 9.0.30.1482 ME Firmware SKU System Date [Thu 04/16/2015] System Time [08 : 49 : 14] Access Level Administrator Figure 4.7 Main setting screen * The display of the Main tab varies depending on the product configuration. VPC-1600 User’s Manual... -
Page 58: Configuration
[Enabled] Turbo Mode *1 [Enabled] CPU C states [Disabled] Figure 4.9 CPU Configuration setting screen *1 This is not displayed when a Celeron CPU is installed. *2 This is not supported when a Celeron CPU is installed. VPC-1600 User’s Manual... -
Page 59: Chipset Configuration
Disable ME [Disabled] Figure 4.11 AMT Configuration setting screen Memory Configuration Memory Information Total Memory 4096 MB (DDR3) DIMM#0 4096 MB (DDR3) DIMM#1 Not Present DIMM#2 Not Present DIMM#3 Not Present Figure 4.12 Memory Configuration setting screen VPC-1600 User’s Manual... -
Page 60: Lan Configuration
[AUTO] Primary PEG [AUTO] Primary PCIE [AUTO] Internal Graphics [AUTO] Aperture Size [256MB] DVMT Pre-Allocated [32M] DVMT Total Gfx Mem [256M] Primary IGFX Boot Display [CRT] Secondary IGFX Boot Display [DVI] Figure 4.14 Graphics Configuration setting screen VPC-1600 User’s Manual... -
Page 61: Pci/Pcie Configuration
PCH PCI Express Configuration PCI Express Root Port 1 PCIE Port 3 is assigned to I218LM PCI Express Root Port 4 for I210AT PCI Express Root Port 5 Figure 4.17 PCH PCI Express Configuration setting screen VPC-1600 User’s Manual... -
Page 62: Sata Configuration
[Hard Disk Drive] Serial ATA Port 1 ST500LT012-1DG (500.1GB) Port 1 [Enabled] Hot Plug [Disabled] External SATA [Disabled] SATA Device Type [Hard Disk Drive] Serial ATA Port 2 ATAPI iHAS12 ATAPI Port 2 [Enabled] Hot Plug [Disabled] VPC-1600 User’s Manual... -
Page 63: Usb Configuration
USB Configuration USB Devices: 1 Keyboard, 2 Hubs Legacy USB Support [Enabled] XHCI Mode [Enabled] XHCI Hand-off [Enabled] EHCI Hand-off [Disabled] USB Mass Storage Driver Support [Enabled] PCH USB Configuration Figure 4.22 USB Configuration setting screen VPC-1600 User’s Manual... -
Page 64: Power Control Configuration
[S3 only(Suspend to ...] Power Failure [Always off] Wake system with Fixed Time [Disabled] Wkae up Day of Month Wake up hour Wake up minute Wake up second Wake on Ring [Disabled] Figure 4.24 Power Control Configuration settings screen VPC-1600 User’s Manual... -
Page 65: Super Io Configuration
[Enabled] Device Settings IO=268h; IRQ=11; Serial Port5 [Enabled] Device Settings IO=270h; IRQ=10; Serial Port6 [Enabled] Device Settings IO=278h; IRQ=11; Parallel Port [Enabled] Device Settings IO=378h; IRQ=7; Watch Dog Timer [Disabled] Figure 4.25 Super IO Configuration settings screen VPC-1600 User’s Manual... -
Page 66: H/W Monitor
+5.061 V +3.3V +3.297 V VBAT +3.192 V Figure 4.26 H/W Monitor settings screen Serial Port Console Redirection Serial Port Console Redirection COM0 Console Redirection [Disabled] Console Redirection Settings Figure 4.27 Serial Port Console Redirection settings screen VPC-1600 User’s Manual... -
Page 67: Boot
Boot Option #1 [P0: ST500LT012-1DG1...] Boot Option #2 [P1: ST500LT012-1DG1...] Figure 4.29 Hard Disk Drive BBS Priorities settings screen CDROM/DVD Drive BBS Priorities Boot Option #1 [P2: ATAPI iHAS124...] Figure 4.30 CDROM/DVD Drive BBS Priorities settings screen VPC-1600 User’s Manual... -
Page 68: Security
Administrator Password User Password HDD Security Configuration: P0:ST500LT012-1 P1:ST500LT012-1 Figure 4.31 Security settings screen Save & Exit Save Changes and Reset Discard Changes and Reset Restore Defaults Boot Override P0:ST500LT012-1DG142 P2:ATAPI iHAS124 Figure 4.32 Save&Exit settings screen VPC-1600 User’s Manual... - Page 69 4. BIOS setup VPC-1600 User’s Manual...
-
Page 70: Each Component Function
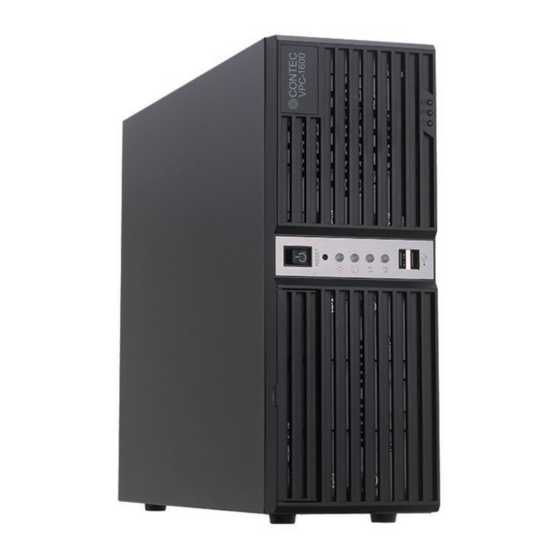
5. Each component function 5. Each component function Component name VPC-1600 front view Optical drive Access LED Drive1 LED Drive2 LED Power switch Reset switch Power LED HDD LED User LED1 User LED2 USB 2.0 connector Cooling fan (Intake air) -
Page 71: Vpc-1600 Rear View
5. Each component function VPC-1600 rear view Digital I/O connector COM4(D)※ COM3(C) PCI×3 COM2(B) COM1(A) LPT coneector Motherboard interface FG Terminal AC input Ethernet connector Mouse connector Intel®I210 controller Intel®I218-LM controller DVI-I connector Line in Line out Mic in USB 3.0 connector USB 2.0 connector... -
Page 72: Each Component Function
機能 K.B DATA N.C. K.B CLOCK N.C. Mouse interface A connector for connecting a mouse is provided. Connector name is MOUSE(6Pin mini-DIN). Table 5.2 Mouse connector Function Pin No. ピン番号 機能 MOUSE DATA N.C. MOUSE CLOCK N.C. VPC-1600 User’s Manual... -
Page 73: Serial Port Interface
With this product, you can use the serial ports from COM1 to COM4. COM5, COM6, and RS-422/485 are not supported. Table 5.4 Serial port connector Connector D-SUB 9 Pin (MALE) No.4-40UNC inch nut Pin No. Signal Function Input Input SOUT Output Output Input Output Input Input VPC-1600 User’s Manual... -
Page 74: Dvi-I Interface
TMDS CLK+ TMDS 4- TMDS CLK- TMDS 4+ Analog RED DDC_CLK HOTPLUG_DETECT Analog Green DDC_DATA TMDS 0- Analog Blue Analog Vertical TMDS 0+ Analog Horizontal Sync Sync TMDS 1- TMDS 0/5 Shield Analog GND TMDS 1+ TMDS 5- VPC-1600 User’s Manual... -
Page 75: Displayport Interface
The product is equipped with a connector for DisplayPort connections. The connector name is DisplayPort (20 pin). Tabel 5.6. DisplayPort Connector Display Port 20 pin Connector Signal Pin NO. Signal Pin No. Lane0+ Lane0- Lane1+ Lane1- Lane2+ Lane2- Lane3+ Lane3- Aux+ Aux- HotPlug 3.3V VPC-1600 User’s Manual... -
Page 76: Parallel Port Interface
Table 5.8 Prallel port connector Connector D-SUB 25 Pin (FEMALE) Signal Signal Direction Direction Output Output Output Input Output INIT Output Output SLIN Output Output Output Output Output Output -ACK Input BUSY Input Input SLCT Input VPC-1600 User’s Manual... -
Page 77: Reset Swith
Eight USB interfaces are provided (USB2.0 : 4port, USB3.0 : 4port). Table 5.9 USB 3.0 connector Signal USB3.0 USB_VCC DATA- DATA+ USB_GND SSRX- SSRX+ USB_GND SSTX- SSTX+ Table 5.10 USB 2.0 connector Signal USB2.0 USB_VCC DATA- DATA+ USB_GND VPC-1600 User’s Manual... -
Page 78: Gigabit Ethernet
5. Each component function Gigabit Ethernet The VPC-1600 is equipped with two channels for Ethernet. Network type :100BASE-TX/1000BASE-T Transmission speed :100M/1000Mbps Max. network path length :100m/segment Contoroller :Intel(R) Ethernet Connection I218-LM (LAN1) Intel(R) I210 Gigabit Network Connection (LAN2) * 1000Mbps operation requires a cable of category 5E or greater. -
Page 79: Digital I/O Interface
*You can not use Output2,3 because they are used for the user LED on the front. 3)PWRON,RST (JDIO1 Pin No.5,6) Short-circuiting PWRON and GND or RST and GND triggers the same operation as pushing the Power button or Reset button on the front. *However, the power-supply from the outside is necessary. VPC-1600 User’s Manual... - Page 80 VPC-1600 internal VPC-1600 external Example of customer construction circuirt Available separately power supply 12-24V PC817X3NIPOF 4.7K Power signal 1N4148 SWITCH 1N4148 PC817X3NIPOF 4.7K Reset signal 1N4148 SWITCH Figure 5.3 External I/O connection VPC-1600 internal equivalent circuit diagram VPC-1600 User’s Manual...
-
Page 81: Audio Interface
PC817X3NIP0F 00,01 Available separately 4.7K power supply 12-24V 4.7K PC817X3NIP0F 4.7K 1N4148 |0,|1,|2,|3 Figure 5.4 External I/O connection VPC-1600 internal equivalent circuit diagram Audio interface The Audio interface is provided. Tabel 5.13 Audio connector Bule Green Pink Signal Blue Line-In... -
Page 82: Software Raid Setup
6. Software RAID Setup This chapter describes software mirroring (RAID1) setup. We only support mirroring. CONTEC only supports RAID1. Operations of all other RAID configurations (RAID0, RAID5, RAID10) are not supported. Be aware that functions not supported are outside the scope of the warranty. -
Page 83: Main Window
Create RAID Volume : A RAID drive can be created. The type and capacity of the created RAID drive can be set when it is created. Delete RAID Volume : An existing RAID drive can be deleted. If deleted, data will be lost. Exit : Exit RAID utility. VPC-1600 User’s Manual... -
Page 84: Create Raid Drive (Mirroring)
“Exit” in the Main window, and then confirm your choice by pressing the <Enter> key or the <6> key. 7. When you are prompted to confirm that you are saving the current settings, press the <Y> key to exit the RAID utility. VPC-1600 User’s Manual... - Page 85 OS, data will be lost and the OS will be unable to boot. Our support is limited to mirroring. Creating a RAID drive other than a mirroring RAID is up to the customer. We assume no responsibility for damage caused by doing so. VPC-1600 User’s Manual...
-
Page 86: Delete Raid Drive (Mirroring)
5. When you are prompted to confirm that you are saving the current settings, press the <Y> key to exit the RAID utility. CAUTION When an existing RAID drive is deleted, data may be lost. Back up the data on a RAID drive before deleting it if the data is important. VPC-1600 User’s Manual... -
Page 87: Software Raid Monitoring Tool (Raipd Strage Technology)
When the contents of Rapid storage technology are updated or activities are in progress internally, an icon is display in the Task Manager. You can also launch it by clicking the icon. Be aware that the icon is not always displayed in the Task Bar. Figure 6.6 Rapid Strage Techonology icon VPC-1600 User’s Manual... -
Page 88: Exiting The Rapid Storage Technology
6. Software RAID Setup Exiting the Rapid storage technology You can exit Rapid storage technology by clicking “×” on the upper right corner of the window. Figure 6.7 Exiting the Rapid Strage techonology VPC-1600 User’s Manual... -
Page 89: Making Of Mirroring Synchronize
If a HDD to be mirroring-configured is not a “Member disk”, you have to set it to be a mirrored drive using the RAID utility or Rapid storage technology. VPC-1600 User’s Manual... -
Page 90: Create Raid Drive (Mirroring)
When the RAID drive is made by the total content of HDD 2 piece connected, “Make” item is not displayed. RAID drives which can created are up two drives in total. 2. Check “Real-time data protection (RAID1)” and select “Next”. VPC-1600 User’s Manual... - Page 91 6. Software RAID Setup 3. Check “Yes:*****” and select “Next”. Input Name and Advanced arbitrarity. Figure 6.10 Create RAID drive (Mirroring) VPC-1600 User’s Manual...
- Page 92 6. Software RAID Setup 4. Select “Create Volume”. Figure 6.11 Create RAID drive (Mirroring) 5. After the wizard displayed, selected “OK”. Figure 6.12 Create RAID drive (Mirroring) 6. When the wizard is finished, a new RAID drive create. VPC-1600 User’s Manual...
-
Page 93: Delete Raid Drive (Mirroring)
2. Select “Delete volume”. 3. After the wizard window is displayed, select “Yes”. Figure 6.14 Delete RAID drive (Mirroring) 4. The selected RAID drive is deleted. CAUTION If an existing RAID drive is a system drive, it cannot be deleted. VPC-1600 User’s Manual... -
Page 94: For The Error
Figure 6.16 For the error * One mirroring-configured HDD is not connected You can check the status information of the HDD and RAID drives. Depending on the situation, perform operations such as restoring the RAID drive or replacing the HDD. VPC-1600 User’s Manual... -
Page 95: Confirming The Error Log
Confirming the error log When an error occurs in a RAID drive, it is logged into the Windows-standard “Event Viewer”. You can check errors using the Windows-standard “Event Viewer”. CAUTION Rapid storage technology does not provide a logging function. VPC-1600 User’s Manual... -
Page 96: Raid Setup When Replacing The Hdd
6. Software RAID Setup RAID setup when replacing the HDD The VPC-1600 series is installed with a RAID-1 Array created. However, if a HDD is replaced, you must reconfigure the mirroring RAID drive in the Array. Set up the RAID in accordance with the following procedure. - Page 97 6. Software RAID Setup VPC-1600 User’s Manual...
-
Page 98: Hardware Raid Setup
Once you have removed the case cover, the bracket for the riser card, and the mirror card bracket, you will be able to see the connectors and jumpers as illustrated below. Figure 7.1 Locations and settings switches and connectors VPC-1600 User’s Manual... -
Page 99: Switch Setting
Switch Setting DIP Switch Table 7.4 DIP switch setting Function State usually (Factory default setting) Setting 1(Reset the information on mirroring configuration) Setting (The failure and the Restoration of the sector error) DIP switch Figure 7.2 DIP switch VPC-1600 User’s Manual... -
Page 100: Internal Led Status
Green lighting* Both drives sre hung Orenge blinking Turning off System HDD configuration information hung Orange blinking Green lighting is incompatible. *1 At the access it lights. You can see these LEDs from the outside of the chassis. VPC-1600 User’s Manual... -
Page 101: Mirror Card
Information and the state of HDDs that it is existing in the mirroring composition can be observed by the “utility(hwRaid)” or “Mirror Card LED”. Regarding this “utility(hwRaid)”, refer to the attached sheet “VPC-1600/3000 Software utility User’s Manual”. The state of HDDs that it is existing in the mirroring composition can be observed by the “Mirror Card LED”. - Page 102 Replace a drive while the RAID board is deactivated (with the power off). If a new drive is not inserted, do not rebuild. A read error occurs from the source during rebuilding. Abnormality Write data where a read error occurs from the source. VPC-1600 User’s Manual...
-
Page 103: For The Error
Drive1 and Drive2 in the software hwRaid and on the mirror card correspond to the drive bays illustrated below. Figure 7.5 Drive1, Drive2 During installation of a HDD and cabling of the mirror card, ensure that they are not turned upside down. VPC-1600 User’s Manual... -
Page 104: Raid Setup When Replacing The Hdd
After checking a HDD for replacement, replace it. Replacing a normal HDD with a faulty HDD may halt and damage the system. If rebuilding is not automatically started, refer to This Chapter “Troubleshooting”. If rebuilding doesn’t end normally, refer to This Chapter “Troubleshooting”. VPC-1600 User’s Manual... -
Page 105: Hot-Swap
In order to replace a HDD using the hot-swap function, always check in advance the HDD to be replaced. Removing a normal HDD with the power on and either HDD faulty may damage the system. Two HDD is normal, and one HDD is not recommended to be detached. VPC-1600 User’s Manual... -
Page 106: Os Recovery Setting
3. Turn off the power and set the DIP switch for the mirror card to normal status. *How to set the DIP switch and installation/removal of the mirror card are the same as step 1 of this procedure. 4. Turn on the power and perform recovery. VPC-1600 User’s Manual... -
Page 107: Faq/Troubleshooting
5. Connect the HDD for which you want to configure mirroring to an empty drive attached to the mirror card and rebuild it. 6. After the rebuilding normally completes, two HDDs that is connected are mirroring composition. VPC-1600 User’s Manual... -
Page 108: Troubleshooting
5. Turn on the power. 6. Connect the replaced good HDD to an empty drive attached to the mirror card and the rebuilding is started. ●Both HDDs are broken. - Prepare two good HDDs and perform recovery. VPC-1600 User’s Manual... - Page 109 3. Check this status. Table 7.10 DIP switch seting 1 Mirror card DIP switch setting 1 *Refer to This Chapter “Internal LED status. *When the DIP switch is the setting 1, can not start Windows. Not Check by hwRaid. VPC-1600 User’s Manual...
- Page 110 DIP switch setting 2 completion hwRaid Status 7. After this step 6 completed, the restoration was completed if there is no error. *When the error is generated, the restoration is a failure. Refer to the next item “Restoration failure”. VPC-1600 User’s Manual...
- Page 111 ※When the error is generated by the not replace HDD, the restoration fails. Replace that HDD for the good HDD. If the error doesn’t occur and the rebuilding completes, the restoration complets after that HDD is replaced the good HDD. When the error occurred, refer to before item “Rebuilding failure(Read error)”. VPC-1600 User’s Manual...
-
Page 112: Appendix
(See "Removing the top cover and drive bay" in Chapter 3.) 2. Remove the battery Figure7.1 Removing the battery Disposing the battrey When disposing of the removed battery, do so properly as instructed by the local government. VPC-1600 User’s Manual... - Page 113 8. Appendix VPC-1600 User’s Manual...
-
Page 114: List Of Options
9. List of Options 9. List of Options ●Hard disk PC-HDD2TS-3 : 3.5inch SATA Hard disk 2TB ●Memory PC-MDD3-1333-4G : DDR3 Memory 4GB ●Fan VPC-1600-FAN : Front chassis fan ●Fan Filter VPC-1600-FILTER : Front fan filter VPC-1600 User’s Manual... - Page 115 VPC-1600 Series User’s Manual CONTEC CO.,LTD. ember 2019 Edition Sept 3-9-31, Himesato, Nishiyodogawa-ku, Osaka 555-0025, Japan https://www.contec.co.com/ All rights reserved. This product and this document are protected by copyright law. Unauthorized copying, duplication, reproduction, and tampering are prohibited. [11132015] Management No...
Need help?
Do you have a question about the VPC-1600 and is the answer not in the manual?
Questions and answers