Panasonic KX-TGM422AZ Operating Instructions Manual
Amplified digital cordless phone with answering machine
Hide thumbs
Also See for KX-TGM422AZ:
- Operating instructions manual (76 pages) ,
- Operating instructions manual (76 pages) ,
- User manual
Table of Contents
Advertisement
Amplified Digital Cordless Phone with Answering Machine
Before initial use, see "Getting Started"
on page 12.
Thank you for purchasing a Panasonic product.
Please read these operating instructions before using the unit and save them for
future reference.
To use this unit in your country, first change the unit's region setting to match
your country (page 47).
Operating Instructions
KX-TGM420AZ
Model No.
KX-TGM422AZ
Advertisement
Table of Contents

Related Manuals for Panasonic KX-TGM422AZ


Summary of Contents for Panasonic KX-TGM422AZ
- Page 1 KX-TGM422AZ Before initial use, see “Getting Started” on page 12. Thank you for purchasing a Panasonic product. Please read these operating instructions before using the unit and save them for future reference. To use this unit in your country, first change the unit’s region setting to match...
-
Page 2: Table Of Contents
Table of Contents Introduction Useful features during a Model composition ....4 call ........31 Accessory information ....4 Intercom .......33 Important Information Call Block For your safety .......7 Call block ......34 Important safety Storing unwanted callers ..34 instructions ......9 Phonebook For best performance ...10 Phonebook ......36 Other information ....10 Memory dial ......38... - Page 3 Table of Contents Warranty (for New Zealand) .......69 Other information ....70 Index Index........71...
-
Page 4: Model Composition
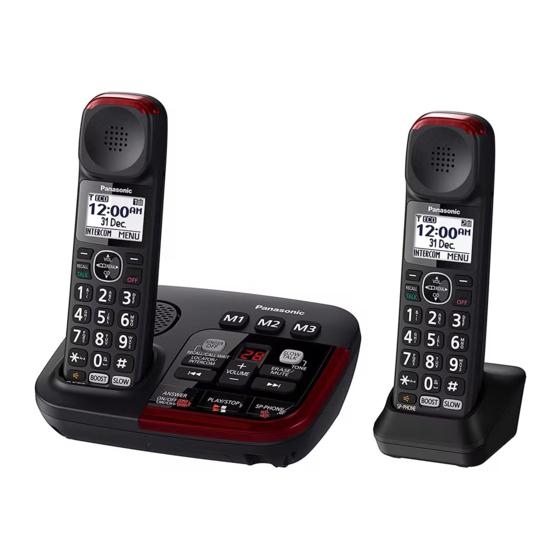
Introduction Model composition Base unit Handset Series Model No. Part No. Part No. Quantity KX-TGM420 KX-TGM420 KX-TGM420 KX-TGMA44 series KX-TGM422 KX-TGM420 KX-TGMA44 Accessory information Supplied accessories Quantity Accessory item/Part number KX-TGM420 KX-TGM422 AC adaptor /PNLV226AL *1, *2 Telephone line cord (for Australia) Telephone line cord (for New Zealand) Wall mounting adaptor *3, *4... - Page 5 We recommend using Panasonic rechargeable batteries. By registering the key finder (4 max.) to a Panasonic Digital Cordless Phone and attaching it to an easy-to-lose item in advance, you can locate and find the mislaid item to which the key finder is attached.
- Page 6 Introduction Expanding your phone system Handset (optional): KX-TGMA44AZ You can expand your phone system by registering optional handsets (6 max.) to a single base unit. R Optional handsets may be a different colour from that of the supplied handsets. Maximum receiver volume is 40 dB (when the booster is on). Graphical symbols for use on equipment and their descriptions Symbol...
-
Page 7: Important Information
Important Information For your safety To prevent severe injury and loss of life/property, read this section carefully before using the product to ensure proper and safe operation of your product. WARNING Power connection R Use only the power source marked on the product. R Do not overload power outlets and extension cords. - Page 8 Important Information R Avoid prolonged exposure to loud sounds produced by this product. Be aware that the louder a sound is, the less time is needed to cause hearing damage. In the event that you experience hearing discomfort, consult a medical professional. Medical R Consult the manufacturer of any personal medical devices, such as pacemakers or hearing aids, to determine if they are adequately shielded from external RF (radio frequency) energy.
-
Page 9: Important Safety Instructions
Important Information – Unplug the telephone line cord from the phone socket. – Unplug the AC adaptor from the AC power outlet. R No “000” (for Australia), “111” (for New Zealand), and/or other calls can be made from this device during a mains power failure. R The earpiece on the handset is magnetised and may retain small metallic objects. -
Page 10: For Best Performance
Important Information For best performance Base unit location/avoiding noise The base unit and other compatible Panasonic units use radio waves to communicate with each other. R For maximum coverage and noise-free communications, place your base unit: – at a convenient, high, and central location with no obstructions between the handset and base unit in an indoor environment. -
Page 11: Specifications
Important Information Information on Disposal in other Countries outside the European Union These symbols are only valid in the European Union. If you wish to discard these items, please contact your local authorities or dealer and ask for the correct method of disposal. Note for the battery removal procedure Refer to “Handset battery installation (for replacement)”... -
Page 12: Getting Started
For Australia: Connect a DSL/ADSL filter between the telephone plug and telephone line cord. Note: R The AC adaptor and telephone line cord come connected to the base unit at the time of shipment. R Use only the supplied Panasonic AC adaptor PNLV226AL. R Use only the supplied telephone line cord. - Page 13 Connect the AC adaptor to the power outlet. Note: R The AC adaptor comes connected to the charger at the time of shipment. R Use only the supplied Panasonic AC adaptor PNLV226AL. Handset battery charging 2 rechargeable Ni-MH batteries are installed in the handset at the time of shipment.
- Page 14 Handset battery level Icon Battery level High Medium Needs charging. Empty Panasonic Ni-MH battery performance Operation Operating time In continuous use 13 hours max. Not in use (standby) 9 days max. If eco mode is on and booster is off.
- Page 15 When the base unit is running on battery power and the remaining battery power is too low, “ ” flashes and the base unit beeps. Additionally, the base unit’s message indicator flashes. Panasonic Ni-MH battery performance when operating on backup battery power Operation Operating time In continuous use 3 hours max.
- Page 16 Note for battery installation R Use the supplied rechargeable batteries. For replacement, we recommend using the Panasonic rechargeable batteries noted on page 5, 8. Note for battery charging R It is normal for the handset to feel warm during charging.
-
Page 17: Controls
Getting Started Intelligent eco mode This feature automatically reduces handset power consumption by suppressing handset transmission power when the handset is close to the base unit. R When this feature is activated, is displayed. R Eco mode is turned off when the sound enhancer is activated (page 32). Controls Handset Belt clip holes... - Page 18 Getting Started MTALKN Dial keypad 0: ( ) Ringer off Headset socket R This socket is used to connect an optional headset (page 5) or a user-supplied neckloop to the handset. You must set the “Headset type” setting to match the type of device connected (page 29).
- Page 19 Getting Started Base unit Charge contacts Speaker MRINGER OFFN RINGER OFF indicator MRECALL/CALL WAITN MLOCATOR/INTERCOMN R You can locate a misplaced handset by pressing MLOCATOR/INTERCOMN. N (Repeat) N (Skip) Message counter MSLOW TALKN SLOW TALK indicator MTONEN (Tone control) MERASE/MUTEN MjN/MkN (VOLUME: Volume up/down) MM1N (Memory dial 1) MM2N (Memory dial 2)
-
Page 20: Display Icons
Getting Started New Message/Play indicator ( ) MANSWER ON/OFFN ANSWER ON/OFF indicator ( Display icons Handset display items Item Meaning Within base unit range Out of base unit range Sound enhancer is on. (page 32) The line is in use. R When flashing: The call is put on hold. -
Page 21: Date And Time
Getting Started Base unit display items Item Meaning “Greeting only” is selected. Caller messages are not recorded. (page 57) Power backup mode is on. (page 15) Date and time MMENUN#101 Enter the current date, month, and year by selecting 2 digits for each. -
Page 22: Accessibility
Accessibility Accessibility This product is designed to provide not only optimal volume, but optimal sound quality as well, ensuring that every call is heard loud and clear. Tone control This feature clarifies the voice of the person you are talking to, producing a more natural-sounding voice that is easier to hear and understand. -
Page 23: Volume Booster
Accessibility MbN: Select the desired setting. a MOKN R If you select “Custom tone”, select the desired type. a MOKN R The selected setting is shown on the handset display while talking. Hearing aid compatibility If you wish to use this product with a hearing aid, change the equalizer setting to “Hearing aid”... - Page 24 Accessibility WARNING R This feature is designed for users who are hard of hearing. If other users use the phone, be sure to turn this feature off. R Do not use this feature unnecessarily. High volume emitted from the product may cause hearing damage.
-
Page 25: Speech Booster (Making Your Voice Louder)
Accessibility BOOST indicator Volume booster Available volume settings Default Light in red Turned on Receiver: 12–40 Speakerphone: 18–30 Headset: 12–40 Speech booster (making your voice louder) This feature allows you to increase the volume of your voice heard by the other party. This feature can be set for each handset. WARNING R The speech booster feature can be used to increase the volume of your voice heard by the other party. -
Page 26: Key Tones
Accessibility Setting the talking keypad and phonebook You can enable this feature by setting its volume to “High” or “Low”, and disable it by setting its volume to “Off”. The default setting is “Off”. This feature can be set for each unit. For handset: MMENUN#750 For base unit (using a handset): MMENUN#*750 MbN: Select the desired setting. -
Page 27: Slow Talk
Accessibility Indicator Status Flashing rapidly – Outside call or intercom call is being received or on hold. (page 30, 31, 33) – The handset alarm is sounding. (page 45) Flashing slowly – There are new messages. (page 52) – There are new voicemails. (page 58) –... -
Page 28: Using Assistive Listening Devices
Accessibility – When screening calls Handset To activate this feature or change the current setting, press MSLOWN repeatedly. Base unit To activate this feature or change the current setting, press MSLOW TALKN repeatedly. – When talking on outside calls or screening calls Switches between normal speed and slow speed. - Page 29 Accessibility To use with a T-coil-equipped hearing aid Set your hearing aid to the "T" setting. R Refer to your hearing aid’s operating instructions for details. Hold the handset near your hearing aid when talking. To use a neckloop When using a neckloop with the handset, you can speak using the neckloop’s microphone or using the handset’s microphone.
-
Page 30: Making/Answering Calls
Making/Answering Calls recommend that you set this product to the lowest volume setting at which you can Making calls hear adequately. Base unit Lift the handset and then dial the phone number. Press MjN or MkN repeatedly while talking. R To correct a digit, press MCLEARN. Press MTALKN to make the call. -
Page 31: Useful Features During A Call
Making/Answering Calls When a call is being received, the SP-PHONE R You can turn the ringer on again by indicator (Z) flashes rapidly. pressing MRINGER OFFN. Additionally, the message indicator flashes rapidly if the base unit message indicator’s “Incoming call” setting is enabled Useful features during (page 27). - Page 32 Making/Answering Calls such as transferring an extension call, or accessing optional telephone services. Transferring calls, Note: conference calls R To change the recall time, see page 44. Outside calls can be transferred or a conference call with an outside party can be Handset sound enhancer made: –...
-
Page 33: Intercom
Making/Answering Calls R You cannot use voice paging if other units Wait for the paged party to answer. are in use. R If the paged party does not answer, press MLOCATOR/INTERCOMN to Base unit return to the outside call. Press MLOCATOR/INTERCOMN. To complete the transfer, press MZN. -
Page 34: Call Block
Call Block Single phone numbers and ranges of numbers can be stored in the call block list up to 250 Call block items in total. Blocking unwanted callers: In the following situations, you can disconnect When a call is received, the unit rings once the current call and add the caller’s phone while caller information is being received. - Page 35 Call Block Enter the phone number (24 digits max.). MbN: “Block a single number” or a MSAVEN a MOFFN “Block range of numbers” a MSELECTN Storing a range of number MbN: Select the desired entry. R After viewing, press MOFFN to exit. MMENUN#217 To edit a number: MbN: “Block range of numbers”...
-
Page 36: Phonebook
Phonebook R To enter another character that is located on the same dial key, first press MEN to Phonebook move the cursor to the next space. R If you do not press any dial key within 2 You can add 100 names (16 characters max.) seconds after entering a character, the and phone numbers (24 digits max.) to the character is fixed and the cursor moves to... - Page 37 Phonebook Changing group names/setting Edit the phone number if necessary. a MOKN ringer ID MbN: Select the desired group (page 36). The default group name is “Group 1” to a MSELECTN 2 times a MOFFN “Group 9”. MFN W a MMENUN Erasing entries MbN: “Group”...
-
Page 38: Memory Dial
Phonebook Erasing an entry Memory dial Press and hold the desired memory dial key (1 to 9). a MMENUN For easy dialling, you can assign a phone MbN: “Erase” a MSELECTN number to each dial key (1 to 9) on the handset. -
Page 39: Programming
Programming Menu list To access the features, there are 2 methods. n Scrolling through the display menus MMENUN Press MCN or MDN to select the desired main menu. a MSELECTN Press MCN or MDN to select the desired item from the next sub-menus. a MSELECTN Press MCN or MDN to select the desired setting. - Page 40 Programming Sub-menu 1 Sub-menu 2 Settings Code New message Outgoing call #338 – On/Off <Off> alert Outgoing call – – Notification to Outgoing call Activate – Remote code <Inactivate> Base unit beep On <Off> #339 Settings Toll saver #211 Ring count 2-9 rings <5 rings>...
- Page 41 Programming Main menu: “Settings” Sub-menu 1 Sub-menu 2 Settings Code Ring adjustments Ringer volume Off–6 <6> #160 – (Incoming) – Handset Ringer volume Off–10 <3> #G160 – (Incoming) – Base unit Intercom ringer 1–6 <6> #175 – volume – Handset Intercom ringer 1–10 <3>...
- Page 42 Programming Sub-menu 1 Sub-menu 2 Settings Code Audio settings Talking dial <Off> #750 – Handset High Talking dial <Off> #G750 – Base unit High Talking caller ID <On> #162 – Handset Talking caller ID <On> #G162 – Base unit Boost speech #783 <Off>...
- Page 43 Programming Sub-menu 1 Sub-menu 2 Settings Code Block a single – #217 Call block number Block range of – numbers Block unknown CID #240 Block (CID: Caller ID) <Unblock> One ring for blocked <Yes> #173 call Memory dial – – #261 –...
- Page 44 Programming Sub-menu 1 Sub-menu 2 Settings Code Set tel line <Tone> #120 Set dial mode Pulse *1, *10, 80 ms #121 Set recall time 90 ms <100 ms> 110 ms 160 ms 200 ms 250 ms 300 ms 400 ms 600 ms 700 ms 900 ms...
-
Page 45: Alarm
Programming To turn this feature on, select “Caller ID auto”. To turn this feature off, select “Manual”. (Caller ID subscribers only) To use this feature, set the date and time first (page 21). The preset ringers in this product (“Ringer 6” - “Ringer 15”) are used with permission of ©... -
Page 46: Night Mode
Programming Turning night mode on/off *: Select “AM” or “PM”. a MOKN Enter a text memo (10 characters max.). For handset: MMENUN#238 a MOKN For base unit (using a handset): MMENUN#*238 MbN: Select the desired alarm tone. a MSELECTN MbN: Select the desired setting. a R If you select one of the ringers MSAVEN (“Ringer 1”... -
Page 47: Other Programming
Programming Other programming Registering a unit Changing the handset Operating additional units name Additional handsets The default handset name is “Handset 1” to Up to 6 handsets can be registered to the “Handset 6”. You can customize the name base unit. of each handset (“Bob”, “Kitchen”, etc.). -
Page 48: Caller Id Service
Caller ID Service – “Out of area”: The caller dials from an area which does not provide a Caller Using Caller ID service ID service. – “Private caller”: The caller Important: requests not to send caller information. R This unit is Caller ID compatible. To use R If the unit is connected to a PBX system, Caller ID features (such as displaying caller caller information may not be properly... -
Page 49: Caller List
Caller ID Service For Caller ID Type II users Phonebook name announcement When you receive a 2nd call during a When caller information is received and it conversation, you will hear a signal tone matches a phone number stored in the following the call waiting tone and the phonebook, the stored name in the conversation will be interrupted or muted... - Page 50 Caller ID Service Example: You have stored the area code Erasing all caller “09”. If you make a call from the caller list to information the phone number “09-456-7890”, the unit dials “456-7890”. MCN CID MMENUN#255 MERASEN a MbN: “Yes” a MSELECTN Enter an area code (5 digits max.).
-
Page 51: Answering System
Answering System Answering system Turning the answering system on/off The answering system can answer and record calls for you when you are unavailable to answer the phone. Base unit You can also set the unit to play a greeting Press MANSWER ON/OFFN to turn on/off the message but not to record caller messages by answering system. -
Page 52: Listening To Messages
Answering System Press M N (PLAY). Using a pre-recorded R During playback, the new message/play greeting message indicator ( ) on the base unit lights. R If new messages have been recorded, the The unit provides 2 pre-recorded greeting base unit plays back new messages. messages: R If there are no new messages, the base –... -
Page 53: Advanced New Message Alerting Features
Answering System Operating the answering system Editing the number before calling MMENUN a MbN: “Answering device” a back MSELECTN Press MPAUSEN during playback. Operation MbN: “Edit & Call” a MSELECTN MjN or MkN Adjust the receiver/speaker Edit the number. a MTALKN volume (during playback) Erasing all messages 1 or MFN... - Page 54 Answering System Important: Erasing the set phone number R A new message alert is stopped 1 minute MMENUN#338 after the unit starts to call. The unit will not MbN: “Notification to” a MSELECTN retry the call even if the call is not answered. MMENUN a MbN: “Erase”...
-
Page 55: Remote Operation
Answering System call to turn off the new message alert by a Voice guidance call feature. During remote operation, the unit’s voice R Even if the unit makes a new message alert guidance starts and prompts you to press 1 call, the handset redial list does not show to perform a specific operation, or press 2 to the record. -
Page 56: Answering System Settings
Answering System To receive voicemail and use the answering R You can either hang up, or enter your system properly, please note the following: remote access code again and begin R “Voicemail” is a service provided by your remote operation (page 55). phone service provider (page 58). - Page 57 Answering System deactivated permanently or temporarily. Alternatively you can leave this service connected and change the “Ring count” to a shorter duration on your unit so your unit’s answering machine can pick up the call prior to the service provided by your phone service provider.
-
Page 58: Useful Information
Useful Information stored your voicemail access number, you can dial it automatically (page 58). Voicemail service MMENUN#331 For Australia Enter your access number (24 digits Voicemail is an automatic answering service max.). a MSAVEN a MOFFN offered by your phone service provider. Note: For New Zealand R When storing your voicemail access... -
Page 59: Wall Mounting
Useful Information R If the handset still indicates there are new messages even after you have listened to Wall mounting all new messages, turn it off by pressing and holding # until the handset beeps. Note: R Make sure that the wall and the fixing method are strong enough to support the weight of the unit. - Page 60 Useful Information Insert the hooks on the wall mounting To single-line telephone socket adaptor into holes ( ) and ( ) on the base unit. Adjust the adaptor to hold the base unit, then push it in the direction of the arrow until it clicks into place.
- Page 61 Useful Information Drive the screws ( ) (not supplied) into Wall mounting template the wall, if necessary. n Base unit Screws 25 mm n Charger...
-
Page 62: Error Messages
Useful Information Error messages Display message Cause/solution Ask phone R You have not stored the voicemail access number. Store the company for number (page 58). VM access # Busy R The called unit is in use. R Other units are in use and the system is busy. Try again later. R The handset you are using is too far from the base unit. -
Page 63: Troubleshooting
Useful Information Troubleshooting If you still have difficulties after following the instructions in this section, disconnect the base unit’s AC adaptor, then reconnect the base unit’s AC adaptor. Remove the batteries from the handset, and then insert them into the handset again. If the base unit batteries for power backup are installed, remove the batteries from the base unit, and then insert them into the base unit again. - Page 64 Useful Information Accessibility Problem Cause/solution I cannot search the R Other units are in use and the system is busy. Try again phonebook, caller list, redial later. list, memory dial, or call block list. The unit does not announce R The default setting for the talking keypad and phonebook names or phone numbers feature is “Off”.
- Page 65 Useful Information Problem Cause/solution I fully charged the batteries, but R Clean the battery ends ( ) and the charge contacts – still flashes, with a dry cloth and charge again. – is displayed, or R It is time to replace the batteries (page 14). –...
- Page 66 Useful Information Problem Cause/solution I cannot make a call. R Set the dialling mode. Press MMENUN#120MSAVENMOFFN R If you are using a BT double adaptor to connect the unit, remove the adaptor and connect the unit to the phone wall socket directly. If the unit operates properly, check or replace the adaptor.
- Page 67 Useful Information Problem Cause/solution Caller information is not R The handset or base unit’s ringer volume is turned off. announced. Adjust it (page 31, 41). R The Talking Caller ID feature is turned off. Turn it on (page 42). R The number of rings for the answering system is set to “2 rings”...
- Page 68 Useful Information Voicemail Problem Cause/solution “Voicemail msg. via R This notification is displayed when your phone service provider’s voicemail service (not the unit’s answering phone co.” is shown on the system) has recorded a message for you. Typically you handset display. can remove this notification from the display by listening How do I remove this message to the message.
- Page 69 6) Damage to the product caused by accident, misuse or Act of God. 7) Repairs when the product has been dismantled, repaired, modified or serviced by other than a Panasonic Authorised Dealer authorised to service that type of product. IF YOUR PANASONIC PRODUCT FAILS WITHIN THE...
- Page 70 Useful Information Other information Charge only mode The charge only mode is the dedicated mode to charge the backup batteries of the base unit. Do not use this mode if it is unnecessary because all functions except the base unit’s battery charge is disabled with this feature on.
- Page 71 Index Caller list edit: 50 Chain dial: 37 Index CID (Caller ID): 49 Conference calls: 32 # 3-way conference: 32 Control type: 18 A Accessibility Customer support: 44 Booster (speech): 25 D Date and time: 21 Booster (volume): 24 Direct command code: 39 Headset type: 18 Display Message indicator: 26...
- Page 72 Index SP-PHONE (Speakerphone): 30 T Talking Caller ID: 49 Time adjustment: 42 Transferring calls: 32 Troubleshooting: 63 V VM (Voicemail): 58 Voice paging: 33 Voicemail: 58 Volume Receiver: 30 Ringer for intercom call (Base unit): 31, 41 Ringer for intercom call (Handset): 31, 41 Ringer for outside call (Base unit): 31, 41...
- Page 73 Notes...
- Page 74 Notes...
- Page 75 Notes...
- Page 76 1 Innovation Road, Macquarie Park NSW 2113, Australia Sales Department: 18 Sir Woolf Fisher Drive, Highbrook, East Tamaki, Auckland, New Zealand Phone: (09) 272 0100 Fax: (09) 272 0137 1-62, 4-chome, Minoshima, Hakata-ku, Fukuoka 812-8531, Japan © Panasonic System Networks Co., Ltd. 2016 *PNQX7803ZA* *PNQX7803ZA* PNQX7803ZA PP0716ZU0...
Need help?
Do you have a question about the KX-TGM422AZ and is the answer not in the manual?
Questions and answers
How do I unblock a phone number
To unblock a phone number on the Panasonic KX-TGM422AZ, follow these steps:
1. Press [MENU] on the handset.
2. Enter #217 to access the call block list.
3. Use the navigation key (Up/Down) to scroll to the number you want to unblock.
4. Select the number.
5. Choose the option to erase or delete the number.
6. Press [SELECT] or [SAVE] to confirm.
7. Press [OFF] to exit.
This removes the number from the call block list.
This answer is automatically generated