Table of Contents
Advertisement
Quick Links
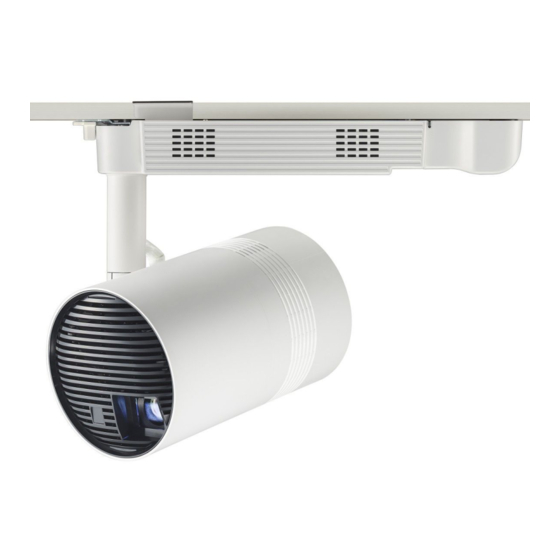
* Above illustration is shown in combination of this product and optional Mount Bracket.
Thank you for purchasing this Panasonic product.
■ This manual is intended for products manufactured from Sep. 2017 and beyond.
■ This product is used in combination with optional Mount Bracket (Model No.: ET-JPC200BE/
ET-JPC200WE) or Floor Stand Kit (Model No.: ET-JPF200BE/ET-JPF200WE). This product
cannot be used by itself.
■ Before operating this product, please read the instructions carefully and save this manual
for future use.
■ Before using this product, be sure to read "Read this first!" ( x pages 4 to 11).
■ Refer to "Operating Instructions – Content Manager Manual" for signage playback.
Operating Instructions
DLP™ Projector
Model No.
Functional Manual
Commercial Use
PT-JX200FBE
PT-JX200FWE
ENGLISH
DPQP1137ZB
Advertisement
Table of Contents

Related Manuals for Panasonic PT-JX200FWE


Summary of Contents for Panasonic PT-JX200FWE
- Page 1 PT-JX200FWE * Above illustration is shown in combination of this product and optional Mount Bracket. Thank you for purchasing this Panasonic product. ■ This manual is intended for products manufactured from Sep. 2017 and beyond. ■ This product is used in combination with optional Mount Bracket (Model No.: ET-JPC200BE/ ET-JPC200WE) or Floor Stand Kit (Model No.: ET-JPF200BE/ET-JPF200WE).
-
Page 2: Table Of Contents
Contents Contents Read this first! Projecting Selecting the input Adjusting the projection Chapter 1 Preparation Using SD cards Notes on use Precautions for use Data protection Cautions when installing Cards that can be used with the projector Cautions when transporting Inserting an SD card Security Ejecting the SD card... - Page 3 [NETWORK] menu When an indicator lights up [PROJECTOR NAME] Inspection and maintenance [WIRED LAN] Before maintaining the projector [WIRELESS LAN] Maintenance [NETWORK CONTROL] Inspection [Panasonic APPLICATION] Troubleshooting [NETWORK STATUS] [Art-Net] Chapter 7 Appendix [Art-Net STATUS] [MIRRORING] Technical information [DISPLAY OPTION] menu...
-
Page 4: Read This First
Read this first! Read this first! WARNING: THIS APPARATUS MUST BE EARTHED. WARNING: To prevent damage which may result in fire or shock hazard, do not expose this appliance to rain or moisture. This device is not intended for use in the direct field of view at visual display workplaces. To avoid incommoding reflexions at visual display workplaces this device must not be placed in the direct field of view. - Page 5 EXPOSITION DANGEREUSE AU RAYONNEMENT DIRECT OU DIFFUS DES YEUX OU DE LA PEAU DPQT1025ZA (Inside of product) Authorized Representative’s name and address within the European Union Panasonic Marketing Europe GmbH Panasonic Testing Centre Winsbergring 15, 22525 Hamburg, Germany ENGLISH - 5...
- Page 6 Inadequate kit may result in a falling accident, a fire, or an electric shock. Use the installation kit (Floor Stand Kit) specified by Panasonic when the projector is used standing on the floor. Inadequate stand may result in a tipping accident, a fire, or an electric shock.
- Page 7 Read this first! WARNING: Do not install the projector in a location that cannot bear the weight, location that is not stable, or location that is tilted when the projector is used standing on the floor. Doing so may result in the projector falling off or tipping, causing damage or deformation, or a serious accident or injury.
- Page 8 Read this first! WARNING: If the battery fluid leaks, do not touch it with bare hands, and take the following measures if necessary. f Battery fluid on your skin or clothing could result in skin inflammation or injury. Rinse with clean water and seek medical advice immediately. f Battery fluid coming in contact with your eyes could result in loss of sight.
- Page 9 Using the projector for long time without inspection may result in fire, electric shocks, or falling of the projector. f For inspection fee, ask your dealer. Panasonic disclaims all liability for any accidents or any damage caused by setting up the projector in an inappropriate environment or mounting the projector using methods that are not described in the Operating Instructions.
- Page 10 This equipment is in compliance with the essential requirements and other relevant provisions of Directive 2014/53/EU. Customers can download a copy of the original DoC for this product from our DoC server: http://www.ptc.panasonic.de Contact in the EU: Panasonic Marketing Europe GmbH, Panasonic Testing Centre, Winsbergring 15, 22525 Hamburg, Germany Indoor use restrictions are to be followed for the following countries if using 5 GHz frequency band.
- Page 11 Read this first! Български Това устройство отговаря на съществените изисквания и останалите приложими разпоредби на Директива 2014/53/EC. Čeština Toto zařízení je v souladu se základními požadavky a ostatními odpovídajícími ustanoveními Směrnice 2014/53/EU. Dansk Dette udstyr er i overensstemmelse med de væsentlige krav og andre relevante bestemmelser i Direktiv 2014/53/EU.
- Page 12 PURPOSE. For details, refer to the license conditions included in the supplied CD-ROM. For customers who contacted the following contact center, Panasonic provides complete and machine-readable source code based on GPL V2.0, LGPL V2.1 or software licensed under other terms imposing source code disclosure obligations in actual expenses, together with information about each copyright owner, for a period of at least 3 years from the purchase of this product.
- Page 13 rIllustrations in this manual f Unless otherwise specified, the illustration of installation status of the projector in this document is using the optional Mount Bracket. f Illustrations of the projector, combination status with the optional accessories, and screen may vary from the actual product.
- Page 14 Features of the Projector Quick Steps For details, refer to the corresponding pages. 1. Install the projector in Variety of projection function combination with the optional accessory. ▶ Various playback method can be selected, (x page 34) such as projecting the still image/movie in the SD card just with the projector, f Be sure to ask your dealer or a building projecting the image in the computer by...
-
Page 15: Chapter 1 Preparation
Preparation Chapter 1 This chapter describes things you need to know or check before using the projector. ENGLISH - 15... -
Page 16: Precautions For Use
Work of electrical wiring must be performed by qualified personnel only. f Panasonic takes no responsibility for any damage to the projector caused by mounting the product to a wall or ceiling in any method not specified by Panasonic or caused by inappropriate installation environment, even if the warranty period of the projector has not expired. - Page 17 Chapter 1 Preparation — Precautions for use rDo not install the projector on a ceiling with the power supply unit tilted right or left. Power Ceiling supply unit Cannot be installed Can be installed Cannot be installed rWhen installing the projector on a sloped ceiling, install in a direction that the pole side of the power supply unit will be higher than the power <v/b>...
-
Page 18: Cautions When Transporting
Chapter 1 Preparation — Precautions for use f Prevent hot and cool air from the air conditioning system to blow directly to the ventilation ports (intake and exhaust) of the projector. 300 mm (11-13/16") or longer 300 mm (11-13/16") or longer Power supply unit Air exhaust port Power supply unit... -
Page 19: Security
Change your password periodically. Set the password from the [SECURITY] menu → [SECURITY PASSWORD CHANGE]. f Panasonic Corporation or its affiliate companies will never ask for your password directly. Do not divulge your password in case you receive such inquiries. -
Page 20: Notes Regarding The Wireless Lan
IEEE802.11a/n 36 / 40 / 44 / 48 5.180 GHz - 5.240 GHz For SIMPLE / M-DIRECT mode (x page 76) (When the connecting method is [SIMPLE] / [M-DIRECT] of [Panasonic APPLICATION]) Standard Channels used Frequency band (Center frequency) IEEE802.11b/g/n 1 - 13 2.412 GHz - 2.472 GHz... -
Page 21: Art-Net
Chapter 1 Preparation — Precautions for use For USER mode (x page 77) (When the connecting method is [USER] of [Panasonic APPLICATION]) Standard Channels used Frequency band (Center frequency) IEEE802.11b/g/n 1 - 13 2.412 GHz - 2.472 GHz IEEE802.11a/n 36 / 40 / 44 / 48 5.180 GHz - 5.240 GHz... -
Page 22: Accessories
Chapter 1 Preparation — Precautions for use Accessories Make sure that the following accessories are provided with your projector. Numbers enclosed in < > show the number of accessories. Wireless remote control unit <1> AAA/R03 or AAA/LR03 battery <2> (N2QAYA000134) (For remote control unit) CD-ROM <1>... -
Page 23: Optional Accessories
(Windows/Mac) wireless/wired LAN. Note f The “List of Compatible Device Models” for the flat panel display compatible with the “Multi Monitoring & Control Software” can be downloaded from the Panasonic website (http://panasonic.net/prodisplays/). Optional accessories Optional accessories Model No. Outer color... -
Page 24: About Your Projector
Switches the input to signage. (x page 44) 13 <Panasonic APP> button <MEMORY VIEWER> button Switches the input to Panasonic APPLICATION. (x page 44) Switches the input to Memory Viewer. (x page 44) 14 <HDMI> button asqw buttons/<ENTER> button/<RETURN> button Switches the input to HDMI. -
Page 25: Projector Body
Chapter 1 Preparation — About your projector Note f When operating the remote control by directly pointing to the remote control signal receiver at the power supply unit of the projector, operate the remote control within a distance approximately 7 m (22'11") or shorter from the remote control signal receiver. The remote control can control at angles of up to ±30°... - Page 26 Chapter 1 Preparation — About your projector r Indicators ON(G)/ STANDBY(R) LIGHT TEMP Power indicator <ON (G)/STANDBY (R)> Temperature indicator <TEMP> Indicates the status of the power. (x page 39) Indicates the internal temperature status. (x page 127) Light source indicator <LIGHT> SD card indicator <SD>...
-
Page 27: Preparing The Remote Control
Chapter 1 Preparation — Preparing the remote control Preparing the remote control Inserting and removing the batteries (ii) Fig. 1 Fig. 2 Open the cover. (Fig. 1) Insert the batteries and close the cover (insert the m side first). (Fig. 2) f When removing the batteries, perform the steps in reverse order. -
Page 28: Chapter 2 Getting Started
Getting Started Chapter 2 This chapter describes things you need to do before using the projector such as the setup and connections. 28 - ENGLISH... -
Page 29: Before The Installation
Chapter 2 Getting Started — Before the installation Before the installation This section describes the display method using the projector. Installation method The projector can be installed in three methods of wall or ceiling mount and floor standing depending on the combination of the optional accessories. - Page 30 Chapter 2 Getting Started — Before the installation r Installation form when installing on the wall Orientation of To project forward To project from rear main unit (Using the translucent screen) Menu item Method Menu item Method [PROJECTION METHOD] [FRONT] [PROJECTION METHOD] [REAR] [VERTICAL FLIP] [OFF]...
-
Page 31: Projection Direction
Chapter 2 Getting Started — Before the installation Note f Above illustrations for installation form are examples for explanation, and it may not be the actual condition of usage. Set the [SETUP] menu → [PROJECTION METHOD] (x page 63) and the [VERTICAL FLIP] (x page 63) according to the environment of the usage and the direction of the main unit. - Page 32 Chapter 2 Getting Started — Before the installation r When installing on the ceiling or wall Ceiling or wall Projected image Projection surface L (LW/LT) Lens center 142.5 mm (5-5/8") Pole center Pole center Projection surface L (LW/LT) Lens center Pole center r When standing on the floor Projected image Projection surface...
- Page 33 Chapter 2 Getting Started — Before the installation Projection distance The dimension in the following table contains a slight error. Also, it is corrected to become smaller than the specified image size when [KEYSTONE] is used. r When the image aspect ratio is 4:3 (Unit: m) Distance from the Projected image size...
-
Page 34: Setting Up
Chapter 2 Getting Started — Setting up Setting up Installing the projector This projector is used in combination with the optional Mount Bracket or Floor Stand Kit. r When installing on a wall or ceiling The optional Mount Bracket (Model No.: ET-JPC200BE, ET-JPC200WE) is required to use the projector directly installed on a wall or ceiling. - Page 35 Chapter 2 Getting Started — Setting up Adjust the orientation of the main unit. f Rotate the shaft holder and adjust the ball joint movable part to the direction to tilt the main unit, and adjust the orientation of the main unit. Pole Shaft holder Ball joint fixing screw...
-
Page 36: Connecting
Chapter 2 Getting Started — Connecting Connecting Before connecting f Before connecting, carefully read the operating instructions for the external device to be connected. f Turn off the power of all devices before connecting cables. f Take note of the following points before connecting the cables. Failure to do so may result in malfunctions. g When connecting a cable to a device connected to the projector or the projector itself, touch any nearby metallic objects to eliminate static electricity from your body before performing work. -
Page 37: Attaching The Caps To The Connecting Terminals
Chapter 2 Getting Started — Connecting Attaching the caps to the connecting terminals It is recommended to attach the supplied terminal caps to the <HDMI IN> terminal and the <LAN> terminal where cables are not attached, and the supplied card slot cap to the SD card slot to prevent dust getting into the connecting terminals. -
Page 38: Chapter 3 Basic Operations
Basic Operations Chapter 3 This chapter describes basic operations to start with. 38 - ENGLISH... -
Page 39: Turning On/Off The Projector
The power indicator <ON (G)/STANDBY (R)> blinks in green in frequency of lighting 0.8 seconds → off 0.8 seconds while AV mute is in use. f When the computer (including iPad/iPhone/iPod touch, Android devices) performs a connection check on the projector using the Panasonic image transfer application software, the power indicator <ON (G)/STANDBY (R)>... -
Page 40: Turning On The Projector
Chapter 3 Basic Operations — Turning on/off the projector Turning on the projector Connect the power cord connected to the projector to an outlet. f The power indicator <ON (G)/STANDBY (R)> lights in red, and the projector enters the standby mode. Press the power <v/b>... - Page 41 Chapter 3 Basic Operations — Turning on/off the projector Initial setting (display language) Select the language to show on the screen. After completed the initial setting, you can change the display language from the [DISPLAY LANGUAGE] menu. Press as on the remote control to select the display language. INITIAL SETTING ENGLISH DEUTSCH...
-
Page 42: Making Adjustments And Selections
Refer to “Navigating through the menu” (x page 51) for the operation of the menu screen. Press the <HDMI>, <MEMORY VIEWER>, <MIRRORING>, <Panasonic APP>, or <SIGNAGE> button on the remote control to select the input to project. (x page 44) Adjust the orientation of the main unit to adjust the projection position. -
Page 43: Turning Off The Projector
Chapter 3 Basic Operations — Turning on/off the projector Turning off the projector Press the power <v/b> button. f The [POWER OFF(STANDBY)] confirmation screen is displayed. Press qw on the remote control to select [OK], and press the <ENTER> button. (Or press the power <v/b> button again.) f The projection is finished. -
Page 44: Projecting
To switch the input to anything other than the HDMI input, it may take seconds to complete the switching. [Please wait...] is displayed on the projection screen when the switching takes time. f When the <HDMI>, <MEMORY VIEWER>, <MIRRORING>, or <Panasonic APP> button is pressed during signage playback, the signage playback is stopped and switches to respective input. -
Page 45: Adjusting The Projection
Chapter 3 Basic Operations — Projecting Adjusting the projection Adjust focus and zoom. Press the <FOCUS> or <ZOOM> button on the remote control. f <FOCUS> button: Adjusts focus. f <ZOOM> button: Adjusts zoom. Select each item and press asqw to adjust it. Note f When a projection position is required to be adjusted, adjust according to the steps described in “Adjusting the projection position”... -
Page 46: Using Sd Cards
Manage the contents in the SD card under your responsibility. It is recommended to take a backup of important data on other disc, etc. f Panasonic assumes no responsibility for loss of data recorded by yourself, or any other direct or indirect damage. -
Page 47: Inserting An Sd Card
Chapter 3 Basic Operations — Using SD cards Inserting an SD card Insert the card securely into the SD card slot with the front of the card facing outward, from the side with cut corner. SD card Attention f When using the miniSD memory card or the microSD memory card, always use the dedicated miniSD memory card adapter or the microSD memory card adapter, and insert/eject together with the adapter. -
Page 48: Operating With The Remote Control
Chapter 3 Basic Operations — Operating with the remote control Operating with the remote control Switch on/off spotlight display Enable/disable the setting items in [PATTERN] menu. button Press the <LIGHTING> button. f The spotlight based on the items set for the user ([USER1] - [USER5]) selected in the [PATTERN] individual adjustment screen is displayed. -
Page 49: Using The Av Mute Function
Chapter 3 Basic Operations — Operating with the remote control Using the AV mute function The projection and the audio output can be paused temporarily when the projector is not used for specific time such as during break or preparation. button Press the <AV MUTE>... -
Page 50: Chapter 4 Settings
Settings Chapter 4 This chapter describes the settings and adjustments you can make using the on-screen menu. 50 - ENGLISH... -
Page 51: Menu Navigation
Chapter 4 Settings — Menu navigation Menu navigation The on-screen menu (Menu) is used to perform various settings and adjustments of the projector. Navigating through the menu Operating procedure button Press the <MENU> button on the remote control. f The [MAIN MENU] screen is displayed. MAIN MENU PICTURE LIGHTING... -
Page 52: Main Menu
Chapter 4 Settings — Menu navigation f For some items, press qw to display an individual adjustment screen with a bar scale as shown below. CONTRAST ADJUST Note f Pressing the <RETURN> or <MENU> button on the remote control while the menu screen is displayed returns the screen to the upper-level menu. -
Page 53: Sub-Menu
Chapter 4 Settings — Menu navigation Main menu item Page [DISPLAY LANGUAGE] [SECURITY] [TEST PATTERN] Sub-menu The sub-menu of the selected main menu item is displayed, and you can set and adjust items in the sub-menu. [PICTURE] Sub-menu item Factory default Page [PICTURE MODE] [DYNAMIC]... - Page 54 [NETWORK] Sub-menu item Factory default Page [PROJECTOR NAME] [NAME1234] [WIRED LAN] ― [WIRELESS LAN] [M-DIRECT] [NETWORK CONTROL] ― [Panasonic APPLICATION] ― [NETWORK STATUS] ― [Art-Net] [OFF] [Art-Net STATUS] ― [MIRRORING] [MODERATOR] *1 Differs depending on the product. [DISPLAY OPTION] Sub-menu item...
-
Page 55: [Picture] Menu
Chapter 4 Settings — [PICTURE] menu [PICTURE] menu On the menu screen, select [PICTURE] from the main menu, and select an item from the sub-menu. Refer to “Navigating through the menu” (x page 51) for the operation of the menu screen. f After selecting the item, press asqw to adjust. -
Page 56: [Tint]
Chapter 4 Settings — [PICTURE] menu Press qw or the <ENTER> button. f The [COLOR] individual adjustment screen is displayed. Press qw to adjust the level. Operation Adjustment Range of adjustment Press w. Deepens colors. -31 - +31 Weakens colors. Press q. [TINT] Adjust the skin tone in the projected image. -
Page 57: [Dimmer]
Chapter 4 Settings — [PICTURE] menu Item Operation Adjustment Range of adjustment Press w. Deepens red. [RED] Press q. Weakens red. Press w. Deepens green. 0 - +255 [GREEN] (Factory default is +255) Weakens green. Press q. Deepens blue. Press w. [BLUE] Weakens blue. - Page 58 Chapter 4 Settings — [PICTURE] menu Press as to select [RED], [GREEN], or [BLUE]. f Only [GAIN] can be adjusted when [WHITE] is selected for [3COLORS]. Press qw to adjust. f The adjustment value will change between 0 and 2 048 *1 The limit values vary depending on the color to be adjusted.
-
Page 59: [Lighting] Menu
Chapter 4 Settings — [LIGHTING] menu [LIGHTING] menu On the menu screen, select [LIGHTING] from the main menu, and select an item from the sub-menu. Refer to “Navigating through the menu” (x page 51) for the operation of the menu screen. f After selecting the item, press asqw to set. - Page 60 Chapter 4 Settings — [LIGHTING] menu Press qw. f The [PATTERN] individual adjustment screen is displayed. Press qw to select from [USER1] to [USER5]. Press the <ENTER> button. f The [PATTERN] detailed adjustment screen is displayed. Press as to select from [SPOT LIGHT1] to [SPOT LIGHT3]. Press qw to select [ON], and press the <ENTER>...
-
Page 61: [Memory Viewer] Menu
Chapter 4 Settings — [MEMORY VIEWER] menu [MEMORY VIEWER] menu On the menu screen, select [MEMORY VIEWER] from the main menu, and select an item from the sub- menu. Refer to “Navigating through the menu” (x page 51) for the operation of the menu screen. f After selecting the item, press asqw to set. -
Page 62: [Effect]
Chapter 4 Settings — [MEMORY VIEWER] menu [EFFECT] Set special effects used when changing the playback screen of still image content. Press as to select [EFFECT]. Press qw to switch the item. f The items will switch each time you press the button. [OFF] Does not apply special effects. -
Page 63: [Setup] Menu
Chapter 4 Settings — [SETUP] menu [SETUP] menu On the menu screen, select [SETUP] from the main menu, and select an item from the sub-menu. Refer to “Navigating through the menu” (x page 51) for the operation of the menu screen. f After selecting the item, press asqw to set. -
Page 64: [Aspect]
Chapter 4 Settings — [SETUP] menu Press as to select [SHIFT]. Press the <ENTER> button. f The [SHIFT] screen is displayed. Press asqw to adjust the position. Orientation Operation Adjustment Press the a button. The image moves up. Vertical (up and down) adjustment Press the s button. -
Page 65: [Keystone]
Chapter 4 Settings — [SETUP] menu [KEYSTONE] Correct keystone distortion that occurs when the projector main unit (projection lens surface) does not directly face the projection surface. Setting [HV CORRECTION] Press as to select [KEYSTONE]. Press the <ENTER> button. Press as to select [HV CORRECTION]. Press the <ENTER>... -
Page 66: [Signage]
In addition, pressing each of the <HDMI>, <MEMORY VIEWER>, <MIRRORING>, or <Panasonic APP> button while in signage playback stops signage playback and switches the input to a corresponding one. -
Page 67: [Eco Management]
This function automatically switches the power of the projector to standby if the input is HDMI, MIRRORING, or Panasonic APPLICATION and there is no input signal for a certain period of time. The time before switching to standby can be set. - Page 68 This is a function to automatically turn off the light source of the projector when the input is HDMI, MIRRORING, or Panasonic APPLICATION and there is no input signal for a specific period. The time until the light source is turned off can be set.
-
Page 69: [Initial Startup]
Keeps the input that has been selected the last time. [HDMI] Sets the input to HDMI. [MIRRORING] Sets the input to MIRRORING. [Panasonic APPLICATION] Sets the input to Panasonic APPLICATION. [MEMORY VIEWER] Sets the input to Memory Viewer. [SIGNAGE] Sets the input to signage. Note f If [POWER] of the restart option is enabled in “Setting the restart option”... -
Page 70: [Dc Out]
Chapter 4 Settings — [SETUP] menu Adjusting the right/left audio balance Press as to select [AUDIO SETTING]. Press the <ENTER> button. f The [AUDIO SETTING] screen is displayed. Press as to select [BALANCE]. Press qw to adjust the level. Operation Adjustment Range of adjustment Increases the volume on the right. -
Page 71: [Schedule]
Chapter 4 Settings — [SETUP] menu Note f The content of status can be sent via E-mail to E-mail addresses (up to two) set in “[E-mail set up] page” (x page 115) by pressing the <ENTER> button while the [STATUS] screen is displayed. [SCHEDULE] Set the command execution schedule for each day of the week. -
Page 72: [Date And Time]
Chapter 4 Settings — [SETUP] menu [COMMAND] Description [POWER ON] Switches on the projector. [STANDBY] Enters standby. f After Step 8), you can press qw to select [COMMAND]. 11) Press the <ENTER> button. f After the command is confirmed, n is displayed at the left of the selected command. 12) Press the <MENU>... -
Page 73: [Save All User Data]
Chapter 4 Settings — [SETUP] menu Press the <ENTER> button. f The [ADJUST CLOCK] screen is displayed. Press as to select [NTP SYNCHRONIZATION], and press qw to switch to [ON]. Press as to select [APPLY], and press the <ENTER> button. f The setting of the date and time will be completed. Note f To set the date and time automatically, the projector must be connected to the network. -
Page 74: [Service Password]
Chapter 4 Settings — [SETUP] menu Press as to select an item to initialize. Returns all setting items including [SIGNAGE], [NETWORK], and [E-mail set up] to the factory default [ALL USER DATA] settings. The projector enters the standby mode to reflect the setting values. [NETWORK/E-MAIL] Returns [SIGNAGE], [NETWORK], and [E-mail set up] to the factory default settings. -
Page 75: [Network] Menu
Chapter 4 Settings — [NETWORK] menu [NETWORK] menu On the menu screen, select [NETWORK] from the main menu, and select an item from the sub-menu. Refer to “Navigating through the menu” (x page 51) for the operation of the menu screen. f After selecting the item, press asqw to set. -
Page 76: [Wireless Lan]
Manager ME6.3", iPad / iPhone / iPod touch and Android devices. Switch the input to [Panasonic APPLICATION], the idle screen will appear. You can confirm the SSID and KEY. The factory default value of the KEY can be changed. For details, refer to the following "Setting [SIMPLE]". - Page 77 Chapter 4 Settings — [NETWORK] menu Setting [M-DIRECT] Press as to select [WIRELESS LAN]. Press qw to select [M-DIRECT]. Press the <ENTER> button. f The [WIRELESS LAN] ([M-DIRECT]) screen is displayed. Press as to select each item, and change the settings according to the operation instructions of the menu.
- Page 78 Chapter 4 Settings — [NETWORK] menu Press as to select [OTHER], and press the <ENTER> button. f The [WIRELESS LAN] ([USER]) screen (1/2) is displayed. f When there are many search results and [OTHER] is not displayed on the [WIRELESS LAN] (SSID Search) screen, press w until it is found.
-
Page 79: [Network Control]
[IP ADDRESS] 192.168.11.100 [SUBNET MASK] 255.255.255.0 [DEFAULT GATEWAY] 192.168.11.1 [DNS1]/[DNS2] (Blank) [SSID] Panasonic Projector [AUTHENTICATION] Open [ENCRYPTION] None [NETWORK CONTROL] Set up the control method of the network. Press as to select [NETWORK CONTROL]. Press the <ENTER> button. f The [NETWORK CONTROL] screen is displayed. -
Page 80: [Panasonic Application]
Refer to "Operating Instructions - Wireless Manager ME6.3" for details. Multi-live mode can be used with Panasonic’s image transfer application software that supports iPad/iPhone/iPod touch, and Android devices. Refer to the following URL for image transfer application software that supports iPad/iPhone/iPod touch, and Android devices. -
Page 81: [Network Status]
Set or change the password to connect to the projector. Press as to select [Panasonic APPLICATION]. Press the <ENTER> button. f The [Panasonic APPLICATION] screen is displayed. Press as to select [PASSWORD CHANGE]. Press the <ENTER> button. f The [PASSWORD CHANGE] screen is displayed. -
Page 82: [Art-Net]
Chapter 4 Settings — [NETWORK] menu Displays the network information of the wireless LAN set on the projector. [ANTENNA LEVEL] Displays the signal status of wireless LAN. [NETWORK] Displays the connection method of wireless LAN. [CHANNEL] Displays the channel used for wireless LAN. [SSID] Displays the string of SSID. - Page 83 Chapter 4 Settings — [NETWORK] menu Press qw to switch the item. f The items will switch each time you press the button. [2.x.x.x] Sets the IP address to 2.x.x.x automatically. [10.x.x.x] Sets the IP address to 10.x.x.x automatically. [MANUAL] Sets the IP address manually. f When [2.x.x.x] or [10.x.x.x] is selected in Step 7), proceed to Step 9).
- Page 84 Chapter 4 Settings — [NETWORK] menu [SSID] Enter the same string as the SSID registered to the access point. Select the user authentication method used in the network to which the projector is connected. Select this item when the authentication method of the access point [OPEN] is Open System.
-
Page 85: [Art-Net Status]
Chapter 4 Settings — [NETWORK] menu Press qw to switch the item. f The items will switch each time you press the button. [2.x.x.x] Sets the IP address to 2.x.x.x automatically. [10.x.x.x] Sets the IP address to 10.x.x.x automatically. [MANUAL] Sets the IP address manually. f When [2.x.x.x] or [10.x.x.x] is selected in Step 9), proceed to Step 11). - Page 86 Chapter 4 Settings — [NETWORK] menu Press as to select each item, and press qw to change the settings. Selects the connection type for the MIRRORING function. A PIN (8-digit number) will be displayed in the idle screen of the [PIN] MIRRORING function, and then makes connection by entering the [CONNECTION TYPE] PIN on the device.
-
Page 87: [Display Option] Menu
Chapter 4 Settings — [DISPLAY OPTION] menu [DISPLAY OPTION] menu On the menu screen, select [DISPLAY OPTION] from the main menu, and select an item from the sub- menu. Refer to “Navigating through the menu” (x page 51) for the operation of the menu screen. f After selecting the item, press asqw to set. -
Page 88: [Av Mute]
Chapter 4 Settings — [DISPLAY OPTION] menu Press qw to switch the item. f The items will switch each time you press the button. [ON] Displays the warning message. [OFF] Hides the warning message. [AV MUTE] Turn off projection and audio output temporarily when the projector is not used for a certain period of time. Press as to select [AV MUTE]. -
Page 89: [Display Language] Menu
Chapter 4 Settings — [DISPLAY LANGUAGE] menu [DISPLAY LANGUAGE] menu On the menu screen, select [DISPLAY LANGUAGE] from the main menu, and display the sub-menu. Refer to “Navigating through the menu” (x page 51) for the operation of the menu screen. Changing the display language You can select the language of the on-screen display. -
Page 90: [Security] Menu
Chapter 4 Settings — [SECURITY] menu [SECURITY] menu On the menu screen, select [SECURITY] from the main menu, and select an item from the sub-menu. Refer to “Navigating through the menu” (x page 51) for the operation of the menu screen. f When the projector is used for the first time Initial password: Press awsqawsq in order, and press the <ENTER>... -
Page 91: [Test Pattern] Menu
Chapter 4 Settings — [TEST PATTERN] menu [TEST PATTERN] menu On the menu screen, select [TEST PATTERN] from the main menu. Refer to “Navigating through the menu” (x page 51) for the operation of the menu screen. f Press qw to switch. [TEST PATTERN] Display the test pattern built-in to the projector. -
Page 92: Chapter 5 Operations
Operations Chapter 5 This chapter describes how to use each function. 92 - ENGLISH... -
Page 93: Memory Viewer Function
Chapter 5 Operations — Memory Viewer function Memory Viewer function Memory Viewer is a function that allows projection of still images or movies stored in an SD card. Files that can be played back with the Memory Viewer function The following still image/movie files can be played back on the projector. Extension Format Restriction... -
Page 94: Displaying The Memory Viewer Screen
Chapter 5 Operations — Memory Viewer function Displaying the Memory Viewer screen Insert an SD card in which still image or movie files are stored to the SD card slot. f Refer to “Using SD cards” (x page 46) for handling of SD cards. Press the <MEMORY VIEWER>... - Page 95 Chapter 5 Operations — Memory Viewer function Press the <ENTER> button. f Playback starts in the full-screen display. f Refer to “Playing back still images” (x page 96) or “Playing back movies” (x page 97) for detailed playback procedure. Press the <RETURN> button to end playback. f Full-screen display ends and the Memory Viewer screen (thumbnail view) is displayed.
-
Page 96: Playing Back Still Images
Chapter 5 Operations — Memory Viewer function Playing back still images This section describes the procedure using an operation example on the Memory Viewer screen in thumbnail view. Playback on the Memory Viewer screen in list view can be performed with the same procedure except for the file selection. -
Page 97: Playing Back Movies
Chapter 5 Operations — Memory Viewer function f The playback order follows the display order set in the [MEMORY VIEWER] menu → [SORT] (x page 61). Also in the cases where still image and movie files both exist in the same folder, they are played back according to the [SORT] setting. f The operation guide on the lower part of the playback screen can be hidden by setting the [MEMORY VIEWER] menu →... - Page 98 Chapter 5 Operations — Memory Viewer function f After playback ends, playback goes into pause state at the beginning of the file. f Pressing w during playback performs fast-forward playback. Every press of w increases the speed. (3 levels) f Pressing q during playback performs rewind playback. Every press of q increases the speed. (3 levels) f Pressing a plays back the file being played back from the beginning.
-
Page 99: Direct Playback
Chapter 5 Operations — Memory Viewer function Direct playback Still image/movie files in the specified folders of the SD card can be played back by pressing the number (<1> - <6>) buttons on the remote control. This operation is referred to as direct playback. Also, when operating by a browser remote control of Wireless Manager ME6.3, files can be played back directly by pressing the number (<0>... -
Page 100: Memory Viewer Screen Descriptions
Chapter 5 Operations — Memory Viewer function Memory Viewer screen descriptions The icons on the Memory Viewer screen indicate the following. An icon to indicate moving to upper level. Select it to move to the upper level. An icon to display folders in lower level. Select it to move to the lower level. An icon to indicate that the file is still image. -
Page 101: Network Connection
By using image transfer application software “Wireless Manager ME6.3” that supports Windows computers and Mac, and Panasonic’s image transfer application software that supports iPad/iPhone/iPod touch and Android devices, you can transfer images to the projector. The “Multi Monitoring & Control Software”, which monitors and controls multiple projectors connected to the LAN is also supported. -
Page 102: When Connecting Via Wireless Lan
Chapter 5 Operations — Network connection Note f A LAN cable is required to use the network function via wired LAN. f Use a straight or crossover LAN cable that is compatible with category 5 or higher. Whether either of straight/crossover cable or both cables can be used differ depending on the system configuration. - Page 103 Input MIRRORING Panasonic APPLICATION Communication IEEE802.11a/n IEEE802.11b/g/n method Connection method WPS + Wi-Fi Direct Panasonic exclusive method + connection by user Image transmission Intel WiDi / Intel Pro WiDi / Miracast Panasonic exclusive method ® ® method Setting for projector Turn on the projector.
- Page 104 Chapter 5 Operations — Network connection [SSID] Panasonic Projector [DHCP] [IP ADDRESS] 192.168.11.100 [SUBNET MASK] 255.255.255.0 [USER] [DEFAULT GATEWAY] 192.168.11.1 [AUTHENTICATION] Open [ENCRYPTION] None [DNS1]/[DNS2] None Setting for computer Turn on the computer. Configure network settings following the instructions of your network administrator.
-
Page 105: Web Control Function
Enter the IP address set on the projector into the URL entry field of the web browser. Enter the user name and the password. f The factory default setting of the user name is user1 (user rights)/admin1 (administrator rights) and the password is panasonic (lower case). ENGLISH - 105... - Page 106 Chapter 5 Operations — Web control function Click the [OK] button. f The [Projector status] page is displayed. Note f If you use a web browser to control the projector, set [WEB CONTROL] to [ON] in [NETWORK CONTROL] (x page 79). f Do not start up multiple web browsers at the same time to make setting or control.
- Page 107 Chapter 5 Operations — Web control function Descriptions of items Page tab [Detailed set up] Switches pages by clicking this item. The [Detailed set up] page is displayed by clicking this item. [Status] [Change password] The status of the projector is displayed by clicking this item. The [Change password] page is displayed by clicking this item.
- Page 108 Chapter 5 Operations — Web control function Error information page When [Error (Detail)] or [WARNING (Detail)] appears in the self-diagnosis display of the [Projector status] screen, click it to display the error/warning details. f The projector may go into the standby status to protect the projector depending on the contents of the error. Error( Detail ) Self-diagnosis result display Displays the item check results.
- Page 109 Chapter 5 Operations — Web control function r [WARNING] items Item Description The intake air temperature is high. The projector may be used in an environment where [INTAKE AIR TEMPERATURE] the temperature is high, such as near a heating appliance. The temperature around the optics module inside the projector is high. The projector [OPTICS MODULE TEMPERATURE] may be used in an environment where the temperature is high, such as near a heating appliance.
- Page 110 Chapter 5 Operations — Web control function E-mail error information is displayed if periodic E-mail sending fails. Note f [Access error log]/[E-mail error log] displays the recent several hundreds of accesses/requests. All information may not be displayed when many accesses/requests are made at a time. f When information in [Access error log]/[E-mail error log] exceeds a certain amount, they are erased from the oldest.
- Page 111 Chapter 5 Operations — Web control function [Advanced control] page Click [Projector control] → [Advanced control]. [KEYSTONE] [DIMMER] Corrects horizontal/vertical keystone distortion. Adjusts the brightness. [PICTURE] [LENS] Adjusts the items of the picture. Adjusts the projection lens (focus/zoom). [Lighting control] page Click [Projector control] →...
- Page 112 Chapter 5 Operations — Web control function [FRAME GRADATION] [Back] button Sets the gradation of the outer periphery of the projected image. Returns to the previous screen. [SPOT LIGHT1] to [SPOT LIGHT3] Switches on/off each spotlight. Note f For details of settings, refer to the [LIGHTING] menu → [PATTERN] of the projector. (x page 59) [Network config] page Click [Detailed set up] →...
- Page 113 Chapter 5 Operations — Web control function Connecting with wireless LAN (SIMPLE) [KEY] [Back] button, [Next] button Set the key to be used with SIMPLE. Click the [Back] button to return to the previous screen. Click Enter 8 to 15 alphanumeric characters. the [Next] button to display a screen to confirm the settings.
- Page 114 Chapter 5 Operations — Web control function [DHCP ON], [DHCP OFF] [SSID] To enable the DHCP client function, set [DHCP ON]. Enter the same string as the SSID registered to the access point. [IP ADDRESS] Enter the IP address when you do not use a DHCP server. [Back] button, [Next] button Click the [Back] button to return to the previous screen.
- Page 115 Chapter 5 Operations — Web control function Click [Detailed set up] → [Ping test]. [Input IP address] Example of display when the connection has succeeded Enter the IP address of the server to be tested. Example of display when the connection has failed [Submit] button Executes the connection test.
- Page 116 Chapter 5 Operations — Web control function Click [Detailed set up] → [E-mail set up]. [ENABLE] [MINIMUM TIME] Select [Enable] to use the E-mail function. Change the minimum interval for the temperature warning E-mail. The default value is 60 minutes. In this case, another [SMTP SERVER NAME] E-mail will not be sent for 60 minutes after sending the Enter the IP address or the server name of the E-mail server...
- Page 117 Chapter 5 Operations — Web control function [Authentication set up] page Set the authentication items when POP authentication or SMTP authentication is necessary to send an E-mail. Click [Detailed set up] → [Authentication set up]. [Auth] [Password] Select the authentication method specified by your Internet Enter the password for the POP server or the SMTP server.
- Page 118 Chapter 5 Operations — Web control function Contents of E-mail sent Example of the E-mail sent when E-mail is set The following E-mail is sent when the E-mail settings have been established. === Panasonic projector report(CONFIGURE) === Projector Type : JX200FBE Serial No...
- Page 119 Chapter 5 Operations — Web control function Example of the E-mail sent for an error The following E-mail is sent when an error has occurred. === Panasonic projector report(ERROR) === Projector Type : JX200FBE Serial No : 000000000000 ----- check system -----...
- Page 120 Chapter 5 Operations — Web control function [Administrator] account [Account] [New] [Password] Displays the account to change. Enter the desired new password. (Up to 16 characters in single byte) [Current] [User name] Enter the user name before the change. [New] [Password(Retype)] Enter the desired new password again.
- Page 121 Chapter 5 Operations — Web control function [Change password] (For user rights) Only the change of password is enabled under the user rights. [Old Password] [Retype] Enter the current password. Enter the desired new password again. [New Password] [OK] button Enter the desired new password. (Up to 16 characters in single Determines the change of password.
- Page 122 Chapter 5 Operations — Web control function Attention f When you turn on the projector, be careful so that the eyes of people around the projector are not exposed to the sudden light from the light source. Or operate the projector only if the eyes of people around the projector are not exposed to the light from the light source even when projection starts suddenly.
- Page 123 Chapter 5 Operations — Web control function [Help] page Click the [Help] tab on the operation page. The [Help Desk] window is displayed. [Help Desk] Sends/receives messages to/from an administrator who uses Crestron Connected ENGLISH - 123...
-
Page 124: Mirroring Function
Chapter 5 Operations — MIRRORING function MIRRORING function MIRRORING is a function which enables the projector to project the same image as that displayed on a device. This function connects a device compatible with Intel WiDi / Intel Pro WiDi / Miracast to the projector via ®... - Page 125 Chapter 5 Operations — MIRRORING function Note f The name and startup method of the Intel WiDi / Intel Pro WiDi / Miracast application varies depending on the model. ® ® f For the operation of Intel WiDi / Intel Pro WiDi / Miracast application, refer to the operating instructions of your device. ®...
-
Page 126: Chapter 6 Maintenance
Maintenance Chapter 6 This chapter describes troubleshooting and maintenance methods. 126 - ENGLISH... -
Page 127: Light Source/Temperature Indicators
Chapter 6 Maintenance — Light source/temperature indicators Light source/temperature indicators When an indicator lights up If a problem should occur inside the projector, the light source indicator <LIGHT>/temperature indicator <TEMP> will inform you by lighting or blinking. Check the status of the indicators and remedy the indicated problems as follows. -
Page 128: Inspection And Maintenance
Chapter 6 Maintenance — Inspection and maintenance Inspection and maintenance Before maintaining the projector Attention f Make sure to turn off the power before maintaining the projector. (x page 43) f When switching off the projector, make sure to follow the procedures in “Turning off the projector” (x page 43). WARNING Be sure to disconnect the power from the projector before maintaining the projector. -
Page 129: Troubleshooting
Chapter 6 Maintenance — Troubleshooting Troubleshooting Review the following points. For details, see the corresponding pages. Problems Points to be checked Page f Is the circuit breaker turned on? ― f Is the plug of the power cord firmly inserted into the outlet? ―... -
Page 130: Faq
Chapter 6 Maintenance — FAQ Refer to the following when you have problems with the wireless LAN connection. The connection with the wireless LAN is lost. f Under certain reception conditions, the image may be disrupted. In such a case, try the following. g Move the device connected over the wireless LAN closer to the projector. -
Page 131: Chapter 7 Appendix
Appendix Chapter 7 This chapter describes specifications and after-sales service for the projector. ENGLISH - 131... -
Page 132: Technical Information
Standby condition POWR? Power supply status query Power on condition HDMI INPT Input selection MEMORY VIEWER SIGNAGE Panasonic APPLICATION INPT? Input selection query MIRRORING AVMT AV mute control AV mute function off AVMT? AV mute function query AV mute function on 1st byte Indicates fan errors, and returns 0 or 2. - Page 133 Chapter 7 Appendix — Technical information Channel definition The following table lists the channel definitions used for controlling the projector with the Art-Net function. Channel Control details Performance Parameter Default value Remark 100 % Can be set in 256 steps between Light output adjustment …...
-
Page 134: Control Commands Via Lan
“xxxxxx:yyyyy:zzzzzzzz” xxxxxx Administrator rights user name for the web control (default user name is “admin1”) yyyyy Password of above administrator rights user (default password is “panasonic”) zzzzzzzz 8-byte random number obtained in Step 2) Command transmission method Transmit using the following command formats. - Page 135 Chapter 7 Appendix — Technical information r Transmitted data Termination Header Data section symbol Hash value Command ‘0’ ‘0’ Control command (CR) (Refer to “Connecting method” example 0x30 0x30 (ASCII string) 0x0d above) Data length 32 bytes 1 byte 1 byte Undefined length 1 byte r Received data...
- Page 136 Power standby ― Power supply status STANDBY status query Power on status HDMI MEMORY VIEWER Input/mode selection MIRRORING Panasonic APPLICATION SIGNAGE Light source power NORMAL setting Light source power setting query Runtime query 00000 - 99999 In hours AV mute...
-
Page 137: Glossary Of Network Terms
Chapter 7 Appendix — Glossary of network terms Glossary of network terms Term Description Access point This is a signal station for relaying signals between the wireless LAN and the computer. A computer connected to the access point can communicate via the network connected to the access point. Abbreviation for Advanced Encryption Standard. - Page 138 Chapter 7 Appendix — Glossary of network terms Term Description WPA-EAP A standard of encryption method for wireless LAN. This is an encryption method for corporation, and WPA2-EAP encryption is performed using an external server. WPA-PSK A standard of encryption method for wireless LAN. This is advanced security than the WEP, and it has WPA2-PSK functions such as user authentication function and TKIP (encryption protocol) that will automatically change the encryption key every specified time.
-
Page 139: Specifications
*3 Measurement, measuring conditions and method of notation all comply with ISO/IEC 21118:2012 international standards. *4 Operations of the Panasonic SD memory card up to capacity of 2 GB and Panasonic SDHC memory card up to capacity of 32 GB are confirmed. - Page 140 Chapter 7 Appendix — Specifications r Applicable scanning frequency/terminal/wireless LAN Model No. PT-JX200FBE/PT-JX200FWE 525 (480) /60p, 525 (480) /60i, 625 (576) /50p, 625 (576) /50i, 750 (720) /60p, 750 (720) /50p, 1125 (1080) /60p, 1125 (1080) /60i, 1125 (1080) /50p, 1125 (1080) /50i...
-
Page 141: Dimensions
Chapter 7 Appendix — Specifications Dimensions Unit: mm 343.4 (13-17/32") 309.6 (12-3/16") 86.5 (3-13/32") 84.0 (3-5/16") 13.0 (1/2") 142.5 (5-5/8") 149.2 (5-97/8") 268.9 (10-19/32") 198.5 (7-13/16") 278.8 (10-31/32") 343.4 (13-17/32") 309.6 (12-3/16") 84.0 (3-5/16") 86.5 (3-13/32") 13.0 (1/2") 360° Ball joint movable range: Approximately 90°... -
Page 142: List Of Compatible Signals
Chapter 7 Appendix — Specifications List of compatible signals The following table specifies the HDMI input video signal that the projector can project. Scanning freq. Resolution Dot clock freq. Mode Plug and play Horizontal Vertical (Dots) (MHz) (kHz) (Hz) 525 (480) /60i 1 440(720) x 480 15.7 59.9... -
Page 143: Index
Connecting via wireless LAN [CONTRAST] [ON-SCREEN DISPLAY] Control commands via LAN On-screen menu [CORNER CORRECTION] [Crestron Connected(TM)] Operating with the remote control <Panasonic APP> button 24, 44 [DATE AND TIME] [Panasonic APPLICATION] [DC OUT] <DC OUT> terminal [PASSWORD] <DEFAULT> button... - Page 144 These symbols are only valid in the European Union. If you wish to discard these items, please contact your local authorities or dealer and ask for the correct method of disposal. Panasonic Corporation Web Site: http://panasonic.net/avc/projector/ © Panasonic Corporation 2017 W1216JY1097 -PT...
Need help?
Do you have a question about the PT-JX200FWE and is the answer not in the manual?
Questions and answers