Advertisement
Available languages
Available languages
Quick Links
Advertisement
Chapters

Subscribe to Our Youtube Channel
Related Manuals for Electrolux EOB2400AOX


Summary of Contents for Electrolux EOB2400AOX
- Page 1 EOB2400AOX Oven User Manual เตาอบ คู ม ื อ การใช ง าน...
-
Page 2: Table Of Contents
14. ENERGY EFFICIENCY.................. 25 WE’RE THINKING OF YOU Thank you for purchasing an Electrolux appliance. You’ve chosen a product that brings with it decades of professional experience and innovation. Ingenious and stylish, it has been designed with you in mind. So whenever you use it, you can be safe in the knowledge that you’ll get great results every time. -
Page 3: Safety Information
ENGLISH SAFETY INFORMATION Before the installation and use of the appliance, carefully read the supplied instructions. The manufacturer is not responsible for any injuries or damage that are the result of incorrect installation or usage. Always keep the instructions in a safe and accessible location for future reference. -
Page 4: Safety Instructions
WARNING: The appliance and its accessible parts • become hot during use. Care should be taken to avoid touching heating elements. Always use oven gloves to remove or put in • accessories or ovenware. Before carrying out any maintenance, disconnect the •... - Page 5 ENGLISH • Do not use multi-plug adapters and extension cables. Cabinet minimum 590 (600) mm • Make sure not to cause damage to height (Cabinet un‐ the mains plug and to the mains der the worktop cable. Should the mains cable need to minimum height) be replaced, this must be carried out Cabinet width...
- Page 6 – do not put aluminium foil directly on the bottom of cavity of the Total power (W) Section of the ca‐ appliance. ble (mm²) – do not put water directly into the maximum 3680 3 x 1.5 hot appliance.
-
Page 7: Installation
ENGLISH 2.6 Service • Clean the appliance with a moist soft cloth. Only use neutral detergents. Do • To repair the appliance contact the not use any abrasive products, Authorised Service Centre. abrasive cleaning pads, solvents or • Use original spare parts only. metal objects. - Page 8 550 min. 560 3.2 Securing the oven to the cabinet...
-
Page 9: Product Description
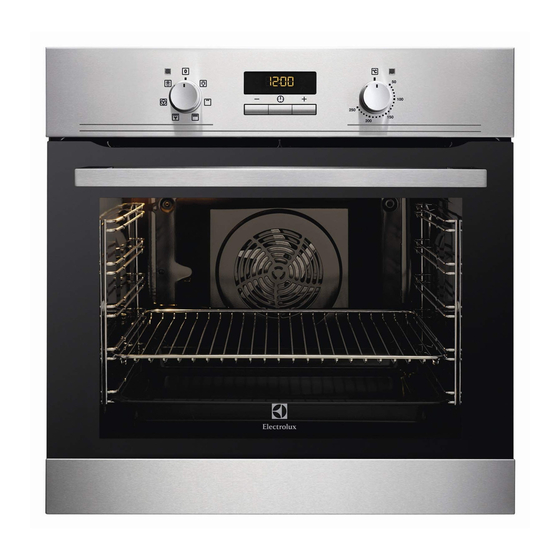
ENGLISH 4. PRODUCT DESCRIPTION 4.1 General overview Control panel Knob for the heating functions Power lamp / symbol Display Control knob (for the temperature) Temperature indicator / symbol Heating element Lamp Shelf support, removable Shelf positions 4.2 Accessories • Grill- / Roasting pan To bake and roast or as pan to collect •... -
Page 10: Before First Use
6. BEFORE FIRST USE 6.2 Preheating WARNING! Refer to Safety chapters. Preheat the empty oven before first use. 1. Set the function .Set the maximum To set the Time of day refer temperature. to "Clock functions" chapter. 2. Let the oven operate for 1 hour. -
Page 11: Clock Functions
ENGLISH Oven Application Oven Application function function This function is designed To grill flat food and to to save energy during toast bread. cooking. For the cooking Moist Fan Grilling instructions refer to "Hints Baking and tips" chapter, Moist To grill flat food in large Fan Baking. - Page 12 8.2 Setting the time. Changing 8.5 Setting the TIME DELAY the time 1. Set an oven function and You must set the time before you temperature. operate the oven. 2. Press again and again until flashes when you connect the starts to flash.
-
Page 13: Using The Accessories
ENGLISH 9. USING THE ACCESSORIES Wire shelf and deep pan together: WARNING! Push the deep pan between the guide Refer to Safety chapters. bars of the shelf support and the wire shelf on the guide bars above. 9.1 Inserting the accessories Wire shelf: Push the shelf between the guide bars of the shelf support and make sure that the... -
Page 14: Hints And Tips
11. HINTS AND TIPS Baking cakes WARNING! Do not open the oven door before 3/4 of Refer to Safety chapters. the set cooking time is up. If you use two baking trays at the same The temperature and baking... - Page 15 ENGLISH Food Top / Bottom Heat Fan Cooking Time Com‐ (min) ments Tempera‐ Shelf po‐ Tempera‐ Shelf po‐ ture (°C) sition ture (°C) sition Apple 2 (left and 80 - 100 In two 20 cake (Ap‐ right) cm cake moulds on ple pie) a wire shelf...
- Page 16 Food Top / Bottom Heat Fan Cooking Time Com‐ (min) ments Tempera‐ Shelf po‐ Tempera‐ Shelf po‐ ture (°C) sition ture (°C) sition Plate tarts 180 45 - 70 In a 20 cm cake mould Rich fruit 110 - 120...
- Page 17 ENGLISH Food Top / Bottom Heat Fan Cooking Time Com‐ (min) ments Tempera‐ Shelf po‐ Tempera‐ Shelf po‐ ture (°C) sition ture (°C) sition 180 - 190 180 - 190 25 - 40 In a mould Lasagne Cannello‐ 180 - 190 180 - 190 25 - 40 In a mould...
- Page 18 Food Top / Bottom Heat Fan Cooking Time Com‐ (min) ments Tempera‐ Shelf po‐ Tempera‐ Shelf po‐ ture (°C) sition ture (°C) sition Hare 150 - 200 Cut in pieces Pheasant 90 - 120 Whole Fish Food Top / Bottom Heat...
- Page 19 ENGLISH 11.4 Moist Fan Baking For best results follow suggestions listed in the table below. Food Accessories Temperature Shelf po‐ Time (min) (°C) sition Sweet rolls, 12 baking tray or dripping 40 - 50 pieces Rolls, 9 pieces baking tray or dripping 35 - 45 Pizza, frozen, wire shelf...
- Page 20 Food Accessories Temperature Shelf po‐ Time (min) (°C) sition Savory pastry, baking tray or dripping 35 - 45 16 pieces Short crust bis‐ baking tray or dripping 40 - 50 cuits, 20 pieces Tartlets, 8 baking tray or dripping...
- Page 21 ENGLISH 11.6 Information for test institutes Tests according to IEC 60350-1. Food Function Acces‐ Shelf Tem‐ Time (min) Comments sories posi‐ pera‐ tion ture (°C) Small Conven‐ Baking 20 - 30 Put 20 small cake tional Cook‐ tray cakes per one baking tray.
-
Page 22: Care And Cleaning
Food Function Acces‐ Shelf Tem‐ Time (min) Comments sories posi‐ pera‐ tion ture (°C) Short True Fan Baking 2 and 140 - 25 - 45 bread Cooking / tray Fan Cook‐ Short Conven‐ Baking 140 - 25 - 45 bread tional Cook‐... - Page 23 ENGLISH 12.3 Cleaning the door gasket The oven door may close if you try to remove the Regularly do a check of the door gasket. internal glass panel before The door gasket is around the frame of you remove the oven door. the oven cavity.
-
Page 24: Troubleshooting
Do not clean the glass panels in the dishwasher. When the cleaning is completed, install the glass panel and the oven door. The screen-printing zone must face the inner side of the door. Make sure that after the installation the surface of the glass panel frame on the screen-printing zones is not rough when you touch it. -
Page 25: Energy Efficiency
ENGLISH 13.1 What to do if... Problem Possible cause Remedy The oven does not heat The oven is deactivated. Activate the oven. The oven does not heat The clock is not set. Set the clock. The oven does not heat The necessary settings are Make sure that the settings not set. - Page 26 When the cooking duration is longer than Cooking with fan 30 minutes, reduce the oven temperature When possible, use the cooking to minimum 3 - 10 minutes before the functions with fan to save energy. end of the cooking time, depending on Keep food warm the duration of the cooking.
- Page 27 ขอบพระคุ ณ ที ่ ซ ื ้ อ เครื ่ อ งใช ไ ฟฟ า จาก Electrolux คุ ณ ได เ ลื อ กผลิ ต ภั ณ ฑ ท ี ่ ผ ลิ ต ขึ ้ น โดยผู ผ ลิ...
-
Page 28: ข อ มู ล ด า นความปลอดภั ย
ข อ มู ล ด า นความปลอดภั ย ก อ นติ ด ตั ้ ง และใช ง านเครื ่ อ ง กรุ ณ าอ า นคำแนะนำที ่ จ ั ด มาให โ ดย ละเอี ย ดก อ นในเบื ้ อ งต น ผู ผ ลิ ต จะไม ร ั บ ผิ ด ชอบใด ๆ ต อ การบาด... -
Page 29: คำแนะนำด า นความปลอดภั ย
อย า ใช เ ครื ่ อ งก อ นติ ด ตั ้ ง กั บ โครงสร า งบิ ล ท อ ิ น • อย า ใช เ ครื ่ อ งพ น ไอน้ ำ ร อ นเพื ่ อ ทำความสะอาดเครื ่ อ งใช •... - Page 30 • อย า ทำให ป ลั ๊ ก ไฟและสายไฟเสี ย หาย ใน • นี ่ เ ป น เครื ่ อ งใช ส ำหรั บ ใช ง านในครั ว เรื อ น กรณี ท ี ่ ต อ งเปลี ่ ย นสายไฟ ควรให ศ ู น ย...
-
Page 31: การติ ด ตั ้ ง
2.4 การดู แ ลและทำความสะอาด • หลอดไฟหรื อ หลอดฮาโลเจนที ่ ใ ช ก ั บ เครื ่ อ ง นี ้ มี ไ ว ใ ช ส ำหรั บ เครื ่ อ งใช ใ นครั ว เรื อ น คำเตื อ น เท... - Page 32 3.1 การติ ด ตั ้ ง แบบบิ ล ท อ ิ น min. 550 min. 560 min. 550 min. 560 3.2 การยึ ด เตาอบเข า กั บ ตู ...
-
Page 33: รายละเอี ย ดผลิ ต ภั ณ ฑ
4. รายละเอี ย ดผลิ ต ภั ณ ฑ 4.1 ภาพรวมเบื ้ อ งต น แผงควบคุ ม แป น ฟ ง ก ช ั ่ น ทำความร อ น ไฟ/สั ญ ลั ก ษณ แ สดงการทำงาน จอแสดงผล ลู ก บิ ด (สำหรั บ ปรั บ อุ ณ หภู ม ิ ) ไฟ/สั... -
Page 34: ก อ นการใช ง านครั ้ ง แรก
6. ก อ นการใช ง านครั ้ ง แรก ติ ด ตั ้ ง ส ว นประกอบต า ง ๆ และฐานรองชั ้ น วาง คำเตื อ น แบบถอดได ก ลั บ เข า ไปที ่ ต ำแหน ง เดิ ม... -
Page 35: ฟ ง ก ช ั ่ น นาฬิ ก า
ฟ ง ก ช ั ่ น ‐ การใช ฟ ง ก ช ั ่ น ‐ การใช เตาอบ เตาอบ สำหรั บ ย า งอาหารและป ง ‐ สำหรั บ อบและย า งอาหารบน‐ ขนมป ง ชั ้ น ที ่ ห นึ ่ ง ป... -
Page 36: การใช อ ุ ป กรณ เ สริ ม
5. กดปุ ม ใด ๆ เพื ่ อ หยุ ด สั ญ ญาณดั ง กล า ว 8.6 การตั ้ ง ค า MINUTE MINDER 6. บิ ด ลู ก บิ ด ปรั บ ฟ ง ก ช ั ่ น ของเตาอบและแป น... -
Page 37: ฟ ง ก ช ั ่ น เพิ ่ ม เติ ม
แนวเว า ด า นบนช ว ยเพิ ่ ม ความ ปลอดภั ย แนวเยื ้ อ งนี ้ ย ั ง ใช เ พื ่ อ ป อ งกั น การพลิ ก ด ว ย ของด า นสู ง รอบ ๆ ชั ้ น วางใช เ พื ่ อ ป อ งกั น ภาชนะเลื... - Page 38 11.2 ตารางการอบและย า ง เค ก อาหาร ความร อ นด า นบน/ด า น‐ ใช พ ั ด ลมปรุ ง สุ ก เวลา ความเห็ น ล า ง (นาที ) อุ ณ หภู ม ิ ตำแหน ง ‐ อุ ณ หภู ม ิ...
- Page 39 อาหาร ความร อ นด า นบน/ด า น‐ ใช พ ั ด ลมปรุ ง สุ ก เวลา ความเห็ น ล า ง (นาที ) อุ ณ หภู ม ิ ตำแหน ง ‐ อุ ณ หภู ม ิ ตำแหน ง ‐ (°C) ชั...
- Page 40 แฟลน อาหาร ความร อ นด า นบน/ด า น‐ ใช พ ั ด ลมปรุ ง สุ ก เวลา ความเห็ น ล า ง (นาที ) อุ ณ หภู ม ิ ตำแหน ง ‐ อุ ณ หภู ม ิ ตำแหน ง ‐...
- Page 41 อาหาร ความร อ นด า นบน/ด า น‐ ใช พ ั ด ลมปรุ ง สุ ก เวลา ความเห็ น ล า ง (นาที ) อุ ณ หภู ม ิ ตำแหน ง ‐ อุ ณ หภู ม ิ ตำแหน ง ‐ (°C) ชั...
- Page 42 อาหาร ปริ ม าณ เวลา (นาที ) ชิ ้ น ปริ ม าณ (กก.) ด า นที ่ 1 ด า นที ่ 2 อกไก 12 - 15 12 - 14 แฮมเบอร เ กอร 20 - 30 เนื ้ อ ปลาไม ม ี ก ระดู ก...
- Page 43 อาหาร อุ ป กรณ เ สริ ม อุ ณ หภู ม ิ (°C) ตำแหน ง ‐ เวลา (นาที ) ชั ้ น วาง มาการอง, 20 ถาดอบหรื อ ถาดรองหยด 45 - 55 ชิ ้ น มาการู น , 12 ชิ ้ น ถาดอบหรื อ ถาดรองหยด 30 - 40 ขนมอบแบบปรุ...
- Page 44 11.6 ข อ มู ล สำหรั บ สถาบั น ทดสอบ ทดสอบตามมาตรฐาน IEC 60350-1 อาหาร ฟ ง ก ช ั ่ น อุ ป กรณ ‐ ตำแห‐ อุ ณ ห‐ เวลา (นาที ) ความเห็ น เสริ ม น ง ‐...
-
Page 45: การดู แ ลรั ก ษาและทำความสะอาด
อาหาร ฟ ง ก ช ั ่ น อุ ป กรณ ‐ ตำแห‐ อุ ณ ห‐ เวลา (นาที ) ความเห็ น เสริ ม น ง ‐ ภู ม ิ ชั ้ น ‐ (°C) วาง ขนมป ง ‐ ใช พ ั ด ลม‐ ถาดอบ... - Page 46 12.3 การทำความสะอาดซี ล ยาง ข อ ควรระวั ง ประตู ป ด อย า ใช เ ตาอบโดยไม ม ี แ ผง กระจกด า นใน ตรวจสอบซี ล ยางที ่ ป ระตู ป ด เป น ประจำ ซี ล ยาง...
-
Page 47: การแก ไ ขป ญ หา
อย า ทำความสะอาดแผงกระจกในเครื ่ อ ง ล า งจาน หลั ง จากทำความสะอาดเสร็ จ สิ ้ น ให ต ิ ด ตั ้ ง แผง กระจกและประตู เ ตาอบ ส ว นพิ ม พ ส กรี น จะต อ งหั น เข า ด า นในของประตู ป... -
Page 48: การประหยั ด พลั ง งาน
13.1 จะทำอย า งไรถ า ... ป ญ หา สาเหตุ ท ี ่ เ ป น ไปได วิ ธ ี แ ก ไ ข เตาไม ท ำความร อ น เตาป ด อยู เป ด เตา เตาไม ท ำความร อ น... - Page 49 อบพั ด ลมแบบมี ค วามชื ้ น ฟ ง ก ช ั ่ น นี ้ อ อกแบบมาเพื ่ อ ให ป ระหยั ด พลั ง งาน ระหว า งการปรุ ง สุ ก 15. ข อ มู ล เพื ่ อ การรั ก ษาสิ ่ ง แวดล อ ม เครื...
- Page 50 www.electrolux.com...
- Page 52 www.electrolux.com/shop...
Need help?
Do you have a question about the EOB2400AOX and is the answer not in the manual?
Questions and answers