
Related Manuals for Kyocera PF-530


Summary of Contents for Kyocera PF-530
- Page 1 All manuals and user guides at all-guides.com PF-520 PF-530 SERVICE MANUAL Published in September 2010 3M9SM061 Rev. 1...
- Page 2 All manuals and user guides at all-guides.com CAUTION RISK OF EXPLOSION IF BATTERY IS REPLACED BY AN INCORRECT TYPE. DISPOSE OF USED BATTERIES ACCORDING TO THE INSTRUCTIONS. It may be illegal to dispose of this battery into the municipal waste stream. Check with your local solid waste officials for details in your area for proper disposal.
- Page 3 All manuals and user guides at all-guides.com Revision history Revision Date Replaced pages Remarks September 17, 2010 1-1-1, 1-2-4, 1-3-1 to 1-3-14...
- Page 4 All manuals and user guides at all-guides.com This page is intentionally left blank.
- Page 5 All manuals and user guides at all-guides.com Safety precautions This booklet provides safety warnings and precautions for our service personnel to ensure the safety of their customers, their machines as well as themselves during maintenance activities. Service personnel are advised to read this booklet carefully to familiarize themselves with the warnings and precautions described here before engaging in maintenance activities.
- Page 6 All manuals and user guides at all-guides.com Safety warnings and precautions Various symbols are used to protect our service personnel and customers from physical danger and to prevent damage to their property. These symbols are described below: DANGER: High risk of serious bodily injury or death may result from insufficient attention to or incorrect compliance with warning messages using this symbol.
- Page 7 All manuals and user guides at all-guides.com 1. Installation Precautions WARNING • Do not use a power supply with a voltage other than that specified. Avoid multiple connections to one outlet: they may cause fire or electric shock. When using an extension cable, always check that it is adequate for the rated current.
- Page 8 All manuals and user guides at all-guides.com 2. Precautions for Maintenance WARNING • Always remove the power plug from the wall outlet before starting machine disassembly....• Always follow the procedures for maintenance described in the service manual and other related brochures.
- Page 9 All manuals and user guides at all-guides.com • Do not remove the ozone filter, if any, from the copier except for routine replacement....... • Do not pull on the AC power cord or connector wires on high-voltage components when removing them;...
- Page 10 All manuals and user guides at all-guides.com This page is intentionally left blank.
-
Page 11: Table Of Contents
All manuals and user guides at all-guides.com 3M9/3NA CONTENTS 1-1 Specifications 1-1-1 Specifications ........................1-1-1 1-1-2 Parts names .......................... 1-1-2 (1) Paper feeder (Normal)...................... 1-1-2 (2) Multi purpose feeder......................1-1-3 1-1-3 Machine cross section ......................1-1-4 (1) Paper feeder (Normal)...................... 1-1-4 (2) Multi purpose feeder...................... - Page 12 All manuals and user guides at all-guides.com 3M9/3NA 2-3 Operation of the PWBs 2-3-1 PF main PWB ........................2-3-1 2-3-2 PF heater PWB........................2-3-4 2-4 Appendixes 2-4-1 Appendixes ..........................2-4-1 (1) Wiring diagram ......................... 2-4-1...
-
Page 13: Specifications
All manuals and user guides at all-guides.com 3M9/3NA-1 1-1-1 Specifications 1-1 Specifications Specifications Item Paper feeder (Normal) Multi purpose feeder Paper weight 60 to 163 g/m 60 to 220 g/m Plain, Recycled, Preprinted, Bond, Plain, Labels, Recycled, Preprinted, Rough, Color, Prepunched, Bond, Rough, Cardstock, Color, Paper type Letterhead, Thick (163g/m... -
Page 14: Parts Names
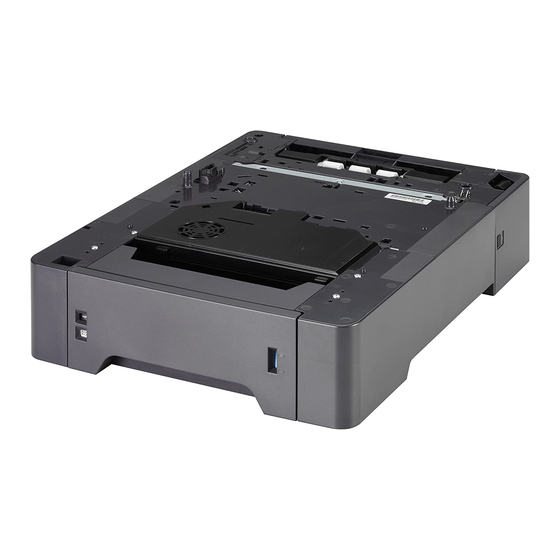
All manuals and user guides at all-guides.com 3M9/3NA 1-1-2 Parts names (1) Paper feeder (Normal) Figure 1-1-1 6. Paper length guide 1. Cassette 2. Paper size dial window 7. Positioning pins 3. Paper size dial 8. Interface connector 4. Paper gauge 9. -
Page 15: Multi Purpose Feeder
All manuals and user guides at all-guides.com 3M9/3NA (2) Multi purpose feeder Figure 1-1-2 1. Cassette 8. Positioning pins 2. Paper size dial window 9. Interface connector 3. Paper size dial 10. PF rear cover 4. Paper type window 11. Power source cover 5. -
Page 16: Machine Cross Section
All manuals and user guides at all-guides.com 3M9/3NA 1-1-3 Machine cross section (1) Paper feeder (Normal) Paper path Figure 1-1-3 (2) Multi purpose feeder Paper path Figure 1-1-4 1-1-4... -
Page 17: Installation Environment
All manuals and user guides at all-guides.com 3M9/3NA 1-2-1 Installation environment 1-2 Installation Installation location (Be based on the machine establishment place.) Avoid direct sunlight or bright lighting. Ensure that the photoconductor will not be exposed to direct sunlight or other strong light when removing paper jams. -
Page 18: Unpacking
All manuals and user guides at all-guides.com 3M9/3NA 1-2-2 Unpacking (1) Unpacking Figure 1-2-1 1. Paper feeder 7. Left sub-cursor* 2. Outer case 8. Right sub-cursor* 3. Plastic bag 600 x 800 9. Installation guide etc. 4. Left pad *: Multi purpose feeder only. 5. -
Page 19: Removing The Tapes
All manuals and user guides at all-guides.com 3M9/3NA (2) Removing the tapes Procedure 1. Remove the tapes. Paper feeder Paper feeder (Normal): two tapes (Normal) Multi purpose feeder: four tapes Tape Tape Multi purpose Tape feeder Tape Tape Tape Figure 1-2-2 1-2-3... -
Page 20: Attaching The Sub-Cursors (Multi Purpose Feeder Only)
All manuals and user guides at all-guides.com 3M9/3NA-1 (3) Attaching the sub-cursors (Multi purpose feeder only) Procedure 1. Attach the right and left sub-cursors to the cassette. Right sub-cursor Right sub-cursor Left sub-cursor Cassette Left sub-cursor Figure 1-2-3 1-2-4... -
Page 21: Paper Misfeed Detection
All manuals and user guides at all-guides.com 3M9/3NA-1 1-3-1 Paper misfeed detection 1-3 Troubleshooting (1) Paper misfeed indication When a paper misfeed occurs, the machine immediately stops printing and displays the paper misfeed mes- sage on the operation panel. To remove paper misfed in the machine, open the PF rear cover. Paper jammed in cassette 2. -
Page 22: Paper Misfeed Detection Condition
All manuals and user guides at all-guides.com 3M9/3NA-1 (2) Paper misfeed detection condition Machine Paper jam location Cassette 1 MP tray Machine inside Fuser/Eject sections Duplex section Cassette 2 Cassette 3 Sensors Paper feeder 1 Registration sensor MP feed sensor Eject sensor PF feed sensor 1 Paper feeder 2... - Page 23 All manuals and user guides at all-guides.com 3M9/3NA-1 Machine Sensors Registration sensor MP feed sensor Eject sensor PF feed sensor 1 PF feed sensor 2 PF feed sensor 3 Paper jam location Paper feeder 1 Cassette 1 MP tray Machine inside Fuser/Eject sections Paper feeder 2 Duplex section...
- Page 24 All manuals and user guides at all-guides.com 3M9/3NA-1 Code Contents Conditions location* 0211 Rear cover open (paper The rear cover of paper feeder 1 is opened during feeder 1) printing. 0212 Rear cover open (paper The rear cover of paper feeder 2 is opened during feeder 2) printing.
- Page 25 All manuals and user guides at all-guides.com 3M9/3NA-1 Code Contents Conditions location* 4012 Registration sensor does not The registration sensor (RS) does not turn off dur- turn OFF ing paper feed from paper feeder 1. 4013 The registration sensor (RS) does not turn off dur- ing paper feed from paper feeder 2.
-
Page 26: Self-Diagnostic Function
All manuals and user guides at all-guides.com 3M9/3NA-1 1-3-2 Self-diagnostic function (1) Self-diagnostic function This machine is equipped with self-diagnostic function. When a problem is detected, the machine stops print- ing and display an error message on the operation panel. An error message consists of a message prompting a contact to service personnel and a four-digit error code indicating the type of the error. -
Page 27: Self Diagnostic Codes
All manuals and user guides at all-guides.com 3M9/3NA-1 (2) Self diagnostic codes If the part causing the problem was not supplied, use the unit including the part for replacement. Check procedures/ Code Contents Causes corrective measures 1020 PF lift motor error Defective bottom Check to see if the bottom plate can move (paper feeder 1) - Page 28 All manuals and user guides at all-guides.com 3M9/3NA-1 Check procedures/ Code Contents Causes corrective measures 1040 PF lift motor error Defective bottom Check to see if the bottom plate can move (paper feeder 3) plate elevation smoothly and repair it if any problem is mechanism in the found.
- Page 29 All manuals and user guides at all-guides.com 3M9/3NA-1 Check procedures/ Code Contents Causes corrective measures 1520 PF heater 1 high tempera- Defective connec- Reinsert the connector. Also check for conti- ture error tor cable or poor nuity within the connector cable. If none, replace the cable.
- Page 30 All manuals and user guides at all-guides.com 3M9/3NA-1 Check procedures/ Code Contents Causes corrective measures 1600 PF heater 1 low temperature Defective connec- Reinsert the connector. Also check for conti- error (paper feeder 1) tor cable or poor nuity within the connector cable. If none, replace the cable.
- Page 31 All manuals and user guides at all-guides.com 3M9/3NA-1 Check procedures/ Code Contents Causes corrective measures 1620 PF heater 1 low temperature Defective connec- Reinsert the connector. Also check for conti- error (paper feeder 2) tor cable or poor nuity within the connector cable. If none, replace the cable.
- Page 32 All manuals and user guides at all-guides.com 3M9/3NA-1 Check procedures/ Code Contents Causes corrective measures 1640 PF heater 1 low temperature Defective connec- Reinsert the connector. Also check for conti- error (paper feeder 3) tor cable or poor nuity within the connector cable. If none, replace the cable.
- Page 33 All manuals and user guides at all-guides.com 3M9/3NA-1 Check procedures/ Code Contents Causes corrective measures 1800 Paper feeder communica- Improper installa- Follow installation instruction carefully again. tion error tion paper feeder. Communication error between Defective connec- Reinsert the connector. Also check for conti- engine PWB and optional tor cable or poor nuity within the connector cable.
- Page 34 All manuals and user guides at all-guides.com 3M9/3NA-1 Check procedures/ Code Contents Causes corrective measures 2620 PF paper feed motor error Defective connec- Reinsert the connector. Also check for conti- (paper feeder 3) tor cable or poor nuity within the connector cable. If none, replace the cable.
-
Page 35: Electric Problems
All manuals and user guides at all-guides.com 3M9/3NA 1-3-3 Electric problems If the part causing the problem was not supplied, use the unit including the part for replacement. Troubleshooting to each failure must be in the order of the numbered symptoms. Problem Causes Check procedures/corrective measures... - Page 36 All manuals and user guides at all-guides.com 3M9/3NA Problem Causes Check procedures/corrective measures 1. Defective connector Reinsert the connector. Also check for continuity within the The size of paper cable or poor con- connector cable. If none, replace the cable. on the cassette is tact in the connector.
-
Page 37: Mechanical Problems
All manuals and user guides at all-guides.com 3M9/3NA 1-3-4 Mechanical problems If the part causing the problem was not supplied, use the unit including the part for replacement. Problem Causes/check procedures Corrective measures Check if the surfaces of the following roll- Clean with isopropyl alcohol. - Page 38 All manuals and user guides at all-guides.com 3M9/3NA This page is intentionally left blank. 1-3-18...
-
Page 39: Precautions For Assembly And Disassembly
All manuals and user guides at all-guides.com 3M9/3NA 1-4-1 Precautions for assembly and disassembly 1-4 Assembly and disassembly (1) Precautions Before starting disassembly of the paper feeder, press the Power key on the operation panel to off. Make sure that the Power lamp is off before turning off the main power switch. And then unplug the power cable from the wall outlet. -
Page 40: Paper Feed Section
All manuals and user guides at all-guides.com 3M9/3NA 1-4-2 Paper feed section (1) Detaching and refitting the retard roller Procedure 1. Open the PF rear cover. 2. Release two hooks and then remove Hook the retard guide and retard spring. Retard spring Retard guide Hook... - Page 41 All manuals and user guides at all-guides.com 3M9/3NA 4. Check or replace the retard roller unit and refit all the removed parts. *: Before refitting the retard roller unit, firmly install the retard spring onto the projec- tion of the retard roller unit. Retard roller unit Retard guide /Retard spring...
-
Page 42: Detaching And Refitting The Paper Feed Roller Unit
All manuals and user guides at all-guides.com 3M9/3NA (2) Detaching and refitting the paper feed roller unit Procedure 1. Remove the cassette. 2. Remove the retard roller unit (see page 1-4-2). Cassette Figure 1-4-5 3. Turn the paper feeder with the bottom side up. - Page 43 All manuals and user guides at all-guides.com 3M9/3NA 4. While pressing the lever A and slide the feed roller pin. Paper feed roller unit 5. Push the lever B and then remove the paper feed roller unit and pickup spring. 6.
-
Page 44: Pwbs
All manuals and user guides at all-guides.com 3M9/3NA 1-4-3 PWBs (1) Detaching and refitting the PF main PWB Procedure 1. Remove the cassette. 2. Turn the paper feeder with the bottom side up. 3. Release two hooks and then top cover. Hook 4. - Page 45 All manuals and user guides at all-guides.com 3M9/3NA 6. Remove the screw. Screw 7. Release four hooks and then remove the PF main PWB. PF main PWB Hook Hook Hook Hook Figure 1-4-10 1-4-7...
-
Page 46: Warm Air Blowing Section (Multi Purpose Feeder Only)
All manuals and user guides at all-guides.com 3M9/3NA 1-4-4 Warm air blowing section (Multi purpose feeder only) (1) Detaching and refitting the PF heater PWB Procedure 1. Remove the cassette. 2. Remove two screws. 3. Insert a flat-blade screwdriver into the cutout and release two hooks. - Page 47 All manuals and user guides at all-guides.com 3M9/3NA 6. Remove seven connectors from PF heater PWB. PF heater PWB Figure 1-4-13 7. Remove the screw. 8. Release two hooks and then remove Screw the PF heater PWB. PF heater PWB Hook Hook Figure 1-4-14...
-
Page 48: Detaching And Refitting The Top Heater Unit
All manuals and user guides at all-guides.com 3M9/3NA (2) Detaching and refitting the top heater unit Procedure 1. Remove the fan cover (see page 1-4-8). 2. Remove six connectors from PF heater PWB. 3. Remove the connector of the PF fan motor 1. -
Page 49: Detaching And Refitting The Side Heater Unit
All manuals and user guides at all-guides.com 3M9/3NA (3) Detaching and refitting the side heater unit Procedure 1. Remove the top heater unit (see page 1-4-10). 2. Release two hooks and then remove the top cover. Hook 3. Remove the actuator and spring. Hook Top cover Spring... - Page 50 All manuals and user guides at all-guides.com 3M9/3NA 5. Turn the paper feeder with the top side Screw 6. Remove four screws. Screw Screw Screw Figure 1-4-19 7. Turn the paper feeder with the bottom side up. 8. Release two hooks of the drive section Hook from the inside of the paper feeder.
- Page 51 All manuals and user guides at all-guides.com 3M9/3NA 9. Turn the paper feeder with the top side up and remove the top frame unit. Top frame unit Figure 1-4-21 10. Remove the side heater unit. Side heater unit Figure 1-4-22 1-4-13...
- Page 52 All manuals and user guides at all-guides.com 3M9/3NA This page is intentionally left blank. 1-4-14...
-
Page 53: Paper Feed Section
All manuals and user guides at all-guides.com 3M9/3NA 2-1-1 Paper feed section 2-1 Mechanical Construction (1) Paper feed section The paper feeder conveys paper from the cassette to the machine. Cassette can hold up to 500 sheets of plain paper (80 g/m ). -
Page 54: Warm Air Blowing Section (Multi Purpose Feeder Only)
All manuals and user guides at all-guides.com 3M9/3NA (2) Warm air blowing section (Multi purpose feeder only) PF fan motor 1 in the top heater unit blows warm air into the cassette to dehumidity the whole paper, and PF fan motor 2 in the side heater unit blows warm air from near the leading edge of the paper to assist separation of paper. -
Page 55: Electrical Parts Layout
All manuals and user guides at all-guides.com 3M9/3NA 2-2-1 Electrical parts layout 2-2 Electrical Parts Layout (1) Paper feeder (Normal) Machine right Machine inside Machine left Figure 2-2-1 1. PF main PWB (PFMPWB) ....Controls electrical components in the paper feeder and serial communications with the machine. - Page 56 All manuals and user guides at all-guides.com 3M9/3NA (2) Multi purpose feeder Machine right Machine inside Machine left Figure 2-2-2 1. PF main PWB (PFMPWB) ....Controls electrical components in the paper feeder and serial communications with the machine. 2. PF paper sensor 1 (PFPS1)....Detects the presence of paper in the cassette. 3.
-
Page 57: Pf Main Pwb
All manuals and user guides at all-guides.com 3M9/3NA 2-3-1 PF main PWB 2-3 Operation of the PWBs YC111 YC10 Figure 2-3-1 PF main PWB silk-screen diagram 2-3-1... - Page 58 All manuals and user guides at all-guides.com 3M9/3NA Connector Signal Voltage Description +3.3V 3.3 V DC 3.3 V DC power source Connected to Ground PF feed sen- 0/3.3 V DC PFFS: On/Off PAPSIZE0 0/3.3 V DC PFCSSW: On/Off Connected to PAPSIZE1 0/3.3 V DC PFCSSW: On/Off...
- Page 59 All manuals and user guides at all-guides.com 3M9/3NA Connector Signal Voltage Description TMDIR 0/3.3 V DC PFPFM control signal Connected to TMLOCK 0/3.3 V DC PFPFM lock signal PF paper TMCLK 0/3.3 V DC (pulse) PFPFM clock signal feed motor #TMDRY 0/3.3 V DC PFPFM: On/Off...
-
Page 60: Pf Heater Pwb
All manuals and user guides at all-guides.com 3M9/3NA 2-3-2 PF heater PWB Figure 2-3-2 PF heater PWB silk-screen diagram 2-3-4... - Page 61 All manuals and user guides at all-guides.com 3M9/3NA Connector Signal Voltage Description LIVE 120 V AC AC power output 220-240 V AC Connected to AC outlet NEUTRAL 120 V AC AC power output 220-240 V AC Connected to AC outlet LIVE 120 V AC AC power output...
- Page 62 All manuals and user guides at all-guides.com 3M9/3NA This page is intentionally left blank. 2-3-6...
-
Page 63: Appendixes 2-4-1
All manuals and user guides at all-guides.com 3M9/3NA 2-4-1 Appendixes 2-4 Appendixes (1) Wiring diagram PFPFM Paper feeder I/F Engine I/F PFCSSW PFFS PFLM PFMPWB PFPS1 PFPS2 PFLS YC114 YC115 YC113 YC111 YC10 YC14 PFRCSW PFPFCL PFPCCL PFFM2 PFFM1 Multi purpose feeder only. LIVE AC inlet NEUTRAL... - Page 64 All manuals and user guides at all-guides.com 3M9/3NA This page is intentionally left blank. 2-4-2...
- Page 65 All manuals and user guides at all-guides.com...
- Page 66 All manuals and user guides at all-guides.com...
Need help?
Do you have a question about the PF-530 and is the answer not in the manual?
Questions and answers