Chapters
Table of Contents

Subscribe to Our Youtube Channel
Related Manuals for Bosch HGV423123N


Summary of Contents for Bosch HGV423123N
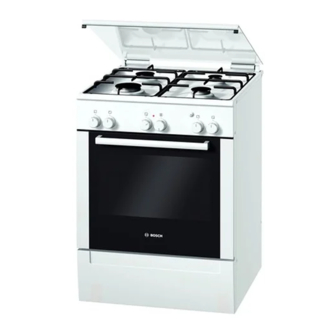
- Page 1 Free standing cooker HGV423123N Fornuis HGV423123N [en] Instruction manual ........3 [nl] Gebruiksaanwijzing ........24...
-
Page 3: Table Of Contents
Setting the oven................ 12 Additional information on products, accessories, replacement Types of heating and temperature ..........12 parts and services can be found at www.bosch-home.com and Care and cleaning ..............13 in the online shop www.bosch-eshop.com Upper glass cover ................13 : Important safety information Read these instructions carefully. - Page 4 Caution:This appliance is for cooking door if there is smoke inside. Switch off purposes only. It must not be used for other the appliance and unplug the mains plug purposes, for example room heating. or switch off the fuse in the fuse box. Shut off the gas supply.
- Page 5 accessories or ovenware from the cooking the fuse box. Shut off the gas supply. compartment. Contact the after-sales service. Risk of burns! Alcoholic vapours may catch fire in the hot Risk of in jury! Unsuitable pan sizes, damaged or ■ ■...
-
Page 6: Causes Of Damage
Before replacing the bulb, unplug the appliance. Unplug the appliance from the appliance from the mains or switch off the mains or switch off the circuit breaker in circuit breaker in the fuse box. the fuse box. Contact the after-sales service. -
Page 7: Faults In The Gas Installation/Smell Of Gas
Faults in the gas installation/smell of gas If you notice a smell of gas or faults in the gas installation, you must immediately shut off the gas supply and/or close the gas ■ cylinder valve immediately extinguish all naked flames and cigarettes ■... -
Page 8: Your New Cooker
Your new cooker Here you will learn about your new cooker. We will explain the You will find information on the cooking compartment and the control panel, the hob and the individual operating controls. accessories. General information Cooking area The design depends on the respective appliance model. Here is an overview of the control panel. -
Page 9: The Oven
Burner knob Temperature selector You can adjust the heat setting of the hotplates using the four Use the temperature selector to set the temperature and the burner knobs. grill setting. The Positions Function/gas oven Positions Function þ ÿ Zero position The oven is switched off. -
Page 10: Your Accessories
Your accessories The accessories supplied with your appliance are suitable for Note: Heat may cause the accessories to deform. As soon as making many meals. Ensure that you always insert the the accessories cool down, they regain their original shape. accessories into the cooking compartment the right way round. -
Page 11: After-Sales Service Products
Optional accessories HEZ number Function Universal pan HEZ332003 For moist cakes, pastries, frozen meals and large roasts. Can also be used under the wire rack to catch fat or meat juices. Place the universal pan in the oven with the sloping edge towards the oven door. -
Page 12: Making Settings On The Hob
Making settings on the hob Your hob is equipped with four gas burners. The following out, the gas supply is automatically interrupted by the safety information explains how to light the gas burners and set the pilot. û size of flame. —... -
Page 13: Care And Cleaning
Changing the settings The type of heating and temperature or grill setting can be changed at any time using their respective selectors. Care and cleaning With attentive care and cleaning, your hob and oven will retain If the cover hinges become loose, note the letters marked on its looks and remain in good working order for a long time. -
Page 14: Detaching And Refitting The Rails
Seal Wipe with a damp cloth. Dry with a soft cloth. Oven interior Clean with hot water or vinegar solution. For heavy soiling: Only use oven cleaner on cold surfaces. Glass cover on the Clean with some washing-up liquid and a damp cloth. Dry with a soft cloth. oven light Accessories Soak in hot soapy water. -
Page 15: Removing And Refitting The Door Panels
Removing and refitting the door panels Risk of injury! The glass panels can be removed from the oven door to allow Whenever the hinges are not locked, they snap shut with great more thorough cleaning. force. Ensure that the locking levers are always fully closed or, when detaching the oven door, fully open. -
Page 16: Troubleshooting
Troubleshooting Replacing the bulb in the oven ceiling light Malfunctions often have simple explanations. Refer to the table before calling the after-sales service as you may be able to If the bulb in the oven light fails, it must be replaced. Heat- remedy the fault yourself. -
Page 17: Energy And Environment Tips
Energy and environment tips Saving energy with the gas hob Here you can find tips on how to save energy when baking and roasting in the oven and when cooking on the hob, and how to Always use a saucepan which is the correct size for your ■... -
Page 18: Baking Tips
Cake in a mould Level Type of Temperature in Cooking time heating °C in minutes Spice cake* Springform cake tin 180-200 50-60 * Allow cakes to cool in the appliance for approx. 20 minutes. Cakes on trays Accessories Level Type of Temperature Cooking time heating... -
Page 19: Meat, Poultry, Fish
The bread or cake (e.g. cheesecake) Use slightly less fluid next time and bake for slightly longer at a lower temperature. For looks good, but is soggy on the inside cakes with a moist topping, bake the base first. Sprinkle it with almonds or bread crumbs (sticky, streaked with water). - Page 20 Meat Weight Accessories and Level Type of Temperature in Cooking time ovenware heating °C, grill setting in minutes Veal Joint of veal 1.0 kg Uncovered 190-210 2.0 kg 170-190 Pork without rind (e.g. neck) 1.0 kg Uncovered 210-230 1.5 kg 200-220 2.0 kg 190-210...
-
Page 21: Tips For Roasting And Grilling
Tips for roasting and grilling The table does not contain information Select the next lowest weight from the instructions and extend the time. for the weight of the joint. How to tell when the roast is ready. Use a meat thermometer (available from specialist shops) or carry out a “spoon test”. Press down on the roast with a spoon. -
Page 22: Special Dishes
Special dishes Place the jars on a wire rack and slide in at level 1. Set the baking temperature to 50 °C and continue as Low temperatures are particularly good for preparing yeast indicated. dough and home-made yoghurt. Remove the accessories from the oven. Proving yeast dough Preparing yoghurt Prepare the yeast dough as usual, place it in a heat-resistant... -
Page 23: Acrylamide In Foodstuffs
Acrylamide in foodstuffs Acrylamide is mainly produced in grain and potato products toast, bread rolls, bread or fine baked goods (biscuits, prepared at high temperatures, such as potato crisps, chips, gingerbread, cookies). Tips for keeping acrylamide to a minimum when preparing food General Keep cooking times to a minimum. -
Page 24: Produktinfo
Toebehoren reinigen ............... 33 Meer informatie over producten, accessoires, onderdelen en Reinigen van de branderkelk en het branderdeksel ....33 diensten vindt u op het internet: www.bosch-home.com en in Kookplaat instellen ..............34 de online-shop: www.bosch-eshop.com Gasbrander ontsteken ..............34 Tabel - koken .................. -
Page 25: Belangrijke Veiligheidsvoorschriften
: Belangrijke veiligheidsvoorschriften Lees deze gebruiksaanwijzing zorgvuldig beperkte fysieke, sensorische of geestelijke door. Alleen dan kunt u uw apparaat goed vermogens of personen die gebrek aan en veilig bedienen. Bewaar de kennis of ervaring hebben, wanneer zij gebruiksaanwijzing voor later gebruik of om onder toezicht staan van een persoon die door te geven aan een volgende eigenaar. - Page 26 Het apparaat wordt erg heet, brandbare oppervlakken nooit aan. Zorg ervoor dat ■ materialen kunnen snel vlam vatten. er geen kinderen in de buurt zijn. Bewaar of gebruik geen brandbare Verbrandingsg evaar! Tijdens het gebruikt worden de ■ voorwerpen ( bijv. spuitbussen, oppervlakken van het apparaat heet.
- Page 27 Neem de aanwijzingen voor het kookgerei Kans op een elektrische schok! in acht Ondeskundige reparaties zijn ■ gevaarlijk.Reparaties mogen uitsluitend Risico van letsel! Opgelet: De glasafdekking kan door de ■ worden uitgevoerd door technici die zijn hitte barsten. Voor het sluiten van de geïnstrueerd door de klantenservice.Is het afdekking moeten alle branders apparaat defect, haal dan de stekker uit...
-
Page 28: Oorzaken Van Schade
Oorzaken van schade Kookplaat verandering van temperatuur kan schade aan het email ontstaan. Attentie! Vochtige levensmiddelen: Geen vochtige levensmiddelen ■ Gebruik de kookzones alleen als er een pan op staat. Verhit ■ langere tijd in de afgesloten binnenruimte bewaren. Het email geen lege pannen. -
Page 29: Apparaat Aan De Gasleiding Of Aan De Deurgreep Verschuiven
Apparaat aan de gasleiding of aan de Bevestiging aan de wand deurgreep verschuiven Om te voorkomen dat het fornuis kantelt, dient u het met de meegeleverde haak aan de wand te bevestigen. Neem het Verschuif het apparaat niet door aan de gasleiding te trekken; montagevoorschrift voor bevestiging aan de wand in acht. -
Page 30: Uw Nieuwe Fornuis
Uw nieuwe fornuis Hier maakt u kennis met uw nieuwe fornuis. Wij leggen u de afzonderlijke bedieningselementen uit. U krijgt informatie over werking van het bedieningspaneel, de kookplaat en de de binnenruimte en de toebehoren. Algemeen Kookplaat De uitvoering hangt van het type apparaat af. Hier krijgt u een overzicht van het bedieningspaneel. -
Page 31: De Oven
Kookzoneschakelaars Temperatuurkeuzeknop Met de vier kookzoneschakelaars kunt u het Met de temperatuurkeuzeknop kunt u de temperatuur en de verwarmingsvermogen van de kookzones instellen. grillstand instellen. Standen Functie/gasfornuis Standen Functie þ ÿ Nulstand Fornuis is uitgeschakeld. Nulstand Oven niet heet. — Instelbereik Grote vlam = hoogste instelling 50-270... -
Page 32: De Toebehoren
De toebehoren De meegeleverde toebehoren zijn geschikt voor vele Aanwijzing: Het toebehoren kan door de hitte vervormen. gerechten. Let erop dat u de toebehoren altijd op de juiste Zodra het toebehoren afgekoeld is, neemt het zijn manier in de binnenruimte plaatst. oorspronkelijke vorm weer aan. -
Page 33: Klantenserviceartikelen
Extra toebehoren HEZ-nummer Functie Geëmailleerde bakplaat met anti-aanplaklaag HEZ331011 Gebak en koekjes kunnen goed op de bakplaat worden ver- deeld. Schuif de bakplaat met de schuine kant naar de oven- deur in de oven. Braadslede HEZ332003 Voor vochtig gebak, koekjes, diepvriesgerechten en grote braadstukken. -
Page 34: Kookplaat Instellen
Kookplaat instellen û — Uw kookplaat is voorzien van vier gasbranders. Hier kunt u Stel de gewenste vlamhoogte in. Tussen de instelling Uit en — ˜ nalezen hoe u de gasbranders aansteekt en de kookplaat de instelling is de vlam niet stabiel. U moet daarom altijd instelt. -
Page 35: Oven Instellen
Oven instellen Hier leert u hoe u de oven moet instellen. Wijzen van verwarmen en temperatuur Voorbeeld op de afbeelding: 190 °C, boven-/onderwarmte Met de functiekiezer de gewenste wijze van verwarmen instellen. Met de temperatuurkeuzeknop kunt u de temperatuur of de grillstand instellen. - Page 36 Roestvrijstalen fron- Reinig deze met een vochtige doek en wat afwasmiddel. Veeg bij roestvrijstalen fronten altijd in de slijprich- ting. Anders kunnen er krassen ontstaan. Droog met een zachte doek af. Kalk, vet, zetmeel en eiwitvlek- ken moeten altijd onmiddellijk worden verwijderd. Gebruik geen schuurmiddelen, schuursponsjes of grove reinigingsdoeken.
-
Page 37: Inschuifrails Verwijderen En Bevestigen
Inschuifrails verwijderen en bevestigen U kunt de rails voor het reinigen verwijderen. De oven dient afgekoeld te zijn. Uithangen van de rekjes Trek het rekje onderaan eruit en trek het iets naar voren. Trek de verlengingspinnen onder in het rekje uit de bevestigingsopeningen (afbeelding A). -
Page 38: Glazen Deurplaten Uit- En Inbouwen
Deur inbrengen Verwijder de afdekking (afbeelding C). De ovendeur in de omgekeerde volgorde weer inbrengen. & Let er bij het inbrengen van de ovendeur op dat beide scharnieren recht in de opening worden geleid (Afbeelding A). De keep op het scharnier dient aan beide kanten in te klikken (Afbeelding B). -
Page 39: Wat Te Doen Bij Storingen
Wat te doen bij storingen? Ovenlamp aan het plafond vervangen Storingen worden vaak veroorzaakt door een kleinigheid. Raadpleeg de volgende tabel voordat u contact opneemt met Als de ovenlamp is uitgevallen, moet deze worden vervangen. de servicedienst. Wellicht kunt u zelf de storing verhelpen. Temperatuurbestendige reservelampen, 40 watt, kunt u krijgen bij de klantenservice of uw speciaalzaak. -
Page 40: Energie En Milieutips
Energie en milieutips Energie besparen met de gas-kookplaat Hier krijgt u tips over de manier waarop u bij het bakken en braden in de oven en bij het koken op de kookplaat energie Kies altijd een pan die de juiste grootte heeft voor uw ■... -
Page 41: Tips Voor Het Bakken
Gebak in vormen Vorm Hoogte Wijze van Temperatuurin- Bereidings- verwarmen stelling in °C duur, minuten Kruidkoek* Springvorm 180-200 50-60 * Gebak ca. 20 minuten in de oven laten afkoelen. Gebak op de plaat Toebehoren Hoogte Verwar- Temperatuur Tijdsduur mingsme- in °C in minuten thode Roer... -
Page 42: Vlees, Gevogelte, Vis
Het brood of het gebak (bijv. kwarktaart) Gebruik de volgende keer wat minder vloeistof en bak iets langer bij een wat lagere tem- ziet er goed uit, maar is van binnen klef peratuur. Bij gebak met een vochtige bovenkant bakt u eerst de bodem voor. Bestrooi (zacht, doortrokken met waterstrepen). - Page 43 Vlees Gewicht Toebehoren en Hoogte Wijze van Temperatuurin Bereidings- vormen verwarmen stelling in °C, duur, minuten grillstand Kalfsvlees Gebraden kalfsvlees 1,0 kg open 190-210 2,0 kg 170-190 Varkensvlees zonder zwoerd (bijv.halsstuk) 1,0 kg open 210-230 1,5 kg 200-220 2,0 kg 190-210 met zwoerd (bijv.schouder) 1,0 kg...
-
Page 44: Tips Voor Het Braden En Grillen
Tips voor het braden en grillen Voor het gewicht van het vlees staan Maak uw keuze in overeenstemming met het eerstvolgende, lagere gewicht en houd een geen gegevens in de tabel. langere tijd aan. Hoe kunt u vaststellen of het vlees klaar Gebruik de vleesthermometer (verkrijgbaar in de speciaalzaak) of doe de “lepeltest". -
Page 45: Bijzondere Gerechten
Bijzondere gerechten In kleine afsluitbare yoghurtglazen doen en met folie afdekken. Gistdeeg en zelfgemaakte yoghurt kunnen op lage De glazen op het rooster zetten en op hoogte 1 inschuiven. temperaturen zeer goed bereid worden. De oventemperatuur op 50 °C instellen en vervolgens Het toebehoren uit de oven verwijderen. -
Page 46: Acrylamide In Levensmiddelen
Acrylamide in levensmiddelen Acrylamide ontstaat vooral bij graan- en aardappelproducten toast, broodjes, brood of fijne bakwaren (koekjes, taaitaai, die met grote hitte worden bereid, zoals aardappelchips, frites, speculaas). Tips voor het klaarmaken van gerechten met weinig acrylamide Algemeen Bereidingstijden zo kort mogelijk houden. ■... - Page 48 Robert Bosch Hausgeräte GmbH Carl-Wery-Straße 34 81739 München Germany www.bosch-home.com *9000713467* 170492 9000713467...
Need help?
Do you have a question about the HGV423123N and is the answer not in the manual?
Questions and answers