Chapters
Table of Contents

Related Manuals for Beko RCNE560E30ZXP


Summary of Contents for Beko RCNE560E30ZXP
- Page 1 Refrigerator User manual Frigider Manual de instrucţiuni Lednice Návod k použití RCNE560E30ZXP - RCNE560E30DZXP - RCNE560I30DXB RCNE560E30DZXB - RCNE560E30ZXB EN / RO / CZ 58 0940 0000/AT...
- Page 2 Please read this manual before using the product! Dear Valued Customer, We wish you to get the best results from your product that has been manufactured meticulously at modern plants and tested with detailed quality control checks. For this reason, we recommend that you read this user manual thoroughly before starting the product. If you hand over the product to someone else, please remember to give the user manual as well.
-
Page 3: Table Of Contents
1 Important Instructions Regarding Safety and Using the product Environment 5.1. Temperature adjustment button ... . 12 1.1. General Safety ......3 5.2. -
Page 4: Important Instructions Regarding Safety And Environment
Important Instructions Regarding Safety and Environment This chapter contains safety information 1.1. General Safety that will help you avoid the risk personal Persons with physical, sensory or injury or property damage. Failure to mental disabilities; persons who follow these instructions shall render any lack experience and information and product warranty void. - Page 5 Safety and environment instructions Do not plug the refrigerator if the wall channels of the evaporator, pipe socket is loose. extensions or surface coatings are Never connect your refrigerator to punctured causes skin irritations and energy saving devices. Such systems eye injuries.
-
Page 6: Hydrocarbon (Hc) Warning
Safety and environment instructions problems may arise if any object is WARNING: placed onto the product. Never throw the product into fire If the product has a door handle, do for disposal. not pull the handle when re-locating the product. The handle might be loose. -
Page 7: Intended Use
Safety and environment instructions 1.2. Intended Use 1.4. Compliance with the WEEE Directive This product has been designed for and Disposing the Waste Product: domestic use. It is not suitable for commercial use and it must not be This product conforms to the EU used out of its intended use. -
Page 8: Your Refrigerator
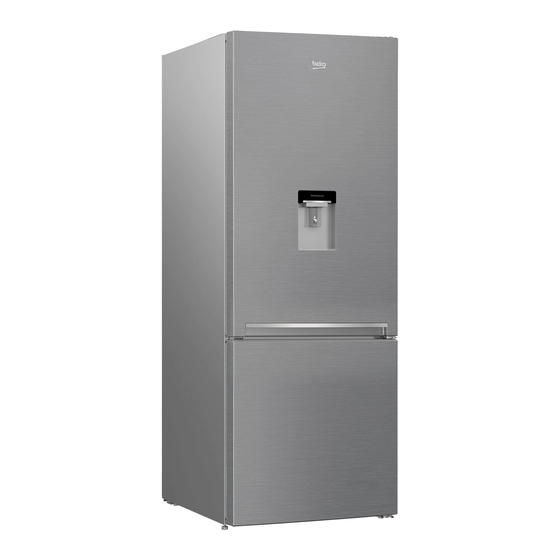
Your Refrigerator Cooler compartment door shelf Vegetable bin Water dispenser filling tank Zero degree compartment Egg section Interior light Water dispenser reservoir Cooler compartment glass shelf Bottle shelf Temperature adjustment button Sliding storage box Cooler compartment Adjustable legs Freezer compartment Deep freezer compartment May not be available in all models Quick freeze compartment... -
Page 9: Installation
Installation 3.1. Right place for installation 3.3. Adjusting the stands Contact the Authorized Service for the product's If the product is not in balanced position, adjust the front installation. To ready the product for installation, see adjustable stands by rotating right or left. the information in the user guide and make sure the electric and water utilities are as required. -
Page 10: Reversing The Doors
Installation 3.5. Reversing the doors Proceed in numerical order . Refrigerator / User Guide 9/35EN... - Page 11 Installation 3.6. Reversing the doors Proceed in numerical order . (13) 45 ° 180° Refrigerator / User Guide 10 /35EN...
-
Page 12: Preparation
Preparation 4.1. What to do for energy saving 4.2. First Use Before using your refrigerator, make sure the necessary Connecting the product to electronic preparations are made in line with the instructions in energy-saving systems is harmful, as it “Safety and environment instructions” and “Installation” may damage the product. -
Page 13: Using The Product
sing the product 5.1. Temperature adjustment button 5.2. Rapid freezing If you want to freeze large amounts of fresh food, switch Internal temperature of your refrigerator varies the temperature adjustment button to depending on the following reasons: ) position before putting the food into the quick Seasonal temperatures, freezing compartment. -
Page 14: Vacation Function
Using the product 5.3. Vacation function If doors of the product is not ( ) opened for at least 12 hours after adjusting the temperature setting button to the highest, vacation function is automatically activated. Button setting must be changed to cancel the function. -
Page 15: Thermostat Setting Button
Using the product 5.5. Thermostat setting button 5.4. Thermostat setting button The operating temperature is regu- The interior temperature of your refrigerator changes lated by the temperature control. for the following reasons; Seasonal temperatures, Frequent opening of the door and leaving the door open for long periods, Food put into the refrigerator without cooling down to the room temperature,... -
Page 16: Indicator Panel
Using the product 5.7. Indicator panel Key For Changing the Cooling Value: It is used Compartment Selection Key: It is used to select to adjust the cooling value of the fridge and fridge and freezer compartments. freezer compartments. If you press this key Cooling Indicator: It shows the cooling value while the freezer compartment indicator (2) of the selected compartment. - Page 17 Using the product 5.8. Indicator panel Indicator panels may vary according to the product model. Audio – visual functions on the indicator panel helps you in using your product. Fridge Compartment Indicator Error status indicator Temperature indicator Vacation function button Temperature setting button Compartment selection button Freezer compartment indicator...
- Page 18 Using the product Fridge compartment light is illuminated while the fridge compartment temperature is set. 2. Error status indicator If your refrigerator does not perform enough cooling or in case of a sensor fault, this indicator is activated. When this indicator is activated, “E” is displayed on the freezer compartment temperature indicator, and numbers such as “1,2,3...”...
-
Page 19: Indicator Panel
Using the product 5.9. Indicator panel This touch-control indicator panel allows you to set the temperature without opening the door of your refrigerator. Just touch the relevant button with your finger to set the temperature. 7.2 7.1 Economic use High temperature / fault alert Energy saving function (display off) Rapid cooling Vacation function... - Page 20 Using the product vacation function button again to cancel 1. Economic use Push the This sign will light up when the freezer compartment this function is set to -18°C', the most economical setting. ( 6. Cooler compartment temperature setting ) Economic use indicator will turn off when rapid After pressing the button, the cooler compartment cooling or rapid freezing function is selected.
- Page 21 Using the product 11. Rapid freezing For rapid freezing, press the button; this will activate the rapid freezing indicator ( When the rapid freezing function is turned on, the rapid freeze indicator will light up and the freezer compartment temperature indicator will display the value -27.
-
Page 22: Indicator Panel
Using the product 5.10. Indicator panel Indicator panel allows you to set the temperature and control the other functions related to the product without opening the door of the product. Just press the inscriptions on relevant buttons for function settings. Energy saving function is activated during delivery 1. - Page 23 Using the product 8. Eco fuzzy If you press the quick cooling button Press and hold eco fuzzy button for 1 seconds to repeatedly with short intervals, the activate eco fuzzy function. Refrigerator will start electronic circuit protection will be operating in the most economic mode at least 6 activated and the compressor will not hours later and the economic usage indicator will...
-
Page 24: Ice Bucket
Using the product 5.12. Eggholder You can put the eggholder on the door or body rack of This function is not recalled when your choice. If you decide to put it on the body rack, it is power restores after a power failure. recommended to prefer the shelves below as they are colder. -
Page 25: Using The Second Crisper Of The Product
Using the product 5.16. Using the second Figure 3. crisper of the product; With the door is open 90°, pull the second crisper up to the first stopper as shown in Figure 3. In the case that the drawer is more open, first of all, open the door by at least 135°... -
Page 26: Moving Door Rack
Using the product 5.17. Moving door rack *optional Moving door rack can be fixed in 3 different positions. In order to move the rack, push the buttons on the side evenly. Rack will be movable. Move the rack up or down. When the rack is in the position that you want, release the buttons. -
Page 27: Moisture Controlled Vegetable Bin
Using the product 5.20. Moisture controlled vegetable bin 5.21. Automatic ice machine *optional *optional With moisture control feature, moisture rates of Automatic ice machine enables you to easily make vegetables and fruits are kept under control and ice in your refrigerator. In order to obtain ice from ensures a longer freshness period for foods. -
Page 28: Icematic And Ice Storage Container
Using the product 5.23. Using the water dispenser 5.22. Icematic and ice storage container *optional *optional Using the Icematic It is normal for the first few glasses of Fill the Icematic with water and place it into its seat. water taken from the dispenser to be Your ice will be ready approximately in two hours. -
Page 29: Filling The Water Dispenser's Tank
Using the product 5.25. Cleaning the water tank 5.24. Filling the water dispenser's tank 1. Remove the water filling reservoir inside the door Water tank filling reservoir is located inside the door rack. rack. 2. Remove the door rack by holding from both sides. 1. -
Page 30: Drip Tray
Using the product 5.27. HerbBox/HerbFresh Remove the film container from HerbBox/ HerbFresh+ Take the film out of the bag and put it into the film container as shown in the image. Seal the container again and replace it into HerbBox/ HerbFresh+ unit. -
Page 31: Freezing Fresh Food
Using the product 5.28. Freezing fresh food Frozen food items must be used immediately after defrosting and should not be frozen again. To preserve food quality, the food items placed Do not free large quantities of food at once. in the freezer compartment must be frozen as quickly as possible, use the rapid freezing for 5.29. -
Page 32: Deep Freezer Details
Using the product 5.30. Deep freezer details Door open alert is indicated to the user both audibly and visually. Interior lighting will turn of if the As per the IEC 62552 standards, the freezer must warning continues for 10 min. have the capacity to freeze 4,5 kg of food items at -18°C or lower temperatures in 24 hours for each 5.33. -
Page 33: Care And Cleaning
Care and Cleaning 6.1. Avoiding Bad Odours Service life of the product will extend and frequently encountered problems will decrease if the product is Materials that may cause odour are not used in the cleaned periodically. production of our refrigerators. However, odour may be emitted if foods are stored improperly or if the inner surface of the product is not cleaned as required. -
Page 34: Cleaning Products With Glass Doors
Care and Cleaning 6.5. Cleaning Products with Glass Doors Remove the protection foil on the glass. There is a coating on the surface of the glass. This coating minimises stain formation and ensures that stains and dirt are cleaned easily. Glasses that are not protected by a coating might be exposed to permanent bonding of organic or inorganic, air or waterborne pollutants such as limescale, mineral salts,... - Page 35 Troubleshooting Please review this list before calling the service. This will The operation noise increases when the save you time and money. This list contains frequently refrigerator is running. encountered problems that are not results of faulty Operating performance of the refrigerator may workmanship or material use.
- Page 36 Troubleshooting Food kept in the fridge compartment drawers is Air might be humid. This is quite normal in humid frozen. weathers. >>>Condensation will disappear when the humidity level decreases. The fridge compartment temperature may be There might be external condensation at the set to a very high value.
- Page 37 Stimate client, Dorim să obţineţi performanţe optime prin utilizarea produsului nostru, care a fost fabricat în unităţi moderne și verificat conform celor mai riguroase proceduri de control al calităţii. În acest scop, înainte de a utiliza produsul, vă rugăm să citiţi manualul de utilizare în întregime și să-l păstraţi pentru a-l consulta pe viitor.
- Page 38 1 Instrucţiuni privind siguranţa și 5.14. Compartiment de zero grade ..22 mediul 5.15. Folosirea celui de-al doilea compartiment pentru legume al produsului; ..23 1.1.
-
Page 39: Instrucţiuni Privind Siguranţa Și Mediul
Instrucţiuni privind siguranţa și mediul 1.1. Siguranţa generală Această secțiune descrie instrucţiunile de siguranţă necesare pentru a împiedica Acest produs nu este destinat utilizării riscul de vătămare corporală și pagubele de către persoane având capacităţi materiale. Nerespectarea acestor fizice, senzoriale și mentale reduse, instrucţiuni va anula toate tipurile de fără... - Page 40 Instrucţiuni privind siguranţa și mediul Nu pulverizaţi substanţe inflamabile în apropierea aparatului. Pericol de incendiu și explozie. Nu păstraţi materiale inflamabile și produse cu gaze inflamabile (spray- uri etc.) în frigider. Nu amplasaţi recipiente conținând lichide pe aparat. Pulverizarea apei pe o piesă...
- Page 41 Instrucţiuni privind siguranţa și mediul proaspete. apă încă și trebuie să chemați un – Dacă aparatul frigorific este lăsat instalator, nu uitați : In cazul în care gol pentru perioade de timp lungi, casa dvs. E prevăzută cu un sistem opriți-l, dezghețați-l, curățați-l, de încălzire în pardoseală, țineți cont uscați-l și lăsați ușa deschisă...
-
Page 42: Siguranța Copiilor
Instrucţiuni privind siguranţa și mediul lipsa efectului de lovitură de berbec 1.4. Conformitatea cu Directiva al apei în instalația dvs. DEEE și eliminarea deșeurilor Nu instalați pe racordul de Acest produs este în conformitate cu alimentare cu apă caldă. Luați Directiva UE privind DEEE (2012/19/UE). -
Page 43: Frigider
Frigider 1. Raft ușă compartiment congelator 10. Tavă cuburi de gheaţă și recipient pentru Rezervor de umplere a dozatorului de apă gheaţă Compartimentul pentru ouă 11. Compartiment de legume Rezervorul dozatorului de apă 12. Compartiment de zero grade 5. Raft pentru sticle 13. -
Page 44: Instalarea
Instalarea 3.1. Locul corect pentru montare Pentru montarea produsului, contactaţi service- -5°C. ul autorizat. Pentru pregătirea produsului pentru 3.2. Montarea distanţierelor montare, consultaţi informaţiile din ghidul de din plastic utilizare și asiguraţi-vă că conexiunile electrice și Utilizaţi distanţierele din plastic furnizate împreună de apă... -
Page 45: Ajustarea Picioarelor
Instalarea 3.3. Ajustarea picioarelor Dacă produsul nu se află în poziţie de echilibru, reglaţi picioarele frontale prin rotirea acestora în partea stângă sau dreaptă. 3.4. Conexiunea electrică AVERTISMENT: Nu utilizaţi prelungitoare sau prize multiple în conexiunea electrică. AVERTISMENT: Cablul de alimentare avariat trebuie să... -
Page 46: Inversarea Ușilor
Instalarea 3.5. Inversarea ușilor Respectaţi ordinea numerotată . Frigider / Manual de utilizare 10 /35RO... - Page 47 Instalarea 3.6. Inversarea ușilor Respectaţi ordinea numerotată . (13) 45 ° 180° Frigider / Manual de utilizare 11/35RO...
-
Page 48: Pregătirea
Pregătirea 4.1. Sfaturi pentru Asiguraţi-vă că alimentele nu se află în economisirea energiei contact cu senzorul de temperatură al compartimentului congelatorului descris mai Conectaţi produsul la sistemele de jos. economisire a enegiei electrice este periculoasă și poate cauza avarierea Deoarece aerul fierbinte și umed nu pătrunde produsului. -
Page 49: Utilizarea Produsului
Utilizarea produsului 5.1. Buton de reglare temperatură 5.2. Congelare rapidă Dacă dumneavoastră doriţi să congelaţi cantităţi Temperatura internă a frigiderului variază în funcţie de mari de alimente proaspete, comutaţi butonul de următoarele motive: Temperatura exterioară reglare a temperaturii în poziţia ( ) înainte de Deschiderea frecventă... -
Page 50: Funcţia Vacanţă
Utilizarea produsului Amintiţi-vă să comutaţi butonul de reglare a Atunci când această funcţie este activată, temperaturii la poziţia anterioară. nu este recomandat să menţineţi alimente în compartimentul congelatorului. 5.3. Funcţia Vacanţă Dacă ușile produsului nu sunt ( ) deschise pentru cel puţin 12 ore după reglarea butonului de setare a temperaturii la setarea maximă, funcţia Vacanţă... -
Page 51: Panoul De Afișaj
Utilizarea produsului 5.4. Panoul de afișaj Panourile de afișaj pot diferi în funcţie de modelul produsului dvs. Funcţiile acustice și vizuale ale panoului de afișaj vă vor ajuta la utilizarea frigiderului. 1. Indicator compartiment frigider 2. Indicator stare eroare 3. Indicator de temperatură 4. -
Page 52: Utilizarea Frigiderului
Utilizarea produsului 7. Indicator compartiment frigider 1. Indicator compartiment frigider Becul din compartimentul congelatorului Becul din compartimentul frigiderului se va aprinde când reglaţi temperatura se va aprinde când reglaţi temperatura compartimentului frigiderului. compartimentului frigiderului. 8. Indicator de funcţionare economică 2. Indicator stare eroare Indică... -
Page 53: Buton De Reglare Termostat
Utilizarea produsului Reţineţi că în zona de răcire vor fi temperaturi dezgheţare automată asigură dezgheţarea diferite. automată a stratului de gheaţă la anumite intervale de timp. Nu este necesară răzuirea Zona cea mai rece se află chiar deasupra manuală a gheţii sau ștergerea picăturilor de compartimentului pentru legume. -
Page 54: Panoul De Afișaj
Utilizarea produsului 5.8. Panoul de afișaj Indicator compartiment frigider: Când acest Tastă pentru schimbarea valorii de răcire: indicator este aprins, gradul actual de răcire Este folosită pentru ajustarea temperaturii al compartimentului frigiderului este afișată de răcire a frigiderului și a compartimentelor pe indicatorul de răcire (5). -
Page 55: Panou Indicator
Utilizarea produsului 5.9. Panou indicator Panoul indicator vă permite să setaţi temperatura și să controlaţi celelalte funcţii corespunzătoare produsului fără deschiderea ușii produsului. Doar apăsaţi inscripţiile de pe butoanele relevante pentru setările funcţiilor. și simbolului de economisire a energiei este 1. - Page 56 Utilizarea produsului 3.Funcţia Quick Fridge: indicatorul modului Vacanţă ( ) va fi activat. Butonul are două funcţii. Pentru activarea și Atunci când funcţia Vacanţă este activată, dezactivarea funcţiei de răcire rapidă apăsaţi semnul ”- -” este afișat pe indicatorul de butonul scurt.
- Page 57 Utilizarea produsului Frigiderul va funcţiona în cel mai economic Utilizaţi funcţia de congelare rapidă mod timp de 6 ore, iar indicatorul de utilizare atunci când doriţi să congelaţi rapid alimentele introduse în compartimentul economică va fi aprins în momentul în care frigider.
-
Page 58: Recipientul Pentru Gheaţă
Utilizarea produsului 5.10. Recipientul pentru gheaţă 5.12. Ventilator (Opţional) Ventilatorul a fost proiectat să distribuie și să circule și să distribuie omogen aerul rece în Luaţi recipientul pentru gheaţă din interiorul frigiderului. Durata de funcţionare compartimentul congelator. a ventilatorului poate varia în funcţie de Umpleţi recipientul pentru gheaţă... -
Page 59: Folosirea Celui De-Al Doilea Compartiment Pentru Legume Al Produsului
Utilizarea produsului 5.15. Folosirea celui de-al Figura 3. doilea compartiment pentru Cu ușa deschisa la 90°, trageți cel de-al doilea legume al produsului; compartiment pentru legume până la primul opritor, după cum este prezentat în Figura 3. În cazul în care sertarul este deschis mai mult, la început deschideți ușa la cel puțin 135°. -
Page 60: Raft De Ușă Mobil
Utilizarea produsului 5.16. Raft de ușă mobil 5.18. Modul de dezodorizare (Opţional) (FreshGuard) *opțional Raftul de ușă mobil poate fi fixat în 3 poziţii Modulul de dezodorizare elimină rapid diferite. mirosurile neplăcute din frigider, înainte de Pentru a muta raftul, apăsaţi ușor butoanele a pătrunde în suprafețe. -
Page 61: Controlul Umidităţii În Compartimentul De
Utilizarea produsului 5.19. Controlul umidităţii în 5.20. Aparat automat de gheaţă compartimentul de legume (Opţional) (Opţional) Aparatul automat de gheaţă vă permite să creaţi gheaţă ușor în frigiderul dumneavoastră. Cu caracteristica de control a umidităţii, Pentru a obţine gheaţă din aparatul de gheaţă, coeficientul de umiditate a legumelor și scoateţi rezervorul de apă... -
Page 62: Aparatul Icematic Și Recipientul De Depozitare A
Utilizarea produsului 5.21. Aparatul Icematic și 5.22. Dozatorul de apă recipientul de depozitare a gheţii *opţional *opţional Dozatorul de apă este o funcţie foarte utilă bazată pe ideea de asigurare a accesului la Utilizarea aparatului Icematic apă rece fără a deschide ușa frigiderului. Umpleţi aparatul Icematic cu apă... - Page 63 Utilizarea produsului Umplerea rezervorului dozatorului de apă Recipientul de umplere a rezervorului de apă se află în interiorul raftului de pe ușă. Puteţi deschide capacul recipientului și îl puteţi umple cu apă potabilă. Ulterior, închideţi capacul. Avertisment! Nu umpleţi rezervorul de apă cu niciun alt lichid decât apă, precum sucuri de fructe, lapte, băuturi carbogazoase sau băuturi al- coolice care nu sunt potrivite pentru a fi uti-...
-
Page 64: Curăţarea Rezervorului De Apă
Utilizarea produsului 5.24. Curăţarea rezervorului de apă Demontaţi rezervorul de umplere cu apă din raftul de pe ușă. Demontaţi raftul de pe ușă prinzându-l de ambele părţi. Prindeţi rezervorul de apă din ambele părţi și demontaţi-l la un unghi de 45°C. Curăţaţi rezervorul de apă... -
Page 65: Tava Pentru Apă
Utilizarea produsului HerbBox/HerbFresh 5.25. Tava pentru apă Picăturile de apă care se scurg la utilizarea Îndepărtați containerul filmului din HerbBox/ dozatorului de apă se acumulează în tava HerbFresh+ pentru scurgeri. Scoateți filmul din pungă și puneți-l în Scoateţi sita din plastic conform celor indicate container precum în imagine. -
Page 66: Congelarea Alimentelor Proaspete
Utilizarea produsului 5.26. Congelarea Marcaţi fiecare ambalaj prin înscripţionarea alimentelor proaspete datei pe ambalaj înainte de congelare. Acest lucru vă va permite să determinaţi Pentru menţinerea calităţii alimentelor, prospeţimea fiecărui ambalaj de fiecare alimentele plasate în compartimentul dată când frigiderul este deschis. Menţineţi frigiderului trebuie să... -
Page 67: Detalii Despre Congelator
Utilizarea produsului 5.28. Detalii despre congelator Alimentele delicate Conform standardelor IEC 62552, frigiderul Compartiment (alimente pentru mic dejun, trebuie să aibă capacitatea să congeleze de alimente produse din carne care o cantitate de 4,5 kg de alimente la o proaspete vor fi consumate într-o temperatură... -
Page 68: Întreţinerea Și Curăţarea
Întreţinerea și curăţarea Durata de viaţă a produsului este mărită dacă este Nu ţineţi niciodată alimente care au expirat sau curăţat în mod regulat. sunt alterate în frigider. 6.2. Protejarea suprafeţelor AVERTISMENT: Înainte de curăţare din plastic decuplaţi mai întâi produsul. Curăţaţi cu apă... -
Page 69: Depanare
Depanare Înainte de a apela la service, citiţi această listă. Sistemul de protecţie termică a Puteţi economisi timp și bani. Această listă include compresorului se va activa în cazul probleme frecvente care nu sunt provocate de penelor de curent sau în cazul defecte de material sau de manoperă. - Page 70 Depanare Este posibil ca noul frigider să fie mai Temperatura frigiderului este foarte joasă, iar temperatura congelatorului este adecvată. mare decât cel vechi. Frigiderele mari Aţi selectat o temperatură foarte joasă a funcţionează perioade îndelungate de frigiderului. >>> Selectaţi o temperatură timp.
- Page 71 Depanare Este posibil ca alimentele să împiedice Frigiderul emite zgomote asemănătoare curgerii sau pulverizării lichidelor etc. închiderea ușii. >>> Mutaţi alimentele care împiedică închiderea ușii. Funcţionarea frigiderului se bazează pe Este posibil ca frigiderul să fie înclinat. circulaţia gazelor și lichidelor. >>> Acesta >>>...
- Page 72 Před použitím produktu si pozorně přečtěte tento návod k obsluze. Vážení zákazníci, Chceme Vám poskytnout možnost nejlepšího použití našeho výrobku, který byl vyroben v moderních zařízeních s péčí a důkladnou kontrolou kvality. Také, před použitím výrobku Vám doporučujeme přečíst si celý návod k použití. V případě odprodeje výrobku, nezapomeňte předat návod jeho novému majiteli společně...
- Page 73 Bezpečnostní pokyny a životní 5.16. Posuvná odkládací schránka ..26 prostředí 5.17. Použití druhého prostoru pro zeleninu a ovoce; ......27 Všeobecná...
-
Page 74: Bezpečnostní Pokyny A Životní Prostředí
Bezpečnostní pokyny a životní prostředí Všeobecná bezpečnost Tato část obsahuje bezpečnostní pokyny Tento produkt by neměly používat osoby s nezbytné pro zabránění nebezpečí zranění tělesným, smyslovým a mentálním postižením, a materiálních škod. Nedodržením těchto osoby bez dostatečných znalostí a zkušeností, pokynů... - Page 75 ezpečnostní pokyny a životní prostředí Nepokládejte nádoby obsahující kapaliny na horní část výrobku. Voda stříkající na elektrifikované části může způsobit úraz elektrickým proudem a nebezpečí požáru. Vystavení produktu dešti, sněhu, slunci a větru může způsobit elektrické nebezpečí. Při přemisťování výrobku jej netahejte držením za rukojeť...
-
Page 76: Varování Hc
ezpečnostní pokyny a životní prostředí Vaši Side-by-Side chladničku je Oddělení s jednou, dvěma a třemi třeba připojit k přípojce na vodu. hvězdičkami nejsou vhodná pro Pokud ještě není k dispozici žádný zmrazení čerstvého jídla. vodovodní kohoutek a musíte Je-li chladicí zařízení ponecháno zavolat instalatéra, nezapomeňte: prázdné... -
Page 77: Účel Použití
ezpečnostní pokyny a životní prostředí Neinstalujte na přívodu pro teplou 1.3. Soulad se směrnicí WEEE vodu. Proveďte nezbytná opatření a Odstranění odpadů výrobku proti riziku zamrznutí hadic. Tento výrobek splňuje Provozní interval teplota vody požadavky směrnice WEEE EU musí být mezi minimálně 33 ° F (2012/19/EU). -
Page 78: Vaše Lednička
Vaše lednička 1. Police v dveřích chladící části 10. Zásobník na ledové kostky a akumulovaný 2. Plnicí nádrž dávkovače vody 11. Zásobník na zeleninu 3. Část pro vajíčka 4. Zásobník dávkovače vody 12. Oddělení Nulového stupně 13. Vnitřní osvětlení 5. Police pro láhve 14. -
Page 79: Instalace
Instalace 3.1. Správné místo pro instalaci 3.2. Připojení plastových klínů Pro instalaci výrobku se obraťte na autorizovaný Použijte plastové klíny dodané s produktem pro servis. Pro přípravu produktu pro instalaci zajištění dostatečného prostoru pro cirkulaci vyhledejte informace v uživatelské příručce vzduchu mezi výrobkem a stěnou. -
Page 80: Připojení Napájení
Instalace 3.4. Připojení napájení VAROVÁNÍ: Pro napájení nepoužívejte rozšířené nebo sdružené zásuvky. VAROVÁNÍ: Poškozený napájecí kabel musí být vyměněn autorizovaným servisem. Při umístění dvou chladniček v přilehlé pozici, mezi dvěma jednotkami nechejte vzdálenost nejméně 4 cm. Naše společnost nenese zodpovědnost za případné... -
Page 81: Obrácení Dveří
Instalace 3.5. Obrácení dveří Postupujte v číselném pořadí. Chladnička / Uživatelská příručka 10 /39CZ... - Page 82 Instalace 3.6. Obrácení dveří Postupujte v číselném pořadí. (13) 45 ° 180° Chladnička / Uživatelská příručka 11/39CZ...
-
Page 83: Příprava
Příprava 4.1. Co udělat pro úsporu energie Protože horký a vlhký vzduch se nedostane přímo do vašeho výrobku, když nejsou Připojení výrobku k elektronickým dvířka otevřena, spotřebič se optimalizuje systémům pro úsporu energie je škodlivé, ve stávajících podmínkách tak, aby nadějně protože může dojít k poškození... -
Page 84: Tlačítko Pro Nastavení Teploty
Tlačítko pro Nastavení teploty 5.1. Tlačítko pro Nastavení teploty 5.2. Rychlé zmrazování Chcete-li zmrazit velké množství čerstvých Vnitřní teplota chladničky se může měnit z potravin, před uložením potravin do rychlého následujících důvodů: mrazicího boxu přepněte tlačítko pro nastavení • Sezónní teploty, •... -
Page 85: Funkce Dovolená
Tlačítko pro Nastavení teploty 5.4. Tlačítko nastavení termostatu 5.3. Funkce Dovolená Provozní teplota je regulo- Pokud se dveře výrobku ( ) neotevřou po vána ovládáním teploty. dobu nejméně 12 hodin po nastavení tlačítka nastavení teploty na nejvyšší hodnotu, automaticky se aktivuje funkce Dovolená. Pro zrušení... -
Page 86: Odmrazování
Tlačítko pro Nastavení teploty Je-li okolní teplota vyšší než 32°C, otočte tlačítko termostatu do maximální po- lohy. Je-li okolní teplota nižší než 25°C, otočte tlačítko termostatu do minimální polohy. 5.6. Odmrazování Prostor chladničky V prostoru chladničky dochází k plně automatickému odmrazení. Kapky vody a námraza do síly 7 –... -
Page 87: Panel Indikátorů
Tlačítko pro Nastavení teploty 5.7. Panel indikátorů 1. Tlačítko pro změnu hodnoty chlazení: 3. Indikátor prostoru chladničky: Když je Používá se k nastavení hodnoty chlazení rozsvícen tento indikátor, stávající hodnota chladničky a mrazničky. Stisknete-li chlazení v prostoru chladničky se zobrazí toto tlačítko, když... -
Page 88: Indikační Panel
Tlačítko pro Nastavení teploty 5.8. Indikační panel Indikační panely se mohou lišit v závislosti na typu modelu. Při používání vašeho produktu vám pomohou audio - vizuální funkce, nacházející se na indikačním panelu. 1. Indikátor Chladicího prostoru 2. Indikátor poruchového stavu 3. - Page 89 Tlačítko pro Nastavení teploty 1. Indikátor chladicího oddílu 8. Indikátor Ekonomického režimu Při nastavování teploty chladicího prostoru Signalizuje, že chladnička pracuje v bude světlo chladničky svítit. úsporném režimu. Tento displej se aktivuje, pokud je teplota mrazničky nastavena na -18 2. Indikátor poruchového stavu °C.
- Page 90 Tlačítko pro Nastavení teploty 5.9. Indikační panel Indikační panel umožňuje nastavit teplotu a ovládat další funkce produktu bez otevření dvířek produktu. Pro nastavení funkcí stačí stisknout nápisy na příslušných tlačítkách. Když je aktivována funkce úspory energie, 1. Indikátor výpadku proudu / vysoké teploty vypnou se všechny symboly na displeji, / poruchy kromě...
- Page 91 Tlačítko pro Nastavení teploty 6. Zrušení alarmu: Funkci rychlého chlazení použijte, V případě alarmu výpadku proudu / vysoké když chcete rychle ochladit potraviny umístěné v chladničce. Chcete-li teploty, po kontrole potravin umístěných v ochladit velké množství čerstvých mrazící části ( ), pro zrušení upozornění potravin, aktivujte tuto funkci před stiskněte tlačítko zrušení...
- Page 92 Tlačítko pro Nastavení teploty výrobník ledu Icematic není v provozu. Pro Indikátor ekonomického použití se opětovné spuštění výrobníku ledu Icematic vypne, když je zvolena funkce rychlého chlazení nebo rychlého zmrazování. stiskněte a podržte tlačítko zapnuto-vypnuto po dobu 3 sekundy. Pokud je tato funkce zvolena, průtok vody z vodní...
- Page 93 Tlačítko pro Nastavení teploty *7.2 *7.1 1. Ekonomické použití 2. Alarm Vysoká teplota/Závada 3. Funkce úspory energie (vypnutí displeje) 4. Rychlé chlazení 5. Funkce Dovolená 6. Nastavení teploty v prostoru chladničky 7. Úspora energie (vypnutí displeje)/ Vypnutí alarmu 8. Zámek tlačítek 9.
- Page 94 Tlačítko pro Nastavení teploty li zrušena uživatelem. Při chlazení velkého 1. Ekonomické použití množství čerstvých potravin stiskněte tlačítko Tato značka se rozsvítí je-li teplota v prostoru rychlého chlazení ještě než potraviny do mrazničky nastavena na -18°C, nejúspornější chladničky vložíte. nastavení. ( ) Když...
- Page 95 Tlačítko pro Nastavení teploty Tlačítko vypnutí displeje znovu stiskněte po Když se zapne funkce rychlého chlazení, dobu 3 sekund. Značka zámku zhasne a režim rozsvítí se kontrolka rychlého mražení a zámku tlačítek bude deaktivovaný. Abyste na kontrolce teploty v prostoru mrazničky předešli změně...
-
Page 96: Zásobník Na Led
Tlačítko pro Nastavení teploty 5.12. Ventilátor 5.10. Zásobník na led Ventilátor byl navržen tak, aby zajistil cirkulaci (Volitelně) chladného vzduchu uvnitř chladničky ho- • Vyberte ven nádobu na led z mrazáku. mogenní. Provozní doba ventilátoru se může • Naplňte nádobu na led vodou. lišit v závislosti na funkcích vašeho produktu. -
Page 97: Pohyblivý Stojan Ve Dveřích
Tlačítko pro Nastavení teploty 5.15. Pohyblivý stojan ve dveřích 5.16. Posuvná odkládací schránka (Volitelně) (Volitelně) Pohyblivý stojan ve dveřích lze upevnit do Tento doplněk byl navržen pro zvýšení 3 různých poloh. objemu využití dveřních stojanů. Pro přesun stojanu, rovnoměrně stiskněte Díky své... -
Page 98: Použití Druhého Prostoru Pro Zeleninu A Ovoce
Tlačítko pro Nastavení teploty 5.17. Použití druhého prostoru Obrázek 3. pro zeleninu a ovoce; Otevřete dvířka do úhlu 90° a vytáhněte druhý prostor až po první zarážku, jak je znázorněno na obrázku 3. V případě, že je zásuvka více otevřená, nejdřív zkuste otevřít dvířka do úhlu aspoň... -
Page 99: Pohlcovač Pachů
Tlačítko pro Nastavení teploty 5.18. Pohlcovač pachů Chcete-li zachovat optimální výkon, je dobré si nechat zkontrolovat filtr v deodorantu (FreshGuard) autorizovaným poskytovatelem každých 5 let. (Volitelně) Díky větráku zabudovaného v deodorantu je Deodorant rychle zápach ve vaši ledničce hluk, který uslyšíte během provozu, normální. než... -
Page 100: Zásobník Na Zeleninu S Kontrolou Vlhkosti
Tlačítko pro Nastavení teploty 5.19. Zásobník na zeleninu 5.20. Automatický výrobník ledu s kontrolou vlhkosti (Volitelně) (Volitelně) Automat led vám umožní snadno vytvořit led v Pomocí funkce regulace vlhkosti je vlhkost chladničce. Za účelem získání led z výrobníku zeleniny a ovoce pod kontrolou a zajistí se tím ledu, vyberte nádržku na vodu z chladicího delší... -
Page 101: Icematic A Držák Na Skladování Ledu
Tlačítko pro Nastavení teploty 5.21. Icematic a držák 5.22. Použití dávkovače vody na skladování ledu *volitelné *volitelné Je normální, že prvních několik Používání výrobníku ledu Icematic sklenic vody odebraných z Naplňte výrobník ledu Icematic vodou a dávkovače vody bude obvykle umístěte ho na jeho místo. -
Page 102: Plnění Nádrže Dávkovače Na Vodu
Tlačítko pro Nastavení teploty 5.23. Plnění nádrže dávkovače na vodu Plnicí nádrž Vodní nádrže je umístěna uvnitř stojanu dveří. 1. Otevřete kryt nádrže. 2. Naplňte nádrž čerstvou pitnou vodou. 3. Zavřete kryt. Neplňte nádrž na vodu s jinou kapalinou kromě vody, jako jsou například ovocné... -
Page 103: Čištění Nádrže Na Vodu
Tlačítko pro Nastavení teploty 5.24. Čištění nádrže na vodu 1. Vyberte nádrž na vodu uvnitř rámu dveří. 2. Odstraňte rám dveří jejich přidržením z obou stran. 3. Chyťte nádržku na vodu z obou stran a odstranit ji pod úhlem 45 ° C. 4. -
Page 104: Odkapávací Zásobník
Tlačítko pro Nastavení teploty 5.25. Odkapávací zásobník HerbBox/HerbFresh Voda, která při použití dávkovače vody Vyberte filmový zásobník z HerbBox/HerbFresh vykvapkala, se hromadí v odkapávacím zásobníku. Odstraňte film ze sáčku a vložte jej do Odstraňte plastový filtr, jak je znázorněno na filmového zásobníku, jak je znázorněno na obrázku. -
Page 105: Zmrazování Čerstvých Potravin
Tlačítko pro Nastavení teploty 5.26. Zmrazování čerstvých potravin Před zmrazením označte každé balení potravin napsáním data na jejich obal. Pokud chcete zachovat kvalitu potravin, To vám umožní určit čerstvost každého potraviny umístěné v mrazničce musí být balení při každém otevření mrazničky. zmražené... -
Page 106: Podrobnosti O Mrazničce
Tlačítko pro Nastavení teploty 5.28. Podrobnosti o mrazničce 5.30. Upozornění na otevřené dveře Podle norem IEC 62552, mraznička musí mít (Volitelně) schopnost zmrazit 4,5 kg potravin na teplotu Pokud dveře výrobku zůstanou otevřené, -18 °C nebo nižší do 24 hodin na každých po dobu alespoň... -
Page 107: Údržba A Čištění
Údržba a čištění 6.2. Ochrana plastových povrchů Při pravidelném čištění se zvýší životnost výrobku. Okamžitě očistěte s teplou vodou, protože olej VAROVÁNÍ: Před čištěním chladničky nanesený na plastové povrchy může způsobit produkt nejprve odpojte z elektrické sítě. poškození povrchu. 6.3. Dveřní skla K čištění... -
Page 108: Řešení Problémů
Řešení problémů Než se obrátíte na servis, viz následující seznam. V případě náhlého výpadku proudu Může Vám to ušetřit čas i peníze. Tento seznam nebo vytažení napájecího kabelu a obsahuje časté stížnosti, které nejsou spojeny s po jeho opětovném připojení tlak chybným zpracováním nebo poškozením materiálu. - Page 109 ešení problémů Nový výrobek může být větší než Teplota mražení je velmi nízká, ale teplota ten předchozí. Větší výrobky budou chladiče je dostačující. pracovat po delší dobu. Teplota prostoru mrazničky Teplota v místnosti může být je nastavena na velmi nízký vysoká.
- Page 110 ešení problémů Teplota v chladničce nebo v mrazničce je Výrobek vytváří hluk tekoucí, stříkající příliš vysoká. kapaliny apod. Teplota prostoru chladničky je Princip fungování tohoto výrobku nastavena na velmi vysoký stupeň. je založen na toku kapalin a plynu. >>> Nastavení teploty chladící >>>...
- Page 111 ešení problémů Dveře se nezavírají. Balíčky s potravinami mohou blokovat dveře. >>> Přemístěte předměty blokující dveře. Produkt nestojí ve zcela svislé poloze na zemi. >>> Nastavte stojany pro uvedení výrobku do svislé polohy. Podlaha není ve vodováze nebo není odolná. >>> Ujistěte se, že podlaha je vyvážená...
Need help?
Do you have a question about the RCNE560E30ZXP and is the answer not in the manual?
Questions and answers