Table of Contents
Advertisement
Quick Links
Advertisement
Table of Contents

Related Manuals for Sercomm SCD2R0-29


Summary of Contents for Sercomm SCD2R0-29
- Page 1 FCC ID: P27SCD2R0 SCD2R0-29 Wireless FHD Doorbell Camera Setup Guide...
- Page 2 FCC ID: P27SCD2R0 Copyright 2019. All Rights Reserved. Document Version: 1.1...
-
Page 3: Table Of Contents
FCC ID: P27SCD2R0 Table of Contents Chapter 1 Introduction ......................1 Package Contents ......................1 Physical Details ........................2 Chapter 2 Setup ........................5 System Requirements ......................5 Installation ......................... 5 Chapter 3 Hardware Installation ..................8 Overview ..........................8 Power Kit Installation ..................... -
Page 4: Chapter 1 Introduction
FCC ID: P27SCD2R0 Chapter 1 Introduction This section provides information about the Doorbell Camera features, components and capabilities.. Package Contents The following items should be included: If any of these items are damaged or missing, please contact your dealer immediately. 1. -
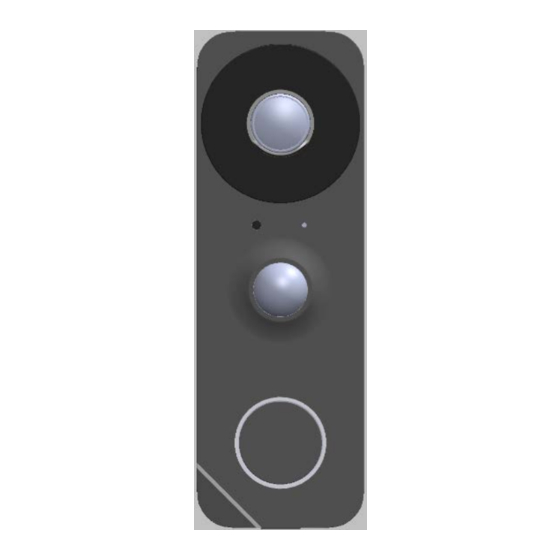
Page 5: Physical Details
The operation temperature of SCD2R0-29 with regular mounting bracket and Battery pack is –4°F to 122°F (–20°C to 50°C). As to SCD2R0-29 with Always on bracket, the operating temperature is –4°F to 104°F. (–20°C to 40°C) on day mode and –4°F to 95°F. (–20°C to 35°C) on night mode. - Page 6 FCC ID: P27SCD2R0 Rear Panel Reset Button When pressed and held over 10 seconds, the LED will be solid amber, which means the settings of camera will be set to their default values. On/Off Switch Use this switch to turn on/off the device. Micro USB Connector This connector is used for charging the power.
- Page 7 FCC ID: P27SCD2R0 LED Activity & Behavior Doorbell Description Activity Color Behavior Factory Reset Amber Solid Press the reset button for 10 seconds to start this process. WPS Pairing Amber Blinking When doorbell button is held down for more (PIN Code than 3 seconds, the LED will start flashing (200ms) Mode)
-
Page 8: Chapter 2 Setup
FCC ID: P27SCD2R0 Chapter 2 Setup This Chapter provides details on how to install and configure the Doorbell Camera. System Requirements • A computer with Internet access • You can use the following web browser while using a computer: • Internet Explorer 10 or later •... - Page 9 FCC ID: P27SCD2R0 b. 1) WPS PBC Mode:Press the Doorbell button for less than 3 second and on your Wireless device (AP or router) as well to establish a wireless connection automatically. The wireless connection is successful when the Green LED blinking. 2) WPS Pin Code Mode:Key in the PIN code of Doorbell’s back label on the Client PIN code of AP, and then held down Doorbell button for more than 3 seconds, the Doorbell Camera will be in the WPS Pin Code mode.
- Page 10 Access the Administration for more Doorbell settings on SCD2R0-29 GUI. 3. Switch to analog or digital chime according to your existing doorbell in the process. (The default chime which SCD2R0-29 support is analog type; the customers are required to develop this feature on the App)
-
Page 11: Chapter 3 Hardware Installation
Note: Ensure the camera is configured and enrolled in AP or router before permanently mounting. Note: If SCD2R0-29 is using for engineering develop purpose, it is available to use Mirco USB cable to charge the battery for replacing the transformer. And doorbell does not require attaching with the chimer. - Page 12 FCC ID: P27SCD2R0 Choose either the Always On bracket or the regular mounting bracket that will cover the hole of the legacy doorbell button. Please check Always On Bracket Installation section for more details 5. Connect the power wires from the existing doorbell to the screw terminals of the bracket. 6.
- Page 13 FCC ID: P27SCD2R0 8. Turn on the breaker circuit. 9. Check that the chime is working normally by pushing the doorbell button. If the AC wires are not connected properly, the LED will blink amber every 5 seconds.
-
Page 14: Power Kit Installation
FCC ID: P27SCD2R0 Power Kit Installation The Power Kit included with the doorbell camera is a small device, which support Doorbell with any kinds of analog and digital chime usage by going between the doorbell transformers and chime wiring. Note: Before removing or attaching wires to your original bell, be sure that the power is turned off at the breaker box. -
Page 15: Always On Bracket Installation (Optional)
FCC ID: P27SCD2R0 Always On Bracket Installation (Optional) The Always On bracket (may not included in the package) can only be installed with mechanical doorbell chimes (AC16V~24V). In this configuration, the doorbell camera will be in always on mode, which brings back the 5 second pre-buffer, connects live view faster, and removes the need for the internal battery to be charged. -
Page 16: Battery Pack Installation (Optional)
FCC ID: P27SCD2R0 Attach the doorbell camera to the mounting bracket. Make sure the doorbell camera is firmly fixed and working properly. Caution: To avoid damaging the rubber seal of the pogo pins, please attach the camera to the mounting bracket flush. Mounting bracket should lay flat against the wall. Over torqueing can warp the bracket and cause it to lose contact with pins. -
Page 17: Appendix A Specifications
Appendix A Specifications Wireless Doorbell Camera Model Wireless 2-Way Doorbell Camera Dimensions 126 mm * 42.7mm * 35.2mm (4.96 x 1.68 x 1.39) (H x W x D) Operating Temperature Mounting Bracket and Battery Pack mode: -20°C to 50°C Always On Bracket mode: ... -
Page 18: Regulatory Approvals
Regulatory Approvals FCC Statement This equipment generates, uses and can radiate radio frequency energy and, if not installed and used in accordance with the instructions, may cause harmful interference to radio communications. However, there is no guarantee that interference will not occur in a particular installation.
Need help?
Do you have a question about the SCD2R0-29 and is the answer not in the manual?
Questions and answers