
Subscribe to Our Youtube Channel
Related Manuals for Sercomm OC835-ADT


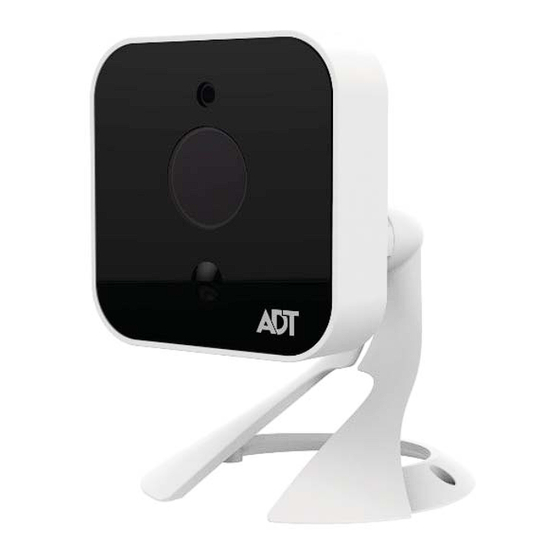
Summary of Contents for Sercomm OC835-ADT
- Page 1 ® ADT Pulse Interactive Solutions OC835-ADT :DWHUSURRI +' ,3 &DPHUD Quick Installation Guide...
-
Page 2: Table Of Contents
If the Camera Continually Goes Offline ............20 CHAPTER 4 WALL MOUNTING ..............21 APPENDIX A SPECIFICATIONS ..............23 OC835-ADT Outdoor Day/Night HD Camera ..........23 Regulatory Approvals ..................24 Property of ADT LLC. Information accurate as of published date and is provided “as is”... -
Page 3: Chapter 1 Introduction
This section provides information about the OC835-ADT Outdoor Day/Night HD Camera's features, components and capabilities. Overview The OC835-ADT is a true outdoor day/night wireless camera with HD resolution, 802.11n Wi-Fi connectivity and Wi-Fi Protected Setup (WPS) support. This ® camera is intended for use with ADT Pulse Features Standalone Design. -
Page 4: Physical Details
The lens cannot be adjusted. Please ensure that the lens cover remains clean. PIR Sensor This is a Passive Infrared sensor to detect motion. Rear DC Power Input Power LED WPS/Reset Button Network/Wireless LED Network Port Figure 2: Rear Panel OC835-ADT Outdoor HD Camera Installation Guide... - Page 5 OFF. Attaching or detaching the Micro USB to RJ-45 Adapter Cable while the camera is powered on does NOT switch the interface between wired and wireless. OC835-ADT Outdoor Day/Night HD Camera Installation Guide...
-
Page 6: Package Contents
Chapter 1 Introduction Package Contents The following items are included in the package. Figure 3: What’s in the Box OC835-ADT Outdoor HD Camera Installation Guide... -
Page 7: Chapter 2 Basic Setup
2. Make the Connection Using a Wired Connection If you are using a wired connection to the OC835-ADT, connect a Micro USB to RJ-45 Adapter Cable (not included) to the USB port of the camera. Then use a standard Ethernet cable (not included) to connect to the Pulse Gateway or Total Security (TS) Base panel. - Page 8 If installing on a tabletop, place the camera as close to the edge as possible. If installing on a wall, angle the camera so that a minimal portion of the wall is visible. OC835-ADT Outdoor HD Camera Installation Guide...
-
Page 9: Chapter 3 Adt Pulse Enrollment
ADT Pulse Enrollment This section provides examples of three different methods for enrolling the OC835-ADT Outdoor HD Camera into the ADT Pulse network. (1) The first method uses a wired connection to enroll the HD Camera to a Gateway via the Pulse Portal. - Page 10 Chapter 3 ADT Pulse Enrollment 5. In the Manage Devices screen, click Cameras. 6. Click the Add button at the bottom of the screen. 7. On the rear of the camera locate the camera’s MAC ID. OC835-ADT Outdoor HD Camera Installation Guide...
- Page 11 12VDC power adapter. 10. After the Power and Network LEDs turn on solid green, click Continue. 11. Wait for the camera to add. It could take a few minutes, especially if an upgrade is required. OC835-ADT Outdoor Day/Night HD Camera Installation Guide...
- Page 12 Click Close. 16. Click Close again to confirm. 17. Disconnect the camera from the Gateway and remove from power. 18. Install the camera in its final location. For Wall Mounting, refer to Chapter 4. OC835-ADT Outdoor HD Camera Installation Guide...
-
Page 13: Wireless Connection To The Gateway Using The Pulse Portal
3. Type your Username and Password, and then click the Sign In button. 4. Click the System tab, and then click the Manage Devices button. 5. In the Manage Devices screen, click Cameras. OC835-ADT Outdoor Day/Night HD Camera Installation Guide... - Page 14 7. Locate the PIN number located on the label on the rear of the camera and enter that number in the WPS PIN field. 8. Ensure that the camera is powered on, and then click the Continue button to initiate the WPS process. OC835-ADT Outdoor HD Camera Installation Guide...
- Page 15 The time remaining is displayed in the upper left portion of the screen. The Network/WPS LED flashes amber as the Gateway attempts to connect to the camera. The wireless connection is successful when the Network/WPS LED turns solid green. OC835-ADT Outdoor Day/Night HD Camera Installation Guide...
- Page 16 Chapter 3 ADT Pulse Enrollment 10. When the Camera Details screen appears, showing that the camera has been enrolled, assign the OC835-ADT a unique name (usually based on the location of the camera) in the Name field, and then click Save.
-
Page 17: Wireless Connection To The Ts Base Using The Installer App
1. Install and configure the camera, as described in the previous chapter. 2. Launch an Internet browser from a computer and log in to the Installer App. 3. Select Pulse Devices. 4. Click Cameras. OC835-ADT Outdoor Day/Night HD Camera Installation Guide... - Page 18 6. Locate the PIN number located on the label on the rear of the camera and enter that number in the WPS PIN field. 7. Ensure that the camera is powered on, and then click the Continue button to initiate the WPS process. OC835-ADT Outdoor HD Camera Installation Guide...
- Page 19 9. When the Camera Details screen appears, showing that the camera has been enrolled, assign the OC835-ADT a unique name (usually based on the location of the camera) in the Name field, and then click Save.
-
Page 20: If The Camera Continually Goes Offline
3. If the previous measure fails, press the camera’s reset button for 15 seconds, and then re-enroll the camera into Pulse. 4. If the previous measure fails, install a Wi-Fi Range Extender model WN3000RPH-2ADPAS. OC835-ADT Outdoor HD Camera Installation Guide... -
Page 21: Chapter 4 Wall Mounting
Chapter 4 Wall Mounting This section provides details for final mounting of the OC835-ADT Outdoor Day/Night HD Camera. You should ensure that the camera is configured and enrolled in ADT Pulse before permanently mounting it. Mounting Suggestion. To get the best video quality for targets at night, make sure that the camera’s field of view does not include a large... - Page 22 10. Verify that the camera is active on the wireless network and is recognized by ADT Pulse. Note: If the camera does not re-connect, use of the ADT Wi-Fi extender, part # WN3000RPH-2ADPAS may be recommended to improve wireless connectivity. OC835-ADT Outdoor HD Camera Installation Guide...
-
Page 23: Appendix A Specifications
Network Interface to RJ-45 Adapter Cable IEEE 802.11n/802.11b/802.11g compatible, WEP Wireless Interface 64/128 bit, WPA/WPA2 personal security support Button 1, WPS/Network LEDs 2, Power and Network/WPS IR LEDs Power Adapter 12VDC/1.5A, 100 to 240VAC OC835-ADT Outdoor HD Camera Installation Guide... -
Page 24: Regulatory Approvals
This s equipmen t generates s, uses and c can radiate radio frequ uency energ gy and, if installed an nd used in a accordance with the in structions, may cause harmful inte erference to o radio comm munication s. However, r, there is no o guarantee e that... - Page 25 FCC Radiation Exposure Statement This equipment complies with FCC RF radiation exposure limits set forth for an uncontrolled environment. This equipment should be installed and operated with a minimum distance of 20 centimeters between the radiator and your body. This transmitter must not be co located or operating in conjunction with any other antenna or transmitter.
- Page 26 IC Radiation Exposure Statement This equipment complies with IC radiation exposure limits set forth for an uncontrolled environment. This equipment should be installed and operated with minimum distance 20cm between the radiator and your body. Déclaration d'exposition aux radiations:Cet équipement est conforme aux limites d'exposition aux rayonnements IC établies pour un environnement non contrôlé.
Need help?
Do you have a question about the OC835-ADT and is the answer not in the manual?
Questions and answers