
Related Manuals for Wi-Tek WI-PMS310GF-Alien


Summary of Contents for Wi-Tek WI-PMS310GF-Alien
- Page 1 Managed, Auto PoE Switch WI-PMS310GF-Alien 8GE + 2 SFP Layer 2 Managed Auto PoE Switch Quick Start Guide V2108 WI-PMS310GF-Alien QSG Page 1 of 16...
-
Page 2: Table Of Contents
DHCP IP Address..................9 Network Time Client Setup..............10 AAA ......................11 6.5.1. TACACS+ ...................... 11 6.5.2. 802.1x (EAP)....................13 SNMP and MIBs..................14 Firmware Update................16 Update using GUI................... 16 Update using TFTP ................16 WI-PMS310GF-Alien QSG Page 2 of 16... -
Page 3: Introduction
Introduction The WI-PMS310GF-Alien is an Auto-PoE, Managed, Layer 2 (L2), POE (24 & 48V) IP Switch, with Gigabit Ethernet (GbE), Small Form-factor Pluggable (SFP), and serial Console interfaces. This document supplements the Wi-TeK Managed Industrial PoE Switch User Manual, available for download from: http://www.wireless-tek.com/Uploads/download/1583371174.pdf... -
Page 4: Leds
48 V PoE applied Orange 24 V PoE applied Link Green 10/100/1000 Mbps connection. Flashes with activity. No Ethernet connection SFP LEDs State Status No link Green Link established at 1000 Mbps (1 Gbps) Flashing Indicates Activity WI-PMS310GF-Alien QSG Page 4 of 16... -
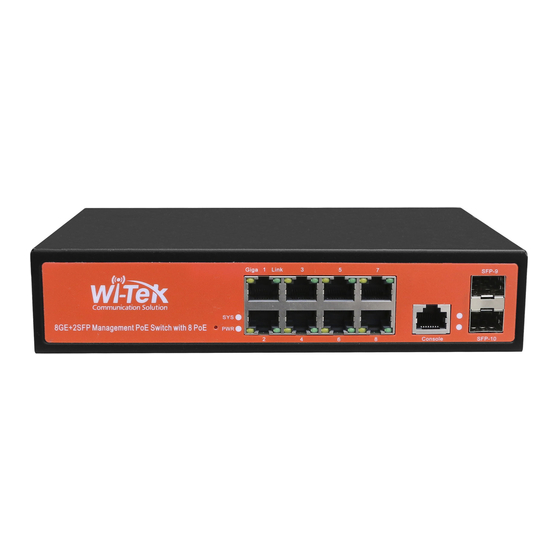
Page 5: Front Panel
To reset the Switch to factory defaults: The Switch should be running after bootup is complete and the SYS LED is blinking. Press and hold the Reset button until the SYS LED starts flashing rapidly. Release the Reset button. WI-PMS310GF-Alien QSG Page 5 of 16... -
Page 6: Configuration
2. Configure the Ethernet adapter on your host system with a static IP address in the 192.168.0.x subnet. e.g. 192.168.0.10 3. Launch your web browser and type http://192.168.0.1 in the address field. Press enter (PC) or return (Mac). WI-PMS310GF-Alien QSG Page 6 of 16... -
Page 7: Command Line Interface
Password:admin Switch>? Exec commands: show Show running system information Switch>show ? Internet Protocol (IP) Switch>show ip ? interface IP interface status and configuration Switch>show ip interface brief Interface IP-Address Status Protocol ge1/1 unassigned down WI-PMS310GF-Alien QSG Page 7 of 16... -
Page 8: Saving Current Configuration
Saving Current Configuration Configuration changes are not permanent, unless saved. To preserve a configuration change to be used on the next boot-up, save the current configuration using the System Configuration / Save Current Configuration menu option. WI-PMS310GF-Alien QSG Page 8 of 16... -
Page 9: Dhcp Ip Address
Set IP Address/DHCP Client 3. The Switch will now query the LAN DHCP server and move to a new IP address. Consult the DHCP server’s list of leases to learn the new IP address of the Switch. WI-PMS310GF-Alien QSG Page 9 of 16... -
Page 10: Network Time Client Setup
1. Select the System Configuration / SNMP Configuration menu selection. 2. Set Enable Status to Enable, Set the Time Zone Enter one or more of the Server IP addresses shown below. Click Apply WI-PMS310GF-Alien QSG Page 10 of 16... -
Page 11: Aaa
Alternatively, these logins can be authenticated against an external TACACS+ server. WARNING: When you enable & apply TACACS+ authentication, management login to the switch will ONLY use TACACS+. Only save the configuration after confirming you can still login. WI-PMS310GF-Alien QSG Page 11 of 16... - Page 12 = admin { member = admins = des tColoimj9QXZc chap = cleartext admin enable = des tColoimj9QXZc 2. Select the AAA Configuration / Tacacs+ Configuration menu option and setup similar to as below and click Apply. WI-PMS310GF-Alien QSG Page 12 of 16...
-
Page 13: 802.1X (Eap)
Configuration menu option and click Save. Otherwise: Resolve the TACACS+ problem. 6.5.2. 802.1x (EAP) The default switch behaviour can be changed such that devices (e.g. PCs) plugged into specified ports have no network connectivity until authorized. WI-PMS310GF-Alien QSG Page 13 of 16... -
Page 14: Snmp And Mibs
In addition, the Switch can send alerts to a TRAP server. Shown below are some example screen captures from a Windows program called PowerSNMP Free Manager available from https://www.dart.com/pages/powersnmp-free-manager Figure 1 - Basic SNMP queries WI-PMS310GF-Alien QSG Page 14 of 16... - Page 15 Figure 2 Interface Table Query Figure 3 Example Received TRAP messages WI-PMS310GF-Alien QSG Page 15 of 16...
-
Page 16: Firmware Update
2. Click Choose file and select the xx.img file downloaded in section 7. 3. Click Upload. 4. Wait until you see: File uploaded successfully, please reset switch. 5. Select the IP Basic Configuration / System Reboot menu selection 6. Click Reboot Update using TFTP See https://ubwh.com.au/documents/WI-TEK_CLI.pdf WI-PMS310GF-Alien QSG Page 16 of 16...
Need help?
Do you have a question about the WI-PMS310GF-Alien and is the answer not in the manual?
Questions and answers