Table of Contents
Advertisement
Available languages
Available languages
Quick Links
Advertisement
Chapters
Table of Contents

Subscribe to Our Youtube Channel
Related Manuals for Honda UMK425T


Summary of Contents for Honda UMK425T
- Page 1 GRASS/WEED TRIMMER UMK425T OWNER'S MANUAL MANUAL DEL PROPIETARIO Read and understand this Owner’s Manual before operating the grass/weed trimmer. Lea y comprenda este Manual del Propietario antes de operar la desmalezadora.
- Page 2 Honda UMK425T OWNER’S MANUAL MANUAL DEL PROPIETARIO...
- Page 4 This manual covers the operation and maintenance of the Honda GRASS/WEED TRIMMER UMK425T. Honda Motor Co., Ltd. reserves the right to make changes at any time without notice and without incurring any obligation. No part of this publication may be reproduced without written permission.
-
Page 5: Table Of Contents
CONTENTS 1. SAFETY INSTRUCTIONS............3 2. SAFETY LABEL LOCATIONS ..........14 3. COMPONENT IDENTIFICATION..........15 4. CONTROLS ................. 17 5. PRE-OPERATION CHECK............20 6. STARTING THE ENGINE............36 7. TRIMMING OPERATION ............40 8. STOPPING THE ENGINE ............44 9. MAINTENANCE ..............45 10.TRANSPORTING.............. -
Page 6: Safety Instructions
To ensure safe operation For your safety and safety of others, pay special attention to these precautions: • Honda grass/weed trimmer is designed to give safe and dependable service if operated according to instructions. Read and understand the Owner’s Manual before operating the grass/weed trimmer. - Page 7 To ensure safe operation Operator Responsibility • Never operate the grass/weed trimmer when tired, ill or under influence of alcohol or other drugs. • Any part from the machine is a potential source of danger if the machine is used in abnormal conditions or if the maintenance is not done correctly.
- Page 8 To ensure safe operation Operator Responsibility • While operating the grass/weed trimmer, always wear following protective clothing and protective devices. – Protective clothing Wear adequate clothes with long sleeves and long pants.The clothes must fit your body and button up or zip up the clothes securely.
- Page 9 To ensure safe operation Operator Responsibility * Safety boots Wear the safety boots with the non-slip sole and toe protector to protect your feet from the flying debris. Do not operate the equipment when barefoot or wearing open sandals. Wear the leg protectors as well. * Dust mask We recommend that you wear the dust mask if you suffer from the allergic rhinitis, e.g.
- Page 10 To ensure safe operation Operator Responsibility • Do not operate the grass/weed trimmer with the grass deflector, labels, and other parts removed. Note that the grass deflector is provided for protection of the operator from the debris that are thrown from the wheeling cutting attachment.
- Page 11 • The grass/weed trimmer is faulty when the engine is idling by returning the throttle but the cutting attachment keeps turning, and idle speed adjustment must be made. Consult your authorized Honda dealer. • Keep all nuts, bolts and screws tight to be sure the grass/weed trimmer is in safe working condition.
- Page 12 • Do not use the grass/weed trimmer with worn or damaged parts. Parts must be replaced, or repaired. Replace worn or damaged parts with Honda genuine parts. Non equivalent quality parts may damage the machine and be prejudicial to your safety.
- Page 13 To ensure safe operation Operator Responsibility • Injury caused by vibration and cold: You may feel the prickling or burning pain in your fingers, and the fingers may lose color and feeling depending on your constitution. It is believed that these symptoms are brought by vibration and/or exposure to cold.
- Page 14 To ensure safe operation Child Safety • Keep children indoors and supervised at all times any outdoor power grass/weed trimmer is being used nearby. Young children move quickly and are attracted especially to the grass/weed trimmer and trimming activity. • Never assume children will remain where you last saw them. Be alert and turn the grass/weed trimmer off if children enter the area.
- Page 15 To ensure safe operation Fire and Burn Hazard Gasoline is extremely flammable, and gasoline vapor can explode. Use extreme care when handling gasoline. Keep gasoline out of reach of children. • Store fuel in containers specifically designed for this purpose. •...
- Page 16 To ensure safe operation Carbon Monoxide Poisoning Hazard Exhaust contains poisonous carbon monoxide, a colorless and odorless gas. Breathing exhaust can cause loss of consciousness and may lead to death. • If you run the engine in an area that is confined or even partially enclosed, the air you breathe could contain a dangerous amount of exhaust gas.
-
Page 17: Safety Label Locations
Their meanings are explained on page 3. These decals are considered as a part of the grass/weed trimmer. Should one become detached or unreadable, contact your Honda dealer for its replacement. READ OWNER'S MANUAL... -
Page 18: Component Identification
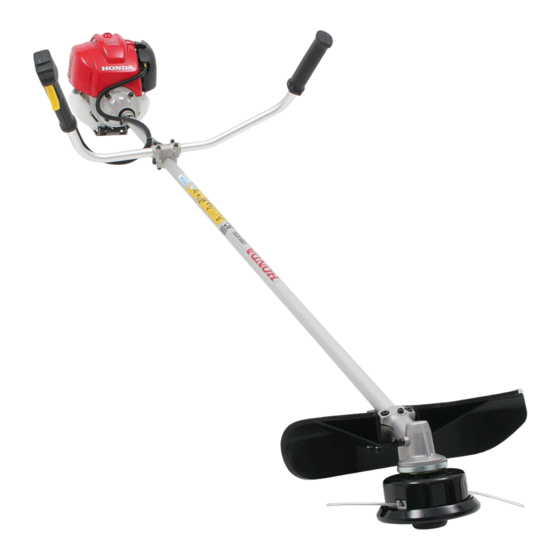
3. COMPONENT IDENTIFICATION THROTTLE TRIGGER ENGINE SWITCH NYLON-LINE CUTTING HEAD GEAR CASE FRAME SERIAL NUMBER THROTTLE TRIGGER INTERLOCK GRASS DEFLECTOR U SHAPED HANDLE... - Page 19 SPARK PLUG CAP (inside the top cover) SPARK PLUG TOP COVER CHOKE LEVER AIR CLEANER PRIMING MUFFLER PUMP FUEL RETURN TUBE ENGINE OIL FILLER CAP STARTER GRIP FUEL TANK CAP ENGINE SERIAL NUMBER FUEL TUBE Record the frame serial number (see page 15), engine serial number, date purchased in the spaces below.
-
Page 20: Controls
4. CONTROLS 1.Engine switch The engine switch enables and disables the ignition system. The engine switch must be in the ON position for the engine to run. Turning the engine switch to the OFF position stops the engine. ENGINE SWITCH 2.Priming pump Pressing the priming pump feeds the gasoline from the fuel tank to the carburetor. - Page 21 3.Choke lever The choke lever opens and closes the choke valve in the carburetor. The CLOSED position enriches the fuel mixture for starting a cold engine. The OPEN position provides the correct fuel mixture for operation after starting, and for restarting a warm engine. CHOKE LEVER CLOSED CLOSED...
- Page 22 5.Throttle trigger The throttle trigger controls engine speed. Pulling and releasing the throttle trigger shown below makes the engine run faster or slower. NOTE: The throttle trigger interlock must be depressed before the throttle trigger can be activated. By pulling the throttle trigger THROTTLE TRIGGER THROTTLE gradually, the engine speed...
-
Page 23: Pre-Operation Check
5. PRE-OPERATION CHECK For safe and efficient trimming, always make a pre-operation inspection before operating: Perform a pre-operation inspection on a firm, level surface with the engine stopped and make sure that the engine switch is in the OFF position. Before each use, look around and underneath the engine for signs of oil or gasoline leaks. - Page 24 Use 4-stroke motor oil that meets or exceeds the requirements for API service classification SE or later (or equivalent). Always check the API service label on the oil container to be sure it includes the letters SE or later (or equivalent). SAE 10W-30 is recommended for general AMBIENT TEMPERATURE use.
- Page 25 2.Check the fuel level Use unleaded gasoline with a Research Octane Number of 91 or higher (a Pump Octane Number of 86 or higher). Never use gasoline that is stale, contaminated, or mixed with oil. Avoid getting dirt or water in the fuel tank. •...
- Page 26 1.Check the fuel level visually from the outside of the fuel tank while keeping the fuel filler neck upright. 2.If the fuel level is low, refuel the fuel tank until the level as specified. Remove the fuel tank cap gradually to release a pressurized air in the fuel tank.
- Page 27 Gasolines containing alcohol If you decide to use a gasoline containing alcohol (gasohol), be sure it’s octane rating is at least as high as that recommended by Honda. There are two types of “gasohol”: one containing ethanol, and the other containing methanol.
- Page 28 3.Check the air cleaner CAUTION: Never run the engine without the air cleaner; rapid engine wear will result. 1.Move the choke lever to the CLOSED (upwards) position. 2.Remove the air cleaner cover by unhooking the upper tab on the top of the air cleaner cover and its two lower tabs.
- Page 29 4.Check the throttle cable free play CHOKE LEVER 1.Move the choke lever to the CLOSED (upwards) position. 2.Remove the air cleaner cover by unhooking the upper tab on the top of the air cleaner cover and its CLEANER COVER two lower tabs. UPPER TAB LOWER TABS 3.Check the throttle cable free play at the tip of the cable by pulling...
- Page 30 5.Adjustment of the shoulder harness Be sure to wear the shoulder harness before using the grass/weed trimmer. Otherwise, injuries might occur due to its instability. 1.Wear the shoulder harness so that the hip pad is on the right side of your body •...
- Page 31 3.Insert the end of the harness in to the hoop. HOOP Insert the end of the harness in to the hoop.
- Page 32 6.Check the shoulder harness 1.Put on the shoulder harness. 2.Set the hook to the hanger. 3.Check that the hook is fastened to the hanger securely. HOOK SHOULDER HARNESS HANGER HIP PAD...
- Page 33 2.Check the cutting head for looseness. Tighten the cutting head securely if it is loose (see page 52). If it is hard to do it yourself, consult your authorized Honda dealer. 3. Check the nylon-line for fluffing. If the nylon-line is damaged, have the nylon-line advance according to the following procedures.
- Page 34 8.Inspect the grass deflector • Never use the grass/weed trimmer without its grass deflector. Stones or other foreign objects thrown outward by the wheeling cutting attachment or contact with the wheeling cutting attachment could cause personal injury or property damage. 1.Stop the engine with the engine switch to the OFF position.
- Page 35 9.Check the gear case • For safety, check the gear case for wear and damage before starting the engine. CAUTION: Wear heavy gloves to protect your hands, when working around the gear case. Inspect the gear case: 1.Stop the engine with the engine switch to the OFF position. 2.Check if there is grass or thread tangled between the grass guard and nylon-line cutting head.
- Page 36 Inspect the grass guard wear: When the (A) part of the grass guard no longer wears down, the grass guard must be replaced. Contact your Honda dealer for replacement. The (A) part of the grass guard prevents contaminated material from entering inside the gear case.
- Page 37 Inspect the drive bolt : Hold the drive bolt, move it left and right, and check if it is loose. If it is loose, the gear case must be replaced. Contact your Honda dealer for replacement. DRIVE BOLT GEAR CASE GRASS GUARD After "Cleaning the gear case", "Inspect the grass guard wear", and...
- Page 38 10.Check all bolts and nuts Check the bolt and nut whether it is loosen before every work. If it was loosen the bolt and nut, please fasten it. 1.Check each bolt and nut for looseness. Tighten them securely if necessary. 2.Check the handle for loose mounting bolts or screws, and tighten them securely if necessary.
-
Page 39: Starting The Engine
6. STARTING THE ENGINE • Exhaust gas contains poisonous carbon monoxide. Never run the engine in an enclosed area. Be sure to provide adequate ventilation. • Start the engine in a place away from the people, pets, and surrounding buildings. Be sure there are no obstacles in the working area. - Page 40 2.To start a cold engine, move the choke lever to the CLOSED position. To restart warm engine, leave the choke lever in the OPEN position. CLOSED CHOKE LEVER CLOSED OPEN OPEN 3.Press the priming pump several times until the priming pump is filled with fuel.
- Page 41 4.Pull the starter grip lightly until you feel resistance while stepping on the carrying frame with your foot and holding the carrying frame with your hand, then pull briskly in the direction of the arrow as shown below. Return the starter grip gently. CAUTION: •...
- Page 42 Carburetor Modification for High Altitude Operation. At high altitude, the standard carburetor air-fuel mixture will be too rich. Performance will decrease, and fuel consumption will increase. A very rich mixture will also foul the spark plugs and cause hard starting. Operation at an altitude that differs from that at which this engine was certified, for extended periods of time, may increase emissions.
-
Page 43: Trimming Operation
Read and understand the safety instructions on pages 3 to 13 before operating the grass/weed trimmer. If you notice any abnormal sound, smell, vibration, or other unusual signs, stop the engine immediately and consult your authorized Honda dealer. Grass/weed trimmer holding position adjustment: Stop the engine and adjust the length of the shoulder harness. - Page 44 Adjustment is necessary if the cutting attachment rises high above your knees. Do not operate the grass/weed trimmer before adjustment, and consult your authorized Honda dealer for adjustment.
- Page 45 The cutting attachment should not rotate with the engine idling. If there is rotation at idle, adjust the idle speed correctly before using the trimmer. For idle adjustment, consult your authorized Honda servicing dealer. SHOULDER HARNESS...
- Page 46 • Operate the grass/weed trimmer not by using your arm force but by using your waist so that the cutting attachment swings in a level arc from right to left. Hold the grass/weed trimmer so that you can shift your weight to the right leg then to the left leg safely and easily, and walk slowly with narrow strides.
-
Page 47: Stopping The Engine
8. STOPPING THE ENGINE 1.Release the throttle trigger. 2.Turn the engine switch to the OFF position. CAUTION: Note that the cutting attachment keeps turning for a while by inertia after the engine is stopped. THROTTLE TRIGGER ENGINE SWITCH NOTE: Be sure that the engine is stopped and the cutting attachment stops turning before placing the grass/weed trimmer on the ground. -
Page 48: Maintenance
OFF position to be certain the engine will not start accidentally. • The grass/weed trimmer should be serviced by an authorized Honda dealer unless the owner has proper tools and service data and feels he is mechanically qualified. - Page 49 (1) Service more frequently when used in dusty areas. (2) These items should be serviced by your servicing dealer, unless you have the proper tools and are mechanically proficient. Refer to the Honda shop manual for service procedures. (3) Log hours of operation to determine proper maintenance intervals.
- Page 50 Tool kit The tools supplied are necessary for performing some periodic maintenance, simple adjustments and repairs. SPARK PLUG WRENCH 8×10mm WRENCH 5 mm HEXAGON WRENCH 4 mm HEXAGON WRENCH TOOL BAG...
- Page 51 1.Engine oil change CAUTION: If the engine has been running, the engine, muffler and the engine oil are very hot and they remain hot for a while after stopping the engine. To protect you from burn, wait until they cool down before starting the oil change.
- Page 52 NOTE: Please dispose of used motor oil in a manner that is compatible with the environment. We suggest you take it in a sealed container to your local service station for reclamation. Do not throw it in the trash or pour it on the ground.
- Page 53 2.Air cleaner service A dirty air cleaner will restrict air flow to the carburetor. To prevent carburetor malfunction, service the air cleaner regularly. Service more frequently when operating the grass/weed trimmer in extremely dusty areas. Never use gasoline or low flash point solvents for cleaning the air cleaner element.
- Page 54 3.Clean in warm soapy water, rinse and allow to dry to thoroughly. Or clean in high flash point solvent and allow to dry. Dip the element in clean engine oil and squeeze out all the excess. The engine will smoke during initial startup if too much oil is left in the foam.
- Page 55 • To avoid severe personal injury, make sure that the engine switch is in the OFF position to prevent accidental starting. • Use a genuine Honda replacement cutting head or its equivalent. CAUTION: Wear heavy gloves to protect your hands when replacing the cutting head.
- Page 56 4.Turn the nylon-line cutting head counterclockwise to assembly it to the gear case. NYLON-LINE CUTTING HEAD GEAR CASE 5.Make sure that the line feeding action of the semi-automatic line feed type cutting head (see page 30). GRASS DEFLECTOR GRASS DEFLECTOR Position 1 Position 2 Position 3...
- Page 57 4.Nylon-line replacement • Never replace the nylon-line with a line of a different material, such as steel wire. • To avoid severe personal injury, make sure that the engine switch is in the OFF position to prevent accidental starting. CAUTION: •...
- Page 58 4.Prepare 3 metres of 2.4 mm diameter nylon-line and fold it in half, lengthwise. 5.Place the middle of the nylon-line in the notch in the reel and coil the nylon-line by turning in the specified direction. NOTCH NYLON-LINE LH DIRECTION 6.Hold the nylon-lines to the line holding notches on one of spool outer flange.
- Page 59 7.Put the spool onto the cover at the position meet the line holding notches with the eyelets on the cover. Set the nylon-lines into the eyelets through the slits on upper side of the eyelets. LINE HOLDING NOTCHES SLIT EYELET EYELET COVER SPOOL...
- Page 60 5.Grass deflector replacement • Install the grass deflector in the proper position securely to protect you from the debris that are thrown from a wheeling cutting attachment. CAUTION: Wear heavy gloves to protect your hands, when working around the cutting attachment. Installation position of grass deflector 1.
- Page 61 6.Spark plug service Recommended spark plug: CMR5H (NGK) To ensure proper engine operation, the spark plug must be properly gapped and free of deposits. If the engine has been running, the muffler will be very hot, be careful not to touch the muffler. CAUTION: Never use a spark plug of incorrect heat range.
- Page 62 4.Measure the plug gap with a feeler gauge. Correct as necessary by carefully bending the side electrode. The gap should be: 0.6 – 0.7 mm SIDE ELECTRODE 0.6–0.7 mm WASHER INSULATOR 5.Check that the spark plug washer is in good condition and thread the spark plug in by hand to prevent cross-threading.
- Page 63 7.Throttle cable check and adjustment Adjust the throttle cable free play properly. Adjustment: 1.Move the choke lever to the CLOSED (upwards) position. CHOKE LEVER 2.Remove the air cleaner cover by unhooking the upper tab on the top of the air cleaner cover and its two lower tabs.
- Page 64 (i.e. throttle lever does not move while operating the throttle trigger). After adjustment, check the throttle trigger for smooth operation. Consult your authorized Honda dealer if necessary. THROTTLE TRIGGER 7.Reinstall the air cleaner cover by inserting the lower tabs, then insert the upper tab.
- Page 65 8.Engine cooling fin inspection Inspect the cooling fin visually through the cover. If there are dry grass, leaves and mud clogged, consult your authorized Honda dealer for cleaning it. COOLING FINS (Inside the top cover)
- Page 66 9.Fuel filter and fuel tank cleaning Note that the clogged fuel filter can cause poor engine performance. Water and dust, dirt or contaminated material in the fuel tank cause a poor engine performance. Gasoline is extremely flammable and is explosive under certain conditions.
- Page 67 3.Pull out the fuel filter with the mechanic’s wire from the fuel filler neck gently. MECHANIC’S WIRE FUEL FILTER 4.Check the fuel filter of its dirt. If the fuel filter is dirty, wash it gently with nonflammable or high flash point solvent. If the fuel filter is excessively dirty, replace it.
- Page 68 Check fuel tubes for cracks and any other deterioration and confirm that there is no leakage of fuel on the fuel tubes. If you notice any abnormal symptoms on the fuel tubes, contact an authorized Honda dealer. FUEL TUBES 11.Grease of gear case 1.Remove the hex bolt of gear case.
-
Page 69: Transporting
10. TRANSPORTING CAUTION: To avoid severe burns or fire hazards, let the engine cool before transporting the grass/weed trimmer. Always turn the engine switch to the OFF position. Make sure the fuel cap is securely tightened. Carrying the grass/weed trimmer by hand: Attach it to the shoulder harness or hold the main pipe ... -
Page 70: Storage
11. STORAGE Proper storage preparation is essential for keeping your grass/weed trimmer trouble free and looking good. The following steps will help to keep rust and corrosion from impairing your grass/weed trimmer. CAUTION: • If the grass/weed trimmer has been running, the engine will be very hot;... - Page 71 c. Press the priming pump several times until all fuel has returned to the fuel tank. FUEL RETURN TUBE PRIMING PUMP FUEL TANK CAP d. Tip the engine toward the fuel filler neck again to drain the fuel left in the fuel tank into the container.
-
Page 72: Troubleshooting
Clean, readjust gap and dry the spark plug. Replace it if necessary (see page 58). 5.If the engine still does not start, take the grass/weed trimmer to an authorized Honda dealer. When an abnormal vibration occurs during operation, immediately turn off the engine and check the cutting attachment is properly installed and tightened securely, and inspect it for wear, crack or any other damage. -
Page 73: Specifications
13. SPECIFICATIONS MODEL UMK425T Power product description code HAJT Frame TYPE UTDT Handle type U handle Clutch type Centrifugal clutch Type Tap-Go Nylon O.D. 450 mm Cutter Number of rotation 5,158 rpm (When engine rotation speed 7,000 rpm) Overall length (With nylon head) - Page 74 Engine MODEL UMK425T Engine model GX25T Engine description code GCALT Engine type 4-stroke, overhead cam, 1 cylinder Displacement 25.0 cm Bore and Stroke 35.0 × 26.0 mm Engine Net power 0.72 kW/7,000 rpm (in accordance with SAE J1349*) Engine max. Net torque 1.0 N∙m/5,000 rpm...
- Page 75 MEMO...
- Page 76 Honda UMK425T MANUAL DEL PROPIETARIO MANUAL DE EXPLICACIONES...
- Page 78 Este manual se refiere al funcionamiento y mantenimiento de la DESBROZADORA Honda UMK425T. Honda Motor Co., Ltd. se reserva el derecho a realizar cambios sin previo aviso y sin incurrir por ello en ninguna obligación. Ninguna parte de este manual puede reproducirse sin permiso por escrito.
- Page 79 ÍNDICE 1. INSTRUCCIONES DE SEGURIDAD ..........3 2. SITUACIÓN DE LAS ETIQUETAS DE SEGURIDAD ....14 3. NOMENCLATURA DE LOS COMPONENTES......15 4. CONTROLES ............... 17 5. COMPROBACIONES PREVIAS ANTES DEL USO....... 20 6. ARRANQUE DEL MOTOR ............36 7. DESBROZADO ..............40 8.
-
Page 80: Instrucciones De Seguridad
Para garantizar una operación segura Para su propia seguridad y la de los demás, preste especial atención a estas precauciones: • La desbrozadora Honda está diseñada para dar un servicio seguro y de confianza si se opera de acuerdo a las instrucciones. - Page 81 ADVERTENCIA Para garantizar una operación segura Responsabilidades del operador • Nunca utilice la desbrozadora si se encuentra cansado, enfermo o ha consumido alcohol u otras drogas. • Cualquier parte de la máquina es una fuente potencial de peligro si se utiliza en condiciones anómalas o si no se realiza un mantenimiento correcto.
- Page 82 ADVERTENCIA Para garantizar una operación segura Responsabilidades del operador • Cuando utilice la desbrozadora, utilice siempre esta ropa protectora y estos equipos protectores. – Ropa protectora Utilice ropa adecuada, con mangas largas y pantalones largos. Las ropas deben quedar bien ajustadas al cuerpo y estar bien abrochadas o con la cremallera hasta arriba.
- Page 83 ADVERTENCIA Para garantizar una operación segura Responsabilidades del operador * Botas de seguridad Utilice botas de seguridad con suela antideslizante y protector en la puntera para protegerse los pies de los residuos que salen despedidos. No utilice sandalias abiertas ni vaya descalzo cuando utilice el equipo. Utilice también protectores para las piernas.
- Page 84 ADVERTENCIA Para garantizar una operación segura Responsabilidades del operador • No utilice la desbrozadora con el deflector de hierba, las etiquetas y otras partes retiradas. Tenga en cuenta que la función del deflector de hierba es proteger al operario de los residuos que salen despedidos desde el accesorio de corte giratorio.
- Page 85 • La desbrozadora está averiada si al soltar el acelerador el motor gira al ralentí pero el accesorio de corte sigue girando, por lo que debe ajustarse la velocidad del ralentí. Consulte a su concesionario Honda autorizado. • Mantenga todas las tuercas, pernos y tornillos apretados para asegurarse de que la desbrozadora está...
- Page 86 • No utilice la desbrozadora si las piezas están gastadas o dañadas. Las piezas deben sustituirse o repararse. Sustituya las piezas gastadas o dañadas con piezas originales de Honda. Las partes de calidad no equivalente pueden dañar la máquina y afectar a su seguridad.
- Page 87 ADVERTENCIA Para garantizar una operación segura Responsabilidades del operador • Lesiones causadas por la vibración y el frío: Según su constitución física, es posible que sienta hormigueo o ardor en los dedos, y estos pueden cambiar de color o perder el tacto. Estos síntomas son debidos a la vibración y/o a la exposición al frío.
- Page 88 ADVERTENCIA Para garantizar una operación segura Seguridad de los niños • Procure que los niños no salgan de casa y vigílelos en todo momento si utiliza la desbrozadora cerca de ellos. Los niños se mueven con rapidez y sienten una especial atracción por la desbrozadora y por el desbrozado.
- Page 89 ADVERTENCIA Para garantizar una operación segura Peligro de incendios y quemaduras La gasolina es muy inflamable, y el vapor de gasolina puede explotar. Tenga mucho cuidado cuando manipule la gasolina. Mantenga la gasolina fuera del alcance de los niños. • Guarde el combustible en recipientes especialmente diseñados para tales aplicaciones.
- Page 90 ADVERTENCIA Para garantizar una operación segura Peligro de envenenamiento por monóxido de carbono Los gases de escape contienen gas de monóxido de carbono venenoso, que es un gas incoloro e inodoro. La aspiración de los gases de escape puede provocar pérdida de conocimiento e incluso la muerte. •...
-
Page 91: Situación De Las Etiquetas De Seguridad
Sus significados se explican en la página 3. Estas etiquetas adhesivas se consideran parte de la desbrozadora. Si alguna de ellas se desprende o resulta ilegible, solicite a su concesionario Honda que la sustituya. LEA EL MANUAL DEL PROPIETARIO... -
Page 92: Nomenclatura De Los Componentes
3. NOMENCLATURA DE LOS COMPONENTES GATILLO DEL ACELERADOR INTERRUPTOR CABEZAL DE CORTE CON HILO DE NAILON DEL MOTOR CAJA DE ENGRANAJES NÚMERO DE SERIE DEL BASTIDOR BLOQUEO DEL GATILLO DEL ACELERADOR DEFLECTOR DE HIERBA EMPU ADURA EN FORMA DE U Ñ... - Page 93 CAPUCHÓN DE LA BUJÍA (en el interior de la tapa superior) BUJÍA TAPA SUPERIOR PALANCA DEL ESTRANGULADOR FILTRO DE AIRE BOMBA DE SILENCIADOR CEBADO TUBO DE RETORNO DE COMBUSTIBLE TAPÓN DE LLENADO DE ACEITE DEL MOTOR EMPU ADURA DEL Ñ Ñ ARRANCADOR TAPA DEL DEPÓSITO DE COMBUSTIBLE...
-
Page 94: Controles
4. CONTROLES 1.Interruptor del motor El interruptor del motor activa y desactiva el sistema de encendido. El interruptor del motor debe estar en la posición ENCENDIDO para que pueda funcionar el motor. Si gira el interruptor del motor a la posición APAGADO, se parará el motor. - Page 95 3.Palanca del estrangulador La palanca del estrangulador abre y cierra la válvula de estrangulamiento del carburador. En la posición CERRADA, se enriquece la mezcla del combustible para arrancar el motor frío. En la posición ABIERTA, se suministra la mezcla correcta de combustible para funcionar después del arranque o para volver a arrancar el motor caliente.
- Page 96 5.Gatillo del acelerador El gatillo del acelerador controla la velocidad del motor. El motor funciona más rápido o más lento en función de si se tira o se suelta el gatillo del acelerador mostrado a continuación. NOTA: Debe pulsar el bloqueo del gatillo del acelerador antes de activar dicho gatillo.
-
Page 97: Comprobaciones Previas Antes Del Uso
5. COMPROBACIONES PREVIAS ANTES DEL USO Para un desbrozado seguro y eficiente, realice siempre una inspección previa antes de empezar la operación: ADVERTENCIA Realice una inspección previa en una superficie firme y nivelada con el motor parado y compruebe que el interruptor del motor se encuentra en la posición APAGADO. - Page 98 Emplee aceite de motores de 4 tiempos que cumpla o supere los requisitos para la clasificación de servicio API de SE o posterior (o equivalente). Compruebe siempre la etiqueta de servicio API del recipiente de aceite para asegurarse de que incluye las letras SE o posterior (o equivalente).
- Page 99 2.Compruebe el nivel de combustible Emplee gasolina sin plomo con un número de octanos de investigación de 91 o más alto (un número de octanos de bomba de 86 o más alto). Nunca utilice gasolina pasada, contaminada ni mezclada con aceite. Evite la entrada de suciedad o agua en el depósito de combustible.
- Page 100 1.Compruebe visualmente el nivel de combustible desde el exterior del depósito de combustible, manteniendo el cuello de llenado del combustible en posición vertical. 2.Si el nivel de combustible es bajo, llene el depósito de combustible hasta el nivel especificado. Retire gradualmente la tapa del depósito de combustible para liberar el aire a presión del depósito.
- Page 101 Gasolinas con alcohol Si decide utilizar gasolina con alcohol (gasohol), asegúrese de que el octanaje sea al menos tan alto como el recomendado por Honda. Existen dos tipos de “gasohol”: uno contiene etanol y el otro contiene metanol. No utilice gasohol con más del 10% de etanol. No emplee gasolina que contenga metanol (alcohol metílico o de madera) que no contenga también...
- Page 102 3.Compruebe el filtro de aire ATENCION: No hacer nunca funcionar el motor sin el filtro de aire, puesto que el motor podría deteriorarse rápidamente. 1.Mueva la palanca del estrangulador a la posición CERRADA (hacia arriba). 2.Retire la cubierta del filtro de aire desenganchando la lengüeta superior situada encima de dicha cubierta y las dos lengüetas inferiores.
- Page 103 4.Compruebe la holgura del cable del acelerador PALANCA DEL ESTRANGULADOR 1.Mueva la palanca del estrangulador a la posición CERRADA (hacia arriba). 2.Retire la cubierta del filtro de aire CUBIERTA DEL FILTRO DE AIRE desenganchando la lengüeta superior situada encima de dicha LENGÜETA cubierta y las dos lengüetas SUPERIOR...
- Page 104 5.Ajuste el arnés de transporte ADVERTENCIA Colóquese siempre el arnés de transporte antes de utilizar la desbrozadora. De lo contrario, pueden producirse lesiones debido a su inestabilidad. 1.Utilice el arnés de transporte de forma que la almohadilla de la cadera quede en el lado derecho de su cuerpo •...
- Page 105 3.Inserte el extremo del arnés en el aro. Inserte el extremo del arnés en el aro.
- Page 106 6.Compruebe el arnés de transporte 1.Colóquese el arnés de transporte. 2.Coloque el gancho en el colgador. 3.Compruebe que el gancho quede sujeto firmemente al colgador. GANCHO ARNÉS DE TRANSPORTE COLGADOR ALMOHADILLA DE LA CADERA...
- Page 107 Apriete firmemente el cabezal de corte si se ha aflojado (consulte la página 52). Si le resulta difícil realizar esta operación, consulte con su concesionario Honda autorizado. 3. Compruebe que el hilo de nailon no se haya ahuecado. Si el hilo de nailon está dañado, hágalo avanzar siguiendo estos procedimientos.
- Page 108 8.Inspeccione el deflector de hierba ADVERTENCIA • Nunca utilice la desbrozadora sin el deflector de hierba. Las piedras u otros objetos extraños pueden salir despedidos al entrar en contacto con el accesorio de corte giratorio, causando lesiones personales o daños materiales. 1.Pare el motor con el interruptor en la posición APAGADO.
- Page 109 9.Compruebe la caja de engranajes ADVERTENCIA • Por razones de seguridad, compruebe que la caja de engranajes no esté desgastada ni dañada antes de arrancar el motor. ATENCION: Utilice unos guantes gruesos para protegerse las manos cuando trabaje alrededor de la caja de engranajes. Inspección de la caja de engranajes: 1.Pare el motor con el interruptor en la posición APAGADO.
- Page 110 Cuando la parte (A) del protector de hierba ya no pueda desgastarse más, deberá sustituir el protector de hierba. Para su reemplazo, póngase en contacto con su concesionario Honda. La parte (A) del protector de hierba evita que entren residuos en el interior de la caja de engranajes.
- Page 111 Sujete el perno de transmisión, muévalo a izquierda y derecha, y compruebe que no esté suelto. Si está suelto, deberá sustituir la caja de engranajes. Para su reemplazo, póngase en contacto con su concesionario Honda. PERNO DE TRANSMISIÓN CAJA DE ENGRANAJES PROTECTOR DE HIERBA Después de la “Limpieza de la caja de engranajes”, la “Inspección del...
- Page 112 10.Compruebe todos los pernos y tuercas Compruebe que los pernos y las tuercas estén firmemente apretados antes de realizar cualquier trabajo. Si están aflojados, apriételos. 1.Compruebe que los pernos y las tuercas no estén sueltos. Si es necesario, apriételos firmemente. 2.Compruebe que los pernos y los tornillos de la empuñadura estén correctamente apretados y, si fuera necesario, apriételos firmemente.
-
Page 113: Arranque Del Motor
6. ARRANQUE DEL MOTOR ADVERTENCIA • El gas de escape contiene monóxido de carbono venenoso. No haga funcionar el motor en un lugar cerrado. Asegúrese de proporcionar una ventilación adecuada. • Arranque el motor en un lugar alejado de personas, animales y edificios circundantes. - Page 114 2.Para arrancar un motor cuando está frío, mueva la palanca del estrangulador hacia la posición CERRADA. Para volver a arrancar el motor cuando está caliente, deje la palanca del estrangulador en la posición ABIERTA. CERRADA PALANCA DEL ESTRANGULADOR CERRADA ABIERTA ABIERTA 3.Presione la bomba de cebado varias veces hasta que esté...
- Page 115 4. Tire de la empuñadura del arrancador ligeramente hasta que note resistencia pisando el bastidor con el pie y sujetándolo con la mano, y luego tire enérgicamente en la dirección de la flecha tal como se muestra a continuación. Suelte la empuñadura del arrancador poco a poco. ATENCION: •...
- Page 116 Modificación del carburador para funcionar a gran altitud. A grandes altitudes, la mezcla normal de aire-combustible del carburador será demasiado rica. Disminuirá el rendimiento y aumentará el consumo de combustible. Si la mezcla es demasiado rica, ensuciará también las bujías y puede dificultar el arranque. La operación a una altitud que varíe de aquélla para la que este motor ha sido certificado, durante periodos de tiempo prolongados, podrá...
-
Page 117: Desbrozado
Si observa algún sonido, olor o vibración anómalos o cualquier otro signo inusual, pare el motor inmediatamente y póngase en contacto con su concesionario Honda autorizado. Ajuste de la posición de sujeción de la desbrozadora: Pare el motor y ajuste la longitud del arnés de transporte. - Page 118 El ajuste es necesario si el accesorio de corte queda por encima de las rodillas. No utilice la desbrozadora antes de realizar el ajuste y póngase en contacto con su concesionario Honda autorizado para obtener más información.
- Page 119 El accesorio de corte no debe girar con el motor al ralentí. Si gira con el motor al ralentí, ajuste correctamente la velocidad de ralentí antes de utilizar la desbrozadora. Para el ajuste del ralentí, póngase en contacto con su concesionario de servicio Honda. ARNÉS DE TRANSPORTE...
- Page 120 • Al utilizar la desbrozadora, no emplee la fuerza del brazo sino la de su cintura, de modo que el accesorio de corte oscile en un arco horizontal de derecha a izquierda. Sujete la desbrozadora de modo que pueda cambiar su peso entre la pierna derecha e izquierda de forma segura y fácil, y camine lentamente con pasos cortos.
-
Page 121: Parada Del Motor
8. PARADA DEL MOTOR 1.Suelte el gatillo del acelerador. 2.Gire el interruptor del motor a la posición APAGADO. ATENCION: Tenga en cuenta que el accesorio de corte sigue girando durante un tiempo por inercia después de parar el motor. GATILLO DEL ACELERADOR APAGADO APAGADO INTERRUPTOR DEL... -
Page 122: Mantenimiento
Las partes de reemplazo que no sean de una calidad equivalente pueden dañar la desbrozadora. El ajuste e inspección periódicos de la Honda UMK425T es esencial si quiere mantenerse un alto nivel de rendimiento. Llevar a cabo un mantenimiento regular también ayudará... - Page 123 (2) El servicio de estas partes deberá realizarlo su concesionario de servicio, a menos que usted disponga de las herramientas adecuadas y posea suficientes conocimientos mecánicos. Para ver los procedimientos de servicio, consulte el manual de taller Honda. (3) Registre las horas de operación para determinar los intervalos correctos de mantenimiento.
- Page 124 Juego de herramientas Las herramientas suministradas son necesarias para realizar algunos mantenimientos periódicos, simples ajustes y reparaciones. LLAVE PARA BUJÍAS LLAVE DE 8×10 mm LLAVE HEXAGONAL DE 5 mm LLAVE HEXAGONAL DE 4 mm BOLSA DE HERRAMIENTAS...
- Page 125 1.Cambio del aceite del motor ATENCION: Si el motor ha estado en marcha, el motor, el silenciador y el aceite del motor estarán muy calientes y seguirán estando calientes un buen rato después de parar el motor. Para evitar quemaduras, espere hasta que se enfríen antes de iniciar el cambio de aceite.
- Page 126 NOTA: Tire el aceite de motor usado de forma que sea compatible con el medio ambiente. Le sugerimos que lo guarde en un recipiente sellado y lo lleve a la estación de servicio para reclamación. No lo tire a la basura ni al suelo.
- Page 127 2.Mantenimiento del filtro de aire Si el filtro de aire está sucio, se restringirá el flujo de aire al carburador. Para evitar fallos en el funcionamiento, efectúe frecuentemente el servicio del filtro de aire. Efectúe el servicio con más frecuencia cuando la desbrozadora funcione en lugares extremadamente polvorientos.
- Page 128 3.Lavar con agua y jabón, aclarar y dejar que se seque por completo. O, limpiarlo con disolvente de alto punto de inflamación y dejar que se seque. Sumerja el elemento en aceite de motor limpio y escúrralo para eliminar el exceso de aceite. El motor producirá...
- Page 129 • Para evitar lesiones personales graves, compruebe que el interruptor del motor se encuentre en la posición APAGADO para evitar el arranque accidental. • Utilice un cabezal de corte de recambio original de Honda o un equivalente. ATENCION: Utilice unos guantes gruesos para protegerse las manos cuando sustituya el cabezal de corte.
- Page 130 4.Gire el cabezal de corte con hilo de nailon hacia la izquierda para montarlo en la caja de engranajes. CABEZAL DE CORTE CON HILO DE NAILON CAJA DE ENGRANAJES 5.Compruebe la acción de avance del hilo del cabezal de corte de tipo semiautomático (consulte la página 30).
- Page 131 4.Sustitución del hilo de nailon ADVERTENCIA • Nunca sustituya el hilo de nailon por un hilo de un material diferente, como por ejemplo alambre de acero. • Para evitar lesiones personales graves, compruebe que el interruptor del motor se encuentre en la posición APAGADO para evitar el arranque accidental.
- Page 132 4.Prepare 3 metros de hilo de nailon con un diámetro de 2,4 mm y dóblelo por la mitad en sentido longitudinal. 5.Coloque el centro del hilo de nailon en la muesca del carrete y enrolle el hilo girándolo en la dirección especificada. MUESCA HILO DE NAILON DIRECCIÓN LH...
- Page 133 7.Coloque el carrete en la cubierta en la posición donde coinciden las muescas de sujeción del hilo con los ojetes de la cubierta. Coloque los hilos de nailon en los ojetes a través de las ranuras del lado superior de los ojetes. MUESCAS DE SUJECIÓN DEL HILO RANURA OJETE...
- Page 134 5.Sustitución del deflector de hierba ADVERTENCIA • Instale firmemente el deflector de hierba en la posición correcta para protegerse de los residuos que salen despedidos desde el accesorio de corte giratorio. ATENCION: Utilice unos guantes gruesos para protegerse las manos cuando trabaje alrededor del accesorio de corte.
- Page 135 6.Mantenimiento de la bujía Bujía recomendada: CMR5H (NGK) Para asegurar la operación correcta del motor, las bujías deben tener el huelgo apropiado y estar exentas de acumulaciones. ADVERTENCIA Si el motor ha estado en marcha, el silenciador estará muy caliente, tenga cuidado de no tocar el silenciador.
- Page 136 4.Mida la separación entre los electrodos con una galga de espesores. Corrija si es necesario doblando el electrodo lateral. El huelgo deberá ser: 0,6 – 0,7 mm ELECTRODO LATERAL 0,6–0,7 mm ARANDELA AISLANTE 5.Compruebe que la arandela de la bujía esté en buen estado y enrosque la bujía con la mano para evitar forzar la rosca.
- Page 137 7.Comprobación y ajuste del cable del acelerador Ajuste correctamente la holgura del cable del acelerador. Ajuste: 1.Mueva la palanca del estrangulador a la posición PALANCA DEL ESTRANGULADOR CERRADA (hacia arriba). 2.Retire la cubierta del filtro de aire desenganchando la lengüeta superior situada encima de dicha cubierta y las CUBIERTA DEL FILTRO DE AIRE...
- Page 138 Después del ajuste, compruebe que el gatillo del acelerador presenta un funcionamiento suave. Si es necesario, consulte a su concesionario Honda autorizado. GATILLO DEL ACELERADOR 7.Vuelva a instalar la cubierta del filtro de aire insertando las lengüetas inferiores y luego inserte la lengüeta superior.
- Page 139 8.Revisión de la aleta de refrigeración del motor Compruebe visualmente la aleta de refrigeración a través de la tapa. Si hay hierba seca, hojas y barro obstruido, consulte a su concesionario Honda autorizado para limpiarla. ALETAS DE REFRIGERACIÓN (En el interior de la tapa superior)
- Page 140 9.Limpieza del filtro de combustible y del depósito de combustible Tenga en cuenta que un filtro de combustible obstruido puede provocar un mal funcionamiento del motor. El agua y el polvo, la suciedad o materiales contaminados en el depósito de combustible provocan un mal funcionamiento del motor. ADVERTENCIA La gasolina es muy inflamable y explosiva bajo ciertas condiciones.
- Page 141 3.Extraiga el filtro de combustible tirando suavemente del alambre que se encuentra en el cuello de llenado de combustible. CABLE DEL MECÁNICO FILTRO DE COMBUSTIBLE 4.Compruebe la suciedad del filtro de combustible. Si el filtro de combustible está sucio, lávelo suavemente con disolvente no inflamable o con un alto punto de inflamabilidad.
- Page 142 Si observa algún síntoma anormal en los tubos de combustible, póngase en contacto con un concesionario Honda autorizado. TUBOS DE COMBUSTIBLE 11.Grasa de la caja de engranajes 1.Retire el perno hexagonal de la caja de engranajes.
-
Page 143: Transporte
10. TRANSPORTE ATENCION: Para evitar quemaduras o incendios graves, deje enfriar el motor antes de transportar la desbrozadora. Gire siempre el interruptor del motor a la posición APAGADO. Asegúrese de que la tapa del combustible esté firmemente apretada. Transportar la desbrozadora con la mano: Colóquela en el arnés de transporte o sujete el tubo principal para transportarla con el equilibrio adecuado. -
Page 144: Almacenaje
11. ALMACENAJE Los preparativos adecuados para el almacenaje son esenciales para mantener la desbrozadora exenta de problemas y con buena apariencia exterior. Los siguientes pasos le ayudarán a evitar que la oxidación y la corrosión afecten a su desbrozadora. ATENCION: •... - Page 145 c. Pulse la bomba de cebado varias veces hasta que todo el combustible haya vuelto al depósito. TUBO DE RETORNO DE COMBUSTIBLE BOMBA DE CEBADO TAPA DEL DEPÓSITO DE COMBUSTIBLE d. Vuelva a inclinar el motor hacia el cuello de llenado de combustible para drenar el combustible que queda en el depósito de combustible en el recipiente.
-
Page 146: Resolución De Problemas
Cámbiela si es necesario (consulte la página 58). 5.Si el motor sigue sin arrancar, lleve la desbrozadora a un concesionario Honda autorizado. Si se produce una vibración inusual durante el funcionamiento, apague inmediatamente el motor y compruebe que el accesorio de corte esté... -
Page 147: Especificaciones
13. ESPECIFICACIONES MODELO UMK425T Código de descripción del producto HAJT motorizado Bastidor TIPO UTDT Tipo de empuñadura Empuñadura en forma de U Tipo de embrague Embrague centrífugo Tipo Nailon Tap-Go Diám. ext. 450 mm Número de rotación 5.158 rpm Cortador (Con una velocidad de rotación del motor de... - Page 148 Motor MODELO UMK425T Modelo de motor GX25T Código de descripción del motor GCALT Tipo de motor 4 tiempos, leva en culata, monocilíndrico Cilindrada 25,0 cm Diámetro y carrera 35,0 × 26,0 mm Potencia neta del motor 0,72 kW/7.000 rpm (de acuerdo con SAE J1349*) Par neto máximo del motor...
- Page 149 NOTA...
- Page 150 UMK425T Honda Motor Co., Ltd. 2020 4MVR2700 00X4M-VR2-7001 Printed in Thailand...
Need help?
Do you have a question about the UMK425T and is the answer not in the manual?
Questions and answers