Table of Contents
Advertisement
Available languages
Available languages
Quick Links
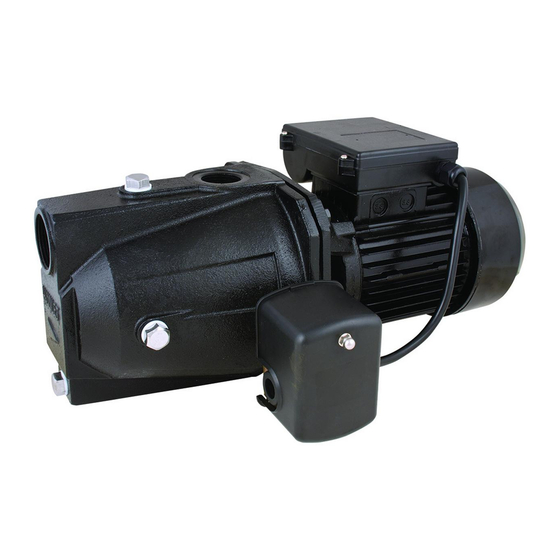
SHALLOW WELL JET PUMP
MODEL SJ05S 1/2 HP, SJ07S 3/4 HP, SJ10S 1 HP
STOP
ATTACH YOUR RECEIPT HERE
Serial Number
Español p. 19
Questions, problems, missing parts? Before
returning to your retailer, call our customer service
department at 1-800-742-5044, 7:30 a.m. - 5 p.m.,
EST, Monday - Friday.
Purchase Date
Copyright © 2019 Star Water Systems. All rights reserved.
starwatersystems.com
1
FW1626 D
Advertisement
Chapters
Table of Contents

Related Manuals for STAR Water Systems SJ07S


Summary of Contents for STAR Water Systems SJ07S
- Page 1 SHALLOW WELL JET PUMP MODEL SJ05S 1/2 HP, SJ07S 3/4 HP, SJ10S 1 HP starwatersystems.com Questions, problems, missing parts? Before returning to your retailer, call our customer service STOP department at 1-800-742-5044, 7:30 a.m. - 5 p.m., EST, Monday - Friday.
-
Page 2: Table Of Contents
115/230 7.8/3.6 SJ07S 115/230 60 11.0/5.6 12.2 SJ10S 115/230 60 11.0/5.6 17.0 13.0 SAFETY INFORMATION Please read and understand this entire manual before attempting to assemble, operate or install the product. Copyright © 2019 Star Water Systems. All rights reserved. - Page 3 Install pressure relief valve in discharge pipe. Release all pressure on system before working on any component. EXPLOSION ALERT Do not use to pump flammable or explosive fluids such as gasoline, fuel oil, kerosene, etc. Do not use in flammable and/or explosive atmospheres. Copyright © 2019 Star Water Systems. All rights reserved.
-
Page 4: Package Contents
(optional), electrical wire, electrical wire strain relief, 1 in. x 1 in. x 1 in. tee, 3/4 in. x 3/4 in. slip coupling, 1 in. x 1 in. slip adapter, 1 in. x 3/4 in. slip adapter Copyright © 2019 Star Water Systems. All rights reserved. -
Page 5: General Pump Information
Horizontal Distance - The horizontal distance is the horizontal measurement between pump suction and the water source. This distance may affect the ability of pump to operate. If it is more than 100 ft., call the manufacturer for assistance: 1-800-742-5044. Copyright © 2019 Star Water Systems. All rights reserved. -
Page 6: Well To Pump Connection
1. Thread 1-1/4 in. male PVC adapter (not included) into a 1-1/4 in. foot valve (not included). Hand tighten, then tighten 1/2 turn 1-1/4 in. male with a pipe wrench. PVC adapter 1-1/4 in. Foot valve Copyright © 2019 Star Water Systems. All rights reserved. - Page 7 PVC pipe. IL1535 5. Using a 2-step PVC system, attach a 1-1/4 in. PVC elbow (not included) onto the rigid PVC 1-1/4 in. PVC Elbow pipe extending from the well seal. Copyright © 2019 Star Water Systems. All rights reserved.
- Page 8 PVC elbow attached to the top of the well pipe in Step 5. NOTE: Be sure the pipe slopes downward slightly from pump to the well to prevent air pockets. Well Copyright © 2019 Star Water Systems. All rights reserved.
-
Page 9: Check Tank Pressure
Use a tire pump to adjust the psi to 18 psi Pressure gauge Air release valve b. If water leaks from the air release valve, Set to replace the pressure tank. 18 psi Copyright © 2019 Star Water Systems. All rights reserved. -
Page 10: Pump To Tank Connection
4. Continue with 1 in. fittings and pipe to the pressure tank. An optional 1 in. union (not included) is recommended for easy To pressure tank connection and disconnection. 1 in. union Copyright © 2019 Star Water Systems. All rights reserved. -
Page 11: Tank To House Connection
Install an optional 3/4 in. union (not included) and continue with Glue pipe and 3/4 in. x 3/4 in. x 3/4 in. tee (not Union included). 1 in. pipe Copyright © 2019 Star Water Systems. All rights reserved. -
Page 12: Pump Electrical Connections
Connect the pump to a separate electrical Not economical to run in 115 V, use 230 V circuit with a dedicated circuit breaker. Refer to the Wire Size Chart for proper fuse size. Copyright © 2019 Star Water Systems. All rights reserved. - Page 13 4. Connect the two wires from the power supply Wire from Wire from to the two outside terminals on the pressure power motor supply switch. Two wires from power supply Outside Outside terminal terminal Copyright © 2019 Star Water Systems. All rights reserved.
-
Page 14: Pump Priming And Startup
Discharge Tee 3. Be sure entire suction pipe is filled when priming. Depending on the length of suction pipe, many gallons will be needed to fill the entire system. Suction Pipe Copyright © 2019 Star Water Systems. All rights reserved. - Page 15 Re-prime if necessary, following steps 1 through Well 6 above. Reset breaker at the breaker box. All Foot Valve connections must be water and air tight in order for pump to operate. Copyright © 2019 Star Water Systems. All rights reserved.
-
Page 16: Care And Maintenance
RETURNED TO THE WARRANTY INFORMATION CENTER WITHIN TEN DAYS OF INSTALLATION. In those instances where damages are incurred as a result of an alleged pump failure, the Homeowner must retain possession of the pump for investigation purposes. Copyright © 2019 Star Water Systems. All rights reserved. -
Page 17: Troubleshooting
4. Stone or foreign object lodged in 4. Disassemble pump and remove impeller foreign object 5. Thermal overload has opened circuit 5. Allow unit to cool, restart after reason for overload has been determined Copyright © 2019 Star Water Systems. All rights reserved. -
Page 18: Replacement Parts
REPLACEMENT PARTS LIST For replacement parts, call our customer service department at 1-800-742-5044, 7:30 a.m. - 5 p.m., EST, Monday - Friday. PART DESCRIPTION PART NO. O-rings / Nozzle / Venturi Kit 023735 Diffuser 023707 Impeller (1/2 HP Model) 023709 Impeller (3/4 HP Model &... - Page 19 BOMBA DE CHORRO DE POZO DE POCA PROFUNDIDAD ARTÍCULO SJ05S 1/2 HP, SJ07S 3/4 HP, SJ10S 1 HP ADJUNTE SU RECIBO AQUÍ Número de serie Fecha de compra © 2018 Star Water Systems. Reservados todos los derechos.
-
Page 20: Especifi Caciones Del Producto
13,25 SJ07S 115/230 11.0/5.6 46,18 32,55 18,55 SJ10S 115/230 11.0/5.6 64,4 49,2 26,5 INFORMACIÓN DE SEGURIDAD Lea y comprenda completamente este manual antes de intentar ensamblar, usar o instalar el producto. © 2018 Star Water Systems. Reservados todos los derechos. - Page 21 ALERTA DE EXPLOSIÓN No la use para bombear líquidos infl amables o explosivos como gasolina, combustible, aceite, queroseno, etc. No la utilice en atmósferas infl amables o explosivas. © 2018 Star Water Systems. Reservados todos los derechos.
-
Page 22: Contenido Del Paquete
1 pulg, conector galvanizado, indicador de presión (opcional) o tapón para tubería, unión de 1-1/4 pulg (opcional), unión de 1 pulg (opcional), cable eléctrico, aliviador de tensión para cable eléctrico, válvula de cierre (opcional) © 2018 Star Water Systems. Reservados todos los derechos. -
Page 23: Información General De La Bomba
La distancia puede afectar la capacidad de funcionamiento de la bomba/tanque. Si la distancia es mayor a 30,48 m, llame al fabricante para obtener ayuda: 1-800-742-5044. © 2018 Star Water Systems. Reservados todos los derechos. -
Page 24: Conexión Desde El Pozo A La Bomba
Adaptador macho de PVC pie de 1-1/4 pulg (no se incluye). Apriete a mano y luego apriete medio giro con una llave de 1-1/4 pulg. para tuberías. Válvula de pie de 1-1/4 pulg. © 2018 Star Water Systems. Reservados todos los derechos. - Page 25 5. Usando un sistema de PVC de 2 pasos, fi je un codo de PVC de 1-1/4 pulg (no se incluye) en Codo de PVC de 1-1/4 pulg. el tubo de PVC rígido que se extiende desde el sello para pozo. © 2018 Star Water Systems. Reservados todos los derechos.
- Page 26 Paso 6. NOTA: Asegúrese de que la tubería se incline levemente desde la bomba/tanque hacia el pozo Pozo para evitar bolsas de aire. © 2018 Star Water Systems. Reservados todos los derechos.
-
Page 27: Revise La Presión Del Tanque
18 psi. de presión descarga de aire Establezca b. Si el agua se filtra por la válvula de en 18 psi descarga de aire, reemplace el tanque de presión. © 2018 Star Water Systems. Reservados todos los derechos. -
Page 28: Conexión Desde La Bomba Al Tanque
Se recomienda Hacia el tanque usar una unión de 1 pulg opcional (no de presión se incluye) para facilitar la conexión y la Unión de 1 pulg. desconexión. © 2018 Star Water Systems. Reservados todos los derechos. -
Page 29: Conexión Desde El Tanque A La Casa
¾ de pulg (no se incluye) y continúe con el tubo y una T de Adhesivo 3/4 de pulg x 3/4 de pulg (no se incluye). Unión Tubo de 1 de pulg. Boquilla reductora © 2018 Star Water Systems. Reservados todos los derechos. -
Page 30: Conexiones Eléctricas De La Bomba
230 vatios • Conecte la bomba a un circuito eléctrico separado con un interruptor de circuito dedicado. Consulte la tabla de tamaños para conocer el tamaño de fusible adecuado. © 2018 Star Water Systems. Reservados todos los derechos. - Page 31 Cable desde el suministro del interruptor de presión. de electricidad Dos cables Cable desde el desde el suministro de motor electricidad Terminal Terminal exterior exterior © 2018 Star Water Systems. Reservados todos los derechos.
-
Page 32: Cebado Y Arranque De La Bomba
3. Asegúrese de que la tubería de succión se llene completamente al realizar el cebado. Dependiendo de la longitud de la tubería de succión, podrían necesitarse varios litros para llenar completamente el sistema. Tubería de succión © 2018 Star Water Systems. Reservados todos los derechos. - Page 33 6 anteriores. Reinicie el interruptor en la caja succión de 1-1/4 pulg de interruptores. Todas las conexiones deben Pozo ser impermeables y herméticas para que la bomba pueda funcionar. Válvula de pie © 2018 Star Water Systems. Reservados todos los derechos.
-
Page 34: Cuidado Y Mantenimiento
En aquellas instancias en que haya daños causados por una presunta falla de la bomba, el propietario deberá conservar la bomba a fin de investigar dicha falla. © 2018 Star Water Systems. Reservados todos los derechos. -
Page 35: Solución De Problemas
4. Desensamble la bomba y retire los objetos impulsor extraños 5. Una sobrecarga térmica abrió el circuito 5. Permita que la unidad se enfríe y reinicie después de haber determinado la razón de la sobrecarga © 2018 Star Water Systems. Reservados todos los derechos. -
Page 36: Piezas De Repuesto
023735 Difusor 023707 Impulsor (Modelo de 1/2 HP) 023709 Impulsor (Modelo de 3/4 HP & 1 HP) 023711 Sello mecánico 023720 Junta tórica 023721 Interruptor de presión 023722 Impreso en China © 2018 Star Water Systems. Reservados todos los derechos.
Need help?
Do you have a question about the SJ07S and is the answer not in the manual?
Questions and answers