Table of Contents
Advertisement
Available languages
Available languages
Quick Links
Advertisement
Chapters
Table of Contents

Related Manuals for Watts U-M311


Summary of Contents for Watts U-M311
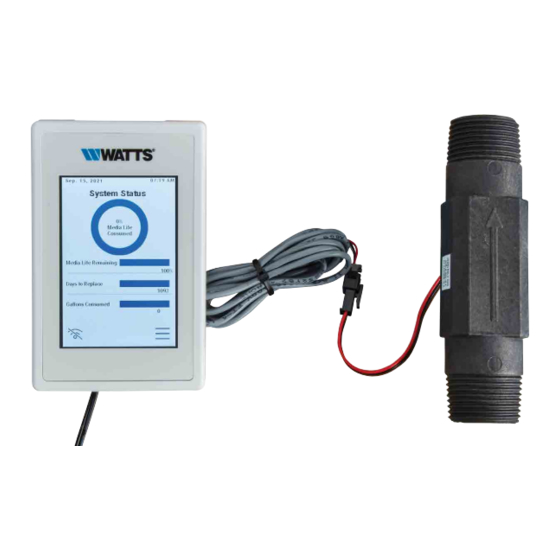
- Page 1 Smart Elapsed Time Monitor with 1" Flow Meter Model U-M311 Ordering Code 7100992 The U-M311 is tested and certified by WQA to NSF/ANSI/CAN 61 for material safety, and to NSF/ANSI/CAN 372 for Lead Free Compliance. #Z64-CC3100MODR1 Meets Class B: ICES & FCC Part 15...
- Page 2 The U-M311 Smart Elapsed Time Monitor will automatically notify you when OneFlow media replacement is needed. This ensures your investment is protecting your home from limescale and providing nothing less than the best results!
-
Page 3: Table Of Contents
If this information is not consistent with local building or plumbing codes, the local codes should be followed. NOTICE Watts is not responsible for the failure of alerts due to connectivity or power issues. Save manual for future reference. -
Page 4: Overview
The recommended life span for the media within these systems Installation must comply with state and local plumbing regulations. is 3 years. Upon reaching a 3 year service life, the U-M311 will Please review operating pressures, temperatures and water send an automatic notification by email or text based on user chemistry limitations to ensure compatibility. -
Page 5: Installation
Use PTFE plumbing tape only on the meter threads. 5. Connect monitor cable to meter cable. 2. Lift up on tab at bottom center of U-M311 monitor display screen and separate display screen from base. A small amount of force will be required for separation due to the internal interconnecting plug between the base and monitor. -
Page 6: Installation Diagram
Installation Diagrams U-M311 Elapsed Time Monitor Installed on Watts OneFlow Residential OFRES-K or OFCOM-EK Series Systems. See document IOM-OFRES-K for complete OFRES-K series system installation instruction. See document, IOM-OFCOM-EK for complete OFCOM-EK series system installation instruction. PLUMBING ADAPTOR PLUMBING ADAPTOR REINFORCED 1"... -
Page 7: Product Set Up And Registration
Product Set Up and Registration Note: If WI-FI is not available, selecting I’ll do it later and 1. Plug product into electrical outlet and the Welcome Screen touching Next will automatically advance the display to the will appear: Home / Dashboard Screen and the product will operate with reduced functionality. - Page 8 8. Enter the activation code sent to your Email Address and touch Next: It will then automatically connect to Wi-Fi: The device will then connect to the Watts (servers or cloud) to confirm the activation number. 7. Touch Okay once Wi-Fi connection is confirmed. Display will automatically advance to the Product Registration section and ask for a postal zip code.
- Page 9 Product Set Up and Registration (Cont’d) 9. Verify your First Name, Last Name and Email Address then 12. Confirm SMS Number by touching Next: touch Next: Display screen will automatically advance to the Home / Dashboard 10. Enter Street Address and touch Next: Screen upon completion of Product Registration.
-
Page 10: Product Operation
Product Operation Normal operation is performed from the Home / Dashboard Screen. In the event of a power outage the monitor will resume operation after power is restored and automatically return to the Home / When viewing any screen, after 2 minutes of inactivity, the display Dashboard Screen. -
Page 11: Menu Screen Navigation
Menu Screen Navigation Touch the Back Up Arrow at the top left of any screen to go back to the previous screen. Dashboard Touch Dashboard to return to the Home / Dashboard Screen. A. New Media Reset After replacing media in water conditioning system, the monitor 3. -
Page 12: Notifications
B. Notifications Notifications that have been sent to the user regarding operation 2. Touch Delete All to clear the complete notifications list. The of the product can be viewed in the Notifications Screen. display will automatically return to the Menu Screen: 1. -
Page 13: Notifications
C.2 Notifications 4. Touch Notifications to advance to the Notifications Sub Menu: Notifications regarding media replacement will be sent via SMS and email at set points that are selected by the user. Setpoints can be viewed and selected in this Notifications Screen. 1. -
Page 14: Date And Time Settings
C.3 Date and Time The display will return to the Set Time Screen: Changes to the date and time are made in the Date and Time screens. 1. From the Settings Screen touch Date & Time to advance to the Time and Date Adjustment Screens. Time can be adjusted by selecting Automatic (Left Image) or Manual (Right Image): 3. -
Page 15: My Account
C.4 My Account Make changes to account Name, Address, Email Address and SMS Number. 1. From the Settings Screen touch My Account to view the My Account overview screen: 2. Touch Change to advance to the Product Registration Screens where changes can be made to Account Zip Code, First/Last Name, Email Address, Street Address &... -
Page 16: About
E. About Screens Detailed product information, sending test messages and performing a factory reset is accessible in the About Screen: E.1 About 3. Touch System to advance to the second About This System 1. From the Settings Screen touch About to advance to the Screen: About Screen: 4. -
Page 17: Toolbox
Toolbox Factory Reset- The Toolbox allows test messages to be sent or a factory reset to 1. From the Toolbox Screen touch Factory Reset to access the be performed. Confirm Factory Defaults Screen: Send Test Message- 1. From the About screen touch Toolbox to access the Toolbox Screen: 2. -
Page 18: Troubleshooting
Troubleshooting Issue Possible Cause Corrective Action Elapsed time monitor does not Foreign debris in flow meter Clean meter of foreign debris detect water flow Flow monitor cable is not properly connected Ensure proper cable connection to meter Install flow meter with arrow pointing in the Flow meter is installed backwards direction of flow System bypass valve is open... - Page 19 Notes _ _ _ _ _ _ _ _ _ _ _ _ _ _ _ _ _ _ _ _ _ _ _ _ _ _ _ _ _ _ _ _ _ _ _ _ _ _ _ _ _ _ _ _ _ _ _ _ _ _ _ _ _ _ _ _ _ _ _ _ _ _ _ _ _ _ _ _ _ _ _ _ _ _ _ _ _ _ _ _ _ _ _ _ _ _ _ _ _ _ _ _ _ _ _ _ _ _ _ _ _ _ _ _ _ _ _ _ _ _ _ _ _ _ _ _ _ _ _ _ _ _ _ _ _ _ _ _ _ _ _ _ _ _ _ _ _ _ _ _ _ _ _ _ _ _ _ _ _ _ _ _ _ _ _ _ _ _ _ _ _ _ _ _ _ _ _ _ _ _ _ _ _ _ _ _ _ _ _ _ _ _ _ _ _ _ _ _ _ _ _ _ _ _ _ _ _ _ _ _ _ _ _ _ _ _ _ _ _ _ _ _ _ _ _ _ _ _ _ _ _ _ _ _ _ _ _ _ _ _ _ _ _ _ _ _ _ _ _ _ _ _ _ _ _ _ _ _ _ _ _ _ _ _ _ _ _ _ _ _ _ _ _ _ _ _ _ _ _ _ _ _ _ _ _ _ _ _ _ _ _ _ _ _ _ _ _ _ _ _ _ _ _ _ _ _ _ _ _ _ _ _ _ _ _ _ _ _ _ _ _ _ _ _ _ _ _ _ _ _ _ _ _ _ _ _ _ _ _ _ _ _ _ _ _ _ _ _ _ _ _ _ _ _ _ _ _ _ _ _ _ _ _ _ _ _ _ _ _ _ _ _ _ _ _ _ _ _ _ _ _ _ _ _ _ _ _ _ _ _ _ _ _ _ _ _ _ _ _ _ _ _ _ _ _ _ _ _ _ _ _ _ _ _ _ _ _ _ _ _ _ _ _ _ _ _ _ _ _ _ _ _ _ _ _ _ _ _ _ _ _ _ _ _ _ _ _ _ _ _ _ _ _ _ _ _ _ _ _ _ _ _ _ _ _ _ _ _ _ _ _ _ _ _ _ _ _ _ _ _ _ _ _ _ _ _ _ _ _ _ _ _ _ _ _ _ _ _ _ _ _ _ _ _ _ _ _ _ _ _ _ _ _ _ _ _ _ _ _ _ _ _ _ _ _ _ _ _ _ _ _ _ _ _ _ _ _ _ _ _ _ _ _ _ _ _ _ _ _ _ _ _ _ _ _ _ _ _ _ _ _ _ _ _ _ _ _ _ _ _ _ _ _ _ _ _ _ _ _ _ _ _ _ _ _ _ _ _ _ _ _ _ _ _ _ _ _ _ _ _ _ _ _ _ _ _ _ _ _ _ _ _ _ _ _ _ _ _ _ _ _ _ _ _ _ _ _ _ _ _ _ _ _ _ _ _ _ _ _ _ _ _ _ _ _ _ _ _ _ _ _ _ _ _ _ _ _ _ _ _ _ _ _ _ _ _ _ _ _ _ _ _ _ _ _ _ _ _ _ _ _ _ _ _ _ _ _ _ _ _ _ _ _ _ _ _ _ _ _ _ _ _ _ _ _ _ _ _ _ _ _ _ _ _ _ _ _ _ _ _ _ _ _ _ _ _ _ _ _ _ _ _ _ _ _ _ _ _ _ _ _ _ _ _ _ _ _ _ _ _ _ _ _ _ _ _ _ _ _ _ _ _ _ _ _ _ _ _ _ _ _ _ _ _ _ _ _ _ _ _ _ _ _ _ _ _ _ _ _ _ _ _ _ _ _ _ _ _ _ _ _ _ _ _ _ _...
-
Page 20: Limited Warranty
Limited Warranty: Watts (the “Company”) warrants each product to be free from defects in material and workmanship under normal usage for a period of three years from the date of original ship- ment. In the event of such defects within the warranty period, the Company will, at its option, replace or recondition the product without charge. - Page 21 1" (2.54 cm) Modelo U-M311 N.º de código del pedido 7100992 WQA ha probado y certificado el monitor U-M311 según las normas NSF/ANSI/CAN 61 en cuanto a seguridad de materiales y NSF/ANSI/CAN 372 en cuanto a cumplimiento sin plomo.
- Page 22 ¡Felicitaciones por la compra del monitor de tiempo transcurrido inteligente Watts U-M311! ® Ha tomado una gran decisión para garantizar el máximo rendimiento de su sistema Watts OneFlow . A menudo, los ® ® sistemas de acondicionamiento de agua no funcionan tan bien como cuando eran nuevos porque no se han mantenido adecuadamente.
-
Page 23: Introducción
Mi cuenta.........35 U-M311 de Watts, póngase en contacto con un representante de Configuración de Wi-Fi . -
Page 24: Descripción General
Para obtener más información sobre las demás especificaciones, póngase en contacto con su representante de Watts. El agua que no cumpla con las especificaciones anteriores requerirá un tratamiento previo adicional. -
Page 25: Instalación
Consulte la Figura 2 para ver la pantalla de visualización y la separación de la base. 3. Monte la base del monitor U-M311 en la superficie de montaje. Se proporcionan accesorios de montaje para el montaje en paneles de yeso. -
Page 26: Diagrama De Instalación
Diagramas de instalación Monitor de tiempo transcurrido U-M311 instalado en los sistemas residenciales de la serie Watts OneFlow OFRES-K u OFCOM-EK. Consulte el documento IOM-OFRES-K para obtener instrucciones completas de instalación del sistema de la serie OFRES-K. Consulte el documento IOM-OFCOM-EK para obtener instrucciones completas de instalación del sistema de la serie OFCOM-EK. -
Page 27: Configuración Y Registro Del Producto
Configuración y registro del producto 1. Enchufe el producto a un tomacorriente y aparecerá la pantalla de Nota: Si no hay Wi-Fi disponible, si selecciona I’ll do it later y toca Next, la pantalla avanzará automáticamente a la pantalla de inicio/ bienvenida: panel de control y el producto funcionará... - Page 28 8. Introduzca el código de activación enviado a su dirección de correo electrónico y toque Next: A continuación, se conectará automáticamente a Wi-Fi: El dispositivo se conectará a Watts (servidores o nube) para confirmar el número de activación. 7. Toque Okay una vez confirmada la conexión Wi-Fi. La pantalla avanzará...
- Page 29 Configuración y registro del producto (cont.) 9. Verifique su nombre, apellido y dirección de correo electrónico y, a 12. Confirme el número de SMS tocando Next: continuación, toque Next: La pantalla de visualización avanzará automáticamente a la pantalla 10. Introduzca la dirección y toque Next: de inicio/panel de control una vez finalizado el registro del producto.
-
Page 30: Funcionamiento Del Producto
Funcionamiento del producto El funcionamiento normal se realiza desde la pantalla de inicio/panel En el caso de corte de energía, el monitor reanudará el de control. funcionamiento después de que se restablezca la alimentación y volverá automáticamente a la pantalla de inicio/panel de control. Al ver cualquier pantalla, después de 2 minutos de inactividad, la pantalla volverá... -
Page 31: Navegación Por La Pantalla Del Menú
Navegación por la pantalla del menú Toque la flecha de retroceso en la parte superior izquierda de cualquier pantalla para volver a la pantalla anterior. Panel de control Toque Dashboard para volver a la pantalla Home/Dashboard. A. Nuevo restablecimiento de medios Después de reemplazar los medios en el sistema de 3. -
Page 32: Notificaciones
B. Notificaciones Las notificaciones que se han enviado al usuario con respecto al 2. Toque Delete All para borrar la lista completa de notificaciones. La funcionamiento del producto se pueden ver en la pantalla Notifications. pantalla volverá automáticamente a la pantalla Menu: 1. -
Page 33: Notificaciones
C.2 Notificaciones 4. Toque Notifications para avanzar al submenú Notifications: Las notificaciones relativas al reemplazo de medios se enviarán por SMS y correo electrónico a los puntos de ajuste seleccionados por el usuario. Los puntos de ajuste se pueden ver y seleccionar en esta pantalla Notifications. -
Page 34: Configuraciones De Fecha Y Hora
C.3 Fecha y hora La pantalla volverá a la pantalla Set Time: Los cambios en la fecha y hora se realizan en las pantallas Date & Time. 1. En la pantalla Settings, toque Date & Time para avanzar a las pantallas de ajuste de hora y fecha. -
Page 35: Mi Cuenta
C.4 Mi cuenta Realice cambios en el nombre, la dirección, la dirección de correo electrónico y el número de SMS de la cuenta. 1. En la pantalla Settings, toque My Account para ver la pantalla de descripción general de Mi cuenta: 2. -
Page 36: Acerca De
E. Pantallas About Se puede acceder a información detallada del producto, enviar mensajes de prueba y realizar un restablecimiento de fábrica en la pantalla About: E.1 About 3. Toque System para avanzar a la segunda pantalla About This System: 1. En la pantalla Settings, toque About para avanzar a la pantalla About: 4. -
Page 37: Caja De Herramientas
Toolbox Restablecimiento de fábrica La Toolbox permite enviar mensajes de prueba o realizar un restab- 1. En la pantalla Toolbox, toque Factory Reset para acceder a la lecimiento de fábrica. pantalla Confirm Factory Defaults: Enviar mensaje de prueba 1. En la pantalla About, toque Toolbox para acceder a la pantalla Toolbox: 2. -
Page 38: Solución De Problemas
Solución de problemas Problema Causa posible Acción correctiva El monitor de tiempo transcurrido Residuos extraños en el caudalímetro Limpie el medidor de residuos extraños no detecta el flujo de agua El cable del monitor de flujo no está conectado Asegúrese de que la conexión del cable sea correctamente al medidor correcta Instale el caudalímetro con la flecha apuntando en... - Page 39 Notas _________________________________________________________________________________________________________________________________ _________________________________________________________________________________________________________________________________ _________________________________________________________________________________________________________________________________ _________________________________________________________________________________________________________________________________ _________________________________________________________________________________________________________________________________ _________________________________________________________________________________________________________________________________ _________________________________________________________________________________________________________________________________ _________________________________________________________________________________________________________________________________ _________________________________________________________________________________________________________________________________ _________________________________________________________________________________________________________________________________ _________________________________________________________________________________________________________________________________ _________________________________________________________________________________________________________________________________ _________________________________________________________________________________________________________________________________ _________________________________________________________________________________________________________________________________ _________________________________________________________________________________________________________________________________ _________________________________________________________________________________________________________________________________ _________________________________________________________________________________________________________________________________ _________________________________________________________________________________________________________________________________ _________________________________________________________________________________________________________________________________ _________________________________________________________________________________________________________________________________ _________________________________________________________________________________________________________________________________ _________________________________________________________________________________________________________________________________ _________________________________________________________________________________________________________________________________ _________________________________________________________________________________________________________________________________ _________________________________________________________________________________________________________________________________ _________________________________________________________________________________________________________________________________ _________________________________________________________________________________________________________________________________ _________________________________________________________________________________________________________________________________...
-
Page 40: Garantía Limitada
Garantía limitada: Watts (la “Compañía”) garantiza que cada producto está libre de defectos en los materiales y la mano de obra en condiciones de uso normal durante el período de tres años a partir de la fecha de envío original. En caso de que tales defectos se presenten dentro del período de garantía, la Compañía, a su criterio, reemplazará o reacondicionará el producto sin cargo alguno. - Page 41 Appareil de contrôle de temps écoulé intelligent avec débitmètre de 1 po (2,54 cm) Modèle U-M311 Code de commande 7100992 Le U-M311 est testé et certifié par la WQA selon la norme NSF/ANSI/CAN 61 pour la sécurité des matériaux et la norme NSF/ANSI/CAN 372 pour l’absence de plomb.
- Page 42 Félicitations pour votre achat de l’appareil de contrôle de temps écoulé intelligent U-M311 de Watts ®! Vous avez fait un excellent choix pour assurer une performance optimale de votre système Watts OneFlow . Souvent, ® ® les systèmes de conditionnement de l’eau ne fonctionnent pas comme neufs parce qu’ils n’ont pas été correctement entretenus.
-
Page 43: Introduction
AV I S Watts n’est pas responsable de la défaillance des alertes en raison de problèmes de connectivité ou d’alimentation. Conservez ce manuel pour référence ultérieure. Consultez les paramètres de fonctionnement ci-joints pour assurer l’utilisation adéquate avec votre alimentation en eau. -
Page 44: Aperçu
3 ans. en matière de plomberie. Examinez les limites de pressions de fonc- Lorsque la durée de vie utile de 3 ans est atteinte, l’U-M311 enverra tionnement, de températures et de chimie de l’eau afin d’assurer la une notification automatique par courriel ou par message texte selon compatibilité. -
Page 45: Installation
Voir la figure 2 pour la séparation de l’écran d’affichage et de la base. 3. Montez la base de l’appareil de contrôle U-M311 sur la surface de montage. Le matériel de montage est fourni pour le montage sur cloison sèche. -
Page 46: Schéma D'installation
Schémas d’installation Appareil de contrôle de temps écoulé U-M311 installé sur les systèmes résidentiels OneFlow OFRES-K ou OFCOM-EK de Watts. Voir le document IOM-OFRES-K pour les instructions d’installation complètes du système de la série OFRES-K. Voir le document IOM-OFCOM-EK pour les instructions d’installation complètes du système de la série OFCOM-EK. -
Page 47: Configuration Et Enregistrement Du Produit
Configuration et enregistrement du produit Remarque : Si le Wi-Fi n’est pas disponible, sélectionnez Je 1. Branchez le produit dans une prise électrique et l’écran d’accueil le ferai plus tard et appuyez sur Suivant pour faire avancer apparaîtra : automatiquement l’affichage vers l’écran Accueil/Tableau de bord; le produit fonctionnera avec une fonctionnalité... - Page 48 8. Entrez le code d’activation envoyé à votre adresse courriel et appuyez sur Suivant : Il y aura connexion automatique au Wi-Fi : L’appareil se connectera ensuite à Watts (serveurs ou nuage) pour confirmer le numéro d’activation. 7. Appuyez sur OK une fois la connexion Wi-Fi confirmée. L’affichage passera automatiquement à...
- Page 49 Configuration et enregistrement du produit (suite) 9. Vérifiez votre prénom, votre nom et votre adresse courriel, puis 12. Confirmez le numéro SMS en appuyant sur Suivant : appuyez sur Suivant : L’écran d’affichage passera automatiquement à l’écran Accueil/ 10. Entrez l’adresse et appuyez sur Suivant : Tableau de bord une fois l’enregistrement du produit terminé.
-
Page 50: Fonctionnement Du Produit
Fonctionnement du produit Le fonctionnement normal est effectué à partir de l’écran Accueil/ En cas de panne de courant, l’appareil de contrôle reprendra son Tableau de bord. fonctionnement après le rétablissement de l’alimentation et reviendra automatiquement à l’écran Accueil/Tableau de bord. Lorsque vous affichez un écran, après 2 minutes d’inactivité, l’écran d’affichage revient à... -
Page 51: Navigation De L'écran De Menu
Navigation de l’écran de menu Appuyez sur la flèche de retour dans le coin supérieur gauche de n’importe quel écran pour revenir à l’écran précédent. Tableau de bord Appuyez sur Tableau de bord pour revenir à l’écran Accueil/ Tableau de bord. A. -
Page 52: Notifications
B. Notifications Les notifications qui ont été envoyées à l’utilisateur concernant 2. Appuyez sur Supprimer tout pour effacer la liste complète des le fonctionnement du produit peuvent être consultées sur l’écran notifications. L’affichage reviendra automatiquement à l’écran Notifications. Menu : 1. À partir de l’écran Menu, appuyez sur Notifications pour afficher une liste des notifications précédentes : A V I S Vous pouvez également accéder au sous-menu Notifications en... -
Page 53: Notifications
C.2 Notifications 4. Appuyez sur Notifications pour passer au sous-menu Les notifications concernant le remplacement du médium seront Notifications : envoyées par message texte et courriel aux points de consigne sélectionnés par l’utilisateur. Les points de consigne peuvent être affichés et sélectionnés sur l’écran Notifications. 1. -
Page 54: Réglages De La Date Et De L'heure
C.3 Date et heure L’affichage reviendra à l’écran Régler l’heure : Les modifications apportées à la date et à l’heure sont effectuées dans les écrans Date et Heure. 1. À partir de l’écran Paramètres, appuyez sur Date et heure pour passer aux écrans de réglage de l’heure et de la date. La durée peut être ajustée en sélectionnant Automatique (image de gauche) ou Manuel (image de droite) : 3. -
Page 55: Mon Compte
C.4 Mon compte Apportez des modifications au nom, à l’adresse, à l’adresse courriel et au numéro SMS. 1. À partir de l’écran Paramètres, appuyez sur Mon compte pour afficher l’écran de vue d’ensemble de Mon compte : 2. Appuyez sur Modifier pour passer aux écrans d’enregistrement de produit où... -
Page 56: À Propos De
E. Écrans À propos de Des renseignements détaillés sur le produit, l’envoi de messages test et la réinitialisation des paramètres par défaut sont accessibles sur l’écran À propos de : E.1 À propos de 3. Appuyez sur Système pour passer au deuxième écran À propos de ce système : 1. -
Page 57: Boîte À Outils
Boîte à outils Réinitialisation des paramètres par défaut La boîte à outils permet d’envoyer des messages test ou d’effectuer 1. À partir de l’écran Boîte à outils, appuyez sur Réinitialisation une réinitialisation des paramètres par défaut. des paramètres par défaut pour accéder à l’écran Confirmer les paramètres par défaut : Envoyer un message de test 1. -
Page 58: Dépannage
Dépannage Problème Cause possible Mesure corrective L’appareil de contrôle de temps Débris étrangers dans le débitmètre Enlevez les débris étrangers du compteur écoulé ne détecte pas le débit Le câble de l’appareil de contrôle du débit n’est Assurez-vous que le câble est bien connecté d’eau pas correctement connecté... - Page 59 Remarques _________________________________________________________________________________________________________________________________ _________________________________________________________________________________________________________________________________ _________________________________________________________________________________________________________________________________ _________________________________________________________________________________________________________________________________ _________________________________________________________________________________________________________________________________ _________________________________________________________________________________________________________________________________ _________________________________________________________________________________________________________________________________ _________________________________________________________________________________________________________________________________ _________________________________________________________________________________________________________________________________ _________________________________________________________________________________________________________________________________ _________________________________________________________________________________________________________________________________ _________________________________________________________________________________________________________________________________ _________________________________________________________________________________________________________________________________ _________________________________________________________________________________________________________________________________ _________________________________________________________________________________________________________________________________ _________________________________________________________________________________________________________________________________ _________________________________________________________________________________________________________________________________ _________________________________________________________________________________________________________________________________ _________________________________________________________________________________________________________________________________ _________________________________________________________________________________________________________________________________ _________________________________________________________________________________________________________________________________ _________________________________________________________________________________________________________________________________ _________________________________________________________________________________________________________________________________ _________________________________________________________________________________________________________________________________ _________________________________________________________________________________________________________________________________ _________________________________________________________________________________________________________________________________ _________________________________________________________________________________________________________________________________ _________________________________________________________________________________________________________________________________...
-
Page 60: Garantie Limitée
Garantie limitée : Watts (la « Société ») garantit que chacun de ses produits est exempt de vice de matériau et de fabrication dans des conditions normales d’utilisation pour une période de trois ans à compter de la date d’expédition d’origine. Si une telle défaillance devait se produire au cours de la période sous garantie, la Société pourra, à sa discrétion, remplacer le produit ou le remettre en état, sans frais.
Need help?
Do you have a question about the U-M311 and is the answer not in the manual?
Questions and answers