Table of Contents
Advertisement
Installer's Guide
Variable Speed ComfortLink™ II
Heat Pumps and Air Conditioners
4TWV0024A1000C
4TWV0036A1000C
4TWV0048A1000C
4TWV0060A1000C
Scan to see help
videos on this
product
Only qualified personnel should install and service the equipment. The installation, starting up, and servicing of heating, ventilating, and air-conditioning
equipment can be hazardous and requires specific knowledge and training. Improperly installed, adjusted or altered equipment by an unqualified person
could result in death or serious injury. When working on the equipment, observe all precautions in the literature and on the tags, stickers, and labels that
are attached to the equipment.
April 2020
4TTV0024A1000C
4TTV0036B1000C
4TTV0048A1000C
4TTV0060A1000C
4TTV0061A1000C
S S A A F F E E T T Y Y W W A A R R N N I I N N G G
1 1 8 8 - - B B C C 8 8 9 9 D D 1 1 - - 1 1 L L - - E E N N
N N o o t t e e : : "Graphics in this document are for representation
only. Actual model may differ in appearance."
Advertisement
Table of Contents

Related Manuals for Trane Variable Speed ComfortLink II


Summary of Contents for Trane Variable Speed ComfortLink II
- Page 1 Installer’s Guide Variable Speed ComfortLink™ II Heat Pumps and Air Conditioners 4TWV0024A1000C 4TTV0024A1000C 4TWV0036A1000C 4TTV0036B1000C 4TWV0048A1000C 4TTV0048A1000C 4TWV0060A1000C 4TTV0060A1000C 4TTV0061A1000C N N o o t t e e : : “Graphics in this document are for representation only. Actual model may differ in appearance.” Scan to see help videos on this product...
- Page 2 E E a a r r t t h h c c o o n n n n e e c c t t i i o o n n e e s s s s e e n n t t i i a a l l b b e e f f o o r r e e c c o o n n n n e e c c t t i i n n g g e e l l e e c c t t r r i i c c a a l l s s u u p p p p l l y y . . 18-BC89D1-1L-EN ©2020 Trane...
- Page 3 S S A A F F E E T T Y Y S S E E C C T T I I O O N N — — O O U U T T D D O O O O R R WARNING CAUTION - HOT SURFACE 400 VOLTS...
-
Page 4: Table Of Contents
Table of Contents Unit Location Considerations ....5 Integrated Variable Speed Control Board LED Indicators ......18 . -
Page 5: Unit Location Considerations
Unit Location Considerations Table 2. Unit Dimensions and Weight Table 3. Refrigerant Line and Service Valve Connection Sizes Standard Line Set 150’ Max Line Length Refer to (a), (b), and (c) footnotes for specific model details 18-BC89D1-1L-EN... - Page 6 U U n n i i t t L L o o c c a a t t i i o o n n C C o o n n s s i i d d e e r r a a t t i i o o n n s s Table 4.
-
Page 7: Coastal Considerations
U U n n i i t t L L o o c c a a t t i i o o n n C C o o n n s s i i d d e e r r a a t t i i o o n n s s Table 6. -
Page 8: Unit Preparation
Unit Preparation 1. Check for damage and report promptly to the carrier any damage found to the unit. 2. To remove the unit from the pallet, remove tabs by cutting with a sharp tool. Setting Up the Unit Table 7. Pad Installation 18-BC89D1-1L-EN... -
Page 9: Refrigerant Line Considerations
Refrigerant Line Considerations Table 8. Factory Charge Table 9. Required Refrigerant Line Length Line Length Table 10. Refrigerant Line Insulation Vapor Line Liquid Line Insulation 18-BC89D1-1L-EN... - Page 10 R R e e f f r r i i g g e e r r a a n n t t L L i i n n e e C C o o n n s s i i d d e e r r a a t t i i o o n n s s Table 11.
- Page 11 R R e e f f r r i i g g e e r r a a n n t t L L i i n n e e C C o o n n s s i i d d e e r r a a t t i i o o n n s s Table 14.
-
Page 12: Refrigerant Line Brazing
Refrigerant Line Brazing Table 16. Braze the Refrigerant Lines 18-BC89D1-1L-EN... - Page 13 R R e e f f r r i i g g e e r r a a n n t t L L i i n n e e B B r r a a z z i i n n g g Table 16.
-
Page 14: Refrigerant Line Leak Check
Refrigerant Line Leak Check Table 17. Check for Leaks 150 PSIG Refrigerant Line and Indoor Coil Evacuation I I m m p p o o r r t t a a n n t t : : Do not open the service valves until the 0350 refrigerant lines and indoor coil leak check and evacuation are complete. -
Page 15: Service Valves
Service Valves Table 18. Open the Gas Service Valve 1/4 Turn Only Counterclockwise for Full Open Position Valve Stem Unit Side of Valve Pressure Tap Port Gas Line Connection Table 19. Open the Liquid Service Valve W W A A R R N N I I N N G G S S E E R R V V I I C C E E V V A A L L V V E E S S ! ! F F a a i i l l u u r r e e t t o o f f o o l l l l o o w w t t h h i i s s w w a a r r n n i i n n g g w w i i l l l l r r e e s s u u l l t t i i n n a a b b r r u u p p t t r r e e l l e e a a s s e e o o f f s s y y s s t t e e m m c c h h a a r r g g e e a a n n d d m m a a y y r r e e s s u u l l t t i i n n... -
Page 16: Communicating
Electrical — Low Voltage Communicating Table 20. Low Voltage Maximum Wire Length Table 21. Low Voltage Hook-up Diagrams Figure 1. Fully Communicating System Communicating Outdoor Unit Neatly bundle all low voltage wires as shown. Communicating Communicating Comfort Control Indoor Unit Note 4 Brown D - Note 3... -
Page 17: Electrical - High Voltage
Electrical — High Voltage Table 22. High Voltage Power Supply W W A A R R N N I I N N G G L L I I V V E E E E L L E E C C T T R R I I C C A A L L C C O O M M P P O O N N E E N N T T S S ! ! F F a a i i l l u u r r e e t t o o f f o o l l l l o o w w t t h h i i s s W W a a r r n n i i n n g g c c o o u u l l d d r r e e s s u u l l t t i i n n p p r r o o p p e e r r t t y y d d a a m m a a g g e e , , s s e e v v e e r r e e p p e e r r s s o o n n a a l l i i n n j j u u r r y y , , o o r r d d e e a a t t h h . -
Page 18: Integrated Variable Speed Control Board
Integrated Variable Speed Control Board LED Indicators The Status (Green) and High Voltage COMM (Amber) LEDs are to Condensor EXT.ODT located in the upper right Fan Motor LSOV COMM (not used) COMM region of the Control Board. STATUS STATUS PERSONALITY MODULE SHED LOAD T1 T2... -
Page 19: Start Up
Start Up 3 HRS . 18-BC89D1-1L-EN... -
Page 20: System Charge Adjustment
System Charge Adjustment Table 25. Temperature Measurements 120° F 55° F 80° F 70° F Table 26. Subcooling Charging Corrections 18-BC89D1-1L-EN... -
Page 21: Charts
Subcool Charging Correction Charts Figure 2. Subcool Charging Corrections — 2.0 Ton 2.0 TON SUBCOOL CHARGING CHART CORRECTIONS TABLE (FOR LINE LENGTH AND RISE) Add 1° Add 2° Add 1° Use Design Subcooling 100 110 120 130 140 150 TOTAL REFRIGERANT LINE LENGTH (FEET) Figure 3. - Page 22 S S u u b b c c o o o o l l C C h h a a r r g g i i n n g g C C o o r r r r e e c c t t i i o o n n C C h h a a r r t t s s 18-BC89D1-1L-EN...
-
Page 23: Charging The Unit
Charging the Unit Table 27. Proper Gage Pressure Table 28. Stabilize the system 20 MIN. Table 29. Verify Performance PRESSURE CURVE SAMPLE Cooling @ 1450 SCFM Heating @ 1350 SCFM INDOOR ENTERING INDOOR ENTERING WET BULB CURVES DRY BULB CURVES TOP TO BOTTOM TOP TO BOTTOM 80, 70, AND 60 DEG F. -
Page 24: Subcooling Charging Below 55º F Outdoor Temp. (In Heating Only)
Subcooling Charging Below 55º F Outdoor Temp. (In Heating Only) Table 31. Subcooling Charging Below 55º F Outdoor Temp. (In Heating Only) 20 MIN. 18-BC89D1-1L-EN... -
Page 25: Communicating Display Assembly
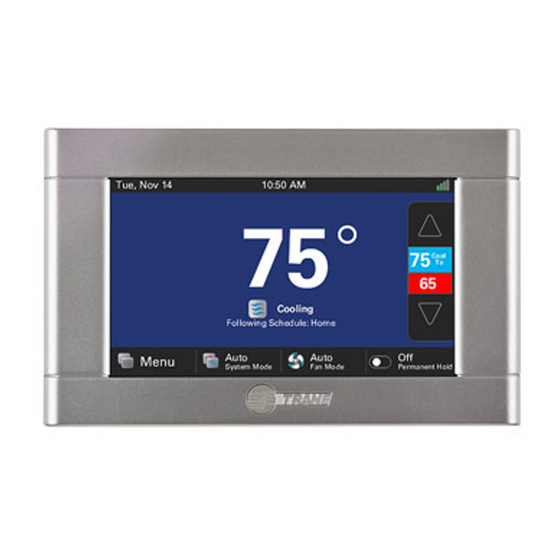
Communicating Display Assembly (CDA) NAVIGATION • To enter and exit Technician Menus, press the Up/Down buttons simultaneously for 5 seconds. • To return to the Home Screen, press the Up/Down buttons SYSTEM STATUS simultaneously for 5 seconds. • To return to the top level of any menu, press the Left/Right buttons XXXXXXXXXXXXXXXX simultaneously for 5 seconds. -
Page 26: Defrost Control (Heat Pump Only)
Defrost Control (Heat Pump only) D D e e m m a a n n d d D D e e f f r r o o s s t t C C D D A A N N a a v v i i g g a a t t i i o o n n t t o o F F o o r r c c e e d d D D e e f f r r o o s s t t The demand defrost control measures heat pump Figure 6. -
Page 27: Checkout Procedures
Checkout Procedures 18-BC89D1-1L-EN... - Page 28 The AHRI Certified mark indicates Trane U.S. Inc. participation in the AHRI Certification program. For verification of individual certified products, go to ahridirectory. org. Trane has a policy of continuous data improvement and it reserves the right to change design and specifications without notice. We are committed to using environmentally conscious print practices.
Need help?
Do you have a question about the Variable Speed ComfortLink II and is the answer not in the manual?
Questions and answers