Table of Contents
Advertisement
Quick Links
Advertisement
Table of Contents

Subscribe to Our Youtube Channel
Related Manuals for Azbil RA1B


Summary of Contents for Azbil RA1B
- Page 1 CM2-RA1B10-2001 Pressure Regulator with Air Filter Model RA1B User’s Manual...
- Page 2 Considerable effort has been made to ensure that this manual is complete and accurate, but if you should find an omission or error, please contact us. In no event is Azbil Corporation liable to anyone for any indirect, special, or consequential damages as a result of using this product.
- Page 3 Conventions Used in This User’s Manual ■ The safety precautions explained below aim to prevent injury to you and others, and to prevent property damage. Warnings are indicated when mishandling this product may WARNING result in death or serious injury. Cautions are indicated when mishandling this product may CAUTION result in minor injury or property damage only.
-
Page 4: Handling Precautions
Handling Precautions „ General WARNING Before starting to work, check that the pressure in the pipes has dropped to atmospheric pressure. If fluid spews out, injury may result. „ Installation CAUTION Do not stand on the device or use it as a step. There is a risk of falling. Do not touch the device unnecessarily while it is operating. -
Page 5: Introduction
Introduction Thank you for purchasing the model RA1B pressure regulator with air filter. „ Unpacking and Storing the Product Unpacking This device is a precision instrument. When unpacking, take special care in handling it to prevent accidents, damage, etc. After unpacking, check for the following items. -
Page 6: Structure Of This User's Manual
Structure of This User’s Manual This manual explains the structure of this device and its uses in the following order. Chapter 1 Overview Structure and operating principles Chapter 2 Installation How to install this device and points to keep in mind during installation Chapter 3 Operation Procedures and important points for operating and stopping this device Chapter 4 Maintenance... -
Page 7: Table Of Contents
Contents Conventions Used in This User’s Manual Handling Precautions Introduction Structure of This User’s Manual Chapter 1 Overview „ Overview „ Structure „ Operating Principles Chapter 2 Installation „ Description of Parts „ Instrumentation Air „ Installation Procedure Chapter 3 Operation „... -
Page 9: Chapter 1 Overview
„ Structure (1)(2) (1) removed (22) (21) (10) Primary Secondary side side (12) (19)(20) (18) (13)(14) (15) (11) (16)(17) * Bleed hole (actual position may di er) ** Retaining mechanism Fig. 1-1. RA1B-1 (23) (2)(24)(25) (26) Fig. 1-2. RA1B-2, RA1B-3... -
Page 10: X84; Operating Principles
Chapter 1 Overview Table 1-1. RA1B standard specifications — Main materials Name Material Name Material Cover screw (M6) Stainless steel Filter PVA resin O-ring Drain bowl Aluminum alloy Screw (M4) Stainless steel Drain plug (M5) Stainless steel Bonnet Aluminum alloy... -
Page 11: Chapter 2 Installation
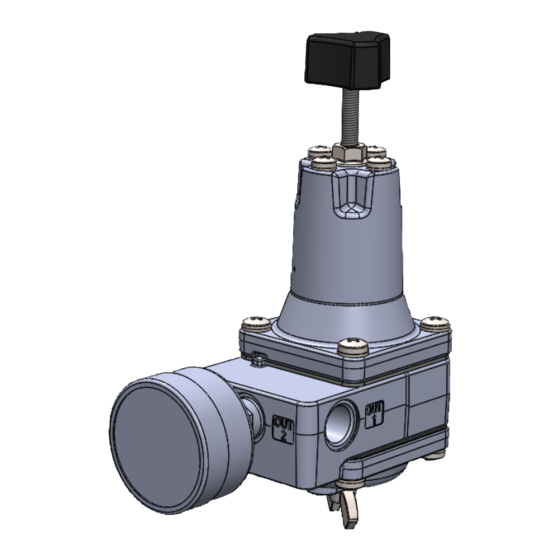
Chapter 2 Installation „ Description of Parts The structure of each model is shown in the figures below. Model RA1B-1 Fig. 2-1. RA1B-1: Side view Air pipe connection port (OUT) Pressure gauge connection port Rc1/8 Air pipe connection port (IN) Fig. - Page 12 Chapter 2 Installation Models RA1B-2 and RA1B-3 Fig. 2-4. Side view Air pipe connection Air pipe connection port (OUT2) port (IN) Air pipe connection port (OUT1) Fig. 2-5. Top view Bolt hole (M6) × 2, with cover seals Fig. 2-6. Bottom view...
-
Page 13: X84; Instrumentation Air
Chapter 2 Installation „ Instrumentation Air The quality of instrumentation air to be supplied to this device is defined as follows. • Solid material: No particles with a diameter larger than 3 μm (although solid material will be collected by the filter of this device, there should be none in the instrumentation air) •... -
Page 14: X84; Installation Procedure
Mount the pressure regulator on the mounting plate using two or more of the four M4 screws (Fig. 1-1 (3)) in the top of the pressure regulator. The RA1B-2 and RA1B-3 can also be mounted using the two M6 screw holes (see Fig. 2-6) in the pressure regulator body. - Page 15 In addition, the RA1B-1 has a Rc ⅛ pressure gauge connection port. When attaching a fitting to the OUT2 connection port of the RA1B-2 or RA1B-3, remove the hex socket plug beforehand. Remove any foreign matter on the screw threads using a brush.
- Page 16 Chapter 2 Installation Handling Precautions • Be sure to plug connection ports to which no pipes are attached. Otherwise, air may leak. • Do not connect the secondary-side pipe to the pressure gauge connection port. Doing so may cause this device to malfunction. •...
-
Page 17: Chapter 3 Operation
Chapter 3 Operation This chapter describes how to start and stop this device and how to adjust the pressure. If the user’s manual for the product on the secondary side provides instructions on how to start and stop operation and how to adjust pressure, follow them instead of the instructions in this document. „... - Page 18 Model RA1B-2, model RA1B-3 (1) Loosen the M6 flange nut. (2) Turn the pressure adjustment knob to adjust the pressure of the secondary side to the prescribed level.
- Page 19 Chapter 3 Operation Required tool and tightening torque • Flange nut M6 Tool: wrench Tightening torque: 7 ± 0.4 N·m Handling Precautions • If a tool comes into contact with the M4 thread when opening or closing the flange nut, the M4 thread may be damaged. In addition, coming into contact with damaged thread may result in injury.
-
Page 21: Chapter 4 Maintenance
Chapter 4 Maintenance „ Drain Water or oil can be drained from the drain bowl without removing it. (1) Make sure that air pressure is not being applied to the pressure regulator, and that there is no residual pressure in it. (2) Place sheeting or an empty container under the pressure regulator as protection against stains, etc. -
Page 22: X84; Filter Maintenance
Chapter 4 Maintenance „ Filter Maintenance Replace the filter regularly. In addition, replace the gasket as well when replacing the filter. (See „ Ordering Parts.) (1) Make sure that air pressure is not being applied to the pressure regulator, and that there is no residual pressure in it. -
Page 23: X84; Storage
Chapter 4 Maintenance „ Storage • Store this device at normal room temperature and humidity (around 25°C and 65 % RH) in an indoor location not exposed to direct sunlight. • Avoid dusty or moldy locations, locations subject to condensation, and locations near heating equipment. -
Page 24: X84; Other
Chapter 4 Maintenance „ Other If this device fails, stop use and replace it with a new one. If there is a problem with a part other than the filter or gasket, replace this device as a whole instead of disassembling it. For corrosive atmospheres and instrumentation air containing ozone, a corrosion-resistant model is recommended. -
Page 25: Appendix A App.1
0.4 kg: RA1B-1 (without pressure gauge) Weight 0.5 kg: RA1B-2/3 (without pressure gauge) Maximum flow rate 200 L/min (secondary pressure drop is 25 kPa max. (for RA1B-3, 30 kPa max.)) INSTRUCTIONS FOR PROPER USE • This product is designed for the general industrial market. - Page 26 Appendix No. SS2-RA1B10-0100 Azbil Corporation MODEL SELECTION Basic model No. Pressure regulator with air filter RA1B – (1) (2) (3) (4) (5) – (6) (7) (8) (9) – (10) (11) semi-bleed type 1. Setting pressure Secondary pressure = Pneumatic range...
- Page 27 Appendix Azbil Corporation No. SS2-RA1B10-0100 DIMENSIONS RA1B-1F Unit: mm Air pressure connection outlet Pressure gauge (Rc ¼ or ¼ NPT) connection port (Rc ⁄ ) Air pressure With pressure gauge (optional) connection inlet (screw pitch) (Rc ¼ or ¼ NPT)
- Page 28 Appendix No. SS2-RA1B10-0100 Azbil Corporation RA1B-1P Unit: mm Air pressure connection outlet (Rc ¼ or ¼ NPT) Pressure gauge connection port (Rc ⁄ ) Air pressure With pressure gauge (optional) connection inlet (Rc ¼ or ¼ NPT) (screw pitch) Indentation...
- Page 29 Appendix Azbil Corporation No. SS2-RA1B10-0100 RA1B-2/3 Unit: mm Air pressure output (Rc ¼ or ¼ NPT) (screw pitch) Air pressure inlet (Rc ¼ or ¼ NPT) With pressure gauge (optional) 4 × M4 M6 nut mounting screw Drain plug Indentation...
- Page 30 Warranty period and warranty scope 1.1 Warranty period Azbil Corporation’s products shall be warranted for one (1) year from the date of your purchase of the said products or the delivery of the said products to a place designated by you.
- Page 31 Although acceleration of the above situation varies depending on the conditions or environment of use of the products, you are required not to use any Azbil Corporation’s products for a period exceeding ten (10) years unless otherwise stated in specifications or instruction manuals.
- Page 32 Specifications are subject to change without notice. (11) 1-12-2 Kawana, Fujisawa Kanagawa 251-8522 Japan URL: https://www.azbil.com 1st edition: May 2022 (S)
Need help?
Do you have a question about the RA1B and is the answer not in the manual?
Questions and answers