Table of Contents
Advertisement
Quick Links
Advertisement
Table of Contents

Related Manuals for TeachLogic Matrix IMA-121


Summary of Contents for TeachLogic Matrix IMA-121
- Page 1 Matrix ™ (IMA-121) Classroom Audio System Installation Manual...
- Page 2 We appreciate your confidence by your selection of our product. It is TeachLogic’s intent to uphold that confidence by providing factory assistance and reseller support. This manual will help you learn to use and gain the maximum benefit of the system.
- Page 3 Green. Save our resources and do not contaminate. charging conductors. Contact: Earth911.com 1-800-CLEANUP Certifications TeachLogic systems are manufactured using lead-free processes and are free of materials harmful to the environment. They conform to European RoHS guidelines for consumer products.
- Page 4 Date of Purchase Model Number Serial Number Notes Contact If you should encounter an unresolved issue, please contact the TeachLogic customer service department for further assistance. 760-631-7800 | support@teachtogic.com | teachlogic.com Limited warranty For full warranty details refer to teachlogic.com/warranty.
-
Page 5: Table Of Contents
Contents System Overview ........................5 System Diagram ......................... 6 Installation ..........................7 Installation Planning ........................7 Connection of Speakers ......................8-9 Installation of Ceiling Sensor ..................... 10 Integration ..........................11 Page Mute/Pass Through Integration ................... 11-12 RS-232 Feature ........................13 Security Alert Feature ......................14-15 Configuration .......................... -
Page 6: System Overview
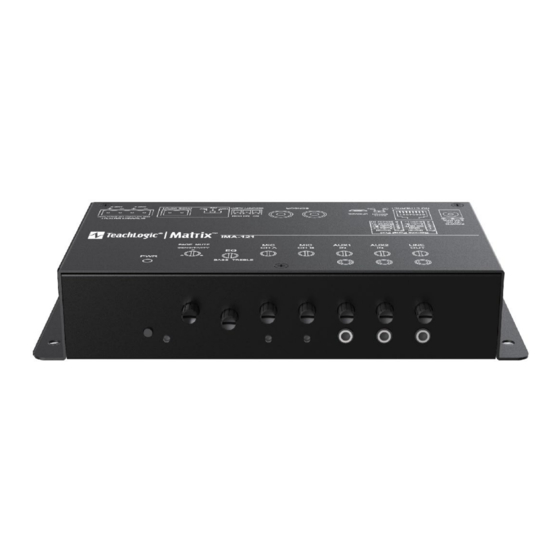
Security Alert - Com | N.O.| N.C. RJ-45 Control Panel Jack Impedance selector 25V, 70V, 100V RS-232 Switch (Off/On) Page Mute Input - 2-pin Phoenix UPGRADE input Micro USB Speaker Output - Two Channel, 4-pin Phoenix Two Sensor Inputs (RCA) connector www.teachlogic.com support@teachlogic.com | (760) 631-7800... -
Page 7: System Diagram
Matrix System Diagram ™ www.teachlogic.com support@teachlogic.com | (760) 631-7800... -
Page 8: Installation Planning
Plenum communications systems, noting how the wiring needs to run. Charger: Confirm microphone charging location for daily use/charging. www.teachlogic.com support@teachlogic.com | (760) 631-7800... - Page 9 Wall Speakers: First observe the shape of the room: ceiling height, door locations, windows, mounting surface, and seating area. Ordinary installation would be to locate the speakers on each side wall beginning at the front row of listeners, at least 6+ feet above the floor. www.teachlogic.com support@teachlogic.com | (760) 631-7800...
-
Page 10: Connection Of Speakers
The IMA-121 has two channels of amplified audio, rated for a minimum 4-ohm speaker load (two 8-ohm speakers each, connected in parallel provide 4 ohms impedance). There is one blue phoenix style speaker connector on the back panel, providing two pairs of speaker terminals. www.teachlogic.com support@teachlogic.com | (760) 631-7800... - Page 11 Installation 3 – Wood Surface FINAL STEP: Route sensor cable to amplifier and plug into one of the amplifier’s two sensor inputs. An illuminated green LED will indicate that the sensor is receiving power from the amplifier. www.teachlogic.com support@teachlogic.com | (760) 631-7800...
-
Page 12: Page Mute/Pass Through Integration
Connecting the system: Before connecting, the installer is responsible for determining that the TeachLogic amplifier impedance is compatible with the paging system. Unplug the 2-pin green Phoenix connector. Connect a cable from the paging system driving its speakers to the 2 pin Phoenix connector of the Page input. - Page 13 Note that you may use the classroom audio system speakers in addition to or in lieu of dedicated paging speaker*. *IMPORTANT: The system does not pass-through paging audio signal to the speakers when the amplifier is powered off (or no power is available). www.teachlogic.com support@teachlogic.com | (760) 631-7800...
- Page 14 This allows the receiver/amplifier to be placed in an area or compartment that is not easily accessed by the user. Codes that are required for this setup are available on the teachlogic/com/resources page under “Application Notes” or directly at https://TeachLogic.com/TeachLogic-app-notes-rs- 232-control/.
-
Page 15: Security Alert Feature
™ Security Alert Feature The Security Alert feature allows a user with a TeachLogic wireless microphone to summon help or indicate to administration personnel of an urgent situation in the room of that user. The Matrix is designed for a 4-pulse system. - Page 16 The process requires 5 full cycles of the RS-232 switch while the power button in Red OFF state. Using the previous process, check the mode to confirm that the Maxim™ III is in the desired 1-pulse or 4-pulse mode. If not, repeat the steps above to change the mode. www.teachlogic.com support@teachlogic.com | (760) 631-7800...
- Page 17 The process requires 5 full cycles of the RS-232 switch while the power button in Red OFF state is held in. Using the previous process, check the mode to confirm that the Maxim™ III is in the desired 1-pulse or 4-pulse mode. If not, repeat the steps above to change the mode. www.teachlogic.com support@teachlogic.com | (760) 631-7800...
-
Page 18: Final Setup
Raise the volume on “Ch B” until feedback begins, then reduce volume to eliminate all feedback. • Walk around the room while talking into the microphone to confirm good connectivity and sound under/in front of each speaker without feedback. Once complete, charge microphones so they are ready for use. www.teachlogic.com support@teachlogic.com | (760) 631-7800... -
Page 19: Power Button Lights | Standby Function
“wake” the amplifier, but to hear the full first page of a morning, be sure to wake it first with one of the methods above since, or the initial several seconds may be missed if there are no other paging speakers provided to deliver the page audio. www.teachlogic.com support@teachlogic.com | (760) 631-7800... -
Page 20: Troubleshooting
Matrix Troubleshooting ™ Troubleshooting Problem Solution System will not power “ON” Verify AC power; the power button will illuminate Blue when turned ON Check if system has been unplugged; reconnect to power outlet or use another device to ascertain power available at outlet Check circuit breaker Call maintenance for assistance System is turned “ON”... - Page 21 Matrix Specifications ™ Matrix™ (IMA-121) Receiver Input Infrared FM Modulation FM Wide-band Reception Frequencies Ch. A: 2.08 MHz | Ch. B: 2.54 MHz Infrared Wavelength 850 nm Tone Signal Ch. A: 32.768 kHz De-emphasis 50 μs Frequency Response 40 Hz, -18 kHz, ± 3 dB S/N Ratio ›65 dB ‹1% @1 kHz...
- Page 22 Matrix Specifications ™ Sapphire (IRT-60) microphone/transmitter specs Transmission Carrier Infrared Transmission Frequencies 2.08 MHz & 2.54 MHz Channel Selection Field Switchable Transmitting Diodes Wavelength 850 nm Modulation FM Wide-Band Frequency Response 100 Hz - 10 kHz Pilotone Frequency 32.768 kHz Peak Deviation ±...
- Page 23 541 Main St., Suite B, Longmont, CO 80501 TeachLogic.com | Support@TeachLogic.com | 760-631-7800 P/N UMM-121 20220323...
Need help?
Do you have a question about the Matrix IMA-121 and is the answer not in the manual?
Questions and answers