Advertisement
Table of Contents
Figure 1
Time Setting Dial
-
+
Figure 4
CLOCK SET UP INSTRUCTIONS
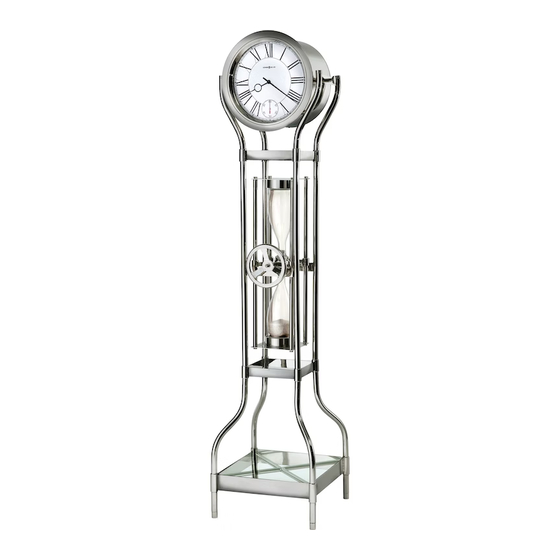
1. Move the clock close to its final location. Levelers are provided on the bottom of the clock (Figure 1).
IMPORTANT: ENSURE CLOCK IS POSITIONED SQUARE AND FIRM ON THE FLOOR SO THAT IT WILL NOT FALL OVER. ADJUST
LEVELERS FOR MAXIMUM STABILITY AND PROPER ALIGNMENT.
2. Access the clock's quartz movment through the the back access panel (Figure 2). Loosen the knob by turning
counter-clockwise. Be sure to hold the back panel in place as the knob is loosened. Gently pull on the back access panel to
release it from the magnetic catches. Replace this panel after set up is complete, and tighten the knob to hold it in
position.
3. Install one "AA" size alkaline battery according to the +/- symbols into each battery holder (Figure 3 & 4).
4. Turn the Time Setting Dial to rotate the hands to the correct time (Figure 4).
5. Close the access panel (Figure 2).
6. Place Metal Cross Brace in position over four (4) threaded studs (Figure 6).
7. Remove backing from non-slip pads and place on base four (4) places (Figure 5).
8. Place glass shelf in position (Figure 6).
IMPORTANT: KEEP PLASTIC BAGS AND SMALL PARTS AWAY FROM CHILDREN.
BATTERY REPLACEMENT
If the clock begins to lose time, this is a sign of a weak or exhausted batteries. Replace with new alkaline batteries.
R
Figure 2
Figure 5
615100 FLOOR CLOCK
SET UP AND OPERATING INSTRUCTIONS
Time Movement
Seconds Movement
Non-Slip Pad
Figure 3
Glass Shelf
Metal Cross Brace
Figure 6
2321619-r1
09/2018
Advertisement
Table of Contents

Related Manuals for Howard Miller 615100


Summary of Contents for Howard Miller 615100
- Page 1 615100 FLOOR CLOCK SET UP AND OPERATING INSTRUCTIONS Time Movement Seconds Movement Figure 1 Figure 2 Figure 3 Glass Shelf Non-Slip Pad Time Setting Dial Metal Cross Brace Figure 4 Figure 5 Figure 6 CLOCK SET UP INSTRUCTIONS 1. Move the clock close to its final location. Levelers are provided on the bottom of the clock (Figure 1).
- Page 2 615100 FLOOR CLOCK SETUP AND OPERATING INSTRUCTIONS INSTRUCCIONES DE CONFIGURACIÓN DEL RELOJ 1. Mueva el reloj cerca de su ubicación final. Los niveladores se proporcionan en la parte inferior del reloj (Figura 1). IMPORTANTE: ASEGÚRESE DE QUE EL RELOJ ESTÉ POSICIONADO CUADRADO Y FIRME EN EL PISO PARA QUE NO SE CAIGA. AJUSTE LOS NIVELADORES PARA UNA MÁXIMA ESTABILIDAD Y UNA ALINEACIÓN ADECUADA.
Need help?
Do you have a question about the 615100 and is the answer not in the manual?
Questions and answers