Advertisement
Available languages
Available languages
CLOCK SET UP INSTRUCTIONS
1. Move the clock close to its final location. Make sure the clock is positioned firmly on the floor.
WARNING: ENSURE CLOCK IS POSITIONED SQUARE AND FIRM ON THE FLOOR SO THAT IT WILL
NOT FALL OVER.
2. Access the clock's quartz movement through the back access panel. (See Figure 1) Loosen
the knob by turning counter-clock wise. Be sure to hold the back panel in place as the knob
is loosened. Gently pull on back access panel to release from magnetic catches. Replace
this panel after set up is complete, and tighten the knob to hold it in position.
WARNING: KEEP PLASTIC BAGS AND SMALL PARTS AWAY FROM CHILDREN.
QUARTZ MOVEMENT INSTRUCTIONS
SETTING THE TIME
1. Before inserting the batteries (Figure 2), adjust the time to 5:50 by using the Time Setting knob
(Figure 2) to rotate the hands CLOCKWISE.
2. Install two "C" size alkaline batteries according to the +/- symbols in the battery holders.
(Figure 2)
Do not install the batteries on the Pendulum Drive motor at this time. (Figure 3)
3. Set the time by using the Time Setting knob (Figure 2) to rotate the hands CLOCKWISE. If
setting the time for PM, make sure the hour hand passes through 12 o'clock noon until the
desired time is shown. While setting the time, it is normal to hear sounds from the movement
or speaker. Continue advancing the time until the correct time is shown. Once the time is set,
the melody will adjust to the time selected, however, it is important that the clock movement
operate for at least one hour for the chime sequence to become fully functional. The clock
may chime out of sequence during the first hour of operation. The quartz movement is highly
accurate and has been adjusted at the factory for precise time keeping.
SETTING THE MELODY (SEE FIGURE 2)
SELECT: Use the chime SELECT switch to select the chime melody according to the following
settings:
4X4 WESTMINSTER = Westminster melody and Hour Strike on the hour. Additionally ¼ of
4X4 AVE MARIA =
WESTMINSTER =
BIM BAM =
VOLUME CONTROL (SEE FIGURE 2)
VOLUME: Turn the Volume Control Knob to adjust the volume.
SOUND: Use the SOUND switch to select the sound options according to the following settings:
PM11:00-AM5:45 NIGHT OFF = turns off the chime melody and strike from 11:00PM to
5:45AM (Automatic Nighttime volume shut-off)
24 Hr ON = the chime melody and strike are always ON
OFF = the chime melody and strike are always OFF
the melody at quarter past the hour, ½ the melody at half past the
hour, ¾ of the melody at three-quarters past the hour, and the full
melody on the hour.
Ave Maria melody and Hour Strike on the hour. Additionally ¼ of the
melody at quarter past the hour, ½ the melody at half past the
hour, ¾ of the melody at three-quarters past the hour, and the full
melody on the hour.
Westminster melody and Hour Strike on the hour. No ¼, ½, ¾ melody
during the hour.
Bim Bam strike on the hour (i.e. at 1 o'clock, 1 strike of "bim-bam",
at 2 o'clock then 2 strike of "bim-bam", etc.) No melody.
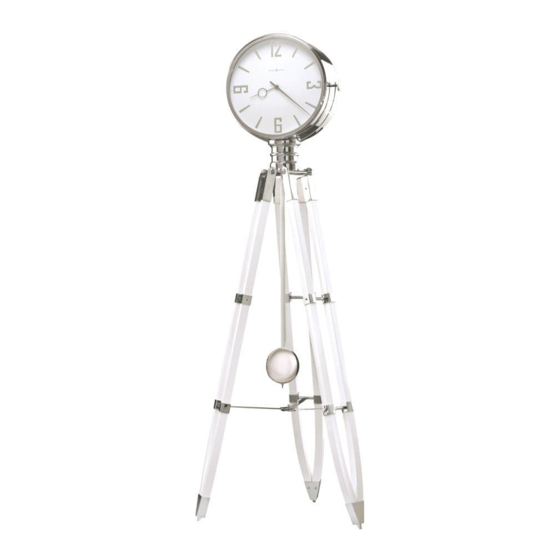
Tripod Floor Clock Quartz Movement
And Pendulum Instruction
1
FIGURE 1
BATTERY
TIME SETTING
SOUND
SET
SELECTION
MONITOR
VOLUME CONTROL
QUARTZ MOVEMENT FIGURE 2
RESET
2320961
Advertisement
Table of Contents

Related Manuals for Howard Miller 615-069


Summary of Contents for Howard Miller 615-069
- Page 1 Tripod Floor Clock Quartz Movement And Pendulum Instruction CLOCK SET UP INSTRUCTIONS 1. Move the clock close to its final location. Make sure the clock is positioned firmly on the floor. WARNING: ENSURE CLOCK IS POSITIONED SQUARE AND FIRM ON THE FLOOR SO THAT IT WILL NOT FALL OVER.
- Page 2 BATTERY PENDULUM GUIDE TRANSPORT LOCKING PIN PENDULUM DRIVER FIGURE 3 FIGURE 4 FIGURE 5 FIGURE 7 FIGURE 8 FIGURE 9 FIGURE 6 OTHER FEATURES (SEE FIGURE 2) MONITOR: Press the MONITOR button to demonstrate the hourly chime melody. SET: Advances the hour strike count without advancing the time shown on the clock. Hour strike may not match time shown on clock after pressing the SET button.
-
Page 3: Limited Warranty
SERVICE INFORMATION Howard Miller offers a limited 2-year warranty on floor clocks from the original date of purchase or date of receipt if the product was a service award. In the unlikely event that your product appears to be malfunctioning or requires repair within the warranty period, please contact your retailer or the company who provided the item if it was an award. - Page 4 RELOJ DE TRIPODE MOVIMIENTO E INSTRUCCIONES DEL PÉNDULO DE CUARZO INSTRUCCIONES DE PREPARACIÓN DEL RELOJ 1. Mueva el reloj cerca de su ubicación final. Asegúrese que el reloj esté bien parado sobre el piso. ADVERTENCIA: ASEGURESE QUE EL RELOJ ESTE VERTICAL Y FIRME SOBRE EL PISO DE MANERA QUE NO PUEDA VOLCARSE.
-
Page 5: Garantia Limitada
INFORMACION DE SERVICIO Howard Miller ofrece una garantía limitada de 2 años en los relojes de piso a partir de la fecha original de compra o la fecha de recepción si el producto fue un premio de servicio. En el caso improbable de que su producto aparezca estar defectuoso o requiera reparación dentro del período de garantía, comuníquese con su distribuidor o con la empresa que proporcionó... - Page 6 HORLOGE INSTRUCTIONS POUR LE MOUVEMENT AU QUARTZ ET LE PENULE QUARTZ Instructions d'installation de l'horloge 1. Placer l'horloge à son emplacement définitif. S'assurer de la ferme stabilité de l'horloge sur le sol. Des dispositifs de mise à niveau sont prévus sur le dessous de l'armoire (voir la figure 1).
-
Page 7: Garantie Limitée
SERVICE Howard Miller offre une garantie limitée de 2 ans sur les horloges de plancher à partir de la date d’achat initiale ou de la date de récep- tion si le produit était une récompense de service. Dans le cas improbable où votre produit semble présenter un dysfonctionnement ou nécessite une réparation pendant la période de garantie, veuillez contacter votre détaillant ou la société... - Page 8 STATIV UHR QUARZ- GEHWERK UND PENDEL - ANLEITUNGEN Anweisungen zum Aufstellen der Uhr 1. Stellen Sie die Uhr nahe ihres endgültigen Aufstellortes. Achten Sie darauf, dass die Uhr fest auf dem Boden steht. Unter dem Gehäuse befinden sich Nivellierfüße (siehe Abbildung 1). WARNUNG: ACHTEN SIE DARAUF, DASS DIE UHR GERADE UND FEST AUF DEM BODEN STEHT UND NICHT UMFALLEN KANN. 2.
-
Page 9: Beschränkte Garantie
Garantie ist auf die Reparatur des Produkts mit neuen oder reparierten Komponenten beschränkt. Das Produkt kann nach dem Ermessen von Howard Miller mit einem neuen oder reparierten Produkt ersetzt werden. Diese Garantie schließt keine Schäden an dem Produkt oder Teilen des Produkts ein, die eine Folge von Misshandlung, Unfall, Änderung, klimatischen oder umgebungsbedingten Umständen, den normalen Gebrauch uberschreitenden Schäden, Frachtschäden, fehlerhafter Handhabung, Missbrauch und nicht genehmigter Reparatur...
Need help?
Do you have a question about the 615-069 and is the answer not in the manual?
Questions and answers