Table of Contents
Advertisement
Available languages
Available languages
Quick Links
Advertisement
Chapters
Table of Contents

Related Manuals for Kernau KVCU 100


Summary of Contents for Kernau KVCU 100
- Page 1 INSTRUKCJA OBSŁUGI ODKURZACZA KVCU 100...
- Page 3 SZANOWNY KLIENCIE Dziękujemy za zaufanie i wybór marki Kernau. Wychodząc naprzeciw Twoim oczekiwaniom, oferowane sprzęty marki Kernau produkowane są w wyspecjalizowanych fabrykach z wykorzystaniem najnowszych technologii oraz przetestowane pod względem jakości. Aby wybrany przez Ciebie produkt służył Ci jak najdłużej, zapoznaj się ze wskazówkami dotyczącymi obsługi, czyszczenia i konserwacji, które znajdziesz poniżej. W niniejszej instrukcji chcemy Ci przedstawić wszystkie możliwości zakupionego produktu, a także przekazać kwestie związane z bezpieczeństwem, instalacją, optymalnymi ustawieniami i oszczędnym użytkowaniem. Znajdziesz tutaj cenne porady, jak najefektywniej korzystać z urządzenia zgodnie ze swoimi aktualnymi potrzebami.
-
Page 4: Table Of Contents
SPIS TREŚCI ROZDZIAŁ 1. OSTRZEŻENIA DOTYCZĄCE BEZPIECZEŃSTWA ..5 ODPOWIEDNIA UTYLIZACJA PRODUKTU ..................6 ROZPAKOWANIE PRODUKTU ........................ 6 ROZDZIAŁ 2. OPIS PRODUKTU ................ 7 AKCESORIA WCHODZĄCE W SKŁAD ZESTAWU: ................7 ROZDZIAŁ 3. UŻYTKOWANIE PRODUKTU ..........8 INSTRUKCJA DOTYCZĄCA PRZECHOWYWANIA ................9 POSTĘPOWANIE ZE ZUŻYTYM SPRZĘTEM ..................9 ROZDZIAŁ 4. CZYSZCZENIE I KONSERWACJA ........10 ŁADOWANIE .............................. 10 CZYSZCZENIE LUB WYMIANA FILTRA HEPA ................. 10 OPRÓŻNIANIE POJEMNIKA NA KURZ ....................11 CZYSZCZENIE ELEKTRYCZNEJ SZCZOTKI DO PODŁÓG ............11 WYMIANA BATERII .......................... 12... -
Page 5: Rozdział 1. Ostrzeżenia Dotyczące Bezpieczeństwa
ROZDZIAŁ 1. OSTRZEŻENIA DOTYCZĄCE BEZPIECZEŃSTWA Uwaga: W celu bezpiecznego i efektywnego użytkowania należy przestrzegać zamieszczonych poniżej uwag i wskazówek. Nie wolno używać nieoryginalnych części zamiennych lub akcesoriów bez uprzedniego uzyskania zgody producenta. W przypadku użycia części bez zgody producenta gwarancja automatycznie wygaśnie. Po rozpakowaniu odkurzacza należy sprawdzić, czy produkt nie jest uszkodzony oraz czy wszystkie części są kompletne. Jeżeli przewód zasilający jest uszkodzony, bezwzględnie musi być on wymieniony na nowy przez producenta, serwis lub autoryzowany punkt serwisowy. Dzieci oraz osoby niepełnosprawne mogą używać produktu tylko pod nadzorem osoby dorosłej. W przypadku wystąpienia uszkodzenia należy bezzwłocznie wyjąć wtyczkę przewodu zasilającego z gniazdka, nie należy używać uszkodzonego odkurzacza. • Należy unikać przechowywania lub używania odkurzacza w pobliżu źródeł ciepła lub innych gorących przedmiotów, gdyż grozi to odkształceniem części z tworzyw sztucznych, co niekorzystnie wpływa na eksploatację urządzenia. •... -
Page 6: Odpowiednia Utylizacja Produktu
W celu uaktywnienia zabezpieczenia akumulatora trzy pierwsze ładowania należy wykonać po całkowitym rozładowaniu akumulatora. UWAGA: Wtyczka musi zostać wyciągnięta z gniazdka sieciowego przed podejmowaniem czynności czyszczących lub konserwujących urządzenie. Jeśli przewód przyłączeniowy został uszkodzony, jego wymianę należy powierzyć producentowi lub wykwalifikowanemu serwisantowi. ROZPAKOWANIE PRODUKTU Urządzenie n a c zas t ransportu z ostało z abezpieczone p rzed u szkodzeniem. P o rozpakowaniu urządzenia prosimy o usunięcie elementów opakowania w sposób niezagrażający środowisku. -
Page 7: Rozdział 2. Opis Produktu
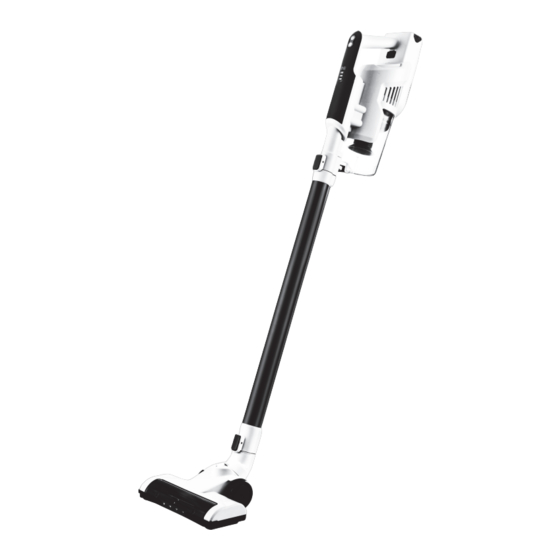
ROZDZIAŁ 2. OPIS PRODUKTU *Zdjęcia produktu mogą odbiegać od rzeczywistego modelu i/lub koloru sprzętu. Przycisk włączenia/wyłączenia/zmiany prędkości. Wskaźnik poziomu naładowania baterii. Przycisk zwolnienia rury. Metalowa rura ssąca. Przycisk zwalniania szczotki. Przycisk zwalniania akumulatora. Wskaźnik zapełnienia worka na kurz. Wylot powietrza. Filtr cyklonowy. 10. Pojemnik na kurz. 11. Przycisk zwalniania pojemnika na kurz. 12. Elektroszczotka. 13. Ładowarka. 14. Uchwyt ścienny. 15. Szczotka okrągła 2w1. 16. Długa ssawka szczelinowa... -
Page 8: Rozdział 3. Użytkowanie Produktu
ROZDZIAŁ 3. UŻYTKOWANIE PRODUKTU Montaż metalowej rury ssącej: • Wsunąć koniec metalowej rury ssącej w otwór wlotowy zespołu silnikowego, po usłyszeniu charakterystycznego dźwięku zapadki, należy uznać, że metalowa rura ssąca jest zainstalowana na swoim miejscu. (Rys.1) Demontaż metalowej rury ssącej: • Aby zdemontować metalową rurę ssącą, należy jedną ręką trzymać część rurową i wcisnąć przycisk zwalniania, zaś drugą ręką należy uchwycić metalową część rury i wysunąć ją. (Rys.2) Montaż i demontaż szczotki: • Wcisnąć przycisk blokady szczotki na wlocie metalowej rury ssącej, szczotka powinna wsunąć się bez luzu, po usłyszeniu odgłosu zapadki, należy uznać, że szczotka do podłogi zamontowana jest na swoim miejscu. (Rys.3) • W celu zdemontowania szczotki do podłóg, należy wcisnąć przycisk zwalniający jedną ręką, trzymając, jednocześnie szczotkę w drugiej ręce. Przycisk umożliwi swobodne wysunięcie szczotki. (Rys.4) Połączenie szczotki do podłóg i złączki na wlocie przewodu ssania: • Wcisnąć przycisk blokujący szczotki do podłóg na wlocie urządzenia, szczotka powinna wsunąć się bez luzu. Po usłyszeniu odgłosu zapadki szczotka do podłogi powinna być zamontowana na swoim miejscu. (Rys.5) • W celu demontażu szczotki do podłóg jedną ręką należy wcisnąć przycisk, a drugą ręką należy trzymać szczotkę i wyciągnąć ją na zewnątrz. (Rys.6) Instrukcja dotycząca akcesoriów: •... -
Page 9: Instrukcja Dotycząca Przechowywania
INSTRUKCJA DOTYCZĄCA PRZECHOWYWANIA Po oczyszczeniu, by ułatwić sobie późniejsze korzystanie z odkurzacza, należy przechowywać urządzenia wraz z akcesoriami tak, jak pokazano na rysunku poniżej. Montaż n a ś cianie. M ożna t akże p rzechowywać u rządzenie m ocowane n a ś cianie. P rzed z amontowaniem mocowania naściennego należy mocno przykręcić śrubę do ściany lub szafki. Zawiesić mocowanie ścienne na łbie śruby. -
Page 10: Rozdział 4. Czyszczenie I Konserwacja
ROZDZIAŁ 4. CZYSZCZENIE I KONSERWACJA ŁADOWANIE Przed podłączeniem do ładowania należy zawsze sprawdzić, czy źródło zasilania jest bezpieczne oraz, czy napięcie w sieci lokalnej jest zgodne z napięciem określonym dla zasilania produktu. Otwór zasilacza znajduje się w tylnej części urządzenia. Jak pokazano na rysunku poniżej, należy wsunąć wtyczkę zasilacza w otwór urządzenia. (Rys.1) Wetknąć wtyczkę ładowarki w gniazdo zasilania. Urządzenie jest teraz ładowane. Podczas ładowania kontrolka zasilania świeci błyskając na zielono, gdy kontrolka wskaźnika zasilania świeci. W sposób ciągły na zielono oznacza to, że akumulator jest całkowicie naładowany. Gdy pierwsza zielona kontrolka zasilania zgaśnie, oznacza to, że moc jest stopniowo zmniejszana. Gdy miga ostatnia zielona kontrolka zasilania bateria jest na wyczerpaniu - urządzenie należy ponownie naładować. Należy pamiętać, że urządzenie nie może pracować w czasie ładowania. Rys. 1 Rys. 2 CZYSZCZENIE LUB WYMIANA FILTRA HEPA Po pewnym czasie filtry mogą ulec zatkaniu, co powoduje zmniejszenie siły ssania. Dlatego do prawidłowej i... -
Page 11: Opróżnianie Pojemnika Na Kurz
OPRÓŻNIANIE POJEMNIKA NA KURZ Gdy odkurzacz pracuje, niezbędnym jest wyczyszczenie co jakiś czas pojemnika na kurz, rdzenia cyklonu, układu zbierania kurzu w celu zapewnienia możliwie najlepszej wydajności odkurzania. Wyłączyć urządzenie. Przenieść urządzenie nad kosz na śmieci. Wcisnąć przycisk zwalniania pokrywy i można wyjąć pojemnik na śmieci. Wyjąć filtr HEPA i filtr cyklonowy. Umieścić pojemnik na kurz nad koszem na śmieci i powoli wyciągnąć układ zbierania kurzu w pojemniku cyklonowym. Delikatnie potrząsać pojemnikiem na kurz, aż do jego opróżnienia. 1. Wyjąć pojemnik 2. Wyjąć filtr cyklonowy 3. Opróżnić pojemnik CZYSZCZENIE ELEKTRYCZNEJ SZCZOTKI DO PODŁÓG Czasami może dojść do zablokowania szczotki przez jakiś większy przedmiot lub poprzez nawinięcie na nią długich włosów itp. Szczotka obrotowa wymaga więc co jakiś czas czyszczenia. Wcisnąć przycisk zwalniania elektrycznej szczotki do podłóg, wyjąć szczotkę z urządzenia. Przesunąć szczotkę elektryczną w kierunku dna bloku jej mocowania i wyjąć szczotkę obrotową. Oczyścić szczotkę (patrz rys.). -
Page 12: Wymiana Baterii
Jeżeli trzeba wymienić akumulator na zapasowy lub gdy jest on rozładowany, zachodzi potrzeba wyjęcia akumulatora. W tym celu należy wcisnąć pomarańczowy przycisk na obudowie. Można wtedy wyjąć akumulator i wymienić go na inny. CZYSZCZENIE Przed czyszczeniem którejkolwiek z części zawsze należy wyłączyć urządzenie i odłączyć je od źródła zasilania, wyjmując wtyczkę z gniazdka. Nie wolno czyścić żadnych części odkurzacza w zmywarce, w razie potrzeby należy je czyścić zwilżoną szmatką. SERWIS PL: +48 22 243 70 00 Pn 8:00 - 17:00 Wt-Pt 8:00 - 16:00 serwis@kernau.com www.kernau.com/support/... - Page 13 USER MANUAL CORDLESS VACUUM CLEANER KVCU 100...
- Page 15 THANK YOU FOR CHOOSING THIS PRODUCT This User Manual contains important safety information and instructions on the operation and maintenance of your appliance. Please take the time to read this User Manual before using your appliance and keep this book for future reference. CAUTION : PLEASE READ THIS MANUAL CAREFULLY BEFORE USING AND KEEP IT PROPERLY FOR FUTURE REFERENCE Read this user manual carefully before you use the appliance and save it for future reference - Please always charge the appliance before your use.
- Page 16 TABLE OF CONTENTS 1. CAUTION ......................5 2. GENERAL DESCRIPTION ................6 3. PREPARING FOR USE ..................7 STORAGE FUNCTION INSTRUCTIONS ................... 8 ENVIRONMENT ............................ 8 4. CLEANING AND MAINTENANCE ..............9 CHARGING ............................ 9 USING THE APPLIANCE ........................ 9 EMPTYING THE DUST CUP ...................... 10 CLEANING OR REPLACING THE HEPA FILTER .............. 10 CLEAN THE ELECTRIC FLOOR BRUSH ................... 11...
-
Page 17: Caution
1. CAUTION Note: This project all the contents are related to safety, please make the user abide it. The project precautions just in order to properly use this product. Note the risk, the magnitude of the hazard, and the possible accidents. Do not use other parts without permission from the manufacturer, if thus the machine is in trouble the warranty will be automatically suspended. After dismantling the packing, please check whether the product is damaged and the parts are complete. If the power cord is damaged in order to avoid danger it must be replaced by the manufacturer, the maintenance department or similar department. Children and incapacitated people use this product under supervision of a guardian. If a fault occurs immediately unplug the power cord, do not have the defective product in working condition. • Please do not let the vacuum cleaner too close to a heat source and other hot objects, avoid plastic parts deformation, affect the use. • When using the vacuum cleaner, please note that each filter element installed, do not use a vacuum cleaner in the absence of the filter member. • Pay attention to check the plug, the power cord must be completely undamaged to avoid the risk of electric shock. • Make sure that the power supply is secure and the local voltage is consistent with the voltage identified by the product. • We suggest you cut the power cord before disposing the product. Also suggest you to any possible causing any danger, especially for children in dangerous parts to take the same action. • This product is just limited to household. Do not use this product in outdoor. • Please don’t use a vacuum cleaner sucking lighted cigarette butts in order to avoid danger. Please do not suck detergent, kerosene, gasoline, paint, sewage and other liquids, in order to avoid the liquid into the motor causing motor failure. • When using the vacuum cleaner, please don’t inhale hair groups, large ball of paper, that are easy to be blocked by the suction port or suction pipe, hose, etc. otherwise may cause motor failure or housing deformation. If inhaled causing blockage, please stop timely and pull the plug off to clean. • When cleaning the vacuum cleaner, please use wet rag with water or neutral detergent. Don’t use gasoline, banana oil and so on, otherwise it will cause shell cracking or fade. -
Page 18: General Description
2. GENERAL DESCRIPTION On-off Switch/Speed-change button Charging indicator Tube release button Spray metal tube Brush release button Battery Battery release button Air outlet Cyclone & Filter 10. Dust cup 11. Dust cup release button 12. Motorized brush 13. Charger 14. Vac hanger 15. 2in1 round nozzle 16. Long crevice Technical data Power adapter Batteries Input voltage /current: 100 - 240V ~, 50/60Hz, 0.45A Capacity: 2200mAh Output voltage/current: 26V 450mA Batteries: 22.2V Protection class: II / Appliance Input voltage 22.2V... -
Page 19: Preparing For Use
3. PREPARING FOR USE Assemble spray metal tube: • Insert the end of the spray metal tube into the main engine inlet opening, after hearing the clicks, spray metal tube installed in place. • If you want to remove the spray metal tube, one hand hold the spray metal tube to release button, the other hand hold the aluminum alloy and remove the outward. Assemble and dis-assemble the brush: • Push the lock pin of electric floor brush to spray metal tube inlet, ensure tight without loose, after hearing the clicks, electric floor brush installed in place. • If you want to remove the electric floor brush, please press the electric floor brush to release button with one hand and the other hand hold the electric floor brush and remove the outwards. Electric floor brush and host suction inlet connection: • Press the lock pin of electric floor brush into the inlet within the appliance, ensure tight without loose, after hearing the clicks, electric floor brush installed in place. • If you want to remove the electric floor brush, one hand push the lock pin of electric floor brush to release button, the other hand hold the electric floor brush and remove the outwards Accessories instructions: • 2 in 1 round nozzle is suitable for cleaning the room that is small, or irregular surfaces, such as a door frame, baseboard, keyboard etc. • Crevice nozzle is suitable for cleaning the gap, thight surface such as corners, car seats, sofas etc Electric floor brush Assemble and dis-assemble Assemble spray metal tube and host suction inlet the brush connection... -
Page 20: Storage Function Instructions
STORAGE FUNCTION INSTRUCTIONS After cleaning in order to facilitate subsequent access, the appliance and accessories as shown in be placed on the storage. Wall mounting. Please nail the screw on wall or cabinet firmly before you install the wall mounting. Hook the wall mounting on the head of screw. Hook appliance (see the hooking position on the pic) into the wall mounting after your use. ENVIRONMENT Do not throw away the appliance and battery with the normal household waste at the end of its life. Hand it in at an official collection point for recycling, by doing this you help to preserve the environment. -
Page 21: Cleaning And Maintenance
4. CLEANING AND MAINTENANCE CHARGING Please always make sure that the power supply is secure and the local voltage is consistent with the voltage identified by the product. The charger hole was in the rear of the appliance. As shown on pic, insert the charge plug pin in the hole of the appliance. You can also charge the appliance on the docking station. Please insert the charger plug pin in top hole of docking station as pic. Twist the plug pin clock-wise till the plug turn into the frame as pic show. Insert the cord into the gap of the docking station. Make sure the plug pin is exposed on the seat of docking station. Insert the appliance. Make sure the appliance is well seat in the position as pic show. If the appliance can not well seat, please try again unit till well seated. Plug of the charger into the power socket, the appliance is in charge. When appliance is charging the power indicator light is showing a green light flashing in turn, when the power indicator light 3 green lights is long, it means the battery is fully charged. When the green power indicator light turn off, it means the power is gradually reduced, when the power is gradually reduced to the result that the appliance can not work correctly,the last green power indicator light is flashing, need to be charged again. Please note the appliance can not work during charging. USING THE APPLIANCE Make sure the product is fully charged before use. -
Page 22: Emptying The Dust Cup
EMPTYING THE DUST CUP When the dust cup sucks for maximum, it should be timely cleaning the dust cup, cyclone core, dust collection system in order to ensure the best cleaning effect. Stop the appliance. Take the appliance over the garbage bin. Press the dust cover release button, and you can take off the dust cup. Take out the HEPA and cyclone. Place the dust cup above the garbage bin, and slowly draw the cyclone dust collecting system out. Gently shake the dust cup, pour the garbage of the dust cup out. 1. Take out the Cup 2. Take out the Cyclone 3. Empty the Cup CLEANING OR REPLACING THE HEPA FILTER The filters can become blocked after some time and can thereby reduce the suction power. It is therefore important that the above mentioned filter determine to replace. Take off the dust cup and pull out the cyclone and HEPA. When you take off HEPA, you will find a sponge in cyclone, and please take it out too. -
Page 23: Clean The Electric Floor Brush
CLEAN THE ELECTRIC FLOOR BRUSH The Electric floor brush can be possibly block by big object or rape around by hair or long thread. It need to be clean the rolling brush timely. Push the electric floor brush release button, remove the electric floor brush from appliance. Arbitrary sliding electric brush to the bottom side of the rolling brush locking block, remove the rolling brush. Clean it - see pic. After the cleanup completed, install the rolling brush inside the electric floor brush. Make sure the rolling brush is proper seat in position. Sliding the locking block in locking position -see pic. REPLACE THE BATTERY If you need the a back up battery or the battery became more and more weak. You need to replace a new battery.You can find the battery case. Press the orange button on the case. Then you can take out the battery and replace a new one. CLEANING Always switch off and unplug the appliance before you clean any parts. Do not clean any part of the vacuum cleaner in the dishwasher, if necessary clean the parts with a moist cloth. - Page 24 SERWIS PL: +48 22 243 70 00 Pn 8:00 - 17:00 Wt-Pt 8:00 - 16:00 serwis@kernau.com www.kernau.com/support/...