Canon PIXMA MX700 Quick Start Manual
Hide thumbs
Also See for PIXMA MX700:
- Quick start manual (204 pages) ,
- Network setup manual (132 pages) ,
- Service manual (44 pages)

Subscribe to Our Youtube Channel
Related Manuals for Canon PIXMA MX700


Summary of Contents for Canon PIXMA MX700
-
Page 1: Table Of Contents
Quick Start Guide Table of Contents Introduction How to Use the Documentation Provided Preparing the Machine Installing the MP Drivers Reading the On-screen Manuals Loading Printing Paper Operation Panel Copying Printing from a Memory Card Printing from Your Computer Scanning Images Printing Photographs Directly from a Compliant Device Faxing Replacing an Ink Tank... - Page 2 For Customers in Europe, Middle-East, Africa and Russia only For Canon Customer Support contacts, please see the back cover of the European Warranty Systems (EWS) Booklet or visit www.canon-europe.com. This equipment conforms with the essential requirements of EC Directive 1999/5/...
-
Page 3: Introduction
“MultiMediaCard” is a trademark of the MultiMediaCard Association. “SD Card”, “miniSD Card”, and “microSD Card” are trademarks of SD Association. © CANON INC. 2007 All rights reserved. No part of this publication may be transmitted or copied in any form whatsoever without the express written permission. - Page 4 Approximately 3 seconds per page fax transmission time based on Canon FAX Standard Chart (Standard Mode) at 33.6 Kbps modem speed. The Public Switched Telephone Network (PSTN) currently supports 28.8 Kbps modem speeds or lower, depending on telephone line conditions.
-
Page 5: How To Use The Documentation Provided
How to Use the Documentation Provided Printed Documentation Setup Sheet Be sure to read this sheet first. This sheet includes instructions for setting up your machine and getting it ready for use. Network Setup Guide Read this guide when starting to use the machine in a network environment. -
Page 6: Preparing The Machine
Preparing the Machine Be sure to read your setup sheet first for setting up your machine and getting it ready for use. Unpack the machine Please confirm the included items against the illustration printed on the lid of the packing box. Important A USB cable is necessary to connect the machine with your computer. - Page 7 Install the ink tanks. Important Make sure that all the ink tanks are installed in the correct position, matching the label. The machine cannot be used unless all the ink tanks are installed. Wait for about 2 minutes, until the machine has stopped making operating noises, before proceeding.
- Page 8 Selecting the Language for the LCD Press the COPY button, wait for about 5 seconds, and then press the MENU button. Press the ] button twice ( ), then press the OK button. Press the ] button once ( ), then press the OK button. Press the } button five times, then press the OK button.
-
Page 9: Installing The Mp Drivers
Installing the MP Drivers The following information is for using the machine with USB connection. If you use the machine over wired LAN, refer to the Network Setup Guide. ® Information Common to Windows and Macintosh Notes on the Installation Process If the Select Language screen appears, select a language, then click Next. - Page 10 Users in Asia To install the User’s Guide on-screen manual in a language other than the installed one, double-click the Manual folder in the Setup CD-ROM, Canon folder, and then copy a language folder to your hard disk. Installing the MP Drivers...
-
Page 11: Reading The On-Screen Manuals
You can view the on-screen manuals in the following way: To view the on-screen manual, double-click the XXX On-screen Manual shortcut icon on the desktop, or click Start > All Programs (or Programs) > Canon XXX Manual > XXX On-screen Manual (where “XXX” is your machine’s name). -
Page 12: Loading Printing Paper
Loading Printing Paper You can load A4, Letter, or B5-sized plain paper in the Front Tray. You cannot load any other paper in the Front Tray. For information on loading paper in the Rear Tray, refer to the User’s Guide on- screen manual. -
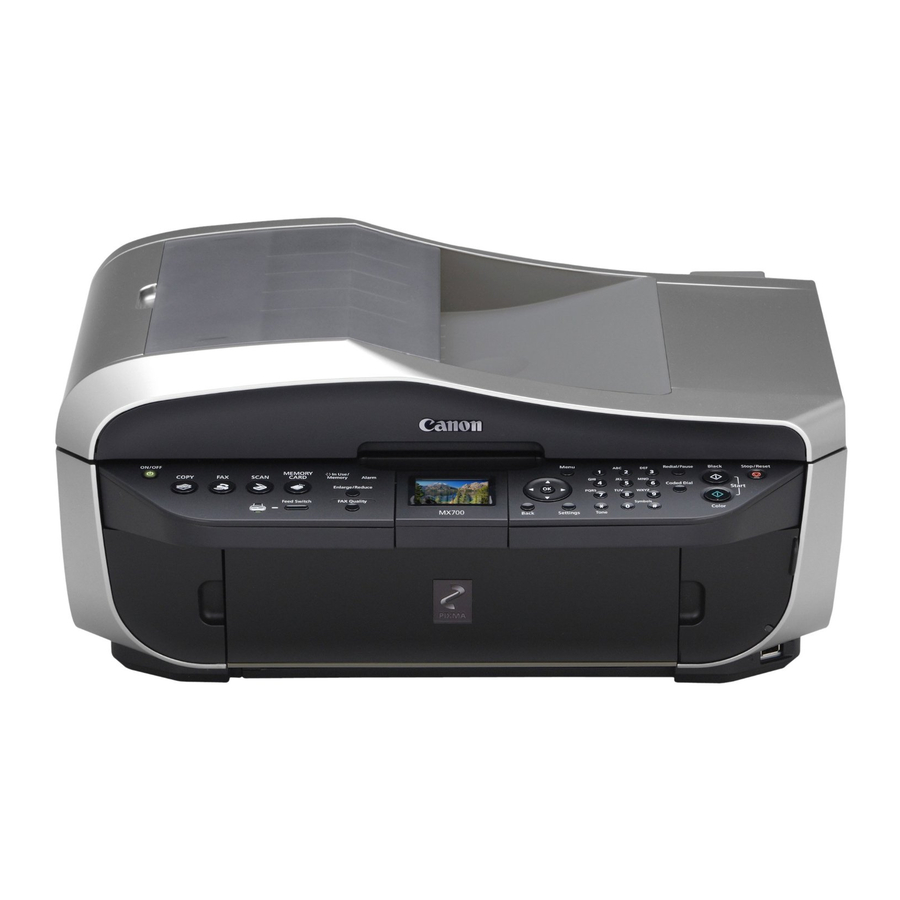
Page 13: Operation Panel
Operation Panel (1) (2) (3) (4) (5) (7)(8) (10) (11) (12) (13) (14) (15) (16) (25) (24) (23) (22) (21) (20) (19) (18) (17) (1) ON/OFF button / Power lamp Turns the machine on and off. Lights or flashes green to indicate the power status. Before turning on the machine, make sure the Document Cover is closed. - Page 14 (14) Redial/Pause button Redials the last number called using the Numeric buttons. Also enters pauses between or after numbers when dialing or registering numbers. (15) Black button Starts black & white copying, scanning, or faxing. (16) Stop/Reset button Cancels operations such as copying, scanning, or faxing, or a print job in progress. (17) Color button Starts color copying, photo printing, scanning, or faxing.
-
Page 15: Copying
Copying Making Copies This section describes the basic procedure to make copies. For details, refer to “Copying” in the User’s Guide on-screen manual. Turn on the machine. Press the COPY button. Load paper. Load the original on the Platen Glass (A) or the ADF. - Page 16 Using Useful Copy Functions For details, refer to “Using Useful Copy Functions” in the User’s Guide on-screen manual. Reducing or Enlarging a Copy Copying Two Pages to Fit onto a Single Page (2-on-1 Copy) Copying Four Pages to Fit Copying without Borders onto a Single Page (Borderless Copy) (4-on-1 Copy)
-
Page 17: Printing From A Memory Card
Printing from a Memory Card Inserting the Memory Card Turn on the machine. Attach a card adapter if your memory card requires one. Open the Card Slot Cover. Insert one and only one memory card into the Card Slot. Card Type Inserting Card Compact Flash (CF) card Microdrive... - Page 18 Removing the Memory Card Open the Card Slot Cover. Make sure that the Access lamp is lit, then remove the memory card. Do not remove the memory card while the Access lamp is flashing. Hold the part of the memory card that is sticking out to remove it from the machine. Important The Access lamp flashes while the machine is reading or writing data from/to the memory card.
- Page 19 Printing Several Photos on a Single Sheet of Paper (Layout print) Prints photos of your choice in the specified layout. Printing on Stickers (Sticker print) Prints your favorite photo with a frame on Canon Photo Stickers. Printing All Photos (Print all photos) Prints all photos saved on the memory card.
-
Page 20: Printing From Your Computer
Create a document or open a file to print using an appropriate application software. Select Print on the application software’s File menu. Make sure that Canon XXX Printer (where “XXX” is your machine’s name) is selected in Select Printer, and click Preferences (or Properties). - Page 21 Printing with Macintosh Turn on the machine and load the paper in the machine. Make sure that the proper paper source is selected. Create a document or open a file to print using an appropriate application software. Select Page Setup on the application software’s File menu.
-
Page 22: Scanning Images
Scanning Images You can scan images from the machine to a computer without printing them and save them in popular image types, such as JPEG, TIFF, bitmaps, or PDF. If you are scanning printed text, you can use the OCR (Optical Character Recognition) software to convert it to text data. Scanning Methods You can select from the various scanning methods. - Page 23 (4) Press the { or } button to select the scan operation, then press the OK button. Press the Color or the Black button. Note The operation to be performed after scanning the original depends on the scan operation setting you have selected in step 4.
-
Page 24: Printing Photographs Directly From A Compliant Device
Printing Photographs Directly from a Compliant Device You can connect a PictBridge compliant device such as a digital camera, camcorder, or mobile phone using a USB cable recommended by the device’s manufacturer, and print recorded images directly without using a computer. Connectable Devices PictBridge is an industry standard enabling a range of digital photo solutions, including the direct printing of photos from a digital still camera, camcorder or mobile phone* without the need to use... - Page 25 Connect the PictBridge compliant device to the machine. Note Depending on the model or brand of your device, you may have to select a print mode compliant with PictBridge before connecting the device. You may also have to turn on the device or select Play mode manually after connecting the device to the machine.
- Page 26 PictBridge compliant device. Note In the following description, names of setting items are given according to those used in Canon- brand PictBridge compliant devices. Setting item names may be different depending on the brand or model of your device.
- Page 27 See “Setting on the Machine” on page 26. When you select On, photos are optimized for printing using the Photo optimizer pro function. If you are using a Canon-brand PictBridge compliant device, the following additional options may be available, depending on the model.
- Page 28 Setting on the Machine This section describes the PictBridge print settings on the machine. Set the print settings to Default on the PictBridge compliant device when you want to print according to the settings on the machine. Displaying the PictBridge Settings Screen and Specifying the Settings Turn on the machine.
- Page 29 Setting Items Setting Item Description Corresponding Setting of PictBridge Compliant Devices Page size Select the page size, when printing Paper size directly from a PictBridge compliant device. Media type Select the media type, when printing Paper type directly from a PictBridge compliant device.
-
Page 30: Faxing
Faxing Preparing the Machine for Fax Important If the Power Disconnects Unexpectedly If there is a power failure or if you accidentally disconnect the power cord, the date/time settings as well as all documents stored in memory will be lost. User data and speed dialing settings are retained. If the power disconnects, the following will apply: You will not be able to send or receive faxes or make copies. - Page 31 Connecting a Telephone or Answering Machine via a Computer (A) Computer (B) Telephone or Answering machine Methods of Connecting the Various Lines Connecting to an xDSL (A) Digital Subscriber Line (B) Splitter (C) xDSL modem (splitter may be built-in to the modem) (D) Computer For details on xDSL connection and settings, see the manual supplied with your xDSL modem.
- Page 32 Press the { or } button to select Telephone line type, then press the OK button. Press the { or } button to select the telephone line type, then press the OK button. Rotary pulse: Suitable for pulse dialing. Touch tone: Suitable for tone dialing.
- Page 33 Registering Sender Information Entering the Date and Time Press the FAX button, then press the Menu button. Press the [ or ] button to select Maintenance/settings, then press the OK button. Press the [ or ] button to select Device settings, then press the OK button. Press the { or } button to select FAX settings, then press the OK button.
- Page 34 (5) Press the Numeric buttons to enter the time (in 24-hour format) when summer time starts, then press the OK button. Set the date and time that summer time ends. (1) Press the { or } button to select End date/time, then press the OK button. (2) Press the { or } button to select the month when summer time ends, then press the OK button.
- Page 35 Sending Faxes Sending Methods Load the original on the Platen Glass or the ADF. Press the FAX button. Adjust fax settings as necessary. Dial the recipient’s number using the Numeric buttons or coded speed dialing. Press the Color button for color sending, or the Black button for black & white sending.
- Page 36 Changing or Deleting Registered Information Changing a Registered Name or Number Follow the procedures from step 1 to 3 in “Registering Coded Speed Dialing” on page 33. Press the { or } button to select Edit, then press the OK button. Press the Numeric buttons to enter the new name (max.
- Page 37 Receiving Faxes Selecting a Receive Mode If You Want to Receive Only Faxes Automatically with the Machine, or Have a Dedicated Telephone Line for Fax Use Only: Select FAX only mode. (A) Incoming call (B) Receives faxes automatically. If You Are Using a Single Telephone Line for Faxes and Voice Calls and Use Voice Calls More Frequently: Select TEL priority mode.
- Page 38 (D) When the answering machine responds: If it is a voice call, the answering machine responds to the call. If it is a fax call, the machine receives the fax automatically. If You Are Using a Single Telephone Line for Faxes and Voice Calls and Want to Receive Faxes Automatically: Select FAX priority mode.
- Page 39 If You Have Subscribed to a Distinctive Ring Pattern Detection (DRPD) Service with Your Telephone Company (US and Canada only): Select DRPD. (A) Incoming call (B) Voice call: The telephone will ring. Pick up the handset to answer the call. (C) Fax: The fax is received automatically when the machine detects the registered fax ring pattern.
-
Page 40: Replacing An Ink Tank
Replacing an Ink Tank When ink tanks run out of ink, replace them using the following steps. Open the Paper Output Tray. Make sure that the machine is turned on, lift the Scanning Unit (Printer Cover) with both hands, and set the Scanning Unit Support to hold the cover. - Page 41 (4) Remove the orange protective cap (F) from the bottom of the ink tank. Carefully hold the protective cap when removing it to prevent the ink from staining your fingers. Discard the cap once it is removed. Important Do not touch the electrical contacts (G) on the ink tank.
-
Page 42: Specifications
Specifications General Specifications Printing resolution (dpi) 4800 (horizontal)* x 1200 (vertical) * Ink droplets can be placed with a pitch of 1/4800 inch at minimum. Interface USB 2.0 High Speed A computer that complies with USB 2.0 Hi-Speed standard is required. Since the USB 2.0 Hi-Speed interface is fully upwardly compatible with USB Full-Speed (USB 1.1), it can be used at USB Full-Speed (USB 1.1). - Page 43 Black & white: Approx. 3 seconds/page at 33.6 Kbps, ECM-MMR, transmitting from memory (Based on ITU-T No.1 chart for US specifications and Canon FAX Standard chart No.1 for others, both in standard mode or Canon FAX Standard chart No.1, standard mode.) Color: Approx.
- Page 44 Default (Selections based on the machine setting), Borderless, Bordered, N-up (2, 4, 9, , 35-up Layout compatible with Canon-brand sticker above. Refer to “Printing Media” in the User’s Guide on-screen manual. Selected photos are printed in 35 mm film style layout (contact printing layout). This print setting is only available with certain Canon PictBridge compliant devices.
- Page 45 MP Navigator EX: QuickTime v6.4 or later is needed (Macintosh only) Some functions may not be available with Windows Media Center To upgrade from Windows XP to Windows Vista, first uninstall software bundled with the Canon inkjet printer. Users in Asia ScanSoft OmniPage SE (OCR software) can work only with English operating system.
- Page 46 The telephone line cable should not be reconnected or the main power switch turned ON until the problem is completely resolved. Users should contact their local authorized Canon Facsimile Service Dealer for the servicing of equipment.
- Page 47 Rights of the Telephone Company If this equipment causes harm to the telephone network, the telephone company may temporarily disconnect service. The telephone company also retains the right to make changes in facilities and services that may affect the operation of this equipment. When such changes are necessary, the telephone company is required to give adequate prior notice to the user.
- Page 48 Users in Canada Pre-Installation Requirements for Canon Facsimile Equipment Notice This equipment meets the applicable Industry Canada technical specifications. The Ringer Equivalence Number is an indication of the maximum number of devices allowed to be connected to a telephone interface. The termination on an interface may consist of any combination of devices subject only to the requirement that the sum of the RENs of all the devices does not exceed five.
- Page 49 Users in New Zealand The grant of a Telepermit for any item of terminal equipment indicates only that Telecom has accepted that the item complies with minimum conditions for connection to its network. It indicates no endorsement of the product by Telecom, nor does it provide any sort of warranty. Above all, it provides no assurance that any item will work correctly in all respects with another item of Telepermitted equipment of a different make or model, nor does it imply that any product is compatible with all of Telecom’s network services.
- Page 51 Do not make any changes or modifications to the equipment unless otherwise specified in the manual. If such changes or modifications should be made, you could be required to stop operation of the equipment. Canon U.S.A., Inc. One Canon Plaza Lake Success, NY 11042...
- Page 52 The following ink tanks are compatible with this product. www.canon-asia.com canon.com.au canon.co.nz QT5-1397-V02 XXXXXXXX © CANON INC. 2007 PRINTED IN THAILAND...
Need help?
Do you have a question about the PIXMA MX700 and is the answer not in the manual?
Questions and answers