Nice NX FIT MB 534 SH BD Instructions And Warnings For Installation And Use
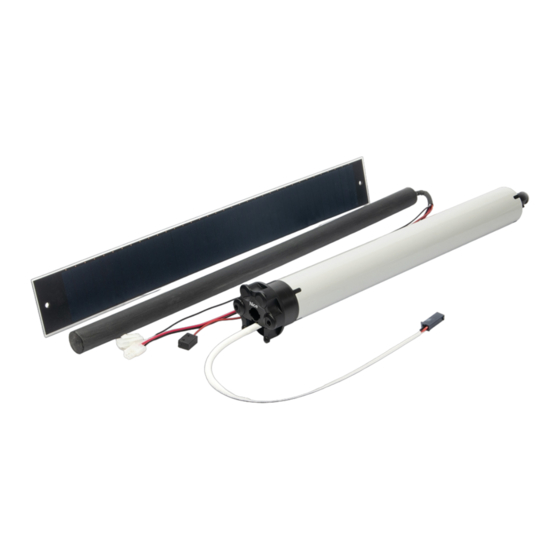
Tubular motor
Hide thumbs
Also See for NX FIT MB 534 SH BD:
- Instructions and warnings for installation and use (10 pages) ,
- Quick manual (2 pages) ,
- Quick manual (2 pages)

Related Manuals for Nice NX FIT MB 534 SH BD


Summary of Contents for Nice NX FIT MB 534 SH BD
- Page 1 Nice NX FIT MB 534 SH BD NX FIT MB 1020 SH BD Tubular Motor EN - Instructions and warnings for installation and use...
-
Page 2: Installation Warnings
GENERAL WARNINGS: SAFETY - INSTALLATION - USE (original instructions in Italian) ATTENTION Important safety instructions. Follow all instructions as improper installation may cause serious damage ATTENTION Important safety instructions. It is important for you to comply with these instructions for your own and other people’s safety. -
Page 3: Product Description And Intended Use
Wireless technology makes even initial programming simple and user- friendly. • it is compatible with all Nice control electronics using the NRC radio system (trans- INSTALLATION OF THE MOTOR AND mitters and climate sensors, the latter can only be used if the motor is configured THE ACCESSORIES for operation in ONE-WAY mode);... -
Page 4: Programming And Adjustments
PROGRAMMING AND ADJUSTMENTS tion could cause severe physical injury. To assemble and install the motor, refer to fig. 3. Moreover, consult the Nice product catalogue or go to www.niceforyou.com to choose the crown of the limit switch (fig. 4.1 - TWO-WAY and ONE-WAY operation 3-a), the drag wheel (fig. - Page 5 Support for fixing the motor head. Cap for fixing the roller to the bracket (not included). Removing the connector if necessary 10 mm English – 4...
-
Page 6: General Warnings
• The limit switch must be adjusted after installing the motor in the roller shutter and connecting it to the power supply. • Procedures that can only be completed with a Nice “ERA P” or “ERA W” • Comply strictly with the time limits indicated in the procedures: after releasing a key, transmitter having the PRG and ESC keys, or with transmitters equipped you have 60 seconds to press the next key indicated in the procedure;... - Page 7 Communication mode (ONE-WAY or TWO-WAY) GENERAL WARNINGS RELATING TO THE PROCEDURES • Before starting any programming, move the roller shutter to an intermediate position, away from the Up and Down limit switches. • When the motor is powered up, if it makes 2 movements this means that: at least one transmitter has been memorised and no limit switch has been programmed;...
- Page 8 –– GROUP “A” PROCEDURES –– for motors configured for TWO-WAY communications Procedures which can only be completed with a Nice transmitter with the ▲, ■, ▼, PRG, ESC keys (eg. “ERA P BD”, “ERA W BD”) GENERAL WARNINGS RELATING TO THE PROCEDURES •...
- Page 9 !!! (x 1) Observe the same roller shutter and, at the start of the movement will count 3 movements. a DOWN movement, stop the movement IMMEDI- stop; ATELY, by pressing and releasing the button (1 time): A.2 - Temporarily deactivating (and reactivating) motors you do not wish to program BiDi NOTES AND WARNINGS •...
- Page 10 A.3 - MANUAL programming of the UP (“0”) and DOWN (“1”) limit switches BiDi NOTES AND WARNINGS • This procedure is obligatory only for roller shutters without a mechanical stop at the Up position. • This procedure can be used if the limit switches have been programmed using the semiautomatic procedure (A.5). •...
- Page 11 A.4 - Programming an INTERMEDIATE POSITION (position “H”) BiDi NOTES AND WARNINGS • This procedure memorises an intermediate position (position “H”) between the Up (“0”) and Down (“1”) limit switch positions. When the automation is being used, after giving the intermediate position command, the system will automatically stop the roller shutter at the programmed “H” position. •...
- Page 12 A.6 - TOTAL or PARTIAL deletion of memory BiDi NOTES AND WARNINGS • In order to carry out the following deletion procedures, the transmitter must be memorised in mode I. • To change the motor’s configuration (from TWO-WAY to ONE-WAY), after completing the “FULL deletion of the memory” procedure, it is necessary to switch the mo- tor off and then on again.
- Page 13 –– GROUP “B” PROCEDURES –– for motors configured for ONE-WAY communications procedures which can only be completed with a Nice “ERA P” or “ERA W” transmitter with the ▲, ■, ▼, PRG, ESC keys GENERAL WARNINGS RELATING TO THE PROCEDURES •...
- Page 14 B.2 - Locking and unlocking the motor’s memory MONO NOTES AND WARNINGS • Locking the motor’s memory stops any other (unscheduled or unauthorised) transmitters being memorised in it. 4 (x 1) (x 1) (x 1) Press and release count 2 movements. Press and release count 2 movements.
- Page 15 B.3.2 - To program the DOWN limit switch (“1”) continues (x 1) = 5 sec Command an DOWN movement Press and release count 2 movements. Hold down the but- release it after 5 count 2 movements. Hold down the button ▼...
- Page 16 “ESC” buttons (like “ERA P” and “ERA W” transmitters). • To run procedure B.5.2 you must have a new transmitter to memorise, chosen from the “Nice Screen” catalogue , and an old previously memorised transmitter. B.5.1 - To memorise the transmitter buttons in “Mode I” (“Standard mode”) •...
- Page 17 MONO NOTES AND WARNINGS • To run this procedure you need the climate sensor you want to memorise, chosen from the “Nice Screen” catalogue, and an old transmitter memorised in Mode I (see par. 4.5.1). • When performing the procedure, you can cancel the programming at any time by holding down ■ and ▼ together for 4 seconds. Alternatively, do not press any keys and wait 60 seconds for the motor to perform 6 movements.
- Page 18 = 5 sec Hold down both but- release them after 5 count 5 movements. seconds; tons... B.7.2 - Procedure run with a transmitter which has not yet been memorised NOTES AND WARNINGS • In order to carry out the following procedures, a transmitter with a PRG button should be used. ...
- Page 19 DOWN for motors configured for ONE-WAY communication mode feasible only with a Nice transmitter equipped with buttons ▲, ■, and ▼ alone and lacking the PRG and ESC buttons GENERAL WARNINGS RELATING TO THE PROCEDURES • Before starting any programming, move the awning to an intermediate position, away from the Up and Down limit switch- •...
- Page 20 “ESC” buttons (like “ERA P” and “ERA W” transmitters). • To run procedure C.2.2 you must have a new transmitter to memorise, chosen from the “Nice Screen” catalogue , and an old previously memorised transmitter. C.2.1 - To memorise the transmitter buttons in “Mode I” (“Standard mode”) •...
- Page 21 DOWN NOTES AND WARNINGS • To run this procedure you need the climate sensor you want to memorise, chosen from the “Nice Screen” catalogue, and an old transmitter memorised in Mode I (see par. 4.6.1). • When performing the procedure, you can cancel the programming at any time by holding down ■ and ▼ together for 4 seconds. Alternatively, do not press any keys and wait 60 seconds for the motor to perform 6 movements.
- Page 22 = 5 sec sec. Hold down the but- count 3 movements; release the button. On the transmitter to be deleted: hold down count 5 movements. ton and any key either the key memorised in mode 2 or the climatic conditions sensor; sec.
- Page 23 Finely adjust- “ 0 ” ing the posi- tion of limit sec. switch “0” Press the buttons until you reach the desired position. Hold down the count 3 movements; release the button. button and C.5.2 - To program the DOWN limit switch (“1”) ...
- Page 24 5 Precisely ad- justing the “ H ” “H” posi- sec. tion Hold down both count 2 movements; release the Press the buttons until you reach the desired position. buttons... buttons. Select one of the following potions and execute it: •...
-
Page 25: Optional Accessories
It is equally important to be able to set the automation’s stop position in relation to the circumstances (sunshine, rain, etc.). If the automation is controlled with a Nice transmitter equipped with a “slider” sur- 5.1 - Maximum continuous work cycle face (e.g. - Page 26 Generalities: The automatic operation of the motor by means of the commands received by the cli- mate sensors does not block the manual commands sent by the user of the shutter. – “Rain present” and “wind over threshold” conditions inhibit the operation of the sun sensor.
-
Page 27: Technical Characteristics
Finally, try to supply the opposite electrical phase. 20° C (± 5° C). • Nice S.p.A. reserves the right to apply modifications to products at any time when deemed necessary, maintaining the same intended use and func- q When sending a Raise command, the motor does not start: tionality. - Page 28 Nice SpA Via Callalta, 1 31046 Oderzo TV Italy www.niceforyou.com info@niceforyou.com...
Need help?
Do you have a question about the NX FIT MB 534 SH BD and is the answer not in the manual?
Questions and answers