Table of Contents
Advertisement
Quick Links
Advertisement
Table of Contents

Related Manuals for Zte MF253M


Summary of Contents for Zte MF253M
- Page 1 MF253M Let’s go Getting started with your device...
-
Page 2: Getting To Know Your Device
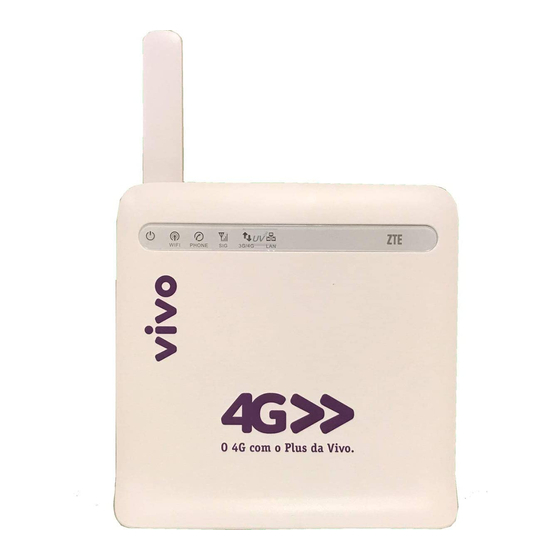
Getting to Know Your Device Appearance NOTE: Please use the original external antenna if necessary. Interface Description Ethernet connections to computer. Phone Standard RJ11 connector for telephone. Reset To restore factory default configurations. WPS button WPS button is used to start Wi-Fi Protected Setup authentication process. -
Page 3: Install The (U)Sim Card
Install the (U)SIM Card Hold the (U)SIM card with its cut corner oriented as shown and slip it into the card holder. NOTE: Your device does not support the micro-SIM card and nano-SIM card or any other nonstandard SIM cards. To avoid damaging the device, do not use those cards or any card holders. -
Page 4: Connecting Your Device
Indicator State Description There is no signal. The device is turned on but not registered to the mobile network. The device is connected to the LTE Blue Blinking network and data is being transferred. The device is registered to the LTE 3G/4G Blue Solid network. -
Page 5: Configuring Your Pc
Configuring Your PC The following procedure describes how to configure the Internet Protocol in the Windows 7 operating system for your Wi-Fi connection. Right-click Network and select Properties. Select Chang adapter settings. Right-click Wireless Network Connection and select Properties. Select Internet Protocol Version 4 (TCP/IPv4) and click Properties. - Page 6 Select Obtain an IP address automatically and Obtain DNS server address automatically, and click OK.
-
Page 7: Accessing The Internet
Accessing the Internet Before accessing the Internet, please make sure that the following operations are finished. Your device is connected via a network cable or Wi-Fi. Your PC is configured. To access the Internet: Log in the Configuration Page. Launch the Internet browser and enter http://192.168.1.1 in the address bar. - Page 8 2. From the Web UI, click SMS > SMS Settings to set the SMS limit settings. Validity: Set valid period of outgoing messages. Center Number: Enter SMS center number. For more information, please contact your service provider. Delivery Report: Receive or reject a prompt informing you that the message is delivered to ...
-
Page 9: Network Settings
Settings Do not modify any settings unless instructed by your service provider. NOTE: Please disconnect the router from the network before changing the settings. Network Settings Dial-up Settings After the client is connected to your device successfully, you can access the Internet in the Automatic, Manual or On Demand mode. - Page 10 Create a new APN selecting the Manual mode, then click Add New. Wi-Fi Settings Basic settings From the Web UI, click Settings > Wi-Fi Settings > Basic Settings, the wireless network basic parameters are shown in the following figure:...
- Page 11 Wi-Fi Switch: Enable or disable Wi-Fi. Multi SSID Switch: Enable or disable multi SSID. Network Name (SSID): Service Set Identifier (SSID). Enter a string less than 32 characters as the name for your wireless local area network (Wi-Fi). ...
- Page 12 Black List From the Web UI, click Settings > Wi-Fi Settings > Black List, to enable or disable black list. From the Web UI, click Settings > Wi-Fi Settings > WPS, select WPS mode, the two modes are described below: ...
-
Page 13: Device Settings
Device settings Account Management Set the account password. PIN Management Configure your PIN. Set all the settings to their factory default values, and then Reset the device will restart automatically. Restart To restart the device. Set the time of the router. SNTP Set limit phone number or phone number range. -
Page 14: Ddns (Dynamic Domain Name Server)
DHCP Server: Enable or disable DHCP Server function. DHCP IP Pool: Allocate begin and end IP address for IP pool. DHCP Lease Time: Define how long the leased IP address will be expired, and will relocate new IP address. Click Apply to confirm your configuration. -
Page 15: Wps Function
WPS Function Your device supports WPS function. You can use this function to connect the client to your device. Power on your device, and enable the Wi-Fi function on your device. Enable the WPS function. Please check the WPS Setting on the Configuration Page. Press the WPS button on your device to start Wi-Fi Protected Setup authentication process. - Page 16 NOTE: Set the client to obtain an IP address automatically. For the detailed procedure, refer to Configuring Your PC. The client gets an IP address, for example, 192.168.1.101. Check the Wi-Fi SSID and Wi-Fi Key printed on the label beneath the device. Select the SSID of your device, and then click Connect.
-
Page 17: Troubleshooting
NOTE: You may need to enter the password for the Wi-Fi connection. You can view the label on your device to get the default password. Wait until the client is connected to your device successfully. Troubleshooting Voice Related Problems Symptoms Possible Problems/ Solutions ... - Page 18 Symptoms Possible Problems/ Solutions I cannot visit the Configuration Page Enter the correct address. The default address is http://192.168.1.1. Only use one network adapter in your PC. Do not use any proxy server. I cannot establish the Wi-Fi connection between my device Make sure the Wi-Fi function is active.
-
Page 19: Using Your Device
Warning and Notice To the Owner • If inadequately shielded, some electronic devices may be affected by the electromagnetic interference caused by the device, such as the electronic system of vehicles. Consult the manufacturers of such devices before using the device if necessary. •Operating the device may interfere with medical instruments such as hearing aids and pacemakers. -
Page 20: Using The Battery
Any other cause beyond the range of normal usage intended for the product. End users have no right to reject or return the product, or receive a refund for the product from ZTE under the above-mentioned situations. - Page 21 You can get help by: Sending an E-mail to mobile@zte.com.cn • Visiting www.ztedevice.com • Calling the service hotline +86–755–26779999 •...
Need help?
Do you have a question about the MF253M and is the answer not in the manual?
Questions and answers