Makita TW004G Instruction Manual
Hide thumbs
Also See for TW004G:
- Instruction manual (80 pages) ,
- Instruction manual (41 pages) ,
- Instruction manual (17 pages)
Table of Contents
Advertisement
Quick Links
Advertisement
Table of Contents

Related Manuals for Makita TW004G


Summary of Contents for Makita TW004G
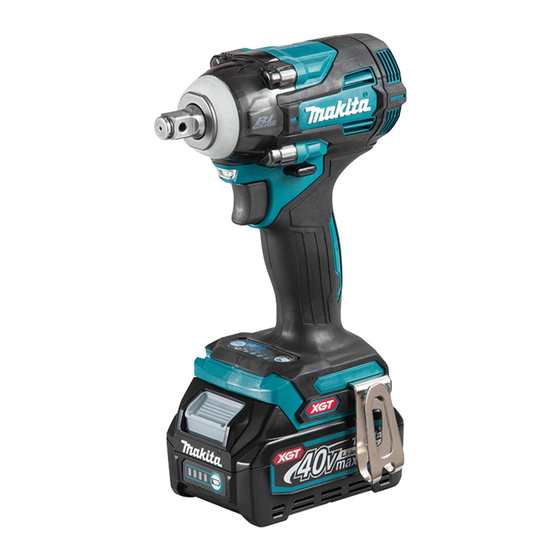
- Page 1 INSTRUCTION MANUAL Cordless Impact Wrench TW004G TW005G Read before use.
-
Page 2: Specifications
The tool is intended for fastening bolts and nuts. for the equipment. Be sure that you understand their Noise meaning before use. Read instruction manual. The typical A-weighted noise level determined accord- ing to EN62841-2-2: Model TW004G Only for EU countries Ni-MH Sound pressure level (L ) : 99 dB (A) Due to the presence of hazardous com- Li-ion... -
Page 3: Ec Declaration Of Conformity
The vibration total value (tri-axial vector sum) deter- mined according to EN62841-2-2: Electrical safety Model TW004G Power tool plugs must match the outlet. Never Work mode: impact tightening of fasteners of the maxi- modify the plug in any way. Do not use any... - Page 4 Remove any adjusting key or wrench before Maintain power tools and accessories. Check for turning the power tool on. A wrench or a key left misalignment or binding of moving parts, break- age of parts and any other condition that may attached to a rotating part of the power tool may affect the power tool’s operation. If damaged, have result in personal injury.
- Page 5 Do not touch the terminals with any con- CAUTION: Only use genuine Makita batteries. ductive material. Use of non-genuine Makita batteries, or batteries that Avoid storing battery cartridge in a con- have been altered, may result in the battery bursting tainer with other metal objects such as causing fires, personal injury and damage. It will nails, coins, etc.
-
Page 6: Functional Description
Tips for maintaining maximum To remove the battery cartridge, slide it from the tool while sliding the button on the front of the cartridge. battery life To install the battery cartridge, align the tongue on the Charge the battery cartridge before completely battery cartridge with the groove in the housing and slip discharged. Always stop tool operation and it into place. Insert it all the way until it locks in place charge the battery cartridge when you notice with a little click. If you can see the red indicator as less tool power. - Page 7 Lighting up the front lamp Indicator lamps Remaining capacity CAUTION: Do not look in the light or see the Lighted Blinking source of light directly. 75% to 100% 50% to 75% 25% to 50% 0% to 25% Charge the battery. The battery may have malfunctioned.
- Page 8 Reversing switch action Fig.6 ► 1 . Reversing switch lever CAUTION: Always check the direction of rotation before operation. CAUTION: Use the reversing switch only after the tool comes to a complete stop. Changing the direction of rotation before the tool stops may dam- age the tool. CAUTION: When not operating the tool, always set the reversing switch lever to the neu- tral position.
- Page 9 Changing the application mode Changing the impact force You can change the impact force in four steps: 4 (max), 3 (hard), 2 (medium), and 1 (soft). This allows a tightening suitable to the work. The level of the impact force changes every time you press the button . You can change the impact force within approximately one minute after releasing the switch trigger. NOTE: You can extend the time to change the impact force approximately one minute if you press the but- Fig.7 Application mode Maximum blows Purpose (Impact force grade displayed on panel)
- Page 10 Example of application Application mode Example of application (Impact force grade displayed on panel) 4 (Max) Assembling steel frames and tightening long screws or bolts. 3 (Hard) Assembling steel frames. 2 (Medium) Assembling or disassembling scaffolds and frameworks. 1 (Soft) Assembling furniture. NOTE: When none of the lamp on the panel is lit, pull the switch trigger once before pressing the button NOTE: All lamps on the switch panel go out when the tool is turned off to save the battery power. The impact force grade can be checked by pulling the switch trigger to the extent that the tool does not operate.
- Page 11 Changing the application mode This tool employs several easy-to-use application modes for driving bolts with good control. The type of the application mode changes every time you press the button . You can change the application mode within approximately one minute after releasing the switch trigger. NOTE: You can extend the time to change the application mode approximately one minute if you press the but- Fig.8 Application mode Feature Purpose (Assist type displayed on panel) Bolt mode Clockwise Clockwise This mode helps to repeat screwdriving continuously with Preventing over equal torque. This mode also helps to reduce the risk of tightening of bolts. Counterclockwise breakage of bolts/nuts due to overtightening.
- Page 12 NOTE: When none of the lamp on the panel is lit, pull the switch trigger once before pressing the button NOTE: All lamps on the switch panel go out when the tool is turned off to save the battery power. The type of the application mode can be checked by pulling the switch trigger to the extent that the tool does not operate. Tool with the ring spring Full speed mode For TW004G For impact socket without O-ring and pin Fig.9 ► 1 . Button 2. Lamp Fig.10...
-
Page 13: Installing Hook
Tool with the detent pin Using hole For TW005G WARNING: Never use the hanging hole for unintended purpose, for instance, tethering the tool at high location. Bearing stress in a heavily loaded hole may cause damages to the hole, result- ing in injuries to you or people around or below you. Fig.12 ► 1 . Impact socket 2. Hole 3. Square drive 4. Detent pin Align the hole in the side of the impact socket with the detent pin on the square drive and push the impact socket onto the square drive until it locks into place. Tap it lightly if required. -
Page 14: Maintenance
NOTE: Hold the tool pointed straight at the bolt or nut. NOTE: Excessive fastening torque may damage the CAUTION: These accessories or attachments bolt/nut or impact socket. Before starting your job, are recommended for use with your Makita tool always perform a test operation to determine the specified in this manual. The use of any other proper fastening time for your bolt or nut. accessories or attachments might present a risk of injury to persons. Only use accessory or attachment... - Page 16 Makita Europe N.V. Jan-Baptist Vinkstraat 2, 3070 Kortenberg, Belgium Makita Corporation 3-11-8, Sumiyoshi-cho, Anjo, Aichi 446-8502 Japan 885804B225 www.makita.com 20211217...
Need help?
Do you have a question about the TW004G and is the answer not in the manual?
Questions and answers