Table of Contents
Advertisement
Quick Links
Download this manual
See also:
Instruction Manual
Advertisement
Table of Contents

Subscribe to Our Youtube Channel
Related Manuals for Teac R4-INT


Summary of Contents for Teac R4-INT
- Page 1 R-4iNT FM/Internet-radio with iPod Dock OWNER’S MANUAL...
-
Page 2: Important Safety Instructions
• Consult the dealer or an experienced radio/TV technician for help. CAUTION Changes or modifications to this equipments not expressly approved by TEAC CORPORATION for compliance will void the user’s warranty. IMPORTANT SAFETY INSTRUCTIONS To reduce the risk of electrical shock, fire, etc.: 1) Read these instructions. - Page 3 EXPOSE THE ELECTRONICS. NO USER SERVICEABLE PARTS ARE WITHIN. < IF YOU ARE EXPERIENCING PROBLEMS WITH THIS PRODUCT, CONTACT TEAC FOR A SERVICE REFERRAL. DO NOT USE THE PRODUCT UNTIL IT HAS BEEN REPAIRED. iPod is a trademark of Apple Inc., registered in the U.S. and other countries.
-
Page 4: Table Of Contents
Contents Thank you for choosing TEAC. Read this manual carefully to get the best performance from this unit. Before Use ........... . .4 Remote Control Unit . -
Page 5: Remote Control Unit
Confirm the supplied standard accessories. Remote control unit (RC-1239) x 1 Batteries (AAA) x 2 AC adapter (PS-M1220) x 1 Power cord for AC adapter x 1 Stereo mini-plug cable x 1 Dock adapter x 4 Dock cover x 1 Owner’s manual (this document) x 1 Warranty card x 1 Maintenance... -
Page 6: Connection
Connection Caution: < Turn off the power (set to standby) before making connections. < Read the instructions of each device you intend to use with this unit. < Be sure to connect each plug securely. To prevent hum and noise, do not bundle the connection cords. iPod/iPhone (back side) R-4iNT (back side) -
Page 7: Internet Connection
FM antenna Extend fully and position for the best reception. Keep antenna away from metallic objects, electrical equipment and cords. ETHERNET port To enjoy the Internet radio and the Music player function, connect the unit to the broadband internet network. This unit has both a built-in wireless LAN antenna and a ETHERNET port for wired internet connection. -
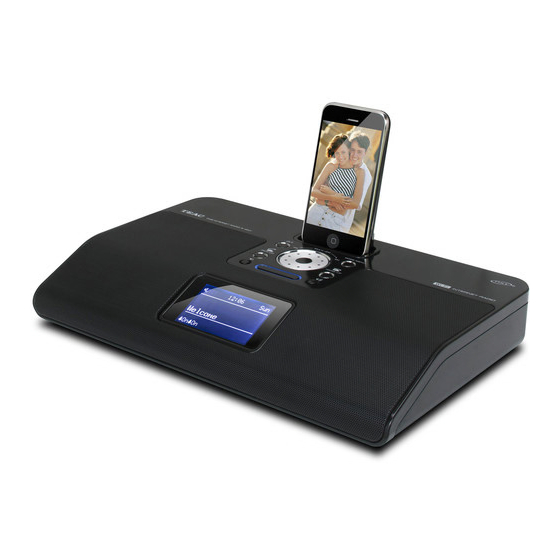
Page 8: Identifying The Parts
Speakers (Stereo) Standby/On ( Use this button to turn the unit on and standby. MULTI JOG Turn this knob to tune in FM stations or to select parameters in menus. Dock Before use, insert an appropriate Dock adapter in the Dock (page 17). - Page 9 STANDBY/ON ( Use this button to turn the unit on and standby. FUNCTION ( ˙ ¥ Use these buttons to select a source. Repeat ( In iPod and Music player mode, use this button to set the repeat function. Cursor buttons ( / / ) Use these cursor buttons to select parameters in menus.
-
Page 10: Setup Wizard
Setup Wizard When you connect the power cord into the wall socket and turn on the unit for the first time, the Setup wizard appears on the display. Follow the steps below to set the clock, the update method, your local wireless LAN region and the network SSID (Service Set ID). - Page 11 Turn the MULTI JOG to select your local wireless LAN region, and then press the SELECT button. Please select Wlan region Wlan region Most of Europe Canada Spain France Turn the MULTI JOG to select your network (SSID), and then press the SELECT button. SSID Customer IR - 2F...
-
Page 12: System Settings
This chapter describes how to use the “System settings”. Most settings and adjustments are required to be set when you first use the unit. In other than iPod mode, press and hold the MENU button for more than 2 seconds. Hold down more than 2 sec. -
Page 13: Setting The Clock
View settings Displays the current network settings. You can check the setting of following items: Active connection MAC address Wlan region DHCP SSID IP address Subnet mask Gateway address Primary DNS Secondary DNS Wlan region Selects the region of the wireless LAN. Manual settings Sets the Internet connection manually. -
Page 14: Basic Operation
This chapter describes the basic operation which is available in every mode. Press the Standby/On button ( < The unit turns on with the source that was last selected. Press the MODE button repeatedly to select a source. The selected source is shown on the display. Each time the MODE button is pressed, the source changes as follows: Internet radio... - Page 15 Equalizer You can adjust the sound according to the genre of music or your taste. Press the EQ button to enter the equalizer mode. Equalizer Normal Flat Jazz Rock Movie Press the Cursor botton ( equalizer and then press the SELECT button. <...
-
Page 16: Aux In
In addition to connecting other audio devices, you can use the AUDIO IN to listen to an iPod that has no dock connector or when an appropriate Dock adapter is not available. Connect the PHONES jack or audio output jack of a portable audio player to the AUDIO IN jack of the R-4iNT using the supplied stereo mini-plug cable. -
Page 17: Ipod/Iphone
Getting Started with an iPod/iPhone To play your iPod/iPhone through the R-4iNT, you must first insert the Dock adapter for your model of iPod/iPhone. Select the Dock adapter that fits your iPod/iPhone. #7: iPod Photo (40 GB/60 GB), iPod with Click Wheel 40 GB, iPod with color display (iPod Photo) 40/60 GB, iPod with color display 60 GB, iPod with video 60/80 GB,... -
Page 18: Listening To An Ipod/Iphone
Before use, insert an appropriate Dock adapter in the Dock. Press the MODE button repeatedly to select “iPod”. iPod < You can also use the FUNCTION button ( control unit to select “iPod”. Insert the iPod/iPhone into the Dock. Press the Play/Pause button ( y / J ) on the iPod or the R-4iNT's remote control unit . - Page 19 Returning to the previous iPod/iPhone menu Press the MENU button on the remote control unit. This button has the same functions as its iPod counterpart. Selecting the iPod/iPhone menu item Press the Cursor button ( ) to scroll to the menu item you want, and then press the SELECT button.
-
Page 20: Internet Radio/Podcast
Internet Radio/Podcast Listening to the Internet Radio/Podcast This chapter describes how to listen to an Internet radio station/a Podcast. Press the MODE button repeatedly to select “Internet radio”. Internet radio The last listened station is received. < You can also use the FUNCTION button ( ˙ / ¥ ) on the remote control unit to select “Internet radio”. -
Page 21: Settings The Internet Radio/Podcast Display
Turn the MULTI JOG to select a station or a Podcast you want to listen to, and then press the SELECT button. Now you can listen to the station. Internet Radio/Podcast Settings the Internet Radio/Podcast Display You can choose the type of information displayed while listening to the Internet Radio/Podcast. -
Page 22: Internet Radio/Podcast Menu Operations
Internet Radio/Podcast Menu Operations You can access station lists or setup menus using the Internet radio menu. In Internet radio mode, press and hold the MENU button for more than 2 seconds. Hold down more than 2 sec. Turn the MULTI JOG to find the desired menu. Internet radio Last listened Station list... -
Page 23: Radio Portal
Access the radio portal on the Internet using your computer to fully enjoy the Internet radio function of this unit. Accessing the radio portal On your computer, open internet browser and access following URL. http://www.wifiradio-frontier.com Click on the “Register” link to start registration. Input your access code and log in. -
Page 24: Listening To The Fm Radio
This chapter describes how to listen to the FM radio. Press the MODE button repeatedly to select “FM radio”. radio The last listened station is received. < You can also use the FUNCTION button ( ˙ / ¥ ) on the remote control unit to select “FM radio”. -
Page 25: Preset Tuning
Changing the sensitivity In FM mode, press and hold the MENU button for more than 2 seconds to open the FM menu. Hold down more than 2 sec. Turn the MULTI JOG to select “Scan setting”, and then press the SELECT button. Scan setting Audio setting Main menu... -
Page 26: Pandora
Pandora You can access Pandora internet radio and listen to the music files. For details, see the website of Pandora. http://www.pandora.com/ This function may be unavailable in any country or region where the Pandora service is not provided. Part or all of the service may also become unavailable in the future due to the service provider's circumstances. - Page 27 Listening to the radio of Pandora Press the MODE button repeatedly to select “Pandora”. Pandora < You can also use the FUNCTION button ( ˙or ¥ ) on the remote control unit to select “Pandora”. Press and hold the MENU button for more than 2 seconds to open the Pandora menu.
-
Page 28: Music Player
About the Music player function Using the Music player function, you can play back the music files in your computers on the same LAN. Using this function, R-4iNT can play back the music files in the shared media library. Tag items such as artist names and album names can be viewed from R-4iNT as well. -
Page 29: Listening To The Music Player
For the preparation of the Music player, see previous page. Press the MODE button repeatedly to select “Music player”. Music player The Music player menu appears. < You can also use the FUNCTION button ( ˙ / ¥ ) on the remote control unit to select “Music player”. -
Page 30: Sleep Timer
Sleep Timer You can set the sleep timer so that the unit turns itself off after a specified amount of time. Each press of the SLEEP button cycles through timer options (from 15 up to 60 minutes). The unit will automatically stop playback and enter Standby mode when the time elapses. - Page 31 Repeat steps to set all the items. After all items are set, turn the MULTI JOG to select “Save”, and then press the SELECT button. Alarm 1 Time: 00:00 Mode: Internet radio Preset: Last listened Volume: 12 Save “Alarm saved” appears on the display. And then the Timer indicator ( ) appears.
-
Page 32: Troubleshooting
If you experience any problems with the unit, please take a moment to look through this chart and see if you can solve the problem yourself before you call your dealer or a TEAC service center. General No power. e Check the connection to the AC power supply. Check and make sure the AC source is not a switched outlet and that, if it is, the switch is turned on. -
Page 33: Specifications
Specifications Amplifier Output power (Stereo, JEITA) ......10 W rms + 10 W rms Total harmonic distortion . - Page 36 7733 Telegraph Road, Montebello, California 90640 U.S.A. Phone: (323) 726-0303 TEAC CANADA LTD. 5939 Wallace Street, Mississauga, Ontario L4Z 1Z8, Canada Phone: (905) 890-8008 TEAC MEXICO, S.A. DE C.V. Río Churubusco 364, Colonia Del Carmen, Delegación Coyoacàn, CP 04100, México DF, México Phone: (5255)5010-6000 TEAC UK LTD.
Need help?
Do you have a question about the R4-INT and is the answer not in the manual?
Questions and answers