
Related Manuals for Roborock S7 MaxV Ultra


Summary of Contents for Roborock S7 MaxV Ultra
- Page 1 Roborock S7 MaxV Ultra Robotic Vacuum Cleaner User Manual Read this user manual with diagrams carefully before using this product and store it properly for future reference.
- Page 2 English Contents 005 Safety Information 006 International Symbols Explanation 007 Product Overview 008 Installation 009 Connecting to the App 010 Instructions 012 Routine Maintenance 014 Basic Parameters 015 Errors 016 Common Issues...
-
Page 3: Safety Information
Restrictions WARNING • For the purposes of recharging the battery, only use the detachable supply unit roborock CDZ11RR, CDZ12RR, AED01HRR, AED02HRR, EWFD01HRR or EWFD02HRR provided with this product. • Do not use this product on elevated surfaces without barriers such as the floor of a loft, an open-ended terrace, or on top of furniture. -
Page 4: Battery And Charging
Safety Information Battery and Charging WARNING • Always use a properly grounded power outlet to minimize the risk of electric shock. If such a socket is not available, consult an electrician to make one available. • In order to avoid a hazard due to inadvertent resetting of the thermal cut-out, this appliance must not be supplied through an external switching device, such as a timer, or connected to a circuit that is regularly switched on and off by the utility. -
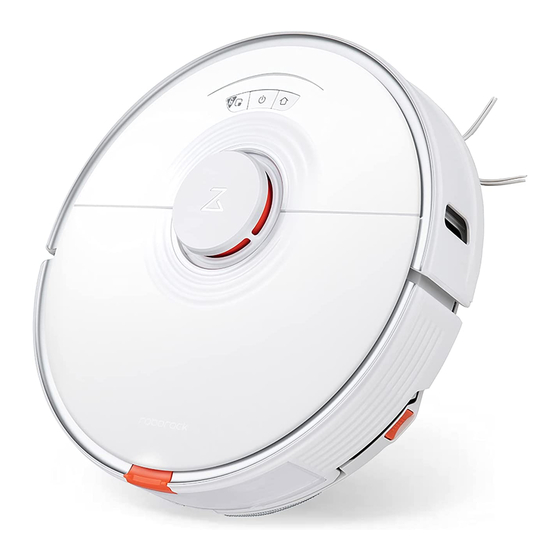
Page 5: Product Overview
A1-2—Microphone Disposable Dust Bag A3-3—Air Inlet • For use with Video Calls A3-4—LiDAR Sensor Note: Only available in the Roborock app. A3-5—Mop Wash Sensor A1-3—Status Indicator Light A3-6—Water Tank Latch • White: Vacuuming A3-7—Positioning Button • Blue: Vacuuming and Mopping A3-8—Water Tank... -
Page 6: Installation
Installation Empty Wash Fill Dock 1. Tidy cables and loose items from the ground and move any unstable, fragile, A11-1—Water Tank Handle Important Information precious, or dangerous items to prevent A11-2—Dirty Water Tank personal injury or property damage due A11-3—Self-Filling Port to items becoming tangled in, struck by, A11-4—Dock Location Beacon or knocked over by the robot. -
Page 7: Connecting To The App
Option 1: Search for “Roborock” in the App rechargeable battery pack. To maintain Store or Google Play or scan the QR code to B1-5—more than 0.5 m (1.6 ft) battery performance, keep the robot download and install the app. -
Page 8: Starting Cleaning
The robot will Notes: then wait for a connection. • To prevent corrosion or damage, only use the Roborock branded floor cleaner in the water tank. Notes: • To avoid water tank deformation, do not place hot water •... - Page 9 Auto Mop Washing Pause Child Lock During cleaning, the robot automatically When the robot is running, press any Press and hold the button to enable/ determines when it should return to dock button to pause it, press the button to disable the child lock.
-
Page 10: Routine Maintenance
• Do not use corrosive cleaning fluids or disinfectants to • Video Call clean the main brush. Note: Only available in the Roborock app. Side Brush • Volume Adjustment • Language Selection * Clean monthly and replace every 3-6 months. - Page 11 Omni-Directional Wheel Washable Filter Robot Sensors * Clean as required. * Clean every 2 weeks and replace every 6-12 months. * Clean monthly. C6-1— Open the filter cover and remove the Use a soft, dry cloth to wipe and clean all C3-1—...
-
Page 12: Water Filter
Basic Parameters Dirty Water Tank Replacing the Disposable Dust Bag * Clean as required. Robot Clean the dirty water tank as needed. Open Replace the disposable dust bag when it is full. the dirty water tank lid and pour out the C15-1—... - Page 13 If the problem persists after using the recommendations in the table above, Error 8: Robot trapped. Clear obstacles surrounding robot. please email our after-sales service team: Europe Support: support@roborock-eu.com Error 9: No dustbin. Install dustbin and filter. Australia Support: service@roborock.com.au Error 12: Low battery.
-
Page 14: Common Issues
• Abnormal WiFi connection. Reset the WiFi, download the latest mobile app, and retry. Unable to connect to WiFi • The current Roborock robot is not supported. You can find supported models in the app. • Unable to connect to WiFi abruptly. There may be an error with your router settings. Contact Roborock customer service for additional support. - Page 15 Common Issues Problem Solution Scheduled cleaning • Keep the robot charged. Scheduled cleaning can only begin when the battery level is above is not working 20%. Is power always being drawn when the • The robot will draw power while it is docked to maintain battery performance, but power robot is on the charging dock? consumption is minimal.
- Page 16 Common Issues Problem Solution • The dustbin or dust bag is not in place. Check and correct installation. • Voltage error. Check that local voltage meets the requirements listed on the dock. The LED status indicator light on the • Check clean water tank placement or refill as required. dock is steady red.
Need help?
Do you have a question about the S7 MaxV Ultra and is the answer not in the manual?
Questions and answers