Table of Contents
Advertisement
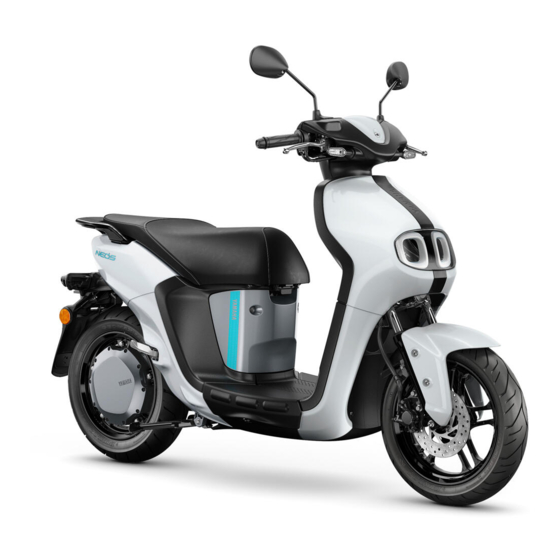
OWNER'S MANUAL
MOTORCYCLE
ESS025 (NEO'S)
ESS025 (sharing model) (NEO'S)
Read this manual carefully
before operating this vehicle.
BFM-F8199-E0
Location of important labels
Safety information
Description
ESS025 features
Smart key system (ESS025)
Instrument and control functions
For your safety – pre-operation checks
Lithium-ion battery
Operation and important riding points
Periodic maintenance and adjustment
Care and storage
Specifications
Consumer information
1
2
3
4
5
6
7
8
9
10
11
12
13
Advertisement
Table of Contents

Related Manuals for Yamaha NEO'S ESS025 2022


Summary of Contents for Yamaha NEO'S ESS025 2022
- Page 1 Read this manual carefully before operating this vehicle. Location of important labels OWNER’S MANUAL Safety information Description ESS025 features Smart key system (ESS025) Instrument and control functions For your safety – pre-operation checks Lithium-ion battery Operation and important riding points MOTORCYCLE Periodic maintenance and adjustment ESS025 (NEO’S)
- Page 2 EAUN3031 Declaration of Conformity: Hereby, YAMAHA MOTOR CO., LTD declares that the radio equipment type, Communication Control Unit, Y08U-A00 is in compliance with Directive 2014/53/EU. The full text of the EU declaration of conformity is available at the following internet address: https://global.yamaha-motor.com/eu_doc/...
- Page 3 For UK Declaration of Conformity: Hereby, YAMAHA MOTOR CO., LTD declares that the radio equipment type, Communication Control Unit, Y08U-A00 is in compliance with the Radio Equipment Regulations 2017. The full text of the declaration of conformity is available at the following internet address: https://global.yamaha-motor.com/eu_doc/...
- Page 4 Maximum output power: 117 dBuV/m at 10 meters Hand Unit: Operation frequency: 433.92 kHz Maximum output power: 10 mW Manufacturer: MITSUBISHI ELECTRIC CORPORATION, HIMEJI WORKS 840, Chiyoda-machi, Himeji, Hyogo 670-8677, Japan Importer: YAMAHA MOTOR EUROPE N.V. Koolhovenlaan 101, 1119 NC Schiphol-Rijk, 1117 ZN, Schiphol, the Netherlands...
- Page 5 Operation frequency: 433.92 kHz Maximum output power: 10 mW Manufacturer: MITSUBISHI ELECTRIC CORPORATION, HIMEJI WORKS 840, Chiyoda-machi, Himeji, Hyogo 670-8677, Japan Importer: YAMAHA MOTOR EUROPE N.V., BRANCH UK Units A2-A3, Kingswey Business Park, Forsyth Road, Woking, Surrey. GU21 5SA. United Kingdom.
- Page 6 EAU97060 Welcome to the Yamaha world! As the owner of the ESS025, you are benefiting from Yamaha’s vast experience and newest technology regarding the design and manufacture of high-quality products, which have earned Yamaha a reputation for dependability. Please take the time to read this manual thoroughly, so as to enjoy all advantages of your ESS025. The Owner’s Manual does not only instruct you in how to operate, inspect and maintain your electric vehicle, but also in how to safeguard yourself and others from trouble and injury.
- Page 7 Important manual information EAU10134 Particularly important information is distinguished in this manual by the following notations: This is the safety alert symbol. It is used to alert you to potential personal injury hazards. Obey all safety messages that follow this symbol to avoid possible injury or death.
- Page 8 Important manual information EAU98171 ESS025 ESS025 (sharing model) OWNER’S MANUAL ©2022 by Yamaha Motor Vietnam Co., Ltd. 1st edition, December 2021 All rights reserved. Any reprinting or unauthorized use without the written permission of Yamaha Motor Vietnam Co., Ltd. is expressly prohibited.
-
Page 9: Table Of Contents
Table of contents Location of important labels... 1-1 Smart key system (ESS025) ... 5-1 For your safety – pre-operation checks..........7-1 Smart key system ......5-1 Safety information ......2-1 Operating range of the smart key Lithium-ion battery ......8-1 Further safe-riding points .... - Page 10 Table of contents Specifications ........ 12-1 Checking the front brake lever free play ........10-9 Consumer information ....13-1 Adjusting the rear brake lever free play ........10-9 Identification numbers ....13-1 Checking the front brake pads Diagnostic connector....13-2 and rear brake shoes .....
-
Page 11: Location Of Important Labels
Read and understand all of the labels on your vehicle. They contain important information for safe and proper operation of your vehicle. Never remove any labels from your vehicle. If a label becomes difficult to read or comes off, a replacement label is available from your Yamaha dealer. 3, 4... - Page 12 • Use only YAMAHA recommended chargers • WHEEL NUT TIGHTENING TORQUE 65 Nm • Utilisez uniquement les chargeurs recommandés par YAMAHA • COPPIA DI SERRAGGIO DADO RUOTA • Utilizzare solo caricabatterie consigliati da YAMAHA • COUPLE DE SERRAGE DES ÉCROUS DE ROUE •...
- Page 13 Location of important labels...
- Page 14 L i - i o n B a t t e r y M o d e l : B F M - 0 0 T y p e : B F M 0 B F M - H 2 1 2 A - 0 0 YAMAHA MOTOR CO.,LTD.
- Page 15 Location of important labels Familiarize yourself with the following pictograms and read the explanatory text. Read the Owner’s manual. No open flame. High voltage. No wet hands. Electrical shock hazard. Hot surface. Do not disassemble. Improper handling may lead to death or serious injury.
- Page 16 Location of important labels The battery charger should be No wet lithium-ion battery. sorted for environmental-friendly recycling. Do not dispose as household waste. Class equipment. Time-lag fuse-link. shock lithium-ion battery.
-
Page 17: Safety Information
Safety information EAU96653 proper training or instruction. Take • Use extra caution when you are training course. Beginners approaching passing should receive training from a cer- through intersections, since in- Be a Responsible Owner tified instructor. Contact an autho- tersections are the most likely As the vehicle’s owner, you are respon- rized dealer to find out about the places for vehicle accidents to... - Page 18 Safety information become thoroughly familiar with he or she can firmly place both that covers your legs, ankles, and the vehicle and all of its controls. feet on the passenger footrests. feet. The EV system and its related Many accidents have been caused Never ride under the influence of components may become very hot...
- Page 19 Yamaha accessories, which are avail- characteristics can put you and others the weight as evenly as possible able only from a Yamaha dealer, have at greater risk of serious injury or death. on both sides of the vehicle to min-...
- Page 20 Safety information Aftermarket Tires and Rims are added to the handlebar or straps carefully so the straps will front fork area, they must be as The tires and rims that came with your not rub against painted surfaces lightweight as possible and vehicle were designed to match the during transport.
-
Page 21: Further Safe-Riding Points
If an electric component iron plates on road construction becomes submerged in water, have a sites, and manhole covers be- Yamaha dealer check the vehicle. come extremely slippery when wet. Slow down and cross them with caution. Keep the vehicle up- right, otherwise it could slide out from under you. -
Page 22: Description
Description EAU10411 Left view 1. Headlight (page 10-18) 2. Fuses (page 10-17) 3. 12V battery (page 10-15) -
Page 23: Right View
Description EAU10421 Right view 1. Brake/tail light 2. Rear storage compartment (page 6-10) 3. Tool kit (page 10-2) 4. Front storage compartment (page 6-10) 5. Power outlet (page 6-12) 6. Luggage hook (page 6-11) -
Page 24: Controls And Instruments
Description EAU10431 Controls and instruments 1. Rear brake lever (page 6-8) 2. Left handlebar switches (page 6-7) 3. Multi-function display (page 6-4) 4. Front brake fluid reservoir (page 10-11) 5. Right handlebar switches (page 6-7) 6. Front brake lever (page 6-8) 7. -
Page 25: Battery Charger/Lithium-Ion Battery
Description EAU98330 Battery charger/lithium-ion battery 1. Battery charger 2. Battery charger indicator light 3. Lithium-ion battery 4. Button 5. Lithium-ion battery level meter... -
Page 26: High-Voltage Components
Description EAU97510 High-voltage components 1. Motor 2. Motor control unit (MCU) 3. High-voltage wiring (orange-colored) 4. DC-DC converter 5. Relay unit 6. Lithium-ion battery... -
Page 27: Ess025 Features
WARNING components The ESS025 is an EV commuter vehi- In the event of a road accident, be cle with an output of 2.5 kW (Yamaha sure to observe the following: This vehicle uses high voltage compo- internal measurement). Never touch the high-voltage ... -
Page 28: Multiple Lithium-Ion Batteries
ESS025 features EAU97425 If the lithium-ion battery currently Multiple lithium-ion batteries used for driving, switches to limited Up to 2 lithium-ion batteries can be in- output power due to low remaining stalled at a time. The batteries can be charge, the limited output indicator installed in the following two patterns: light will come on. -
Page 29: Charging The 12V Battery From
ESS025 features cooled down sufficiently, and then EAU97863 EAU96403 Charging the 12V battery from Traveling distance charge the other lithium-ion bat- lithium-ion battery The traveling distance on a single tery. charge depends on the riding style and When lithium-ion battery 2 (option- While the vehicle power is on, the lithi- overall conditions: al) is not installed, install the plug... -
Page 30: Drive Modes
ESS025 features EAU96371 EAU97685 Drive modes Temperature warning function to protect EV system You can choose the drive mode ac- cording to the riding conditions (road This vehicle is equipped with a temper- conditions, etc.) and your preferences. ature warning function to protect the EV ... -
Page 31: Regenerative Brake
ESS025 features brake may not function well. turn off and the vehicle may stop. EAU96394 Regenerative brake The regenerative brake produces a When the temperature warning func- braking effect, similar to the engine tion limits the output and/or stops the brake on a conventional combustion EV system, it is not a malfunction. -
Page 32: Lithium-Ion Battery Level
ESS025 features EAU96357 Lithium-ion battery level The remaining charge level and status of the lithium-ion battery can be checked via the following indicators. To check the lithium-ion battery level, push the button on the lithium-ion battery. Lithium-ion Lithium-ion Remaining battery level battery level battery level meter (on the... - Page 33 ESS025 features Lithium-ion Lithium-ion Remaining battery level battery level battery level meter (on the Indicator light Current status meter (on the multi-function battery) display) 40–21 – The vehicle can be operated. When the lithium-ion battery level decreases to 15%, the limited output indicator light will come on.
- Page 34 ESS025 features Lithium-ion Lithium-ion Remaining battery level battery level battery level meter (on the Indicator light Current status meter (on the multi-function battery) display) When the lithium-ion battery level decreases to 10%, the last segment will 10–1 flash. Stop riding as soon as possible and charge the lithium-ion battery. If the lithium-ion battery level meter is flashing, the vehicle cannot be driven.
-
Page 35: Effective Use Of The Lithium-Ion Battery
ESS025 features EAU97225 store the vehicle in a cool place EAU96363 Effective use of the lithium-ion CCU (Communication Control (optimum temperature 15–25 C). battery Unit) (ESS025) Check the battery level while the If the lithium-ion battery is charged/ vehicle is in storage. If the battery This model is equipped with a CCU that stored improperly or exposed to high level drops to the last segment, re-... - Page 36 ESS025 features radio towers, power plants, broadcasting stations, airports, etc.). 1 1 1 Pairing the CCU and your smartphone 1. Install the MyRide App on your smartphone and activate it. The MyRide App can be downloaded 1. CCU (Communication Control Unit) from an application store.
-
Page 37: Smart Key System (Ess025)
Smart key system (ESS025) EAU76444 Smart key system The smart key system enables you to operate the vehicle without using a me- chanical key. In addition, there is an an- swer-back function to help you locate the vehicle in a parking lot. (See page 5-5.) 1. -
Page 38: Smart Key System
Smart key system (ESS025) radios or mobile phones in EAU76453 system may not work or its operating Operating range of the smart close proximity of the smart key range may become very short. key system The smart key is in contact with ... -
Page 39: Handling Of The Smart Key And Mechanical Keys
Smart key system (ESS025) write down the identification number EAU97252 EWA21620 Handling of the smart key and WARNING in case the identification number mechanical keys card is lost. The smart key should be carried with you. Do not store it on the ECA21573 NOTICE vehicle. -
Page 40: Smart Key
EV system and operate the vehi- cle. system still does not operate, check the vehicle battery and then have a Yamaha dealer check the To turn the smart key on or off vehicle. Push the smart key button for approxi- ... - Page 41 Smart key system (ESS025) mately 1 second to turn the smart key the answer-back function is as shown. again for 5 seconds. on or off. When the smart key is turned 4. When the beeper sounds, the set- off, the vehicle cannot be operated ting is complete.
-
Page 42: Replacing The Smart Key Battery
Smart key system (ESS025) equivalent type. used batteries away from chil- EAU97271 Replacing the smart key Please check and obey all local dren. battery laws and regulations for the dis- If the battery compartment does posal of batteries or accumula- not close securely, stop using Replace the battery in the following sit- tions. -
Page 43: Main Switch
Smart key system (ESS025) stalled correctly. Confirm the di- EAU97281 Main switch rection of the positive “+” side Dispose of the removed battery in ac- of the battery. cordance with local regulations. 3. Note the polarity of the battery and To replace the smart key battery install it with the “+”... - Page 44 Smart key system (ESS025) main switch knob (and confirmation EAU96711 for information on turning the vehicle with the smart key has taken place), the power on without the smart key. main switch can be turned while the 1 1 1 2 2 2 smart key system indicator light is on EAU96721...
- Page 45 Smart key system (ESS025) onds and the smart key system indica- 1 1 1 2 2 2 tor light will flash for 30 seconds. Make sure that the seat is securely During this 30 seconds, the main closed before starting off. switch can be freely operated.
- Page 46 Smart key system (ESS025) main switch to “ ”. The beeper will turn off after 1 minute. If the steering will not lock, try turning the handlebar back to the right slightly. EAU76521 “ ” (lock) To unlock the steering 1 1 1 2 2 2 1 1 1...
-
Page 47: Instrument And Control Functions
Instrument and control functions EAU97311 on. The EV system can be started. The To lock the steering Main switch/steering lock key cannot be removed. (ESS025 (sharing model)) To prevent lithium-ion battery and 12V 2 2 2 battery discharge, do not leave the key in the “ON”... -
Page 48: Keyhole Shutter (Ess025 (Sharing Model))
If the vehicle turns over, and af- ter placing it upright, ensure that there is no fuel leakage. If fuel is leaking, have a Yamaha dealer check the vehicle. -
Page 49: Indicator Lights And Warning Lights
Check the ready to run, “ ” will come on. When status of the lithium-ion battery, and the light “ ” is not lit, the vehicle cannot then have a Yamaha dealer check the be driven. vehicle. EAU97691 Limited output indicator light “... -
Page 50: Multi-Function Display
The select button is located below the level is low). Otherwise, have a 1 1 1 2 2 multi-function display. This button al- Yamaha dealer check the vehicle. lows you to control or change the set- While this light is on, the accelera- tings of multi-function display. - Page 51 EAU96513 EAU96535 Lithium-ion battery level meters Clock Otherwise have a Yamaha dealer The lithium-ion battery level meters The clock uses a 12-hour time system. check the CCU and the electrical cir- show the current charge of the lithi- cuit.
- Page 52 Instrument and control functions on the information display in certain sit- EAU96550 Incoming notification icon “ ” uations: The odometer will lock at 99999 and This icon flashes for 10 seconds when “PUSH” cannot be reset. the connected smartphone receives an The vehicle and EV system are SMS, E-mail or other notification.
-
Page 53: Handlebar Switches
Instrument and control functions EAU98220 EAU1234T EAU62542 Handlebar switches Charging indicator Dimmer switch “ ” This indicator comes on when the char- Set this switch to “ ” for the high Left ger is connected to the vehicle. beam and to “ ”... -
Page 54: Front Brake Lever
Instrument and control functions EAU12501 EAU97100 EAU12952 Front brake lever Rear brake lever Horn switch “ ” Press this switch to sound the horn. EAU97331 Mode switch “MODE” Press the mode switch “MODE” to change the drive mode in the following order: “ECO”... -
Page 55: Seat
Instrument and control functions EAU97353 then turn it to “OPEN” position. EAU37482 Seat Helmet holders To open the seat 1 1 1 Via the main switch (ESS025) Turn the main switch to “OPEN”, and 1 1 1 then press the “SEAT” button. (See page 5-9.) With the mechanical key (ESS025) 1. -
Page 56: Storage Compartments
Instrument and control functions To release a helmet from a helmet EAU97363 Storage compartments holder Some helmets cannot be stored in the This model is equipped with 2 storage Open the seat, remove the helmet from rear storage compartment because of compartments. -
Page 57: Luggage Hook
Instrument and control functions plastic bag before storing them load of 172 kg (379 lb) for the ve- EAU61380 Luggage hook in the compartment. hicle. Since the storage compartment To use the luggage hook, pull it out as may get wet while the vehicle is shown. -
Page 58: Power Outlet
1. Turn the vehicle power off. fore, check the sidestand switch 2. Remove the power outlet cap. regularly and have a Yamaha dealer 3. Turn the accessory off. repair it if it does not function prop- 4. Insert the accessory plug into the erly. -
Page 59: For Your Safety - Pre-Operation Checks
Before using this vehicle, check the following points: ITEM CHECKS PAGE • Check operation. • If soft or spongy, have Yamaha dealer bleed hydraulic system. • Check brake pads for wear. Front brake • Replace if necessary. 10-10, 10-11 • Check fluid level in reservoir. - Page 60 — • Tighten if necessary. Instruments, lights, signals • Check operation. — and switches • Correct if necessary. Check if the EV system turns off when the sidestand is lowered. Otherwise have Sidestand switch 6-12 Yamaha dealer check the vehicle.
- Page 61 Lithium-ion battery ing and user maintenance shall extension cable. Using a power EAU97963 Safety information not be done by children without strip or similar methods may ex- supervision. ceed rated current and can re- Avoiding electric shock or fire while sult in fire.
-
Page 62: Lithium-Ion Battery
Yamaha dealer. Have the vehicle and charger in- Do not move the vehicle while spected by a Yamaha dealer. Avoiding electric shock or fire while the battery charger is connect- charging ed. -
Page 63: Charging The Lithium-Ion Battery
If it is dropped in wa- risk of electric shock or fire. Not accessible to children or pets ter, it will become permanently Have a Yamaha dealer check the Temperature between 15–25 C useless. lithium-ion battery before using (59–77 F) - Page 64 If a problem occurs during charging, normality is noticed, consult a remove the power plug of the battery suspension occurs, move the lithi- Yamaha dealer immediately. charger from the socket and wait for um-ion battery and battery charger to a Periodically remove dust from the lithium-ion battery and/or the ...
-
Page 65: Charging Procedure
Otherwise, it could cause bend- nor as a portable power supply. problem is detected, have a ing, surface scraping, damage, Yamaha dealer check the bat- etc. to the terminals. If any ab- tery charger. normalities are found on the ter-... - Page 66 Lithium-ion battery 2. Place the vehicle on the center- 4. Connect the power plug into an ap- stand. propriate AC outlet (AC220–240 Insert the charging plug with the “ ” mark facing up. 5. Open the charging connector cap. ECA28110 NOTICE To prevent an electric shock or short circuit, be sure to close the cap of...
-
Page 67: Checking The Charging Status Of
Lithium-ion battery as it could cause damage. Never apply excessive stress to the charging plug or pull the plug while it is locked with the connector. 1 1 1 Never move the vehicle and bat- tery while the charging plug is connected, as it could cause damage. -
Page 68: The Lithium-Ion Battery
Lithium-ion battery green light on the battery charger the button. will go off. Make sure the indicator light is off and unplug the charging plug from the charging connector. ECA27830 NOTICE When unplugging the charging plug, make sure to pull straight out. - Page 69 Lithium-ion battery and have it inspected at your dealer. 8. Insert the charging plug into the charging connector. Charging will start automatically when it is actu- ally connected. Insert the charging plug with the “ ” mark facing up. ECA27840 NOTICE 1.
- Page 70 Lithium-ion battery away from the charging connec- EAU96463 (the time until the battery’s internal Charging time tor cap to avoid damaging the temperature lowers enough to cap. When the bottom of lithium-ion battery start charging). See “Checking the level meter on the battery flashes, the charging status of the lithium-ion 11.
- Page 71 The lithium-ion battery level meter on the lithium-ion battery and the battery charger indicator light come on automatically when the charger is connected. After checking the charging status of the battery, turn the main switch to “OFF”. If the battery charger indicator light does not come on, have your Yamaha dealer check the vehicle. 8-11...
- Page 72 Lithium-ion battery Battery Current Lithium-ion battery level Lithium-ion battery level meter on charger Details status meter on the battery the multi-function display indicator light The battery charger indicator light comes on in green when charging is normal. Charging progress is represented by the Charging flashing segment on the lithium-ion battery level meter.
- Page 73 Lithium-ion battery Battery Current Lithium-ion battery level Lithium-ion battery level meter on charger Details status meter on the battery the multi-function display indicator light When the inside of the battery is hot or the battery is excessively cold, the battery charger indicator light flashes green, and all the segments on the lithium-ion battery level meter flash to inform you that the...
- Page 74 Each segment performed correctly, an error has occurred (1st, 3rd and 1st and 4th during charging. Have a Yamaha dealer Entire lithium-ion battery level meter Flashing [Red] 5th/2nd and segments flash check the vehicle.
-
Page 75: About The Battery
Yamaha need to be completely discharged peri- dealer replace the battery. Always fol- odically. Lithium-ion batteries can be... -
Page 76: Battery Specifications
(Product information) YAMAHA MOTOR EUROPE N.V. Importer (EU) Koolhovenlaan 101, 1119 NC Schiphol-Rijk, 1117 ZN, Schiphol, the netherlands YAMAHA MOTOR EUROPE N.V., BRANCH UK Units A2-A3, Kingswey Business Park, Forsyth Road, Importer (UK) Woking, Surrey. GU21 5SA. United Kingdom. Trademark/Trade Name... -
Page 77: Operation And Important Riding Points
EV system warning light remains from moving. 3. While applying the front or rear brake and press the run switch. ECA24110 NOTICE If a warning or indicator light does not work as described above, have a Yamaha dealer check the vehicle. -
Page 78: Starting Off
Operation and important riding points in motion. EAU97970 Starting off 1. Check that the run indicator light comes on. 2. Switch a turn signal on. 3. Check for oncoming traffic, and then slowly turn the accelerator in order to take off. 4. -
Page 79: Acceleration And Deceleration
Operation and important riding points EAU97110 EAU97120 EAU97613 Acceleration and deceleration Braking Parking EWA17790 When parking, turn the vehicle’s power WARNING off and place it on the sidestand or cen- Avoid braking hard or suddenly terstand. (especially when leaning over to When parking the vehicle, turn the main one side), otherwise the vehicle switch to “OFF”... - Page 80 “OFF” or “ ”. Otherwise, the lithium-ion bat- tery may discharge. The sidestand alarm beeper can be set to not activate. Please con- tact your Yamaha dealer. EWA21610 WARNING Since some components of the EV system can become very...
-
Page 81: Periodic Maintenance And Adjustment
If cle while charging the lithi- you are not familiar with vehicle ser- um-ion battery. This could vice, have a Yamaha dealer perform cause an electric shock or short service. circuit. Replace the charging cable and/ 10-1... -
Page 82: Tool Kit
However, a torque wrench and other tools are necessary to perform certain maintenance work correctly. If you do not have the tools or experi- ence required for a particular job, have your Yamaha dealer perform it for you. 10-2... -
Page 83: General Maintenance And Lubrication Chart
From 30000 km (17500 mi), repeat the maintenance intervals starting from 6000 km (3500 mi). Items marked with an asterisk should be performed by a Yamaha dealer as they require special tools, data and technical skills. EAU71343 General maintenance and lubrication chart... - Page 84 Periodic maintenance and adjustment ODOMETER READING ANNUAL ITEM CHECK OR MAINTENANCE JOB 1000 km 6000 km 12000 km 18000 km 24000 km CHECK (600 mi) (3500 mi) (7000 mi) (10500 mi) (14000 mi) • Check tread depth and for damage. ...
- Page 85 Periodic maintenance and adjustment ODOMETER READING ANNUAL ITEM CHECK OR MAINTENANCE JOB 1000 km 6000 km 12000 km 18000 km 24000 km CHECK (600 mi) (3500 mi) (7000 mi) (10500 mi) (14000 mi) • Check operation. • Check accelerator grip free play, ...
-
Page 86: Checking The Accelerator Grip Free Play
WARNING free play and, if necessary, have a The tire air pressure must be Yamaha dealer adjust it. Never overload your vehicle. Opera- checked and adjusted on cold tion of an overloaded vehicle could tires (i.e., when the temperature cause an accident. - Page 87 “broken cracked, have a Yamaha dealer re- in” for it to develop its optimal place the tire immediately. characteristics.
-
Page 88: Cast Wheels
Yamaha. er damage before each ride. If any EWA21531 WARNING damage is found, have a Yamaha Front tire: dealer replace the wheel. Do not The front and rear tires should Size:... -
Page 89: Checking The Front Brake Lever Free Play
There should be no free play at the 1. Rear brake lever brake lever end. If there is free play, 2. Rear brake lever free play have a Yamaha dealer inspect the brake system. Rear brake lever free play: EWA14212 15.0–20.0 mm (0.59–0.79 in) -
Page 90: Checking The Front Brake Pads And Rear Brake Shoes
Periodic maintenance and adjustment EAU22382 touches the brake disc, have a Yamaha Checking the front brake pads dealer replace the brake pads as a set. and rear brake shoes The front brake pads and the rear brake EAU22541 Rear brake shoes... -
Page 91: Checking The Brake Fluid Level
Before riding, check that the brake fluid fluid level goes down suddenly, have a is above the minimum level mark. fluid from a sealed container. Yamaha dealer check the cause before Check the brake fluid level with the top Use only the specified brake flu- ... -
Page 92: Changing The Brake Fluid
Checking and lubricating the Checking and lubricating the cables accelerator grip Have a Yamaha dealer change the brake fluid every 2 years. In addition, The operation of all control cables and The operation of the accelerator grip have the seals of the master cylinders the condition of the cables should be should be checked before each ride. -
Page 93: Lubricating The Front And Rear Brake Levers
EWA10742 WARNING If the centerstand or sidestand does not move up and down smoothly, have a Yamaha dealer check or re- pair it. Otherwise, the centerstand or sidestand could contact the ground and distract the operator, resulting in a possible loss of control. -
Page 94: Checking The Front Fork
1. Place the vehicle on a level sur- fork does not operate smoothly, face and hold it in an upright posi- have a Yamaha dealer check or re- tion. WARNING! To avoid injury, pair it. securely support the vehicle so there is no danger of it falling over. -
Page 95: Checking The Steering
If there is play in the wheel ward and backward. If any free hub or if the wheel does not turn play can be felt, have a Yamaha smoothly, have a Yamaha dealer check 1. Screw dealer check or repair the steering. - Page 96 WARNING To charge the battery Electrolyte is poisonous and Have a Yamaha dealer charge the bat- dangerous since it contains sul- tery as soon as possible if it seems to furic acid, which causes severe have discharged. Keep in mind that the burns.
-
Page 97: Replacing The Fuses
If a fuse is blown, replace it as follows. If the fuse immediately blows again, 1. Turn off the electrical circuit in have a Yamaha dealer check the elec- question, and then turn off the trical system. main switch. -
Page 98: Vehicle Lights
If a problem occurs, check the following light “ ” is turned on)? 2 2 2 before taking the vehicle to a Yamaha The vehicle cannot be ridden unless it dealer. However, if no electric power is is run mode. - Page 99 If the remaining charge is insuffi- After checking the above, if the vehicle EWA21710 cient, charge the battery before still does not run, have a Yamaha deal- WARNING continuing to ride. er inspect the vehicle. When pushing the vehicle, turn ...
- Page 100 The battery charger indicator light error between the lithium-ion battery is flashing (Once a second) while When pushing the vehicle, turn and the vehicle. Have a Yamaha dealer charging. the vehicle power off. inspect the vehicle. When possible, push the vehi- ...
- Page 101 on. When the battery charger tempera- normal range, have a Yamaha dealer The lithium-ion battery usage rate ture returns to within the normal range, inspect the vehicle.
- Page 102 Yamaha dealer inspect the vehicle. connected to the charger, or if the ab- Have a Yamaha dealer replace the bat- normal condition occurs repeatedly, tery. Each segment (1st, 3rd and 5th /...
-
Page 103: Emergency Mode (Ess025)
Periodic maintenance and adjustment Yamaha dealer check the smart key EAU96631 Emergency mode (ESS025) system. When the smart key is lost or damaged, or its battery has discharged, the vehi- See “Emergency mode” on page 10-23 cle can still be turned on and the EV for information on starting the EV sys- system started. - Page 104 Periodic maintenance and adjustment dicator light. key system indicator light flashes 5. While the smart key system indica- For example, if the identification twice. tor light is on, push the knob once number is 123456: more to complete emergency Push and hold the knob.
-
Page 105: Care And Storage
Be performance and extend the useful life high-pressure washers sure to consult a Yamaha dealer for of many components. Washing, clean- steam-jet cleaners. Excessive advice on what products to use be- ing, and polishing will also give you a water pressure may cause water fore cleaning the vehicle. - Page 106 Care and storage gasoline, rust removers, brake ing lubrication such as seals, been exposed to salt. Warm wa- fluid, or antifreeze, etc. gaskets, and wheel axles. Fol- ter will increase salt’s corrosive low product instructions. properties. [ECA26290] [ECA26301] 3. For windshield-equipped vehicles: Before washing Washing Clean the windshield with a soft...
- Page 107 Care and storage mance and cornering behavior. 3. Use a chrome polish to shine start the EV system and turn on chrome, aluminum, and stainless the headlight to help remove the steel parts. Often the thermally in- moisture. duced discoloring of stainless steel 10.
-
Page 108: Storage
Care and storage EAU97643 3. Lubricate all control cables, pivots, stored in a place where it is exces- Storage levers and pedals, as well as the sively hot or cold, the electric out- Always store the vehicle in a cool, dry sidestand and centerstand (if put capacity may decrease. - Page 109 Care and storage a long time, additionally charge the battery every three months. Make sure the battery and bat- tery charger are compatible with each other. Do not charge VRLA batteries using a conventional battery charger. If the 12V battery will be removed, charge it once a month and store it in a temperate location between 0—30 C (32—90 F).
-
Page 110: Specifications
Specifications Dimensions: Bulb wattage: EAU97750 Size: 130-70-13M/C 63P Overall length: Headlight: Manufacturer/model: 1875 mm (73.8 in) MAXXIS/MA-EVR Overall width: Brake/tail light: Loading: 695 mm (27.4 in) Overall height: Maximum load: Front turn signal light: 1120 mm (44.1 in) 172 kg (379 lb) Seat height: (Total weight of rider, passenger, cargo and Rear turn signal light:... -
Page 111: Consumer Information
These identification numbers are needed when registering the vehicle with the authorities in your area and when ordering spare parts from a Yamaha dealer. VEHICLE IDENTIFICATION NUM- 1. Vehicle identification number 1. EV system serial number... -
Page 112: Diagnostic Connector
Yamaha dealer. Privacy Policy https://www.yamaha-motor.eu/eu/ en/privacy/privacy-policy/ Yamaha will not disclose this data to a third party except in the following cas- es. In addition, Yamaha may provide vehicle data to a contractor in order to outsource services related to the han-... - Page 113 Consumer information dling of vehicle data. Even in this case, Yamaha will require the contractor to properly handle the vehicle data we provided and Yamaha will appropriate- ly manage the data. With the consent of the vehicle owner ...
-
Page 114: Index
Index Dimmer switch ........6-7 Lithium-ion battery, checking the Display units, Charging indicator .... 6-7 charging status ........8-11 12 V battery......... 10-15 Display units, switching ......6-5 Lithium-ion battery, effective use of ..4-9 Drive mode display ......... 6-6 Lithium-ion battery level meters ....6-5 Acceleration and deceleration.... - Page 115 Index Sidestand..........6-12 Smart key ..........5-4 Smart key battery, replacing....5-6 Smart key system ........5-1 Smart key system indicator light..... 6-3 Smart key system, troubleshooting ..10-22 Specifications ........12-1 Speedometer .......... 6-5 Starting off ..........9-2 Steering, checking ......10-15 Storage ..........
- Page 118 Original instructions PRINTED IN VIETNAM 2022.02...
Need help?
Do you have a question about the NEO'S ESS025 2022 and is the answer not in the manual?
Questions and answers