Advertisement
Assembly Instructions
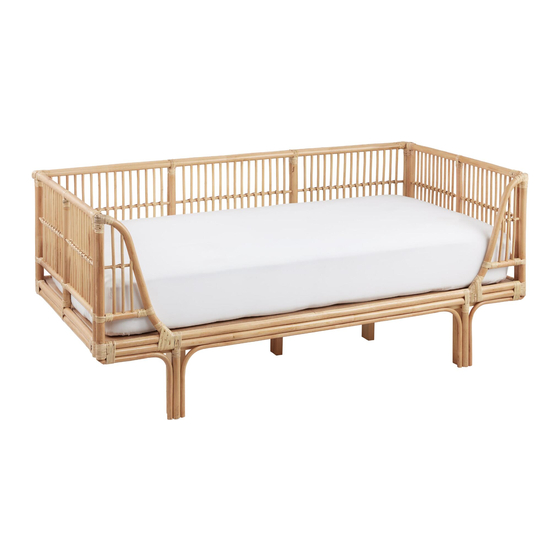
RATTAN DAYBED
SKU - 556650
THANK YOU FOR PURCHASE. IF YOU HAVE ANY QUESTIONS PERTAINING
TO THE ASSEMBLY OF THIS FURNITURE PIECE, PLEASE CONTACT THE
NEAREST COST PLUS WORLD MARKET STORE.
IF YOU ARE NOT NEAR A STORE, PLEASE CALL OUR CUSTOMER
SERVICE CALL CENTER TOLL FREE AT 877-967-5362 FOR ASSISTANCE.
Page–1
REV08022018
Advertisement
Table of Contents

Related Manuals for World Market 556650


Summary of Contents for World Market 556650
- Page 1 THANK YOU FOR PURCHASE. IF YOU HAVE ANY QUESTIONS PERTAINING TO THE ASSEMBLY OF THIS FURNITURE PIECE, PLEASE CONTACT THE NEAREST COST PLUS WORLD MARKET STORE. IF YOU ARE NOT NEAR A STORE, PLEASE CALL OUR CUSTOMER SERVICE CALL CENTER TOLL FREE AT 877-967-5362 FOR ASSISTANCE.
-
Page 2: Part List
Part list Label Picture Description Headboard Right Panel Left Panel Front Panel Supporting Rails Mattress Panel Page–2 REV08022018... -
Page 3: Hardware List
Hardware list Label Picture Description Short Philips Screws 20 mm Long Philips Screws 50 mm Allen Bolt M6 x 50 mm Tool list Label Picture Description Allen Key Philips Screwdriver Provided Page – 3 Rev 08022018... -
Page 4: Assembly Preparation
Assemble on a clean non-marring surface (packing foam)- • Save all packaging until finished- • In case of missing parts, please contact your nearest Cost Plus World Market store or call our customer service call center at call1-877-967-5362. Page – 4 Rev 08022018... - Page 5 Assembly Steps Step 1 : Attach Headboard to Left Panel (H-3) Allen Bolt x 1 (H-3) Alley Bolt x 10 Position and attach Headboard (A) to Left Panel (C) as shown above. Secure corner joint with one Allen Bolt (H3) at lower corner. Loosely tighten Bolt using Allen Key (T1), provided. Page 5 Rev 08022018...
- Page 6 Assembly Steps Step 2 : Attach Front Panel to Left Panel (H-3) Allen Bolt x 7 Position and attach Front Panel (D) to the Left Panel (C) as shown. Secure this front corner with Allen Bolt (H3) at location shown. Loosely tighten Bolt with the Allen Key (T1). Continue to secure Headboard (A) to Left Panel (C) using 3 Allen Bolts (H3).
- Page 7 Assembly Steps Step 3 : Attach Right Panel to Front Panel (H-3) Allen Bolt x 8 Repeat the same steps to secure Right Panel (B) to Front Panel (D) and Headboard (A) using Allen Bolts (H3). Secure the lower right and rear CORNERS (close to the metal plates) with bolt first before securing the vertical front and rear bed posts with 3 bolts each.
- Page 8 Assembly Steps Step 4 : Secure all Pre-installed Corner Plates with Screws (H-1) Short Phillips Screw20mmx8 Secure all 4 lower corners of the bed by installing the Short Phillips screws (H1) through the pre-installed metal connector plates as shown with a Phillips screw drivers, not provided. Page 8 Rev 08022018...
- Page 9 Assembly Steps Step 5 : Attach Supporting Rails secure with Long Screws. (H-2) Long Phillips Screw 50mm x 6 Position each of the 3 Supporting Rails (E) to connect with the Headboard (A) and Front Panel (D) at locations shown. Secure all connections with Long Phillips Screws (H2). Tighten all screws with Phillips Screw Driver, not provided.
- Page 10 Assembly Steps Step 6 : Assembly Mattress Panel. With the help of minimum 2 people, gently place the Mattress Panel (F) onto the assembled bed as shown. Carefully lift and move the bed to the desired location. The bed is ready for use. Page 10 Rev 08022018...
-
Page 11: Care And Maintenance
Care & Maintenance Do not put hot items directly on furniture surface. Do not clean furniture with harsh cleansers or polish. Do not place furniture near heating or cooling vents. Do not write on furniture without a padded barrier to protect the surface. ...
Need help?
Do you have a question about the 556650 and is the answer not in the manual?
Questions and answers