Advertisement
Quick Links
Imported by
Amart Furniture
For any assistance with assembly or for missing parts please phone
Amart Furniture
2021-09-29
Pty Ltd, Qld, Brisbane Australia.
, Customer Service Free call 1800 351 084
ASSEMBLY INSTRUCTION
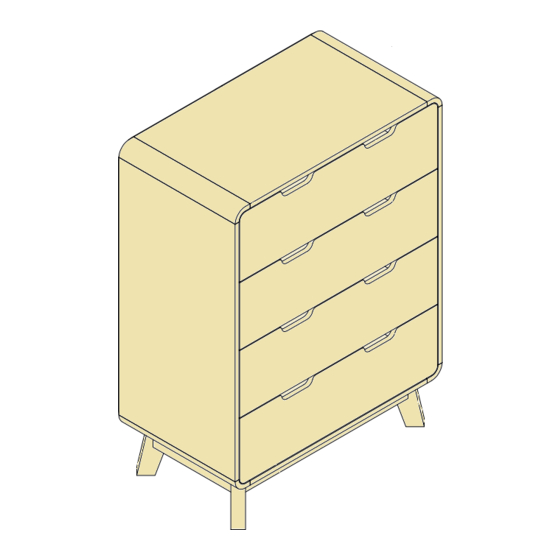
DALVIN TALL CHEST
ITEM CODE 74029
Imported by Amart Furniture Pty Ltd, Qld, Brisbane Australia.
For any assistance with assembly or for missing parts please phone
Amart Furniture , Customer Service Free call 1800 351 084
1
Item Code:74029
Advertisement

Related Manuals for Amart Furniture DALVIN 74029


Summary of Contents for Amart Furniture DALVIN 74029
- Page 1 ITEM CODE 74029 Imported by Amart Furniture Pty Ltd, Qld, Brisbane Australia. For any assistance with assembly or for missing parts please phone Amart Furniture , Customer Service Free call 1800 351 084 Imported by Amart Furniture Pty Ltd, Qld, Brisbane Australia.
- Page 2 2021-09-29 Item Code:74029...
-
Page 3: Back Panel
TOP PANEL BOTTOM PANEL CROSSING BAR LEFT SIDE PANEL RIGHT SIDE PANEL BACK PANEL LEGS TRIANGLE PANEL LEGS DRAWER FRONT PANEL DRAWER LEFT PANEL DRAWER RIGHT PANEL DRAWER BACK PANEL DRAWER SUPPORT LEGS SUPPORT PANEL LEGS SUPPORT PANEL DRAWER BOTTOM PANEL MIDDLE SUPPORT PANEL... - Page 4 CHECKLIST Before you start..1.Choose a clean,level,spacious assembly area. Avoid hard surfaces that may damage the product. 2.Check and ensure that you have all required contents for complete assembly. 3.Always read the assembly instructions carefully before beginning assembly. 4.The packaging and contents can be a choking hazard. Please keep out of reach of small children at all times.
- Page 5 CAM LOCK INSTALL METHOD AS FOLLOWS 1.1cm Step 1 Step 2 Step 3 Lock Fix cam nut into the bottom of hole then tighten it. 2021-09-29 Item Code:74029...
- Page 6 (MM) 800x450x40 800x450x40 580x393x15 865x45x15 865x45x15 874x352x3 140x58x25 431x50x25 762x224x15 350x115x12 350x115x12 721x115x12 337x50x12 624x60x15 278x60x15 727x345x3 865x80x15 Item Code:74029 2021-09-29...
- Page 7 24xI 4xCL 4xCR STEP 1: Fix runners (CL)(CR) to left side panel ④ and right side panel ⑤ using screws (I). Fix cam bolts (A) to panel ④⑤. Front veneer edge Bottom edge Front veneer edge Bottom edge STEP 2: Insert dowels (C) to crossing bars ③ .Attach crossing bars ③ to left side panel ④ and right side panel ⑤...
- Page 8 12xA STEP 3: Fix cam bolts (A) to top panel ① and bottom panel ②. Right veneer edge Front veneer edge Right veneer edge Front veneer edge STEP 4: Insert dowels (C) to top panel ①. Attach top panel ① to the existing unit using cam locks (B). Back veneer edge Back veneer edge Right veneer edge...
- Page 9 STEP 5: Attach middle support panel to the existing unit using cam locks (B). Insert back panels ⑥ to the existing unit. Back veneer edge Back veneer edge Bottom edge STEP 6: Insert dowels (C) to bottom panel ②. Attach bottom panel ② to the existing unit using cam locks (B). Back veneer edge Back veneer edge Bottom edge...
- Page 10 STEP 7: Attach legs support panels to the existing unit using dowels (C). 14 15 Back veneer edge Right veneer edge Bottom veneer edge 10xD STEP 8: Fix legs support panels to the existing unit using screws (D). 14 15 Back veneer edge Right veneer edge Bottom veneer edge...
- Page 11 16xM STEP 9: Fix legs triangle panels ⑦ to legs support panels using screws (M). Back veneer edge Bottom veneer edge Right veneer edge STEP 10: Fix legs ⑧ to the existing unit using screws (E) , spring washers (F), washers (G) and allen key (H).
- Page 12 14xJ 14xK STEP 11: Fix plastic brackets (K) to back panel using screws (J). STEP 12: Fix wall anchor (O) onto the wall using screw (D). Left veneer edge Item Code:74029 2021-09-29...
- Page 13 20xA 20xB STEP 13: Fix cam bolts (A) to drawer front panel ⑨. Attach drawer left panel ⑩,drawer right panel and drawer support bar drawer front panel ⑨ using cam locks (B). Front veneer edge Left veneer edge Left veneer edge 24xN STEP 14: Insert drawer bottom panel to the existing unit.
- Page 14 24xI 4xDL 4xDR STEP 15: Fix runners (DL)(DR) to the bottom of drawer using screws (I). Bottom veneer edge Left veneer edge ASSEMBLY COMPLETE. CAUTION: Always Lift Your Tall Chest When Moving /Relocating - Do Not Drag. Dragging Can Cause The Legs To Bend/Break.
-
Page 15: Product Care
PRODUCT CARE: To protect your furniture,we suggest the following: *Avoid placing your furniture in direct sunlight. *Do not place furniture directly under windows. *Do not place sharp materials(knife,fork,etc) directly onto your furniture as sharp material may scrape and damage the finish. Do not place material with high temperature directly onto the surface of your furniture.
Need help?
Do you have a question about the DALVIN 74029 and is the answer not in the manual?
Questions and answers