
Related Manuals for Cybernet C22 Series


Summary of Contents for Cybernet C22 Series
- Page 1 All manuals and user guides at all-guides.com LCD D -PC Seri User r Gui...
- Page 2 All manuals and user guides at all-guides.com FCC-B Radio Fr requency y Interfere ence State ement This equip pment has been teste d and foun d to comply y with the limits s for a class s B digital d device, purs suant to pa art 15 of the...
- Page 3 All manuals and user guides at all-guides.com Safe ty Inst tructio ways read the safety instructions s carefully. eep this eq uipment aw way from hu umidity. ay this equi pment on a a reliable fla at surface b before setti ing it up.
- Page 4 All manuals and user guides at all-guides.com WEEE Statemen (Waste Electrical a and Electron nic Equipm ment) The WE EEE directiv ve places a n obligation n on EU-ba ased manuf facturers, d distributors, retailers s and impor rters to take e-back elec ctronics pro oducts at th...
-
Page 5: Table Of Contents
FCC-B Radio Frequency Interference Statement ..............i Trademarks ........................... i Safety Instructions ........................ii WEEE Statement ........................iii Introduction ..........................1 LCD-PC C22 Series Specifications .................... 1 Processor Support ........................1 Motherboard Core Logic ......................1 Memory Support ........................1 Networking ..........................1 ... - Page 6 Installing the Hard Disk Drive ....................27 Installing the Optical Disk Drive ................... 28 Installing the Mini-PCIe Card (Optional) ................30 Installing the Cover ....................... 31 Cybernet Recycling SOP…………………………………………………………………………….33 Figures Figure 1: Front View with Optional Webcam………….……………………………..……..……11 Figure 2: Left side view with Optical Drive……………………………………………..…..…….12 ...
-
Page 7: Introduction
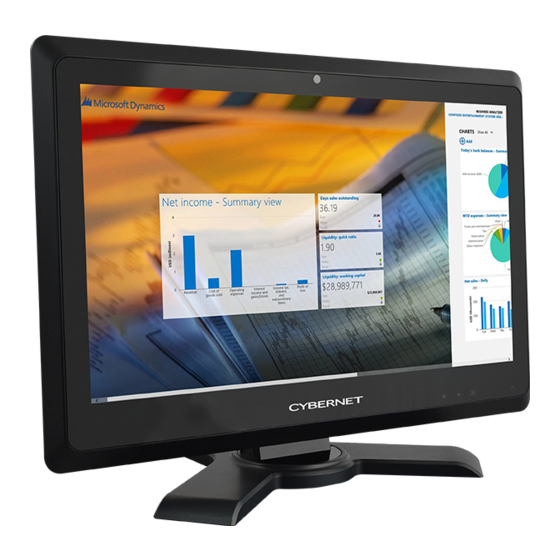
All manuals and user guides at all-guides.com Introduction Congratulations for purchasing the C22 Series. The LCD-PC C22 Series is your best Slim LCD PC choice. With the fantastic appearance and small form factor, it can easily be set anywhere. The feature packed platform also gives you an exciting PC experience. -
Page 8: Hard Disk Drive
Brightness Adjust Right Side Bezel Two USB 2.0 ports (for mouse and keyboard) Optional card reader Left Side Bezel Optional one optical tray type disk drive – 2.5” slim or optional one additional 2.5” SATAII HDD/SSD. C22 Series Page 2... -
Page 9: Bottom I/O Panel
All manuals and user guides at all-guides.com Bottom m I/O Pan 1 Ctrl+A Alt+Del butto 1 DC/IN port, 1 HD DMI-OUT po ort, 1 DP po 2 USB2 .0 ports, 2 USB3.0 po orts, 1 Seria al port, 1 CM MOS clear button, 1 1 394 port, 1... - Page 10 All manuals and user guides at all-guides.com Intended use The C22 Series is designed for general pc application purpose for hospital environment and for diagnosis. It could be used for Radiology, PACS (Picture Archiving Communication Systems), LIS (Lab Information Systems) and Electronic Record purpose.
- Page 11 3.Do not insert objects into the openings. 4. Do not have liquids seep into the internal areas of the LCD PC unit. 5. Having liquids seep in or inserting objects into the unit may result in electric shocks C22 Series Page 5...
- Page 12 Notify and request a qualified service technician for servicing the unit. 3. To avoid risk of electric shock, this equipment must only be connected to a supply mains with protective earth. C22 Series Page 6...
- Page 13 All manuals and user guides at all-guides.com 4. If any y of the follo owing situat tions occur turn the po ower source e off and un nplug the u nit. Then co ontact a qua alified servic ce technicia (a) A liqu uid was spi illed on the...
-
Page 14: Power Management
All manuals and user guides at all-guides.com Power Managem ment Power m managemen nt of LCD-P PC has the p potential to save signif ficant amou unts of elect tricity as well a as deliver e environmen t benefits. To be en nergy efficie ent, turn off f your displ... - Page 15 All manuals and user guides at all-guides.com Select a a power plan n that suits your perso onal needs. . You may a also fine-tu ne the setti ings by clicki ng [Change e plan settin ngs]. The Shu ut Down LC D-PC Menu u presents t the options...
-
Page 16: Waking The System Up
Install power saving software to manage your PC’s energy consumption. Always disconnect the AC power cord or switch the wall socket off if your LCD-PC would be left unused for a certain time to achieve zero energy consumption. C22 Series Page 10... - Page 17 All manuals and user guides at all-guides.com D-PC C22 2 Series O Overview Figure 1: Front Vie ew with Opt tional Webc C22 Ser ries Page 11...
- Page 18 All manuals and user guides at all-guides.com Figure e 2: Left side e view with h Optical Dr r ive C22 Ser ries Page 12...
- Page 19 All manuals and user guides at all-guides.com Figure 3: S Side USB P Ports and op ptional card d reader Figure e 4: Touch Panel and Power butt “ready to use butt ton” C22 Ser ries Page 13...
-
Page 20: On Screen Display Buttons
All manuals and user guides at all-guides.com On Scr reen Disp play Butto Figu ure 5: On S creen Disp play Buttons There a re four butt tons on the lower beze el of the sc reen. From m right to le eft they are: D key Respons... -
Page 21: On Screen Display Usage
All manuals and user guides at all-guides.com On Screen n Display y Usage gure 6: On S Screen Dis play Icons Base on n the lower b bezel OSD key, the W When the Bri ightness / + + and Contr rast / - will c come out on th... - Page 22 All manuals and user guides at all-guides.com ”Menu” to select lang guage. “Factory y Default” re esets monit tor to origin al settings. “Shippin ng Mode” w when it is “on n” it cuts th e power fro om battery o or no batte ry support.
- Page 23 All manuals and user guides at all-guides.com “Display y Mode Swi tch” to turn the System m into Moni itor and Mo onitor into S System (PC C), by connec cting “Displ lay Port In” connector, , as shown in the pictu ure.
- Page 24 All manuals and user guides at all-guides.com Figure e 7: Back vi gure 8: Bot ttom Panel I/O Ports C22 Ser ries Page 18...
- Page 25 All manuals and user guides at all-guides.com Figure 9: C Ctrl+ Alt+De el button Figure e 10: CPU H Heatsink Ve entilation F F an C22 Ser ries Page 19...
- Page 26 All manuals and user guides at all-guides.com...
-
Page 27: System Assembly
All manuals and user guides at all-guides.com System m Assemb This cha apter provid des system assembly information n and proce edures. Wh hile perform ming any inst allation, us e a ground ed wrist str rap before handling co omputer co omponents carefully... -
Page 28: Orientation Of Key Parts
All manuals and user guides at all-guides.com Orienta ation of K Key Parts Figur re 11: Syste em Fans, C CPU Heat S Sink Fan an d Ventilatio C22 Ser ries stem Assem mbly Page 21... -
Page 29: C22 Series Disassembly
All manuals and user guides at all-guides.com C22 Series Disassembly ORIENTATION: Presumes the top of the LCD PC is away from you and the bottom or I/O controller board is nearest you. Do not put any pressure on the LCD PC to avoid adding pressure to the System or place any equipment/device on top of it during assembly/disassembly. - Page 30 All manuals and user guides at all-guides.com Figur re 12: Ope en system w without GP ure 13: Op pen system m with GPU C22 Ser ries stem Assem mbly Page 23...
-
Page 31: Installing The Cpu
All manuals and user guides at all-guides.com Installi ing the C NOTE: If you purc chased your r LCD PC a as a turn-ke ey system, y you must fi rst follow th instructio ons to remo ove the hea at sink in or rder to be a able to reac... - Page 32 All manuals and user guides at all-guides.com Installi ing the C CPU Heat Sink 1. Put t on the hea at sink and make sure e that the r screws fit t the corres sponding sc crew hole es on the m motherboar 2.
- Page 33 All manuals and user guides at all-guides.com Installi ing the M Memory M Module DD DR3 SO-D DIMM 1. The me emory modu ule has onl y one notc and will l only fit in t the slot one e way. 2.
- Page 34 All manuals and user guides at all-guides.com Installi ing the H Hard Disk Drive 1. In nstall the ha ard disk wit h the HDD bracket nd line up th he hard dis k bracket w with ur screw ho ole accordi ingly.
- Page 35 All manuals and user guides at all-guides.com Installi ing the O Optical Dis sk Drive Remove back beze el as indicat ted in the L PC D Disassembl ly. Remove e the Optica al Disk Driv fram Put the O ODD on the e ODD fram me and line...
- Page 36 All manuals and user guides at all-guides.com Conn nect the SA ATA cable. Connect th Power Cabl nnect the o other end of f the cable t o the ODD. Insta all the ODD frame and line up the e two screw holes s over the M Metal Supp...
- Page 37 All manuals and user guides at all-guides.com Installi ing the M Mini-PCIe Card (Op ptional) 1. The min ni-PCIe card ds have on nly one notch an nd will only y fit in one w way. Insert th he mini-PCI Ie card at a a 45°...
- Page 38 All manuals and user guides at all-guides.com Installi ing the C Cover 1. Secu uring the me etal cover a and I/O plat te with eigh hteen screw 2. Secu ure the plas stic cover w with thirteen screws. 3. Ins stall the OD DD bezel ba ack to the O...
- Page 39 All manuals and user guides at all-guides.com stem View w C22 Ser ries Sys s tem Assem m bly Page 32...
- Page 40 All manuals and user guides at all-guides.com Cybernet e e-recyclin ng SOP Cyberne et has an e- -recycling p program tha at is very ea asy to use. Just follow w the steps explaine ed below or r go to our w website at w www.cybern...
Need help?
Do you have a question about the C22 Series and is the answer not in the manual?
Questions and answers