Table of Contents
Advertisement
Advertisement
Table of Contents

Related Manuals for Skydio Skydio X2


Summary of Contents for Skydio Skydio X2
- Page 1 Operator Manual Skydio X2 Color Skydio X2 Color/Thermal WARNING: Please read all documentation provided with your Skydio X2 including but not limited to the Safety & Operating Guide found here: www.skydio.com/getstartedx2 Effective date: June 16, 2022 Version: 19.4...
- Page 2 This document contains instructions from the original product manufacturer Skydio, Inc.
-
Page 3: Table Of Contents
Contents Overview Skydio X2 and Accessories ............1 Skydio Hardware ...............2-4 Skydio Enterprise Controller ............5 Skydio Autonomy Enterprise ............6 Safety Safety Guidelines ................7 Flying Safely ..................8 Getting Started Charging batteries .................9 Charging Enterprise Controller ..........10 Deploy Skydio X2 ..............11-12 Activate Enterprise Controller .......... - Page 4 Emergency landing ..............52 View Last Flight ................52 Maintenance Battery safety guidelines ............53 Updating Skydio X2 ..............54 Updating Skydio Enterprise Controller ......... 55 Tighten arm clamps ..............56-57 Replace propeller blades ..........58-60 Replace hard stops .............. 61-63 Format memory cards ............64-65 Export flight logs ................
-
Page 5: Skydio X2 And Accessories
CW (6) CCW (6) screws (12) 256GB SD cards (pre-installed) Torque driver Tactical soft case T3 driver Admin hard shell case Hard stops and screws 100 W adapter and cable Skydio X2 Color/Thermal - Operator Manual © 2022 Skydio, Inc. All rights reserved. -
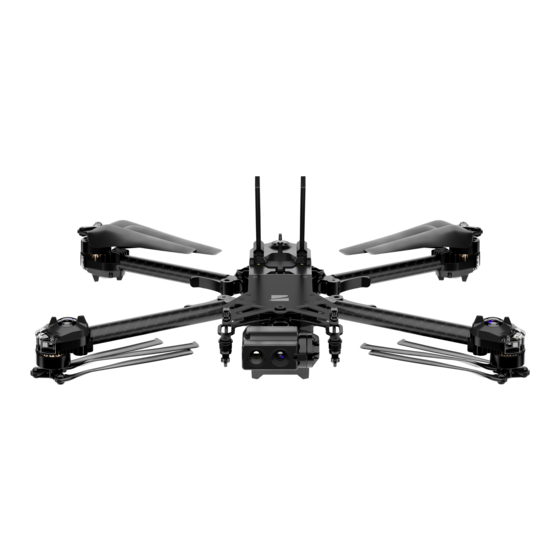
Page 6: Skydio Hardware
9. Antenna(s) microSD card ports & seal USB-C port & seal Cooling outlet (2) do not cover Hard stop (4) Battery Gimbal isolator (3) Power button Payload bay Skydio X2 Color/Thermal - Operator Manual © 2022 Skydio, Inc. All rights reserved. - Page 7 25. Color Electro-Optical and Thermal Infrared Camera CAUTION: Skydio X2 is not weatherproof. Do not operate in any precipitation, including rain, fog, snow, or similar environments. Do not rest in sand, dirt or on similar terrain where particles can get trapped in the fan.
- Page 8 Overview Payload Bay The Skydio X2 payload bay interface is located on the top of the drone and consists of an indented area with recessed USB Type-C electrical interface receptacle, weatherproof cover, and 4 recessed mounting nuts. The payload bay is designed to accommodate third-party payloads with the following limitations: •...
-
Page 9: Skydio Enterprise Controller
• Restore Defaults CAUTION: Skydio Enterprise Controller is not weatherproof. Do not operate in any precipitation, including rain, fog, snow, or similar environments. Do not rest the controller in sand, dirt or on similar terrain where particles can get trapped in the fan. Do not use batteries if the magnets or connector pins are damaged. -
Page 10: Skydio Autonomy Enterprise
Gimbal can vertically look • Inspection Allows for overhung Vertical View straight up above the drone inspections such as ceilings, bridges, and canopies Skydio X2 Color/Thermal - Operator Manual © 2022 Skydio, Inc. All rights reserved. -
Page 11: Safety
Safety Safety Guidelines Use caution around reflective Keep your fingers away from Skydio X2 does not avoid moving surfaces (still water, mirrors, etc.) and moving propellers at all times. objects or cars. small obstacles (thin branches, utility lines, ropes, chain link fencing, etc.) -
Page 12: Flying Safely
• Do not fly in an environment where the use of the device is not authorized or restricted. • Keep your Skydio drone within visual line of sight at all times, unless you have received express permission to fly beyond visual line of sight from a civil aviation authority such as the FAA. -
Page 13: Getting Started
• battery lights will begin to flash WARNING: Skydio X2 batteries are seated using magnets that may potentially attract metallic debris. Prior to installing your battery, visually inspect the magnets and connector pins, to ensure that they are clean and free of debris or damage. -
Page 14: Charging Enterprise Controller
When the controller is powered off, you can view the state of charge by pressing the power button. WARNING: Do not fly when the Skydio Enterprise Controller battery is low. If the controller reaches low battery level while in flight, pilot the drone to a safe location and land immediately. -
Page 15: Deploy Skydio X2
Step 4 - Verify that the log and media memory cards are installed 1. Logs card (do not remove) – records logs and supports future updates 2. Media card – stores images and video Skydio X2 Color/Thermal - Operator Manual © 2022 Skydio, Inc. All rights reserved. - Page 16 Step 6 - Gently push the antennas inward to release • guide into a vertical position Step 7 - Power on your Skydio X2 • press and hold the power button on the battery for 3 seconds TIP: This is the suggested order of operations when deploying your X2 for the first time. It is not necessary to unfold the arms and antennas prior to installing the battery and powering on the drone.
-
Page 17: Activate Enterprise Controller
Getting Started Activate Enterprise Controller Step 1 - Power on the controller Step 2 - Read and accept Skydio purchase terms Step 3 - Connect to the Internet Step 4 - Enter your email address for verification Step 5 - Retrieve the activation code from your email... -
Page 18: Pair Devices
Getting Started Pair devices Your Skydio X2 needs to be paired with the Enterprise Controller to fly. Step 1 - Power on X2 and Enterprise Controller Step 2 - Connect the controller to X2 using the USB-C cable • wait approximately 15 seconds Step 3 - Verify that your Skydio X2 was paired •... -
Page 19: Updates
Skydio Enterprise Controller screen will keep you informed of the progress at every step For step-by-step instructions visit: NOTE: Ensure that your account has been set-up in Skydio Cloud. Getting Started with Skydio Cloud Skydio X2 Color/Thermal - Operator Manual... -
Page 20: Pre-Flight
America, in countries where the frequency of the alternating current in household electrical outlets is 50 Hz. Channel Selection Skydio X2 dynamic channel selection will automatically monitor signal interference and move to a clearer channel to improve wireless transmission signal quality during flight or you can manually select your radio frequency channel to avoid congestion from other signals. -
Page 21: Configure Maps
When viewing maps or creating a waypoint mission, you have the option to enter latitude and longitude coordinates. The Coordinates setting is enabled by default displaying Skydio X2, the Enterprise Controller, Home Point, and Fly Here Now, coordinates on the map in real-time. Disable the setting if you do not want the coordinates displayed on the map, your selection will persist across flights and power cycles. -
Page 22: Plan Waypoint Mission
Delete the entire mission and clear all waypoints • select the trash can icon and OK NOTE: Waypoint are created using GPS coordinates. A strong GPS signal is required to execute a waypoint mission Skydio X2 Color/Thermal - Operator Manual © 2022 Skydio, Inc. All rights reserved. -
Page 23: Configure Drone Settings
Minimal or Disabled obstacle avoidance settings are used to navigate tight spaces and should only be used if you are an experienced pilot. Skydio recommends turning down Controller throttle, roll and pitch sensitivity to the lowest setting and proceeding at a max speed of 2 mph (3 m/s). - Page 24 • Wait Before Land - set the amount of time between 0 to 300 seconds (the default is 240 seconds) that you want X2 to wait before landing. This setting is only enabled when Land Once Return is toggled on. Skydio X2 Color/Thermal - Operator Manual © 2022 Skydio, Inc. All rights reserved.
- Page 25 • X2 uses GPS sensors instead of vision system to navigate WARNING: GPS Night Flight mode requires flying without obstacle avoidance. Skydio X2 may drift slightly when in GPS Night Flight mode, take extra caution when flying in this mode and do not stand near the vehicle.
-
Page 26: Configure Controller Settings
Flight Speed: customize the maximum allowed speed for roll, pitch, yaw, and throttle. Off - the Flight Speed are set to defaults: • Roll - 25% • Pitch - 25% • Yaw - 25% • Throttle - 25% Skydio X2 Color/Thermal - Operator Manual © 2022 Skydio, Inc. All rights reserved. - Page 27 On Screen Display: • Coordinates • Telemetry - speed, height above launch point, range from launch point, and camera angle (gimbal pitch) are displayed while in flight Skydio X2 Color/Thermal - Operator Manual © 2022 Skydio, Inc. All rights reserved.
- Page 28 Step 5 - Select the Region of Interest between 10% - 100% Step 6 - Select the thermal pallet Step 7 - Select the AGC Tuning • Reconnaissance • Low contrast • Medium contrast (default) • High contrast Skydio X2 Color/Thermal - Operator Manual © 2022 Skydio, Inc. All rights reserved.
-
Page 29: Flight Controls
• Pinch and drag your fingers toward each other to zoom out back to 1x, then out to Superzoom • Double-tap anywhere on the fly screen to select a location and X2 will fly to that location Skydio X2 Color/Thermal - Operator Manual © 2022 Skydio, Inc. All rights reserved. -
Page 30: Inspection
Pre-flight Inspection Before each flight, perform a pre-flight inspection to ensure your Skydio X2 is safe and ready to fly. 1. Inspect chassis - inspect the vehicle chassis to ensure it is free of damage. 2. Inspect motor arms - verify that they are free of damage and assembled properly. When assembled and viewing the drone head-on, arms should be parallel to the chassis. -
Page 31: Flight
• X2 will arm and ascend to 10 ft (3 m) and hover in place NOTE: Skydio X2 requires a stable GPS connection to fly greater than 33 ft (10 m) above the launch point. To fly higher than 33 ft (10 m), lateral flight in all directions may be required to establish heading. - Page 32 Hand launch WARNING: Launching and landing Skydio 2 from your hand is an advanced maneuver only to be used when it is necessary, and it is advised that you do so only if you are an experienced pilot. Exercise extreme care to avoid injury if the drone takes off from your hand.
-
Page 33: Flight Screen
NOTE: Signal strength and maximum control range may be affected when flying in areas with electromagnetic interference. As signal strength decreases, users may experience a lower quality video feed or a delay in their controls. Skydio X2 Color/Thermal - Operator Manual © 2022 Skydio, Inc. All rights reserved. -
Page 34: Battery Indicator
Picture-in-picture (PIP) (X2E Color/Thermal only) - live feed of the thermal camera. Tap on the PIP to toggle between viewing the thermal camera feed full screen and the color camera feed full screen. Skydio X2 Color/Thermal - Operator Manual © 2022 Skydio, Inc. All rights reserved. -
Page 35: Camera Settings
* HDR is not supported in all video resolutions and framerates. ** Skydio X2 can record video in either AVC (H.264) or HEVC (H.265). Different mobile devices and personal computers have different compatibility with these encoding standards. Be sure to choose the encoding standard that is best suited to your desired workflow. -
Page 36: Zoom
You may also pinch-to-zoom on the controller touch screen. Tap on the zoom indicator at the top of the screen to quickly snap back to 1x zoom (MIN). Skydio X2 Color/Thermal - Operator Manual © 2022 Skydio, Inc. All rights reserved. - Page 37 Flight Superzoom Zoom out to an equirectangular view of your surroundings. Skydio X2 uses six, 4k navigation cameras to create this omni-directional view in real-time, allowing you to maximize your in-flight situational awareness. To zoom out to Superzoom, place your finger on the right controller wheel, then pull it to the right.
- Page 38 To change your video capture settings, reset the zoom level back to 1x. INFO: Zoom is possible up to 3x when using the Track in Place skill Skydio X2 Color/Thermal - Operator Manual © 2022 Skydio, Inc. All rights reserved.
-
Page 39: Map View
Home points are optional and are not saved between flights. If a Home Point is present during a flight, Skydio X2 will automatically return to that location in the event of a loss of communication link (unless otherwise specified in the waypoint settings). -
Page 40: Manual Skill
Skills Skydio offers a range of manual and autonomous controls called flight skills. Select your desired skill and Skydio X2 will intelligently fly itself to get the best shot. Access available skills by selecting the Skill Menu and adjust the controls by selecting the Skills Settings. -
Page 41: Orbit Point Skill
Flight Orbit Point Skydio X2 will rotate around a user-selected point-of-interest in either a clockwise or counter-clockwise direction, keeping the point in the center of the frame enabling situational awareness, surveillance, and over-watch of any structure or locale. Step 1 - Select Orbit Point from the Skills Menu... -
Page 42: Track In Place Skill
To visually track a subject, select the Track in Place skill, identify a subject of interest, then fly the drone to within 100 ft (30 m) if your subject is a person or 140 ft (40 m) if your subject is a vehicle so that Skydio X2 will detect it. -
Page 43: Waypoint Skill
• if a waypoint is added after a mission is complete, the flight will restart before including the newly added waypoint NOTE: Waypoints are created using GPS coordinates. Skydio X2 must have a good GPS signal prior to executing a waypoint mission. - Page 44 NOTE: Waypoint missions are stored on the controller, however the skill settings for the mission are stored on X2. If you run the same mission with different vehicles, set your Waypoint skill settings for each X2 Skydio X2 Color/Thermal - Operator Manual © 2022 Skydio, Inc. All rights reserved.
-
Page 45: Keyframe Skill
• Edit or Add keyframes to your sequence along the spline at anytime • press the red X button in the top right to fly manually • keyframes will automatically be saved Skydio X2 Color/Thermal - Operator Manual © 2022 Skydio, Inc. All rights reserved. -
Page 46: Gps Night Flight
Enable GPS Night Flight when flying in low-light conditions. When in this mode, Skydio X2 will disable obstacle avoidance and use GPS sensors, instead of its vision system, to navigate. Skydio X2 will display an alert message if the environment is too dark to fly using the vision navigation system and will prompt you to fly using GPS Night Flight. - Page 47 NOTE: The multi-step calibration may not be required for several weeks or even months, depending on the environment. You will be prompted when another calibration is necessary. Skydio X2 Color/Thermal - Operator Manual © 2022 Skydio, Inc. All rights reserved.
- Page 48 Return behavior Review the return behavior height setting in the Drone Settings menu. Skydio X2 does not avoid obstacles when in GPS Night Flight mode, so you may want to set the drone’s return height such that it will be above any potential obstacles.
-
Page 49: Return To Home
You can customize this return height, and other return settings, in the Drone Settings menu. Select Return to Home, and ensure that no obstacles, people, or animals have moved into the return pathway. Skydio X2 will retain the current obstacle avoidance setting while returning. -
Page 50: Visual Return
Visual return will only work with the Launch Point. Flying to a set Home Point or to your controller will require GPS. Skydio X2 returns based on Return Type: RETURN TYPE = GPS RETURN TYPE = VISION... -
Page 51: Land
If a flight is initiated by taking off from a case (or a case is placed at Skydio X2 exact take off point), GPS positional accuracy cannot be relied upon to guarantee a case landing when at exact launch point), GPS positional accuracy cannot be relied upon to guarantee a case landing when using the using the Return to Home function (or in the case of a Return To Home triggered by lost communication). - Page 52 Grasp the battery on the sides and hold the drone in the same position until the propellers completely stop spinning. Skydio X2 Color/Thermal - Operator Manual © 2022 Skydio, Inc. All rights reserved.
-
Page 53: Post-Flight
Step 2 - Select your desired media Step 3 - Select delete INFO: Connecting via USB to a computer that does not supply charging power will cause Skydio X2 to run off of battery power and may drain the battery. -
Page 54: Dismantle Skydio X2
Post-flight Dismantle Skydio X2 Step 1 - Power off Skydio X2 • press and hold the battery button for three seconds Step 2 - Power off Skydio Enterprise Controller • press and hold the power button for three seconds • select Power Off... -
Page 55: Emergency Behaviors
Skydio X2 never had GPS • If Skydio X2 never obtains a strong GPS signal, you may not be able to set a Home Point, fly to a waypoint, or return to Controller/Home. If your Return Type is set to Vision, however, you will be able to reliably return to the Launch Point using the vision navigation system. -
Page 56: Low Battery
Low battery When Skydio X2 battery is low, there will be a series of notifications and actions to ensure a safe landing: • X2 will assess your altitude and distance from the Home Point, and warn you when it is time to return home. It is recommended that you initiate a return or land at this time, however you can choose to keep flying. -
Page 57: Maintenance
Charge your battery as you would normally to exit this idle state. • While charging, the Skydio X2 or X2 Dual Charger should be in an open area as it is normal for the • Do not disassemble the batteries, power adapter, or device to become warm to the touch. -
Page 58: Updating Skydio X2
The lights on your Skydio X2 will flash as the vehicle is updating, and the controller will keep you informed of the progress at every step. NOTE: Skydio will not force an update for your system. If flying your Skydio X2 as part of a larger fleet or organization, follow your organization’s guidelines regarding when to update. -
Page 59: Updating Skydio Enterprise Controller
Maintenance Update Skydio Enterprise Controller To update Skydio Enterprise Controller: Step 1 - Power on Skydio Enterprise Controller Step 2 - Select the INFO menu Step 3 - Scroll down and select Controller Update Step 4 - Select Check for Update Step 5 - Select Update •... -
Page 60: Tighten Arm Clamps
Tighten Arm clamps If during your pre-flight inspection you observe that the arm clamps on Skydio X2 are not tight, you should inspect and tighten the tension bolts on the clamps. This process involves loosening and tightening the tension bolt set screws. - Page 61 • turn the torque driver clockwise until you hear a click indicating the desired torque level has been achieved Step 5 - Repeat steps 1-8 on the remaining arms Skydio X2 Color/Thermal - Operator Manual © 2022 Skydio, Inc. All rights reserved.
-
Page 62: Replace Propeller Blades
WARNING: Propeller blades are sharp. Handle with care. Always ensure X2 is turned off before replacing the propellers to avoid injury. Do NOT attempt to replace your X2 propellers while the Skydio X2 is powered on. Doing so is an extreme safety risk and may lead to serious bodily harm or injury. - Page 63 INFO: Do not reuse screws even if they look to be in good condition. Whenever you replace your X2 propellers, use the new screws provided in your replacement kit. Skydio X2 Color/Thermal - Operator Manual © 2022 Skydio, Inc. All rights reserved.
- Page 64 WARNING: Incorrect propeller installation (i.e. failure to match the markings on the propeller to those on the propeller hub) is a safety hazard and may result in potential serious damage to the aircraft and serious bodily harm or injury to you and bystanders. Skydio X2 Color/Thermal - Operator Manual © 2022 Skydio, Inc. All rights reserved.
-
Page 65: Replace Hard Stops
To replace your hard stops, you will need the T3 driver and replacement hard stops. Skydio X2 Color/Thermal - Operator Manual © 2022 Skydio, Inc. All rights reserved. - Page 66 • grab the hard stop by the flange and pull out to remove - rotate the hard stop back and forth to dislodge it from the drone Skydio X2 Color/Thermal - Operator Manual © 2022 Skydio, Inc. All rights reserved.
- Page 67 • line up the hole in the hard stop flange with the hole in the drone and insert the screw • tighten until the hard stop is secure NOTE: The torque value should be approximately 6 cNm. Skydio X2 Color/Thermal - Operator Manual © 2022 Skydio, Inc. All rights reserved.
-
Page 68: Format Memory Cards
Format memory cards Skydio X2 has two SD memory cards, one for storing media and another for recording flight logs. Each card will need to be formatted separately as-needed. Before formatting your SD card, please ensure any data has been copied or saved on another device. - Page 69 Toggle this setting on to automatically delete the oldest media stored on the SD memory card. This setting will persist across flights and power cycles. Skydio X2 Color/Thermal - Operator Manual © 2022 Skydio, Inc. All rights reserved.
-
Page 70: Export Flight Logs
Save flight information to a flight_log.csv file in the root folder of the media SD card containing the following flight data: • Vehicle name • Flight ID • Launch latitude/longitude and time • Land latitude/longitude and time Skydio X2 Color/Thermal - Operator Manual © 2022 Skydio, Inc. All rights reserved. -
Page 71: Upload Flight Logs
To assist the support team and better troubleshoot any issues or questions you may have, we may require you to upload logs or other data from your drone to Skydio to help us determine the root cause of any issues experienced. -
Page 72: Troubleshooting
Resetting Skydio Enterprise Controller If your Skydio Enterprise Controller is in an unresponsive or other off-nominal state, you may need to perform a hard reset. This will power off the controller and allow you to reboot. To reset your Controller:... -
Page 73: Resetting Skydio Enterprise Controller
Troubleshooting Weak signal For best signal quality, always maintain a direct line of sight between the controller and Skydio X2. When flying at close range high altitude, point the controller cover toward the drone for maximum wireless performance. When flying at max range, point the controller cover toward the drone while also keeping the controller as far away from your body as possible. -
Page 74: Specifications
1.75” x 1.0 x 2.0” Dimensions not to exceed 4.5 cm X 2.5 cm X 5 cm 200 g Weight not to exceed 15 Watts Power not to exceed Skydio X2 Color/Thermal - Operator Manual © 2022 Skydio, Inc. All rights reserved. - Page 75 User-selectable subjects for tracking Up to 20 simultaneous objects of interest Object tracking and identification Automated online calibration of lens Calibration parameters, camera rotations, wind speed, and air density Skydio X2 Color/Thermal - Operator Manual © 2022 Skydio, Inc. All rights reserved.
- Page 76 13 stops Dynamic range Removable Micro SD Card UHS Speed Class 3 / V30 Storage pitch ±124°, roll ±120 Stabilization mechanical range -110° to +90° Pitch controllable range Skydio X2 Color/Thermal - Operator Manual © 2022 Skydio, Inc. All rights reserved.
- Page 77 Signed and encrypted FIRMWARE 5 / 20 MHz (5GHz radio) MEDIA ENCRYPTION Ability to provision and deprovision devices CONTROLS Key provisioning burned-in at time of manufacture INFRASTRUCTURE Skydio X2 Color/Thermal - Operator Manual © 2022 Skydio, Inc. All rights reserved.
-
Page 78: Legal
Skydio will either repair, replace, or refund your Skydio X2 at its own discretion. Warranty benefits are in addition to rights provided under local consumer laws. You may be required to furnish proof of purchase details when making a claim under this warranty. - Page 79 Changes or modifications not expressly approved by Skydio could void the user’s authority to operate these devices. These devices have been tested and found to comply with the limits for a Class A digital device, pursuant to part 15 of the FCC Rules.
- Page 80 Control #: A0118...
Need help?
Do you have a question about the Skydio X2 and is the answer not in the manual?
Questions and answers