Skydio X2D User Manual
Hide thumbs
Also See for X2D:
- User manual ,
- Operator's manual (89 pages) ,
- Maintenance manual (22 pages)
Table of Contents
Advertisement
Skydio X2D
User Guide
Effective: April 6, 2021
Table of
contents
X2 Equipment and Software
Skydio X2 and accessories
What's included with your Skydio AEF software
add-on? Additional equipment needed
Flying Safely
Safety guidelines
Where to fly
First flight
Getting started
Hardware overview
Charging your system
Assembly
Pairing devices
Pre-Flight Operations
Check software versions
Import maps
Plan your waypoint mission
Pre-flight inspection
Configure device settings
Encrypt media
Device Settings
Drone settings
Height Ceiling
Obstacle Avoidance (AEF only)
Show Thermal
Return Behavior
Enable Narrow Band
Lights
GPS Night Flight
Controller settings
Gimbal Speed
Invert Wheels
Flight Speed
Flight Mode
Flight Telemetry
Advertisement
Table of Contents

Subscribe to Our Youtube Channel
Related Manuals for Skydio X2D


Summary of Contents for Skydio X2D
- Page 1 Plan your waypoint mission Pre-flight inspection Configure device settings X2 Equipment and Software Encrypt media Skydio X2 and accessories What’s included with your Skydio AEF software Device Settings add-on? Additional equipment needed Drone settings Height Ceiling Flying Safely Obstacle Avoidance (AEF only)
-
Page 2: Table Of Contents
Launching Table of Flying Skydio X2 Flight screen contents Device Settings Menu Signal Strength Indicator Battery Indicator Color Camera Settings Subject Indicator Thermal Camera PIP Skills Menu Skill Settings Recording Indicator Return to Home Map View Fly to Waypoint Home points... - Page 3 Thermal Camera System Navigation Camera System System Security Compliance information California Prop 65 Warning X2D Appendix: Skydio QGC What’s included with your Skydio AEF software add-on in Skydio QGC? Pre-flight Operations Preparing offline maps Flight controls Main flight screen interface...
-
Page 4: Flying Skydio X2
Exiting the Skydio QGC App Table of X2 EQUIPMENT AND SOFTWARE Skydio X2 and accessories Skydio X2 and its various accessories can be purchased à la carte or in one of our bundles. Below is a list of all Skydio X2 system equipment:... - Page 5 9. 100W Adaptor & Cable 1. Skydio X2 Drone...
- Page 6 If you purchased the Skydio Autonomy Enterprise Foundation (AEF) software add-on, you unlock advanced, enterprise-caliber autonomy functionality for your Skydio X2. AEF for X2 features are listed in the table below: Feature Description Main use cases Key benefits The drone can fly closer to navigation e.g.
- Page 7 • Inspection Allows for overhung inspections such as ceilings, bridges, and canopies Vertical View Gimbal can vertically look straight up 2 Skydio X2 - User guide © 2021 Skydio, Inc. All rights reserved. X2 EQUIPMENT AND SOFTWARE Additional equipment needed...
- Page 8 3 Skydio X2 - User guide © 2021 Skydio, Inc. All rights reserved. FLYING SAFELY Skydio X2 can see clearly. Safety guidelines Skydio X2 does not avoid moving objects Use caution around thin branches, utility or cars. lines, ropes, wires, netting, chain link Keep your fingers away from fencing, etc.
- Page 9 23 in. wide. WARNING: Keep your fingers away from the • If your Skydio X2 does hit an obstacle it can’t see, it will propellers anytime they’re spinning such as do its best to stabilize itself and continue the flight.
- Page 10 (including above). Make sure nothing is obstructing the propellers at your launch location. Although flying Skydio X2 is easy and intuitive, it’s a good idea to give yourself and others a little space when flying for the first time. Always be alert and aware of your surroundings during use.
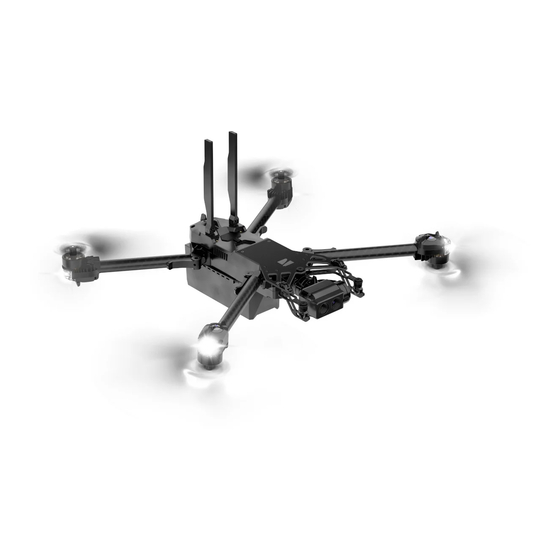
- Page 11 6 Skydio X2 - User guide © 2021 Skydio, Inc. All rights reserved. GETTING STARTED HARDWARE OVERVIEW Hardware overview Skydio X2 1. Chassis 2. Navigation Camera x6 3. Gimbal 4. Motor Pod x4 (includes RGB/IR/Strobe LEDs) 5. Propeller Hub 6. Propeller Blade...
- Page 12 13. Hard Stop x4 14. X2 Battery 15. Gimbal Isolator x3 12. Cooling Outlet x2 (do not 7 Skydio X2 - User guide © 2021 Skydio, Inc. All rights reserved. GETTING STARTED HARDWARE 21. Skydio X2 Label Skydio X2 OVERVIEW (cont.)
- Page 13 18 19 CAUTION: The Skydio X2 is not weatherproof. Do not operate in any precipitation, including rain, fog, snow, or similar environments.
- Page 14 8 Skydio X2 - User guide © 2021 Skydio, Inc. All rights reserved. GETTING STARTED HARDWARE OVERVIEW Skydio Enterprise Controller 1. Left Joystick 2. Right Joystick 3. Menu/Back Button 4. D-pad 5 6 8 9 7 5. C1 Button - Toggle Obstacle 8.
- Page 15 CAUTION: The Skydio Enterprise Controller is not weatherproof. Do not operate in any precipitation, including rain, fog, snow, or similar environments. The Skydio Enterprise Controller is also not resistant to small debris—do not rest the controller in fine sand, dirt or on similar terrain where particles can get trapped in the fan.
- Page 16 10 Skydio X2 - User guide © 2021 Skydio, Inc. All rights reserved. GETTING STARTED CHARGING Skydio X2 YOUR SYSTEM (cont.) How to charge via Skydio X2 Battery Charge Levels When X2 is powered on or the battery is charging, the LEDs on the battery will 1.
- Page 17 0–37% charged 38–62% charged 63–87% charged 88–100% charged 11 Skydio X2 - User guide © 2021 Skydio, Inc. All rights reserved. GETTING STARTED CHARGING • When charging has completed, the LEDs will show solid blue for 1 minute and then power OFF.
- Page 18 LED, solid blue 2 LEDs, solid blue 3 LEDs, 16%–37% 38%–62% 63%–87% 88%–100% CAUTION: Do not fly when the Skydio Enterprise Controller battery is low. If the controller reaches low battery level when in flight, pilot the drone to a safe location and land immediately.
- Page 19 3. Fold the arm clamps to the locked position on all four arms. Ensure that the paint on the arm clamp lines up with the paint on the arm. 13 Skydio X2 - User guide © 2021 Skydio, Inc. All rights reserved. GETTING STARTED ASSEMBLY Skydio X2 (cont.)
- Page 20 14 Skydio X2 - User guide © 2021 Skydio, Inc. All rights reserved. GETTING STARTED ASSEMBLY Skydio X2 (cont.) Step 5 - Power on Skydio X2 Power on your Skydio X2 by holding the power button on the battery for 3 seconds.
- Page 21 15 Skydio X2 - User guide © 2021 Skydio, Inc. All rights reserved. GETTING STARTED ASSEMBLY Skydio Enterprise Controller Step 1 — Open the controller NOTE: Exercise care when lifting the lid open of the controller. Step 2 — Power it on Press and hold the Power button on the controller for 3 seconds to power it on.
- Page 22 Enterprise app is set up and you will see the following screen: 17 Skydio X2 - User guide © 2021 Skydio, Inc. All rights reserved. GETTING STARTED PAIRING DEVICES Pairing devices Once you have assembled your Skydio X2 and Skydio Enterprise Controller, connect one end of...
- Page 23 USB-C to USB-C cable to Skydio X2 and the other end of the cable to the USB-C charging port on the controller. If pairing is successful, you will see the following screen: Once your devices are paired, you will be able to find your drone by navigating to INFO >...
- Page 24 INFO tab and select your drone under PAIRED DRONE. To update your drone, follow the steps listed in the Software Updates section on page 80. 19 Skydio X2 - User guide © 2021 Skydio, Inc. All rights reserved. PRE-FLIGHT OPERATIONS CHECK SOFTWARE VERSIONS...
- Page 25 Enterprise Controller, navigate to the INFO tab and select Controller Update. To update your controller, follow the steps listed in the Software Updates section on page 80. 20 Skydio X2 - User guide © 2021 Skydio, Inc. All rights reserved. PRE-FLIGHT OPERATIONS Import maps...
- Page 26 If you have custom Mapbox tiles, you can import them onto the Skydio Enterprise Controller via a USB-C drive or card reader. NOTE: You can save up to 10 maps per day and can store at most 10 maps at a time in the map library. You may need to clear out maps from time to time to make room for more.
- Page 27 NOTE: Waypoint missions require the use of the map view in the Skydio Enterprise app. Before creating your waypoint mission, you should first prepare your maps by following the steps in the previous section.
- Page 28 Mission-level settings such as speed and lost communication behavior can be configured while in flight. Reference the Flight Skills – Waypoints section under Flying Skydio X2 on page 51 for more information. 23 Skydio X2 - User guide © 2021 Skydio, Inc. All rights reserved.
- Page 29 1. Inspect drone body. Inspect your drone’s body to ensure it is free of damage. 2. Inspect arms. Verify that Skydio X2’s arms are free of damage and assembled properly. When assembled and viewing the drone head-on, arms should be parallel to the chassis 3.
- Page 30 PRE-FLIGHT OPERATIONS Configure device settings Ensure the critical settings for your Skydio X2 and controller are set up as desired before your flight. Information about the various settings can be found in the next section, Device Settings on page 28.
- Page 31 25 Skydio X2 - User guide © 2021 Skydio, Inc. All rights reserved. PRE-FLIGHT OPERATIONS ENCRYPT MEDIA Encrypt media To encrypt the media you will be capturing, follow the steps below. Step 1 – Provision your vehicle Before you can use the encryption feature on your X2, you need to first provision the vehicle using the security key.
- Page 32 Step 2 – Enable (or disable) encryption Now that your drone has been provisioned, you will have the option to enable or disable encryption in the Skydio Enterprise app on your controller. By default, your drone will be set to enable encryption.
- Page 33 27 Skydio X2 - User guide © 2021 Skydio, Inc. All rights reserved. DEVICE SETTINGS Device settings The Device Settings menu gives you access to in-flight settings for the Skydio X2 and Skydio Enterprise Controller. Unless specified otherwise, your device settings will persist after swapping batteries and powering...
- Page 34 28 Skydio X2 - User guide © 2021 Skydio, Inc. All rights reserved. DEVICE SETTINGS DRONE SETTINGS Drone settings Once you are connected to your drone, you may configure these settings before or during flight. It is highly recommended to view and configure your settings before taking off to ensure you understand how the drone will behave in flight.
- Page 35 NOTE: The Height Ceiling is an estimate which the drone will do its best to respect, however there may be some vertical drift above or below that limit. 29 Skydio X2 - User guide © 2021 Skydio, Inc. All rights reserved. DEVICE SETTINGS DRONE SETTINGS...
- Page 36 Disabled obstacle avoidance settings are for limited use cases to slowly and carefully navigate tight spaces, and should only be used if you are an experienced pilot. Skydio recommends turning down Controller throttle, roll and pitch sensitivity to the lowest setting and proceeding at a max speed of 2 mph (1 m/s).
- Page 37 If you toggle Show Thermal to off, you will only see the live feed from the color camera. 31 Skydio X2 - User guide © 2021 Skydio, Inc. All rights reserved. DEVICE SETTINGS DRONE SETTINGS Return Behavior The Return Behavior settings allows you to customize the way...
- Page 38 Reference the Returning section on page 58 for more information. 32 Skydio X2 - User guide © 2021 Skydio, Inc. All rights reserved. DEVICE SETTINGS DRONE SETTINGS This setting allows you to switch your radio frequency to a narrower band.
- Page 39 Skydio X2’s strobe lights are visible at a distance of 3 statute miles. NOTE: You can toggle on either Strobe or Infrared lights, but 33 Skydio X2 - User guide © 2021 Skydio, Inc. All rights reserved. DEVICE SETTINGS DRONE SETTINGS NOTE: This setting does not persist over battery swaps and power cycles.
- Page 40 Calibration is not necessary when entering GPS Night Flight during a flight. Whenever a calibration is needed, you will be notified in the app. If you are unable to switch out of GPS Night Flight, this may be because the conditions are not clear enough for Skydio X2’s obstacle avoidance and vision system.
- Page 41 Invert Wheels Inverts the default controls for the Left Wheel (gimbal pitch) and Right Wheel (zoom) on the controller. 35 Skydio X2 - User guide © 2021 Skydio, Inc. All rights reserved. DEVICE SETTINGS CONTROLLER SETTINGS NOTE: Flying with reduced or disabled obstacle avoidance settings greatly increases Skydio X2’s risk of collision.
- Page 42 (default), and Mode 3 style flight controls. For more information about how each mode controls your drone, refer to the Flight Controls section on page 47. 36 Skydio X2 - User guide © 2021 Skydio, Inc. All rights reserved. DEVICE SETTINGS CONTROLLER...
- Page 43 Launching Set your Skydio X2 down on clear, flat ground at least 10 feet away from you. You may also use the top of Skydio X2’s case as a convenient launch and landing pad. Launching Skydio X2 is as simple as holding the Launch button in the app or on the Skydio Enterprise Controller.
-
Page 44: Device Settings Menu
Return to Home Recording Indicator Skill Settings Skills Menu Thermal Camera PIP Gives you access to in-flight settings for the Skydio X2 as well as control settings for Controller (when connected). See the Device Settings section on page 28 for more information. -
Page 45: Signal Strength Indicator
As the drone’s altitude increases, the red portion of the battery indicator increases. When Skydio X2 reaches low battery, it will notify you in time to return home. Reference the Low Battery section on page 78 under Emergency Procedures for more information. -
Page 46: Color Camera Settings
**** The fastest interval photo setting when capturing in raw DNG is two seconds. You may capture a photo every one second when capturing in JPG mode. ***** DNG photos are not displayed in the media tab of the Skydio Enterprise app and may be retrieved directly from the microSD card. -
Page 47: Subject Indicator
Thermal Camera Settings Thermal camera settings are not currently available in the Skydio Enterprise app. Skydio X2’s thermal camera is available in a single palette, White Hot. Flat Field Correction is always set to auto and is usually performed at power up, when the camera changes temperature, and periodically during operation. -
Page 48: Thermal Camera Pip
You can read about specific settings available for each skill in the Flight Skills section on page [X]. 43 Skydio X2 - User guide © 2021 Skydio, Inc. All rights reserved. FLYING SKYDIO X2... -
Page 49: Recording Indicator
If a Home Point has been set for this flight, the Launch Point option will be replaced with Home Point. 44 Skydio X2 - User guide © 2021 Skydio, Inc. All rights reserved. FLYING SKYDIO X2 THE FLIGHT SCREEN Map view Tap the map icon to enter the map view. -
Page 50: Fly To Waypoint
NOTE: The better and more sustained the GPS signal, the more accurate Skydio X2’s flight will be when returning to that Home Point. If Skydio X2 loses GPS or the GPS signal becomes weak, the drone will do its best to estimate and return to the Home Point... - Page 51 46 Skydio X2 - User guide © 2021 Skydio, Inc. All rights reserved. FLYING SKYDIO X2 FLIGHT Flight CONTROLS controls 1. Left Joystick - Height & Rotation (Mode 2 - default) 2. Right Joystick - Lateral Movement (Mode 2 - default) 3.
- Page 52 14. Left Wheel - Gimbal Tilt 15. R2 Button - Toggle Map View 16. L2 Button - Toggle Camera Type (Color/Thermal) 11 12 13 14 15 16 47 Skydio X2 - User guide © 2021 Skydio, Inc. All rights reserved.
-
Page 53: Flight Controls
1. Tap on the Settings icon to enter the Device Settings menu 2. Select Controller 3. Select Flight Mode 4. Choose the flight mode that best suits your operating style Mode 1 Mode 3 48 Skydio X2 - User guide © 2021 Skydio, Inc. All rights reserved. - Page 54 1x, then out to Superzoom. • Double-tap anywhere on the flight screen to fly directly towards that spot. 49 Skydio X2 - User guide © 2021 Skydio, Inc. All rights reserved.
-
Page 55: Flight Skills
FLIGHT SKILLS Flight skills With the Skydio Enterprise app, you have a range of control over your drone via a unique set of flight skills. Simply choose your skill and put your drone to the task—Skydio X2 will intelligently fly itself to get the best shot. -
Page 56: Waypoints
The Waypoints skill allows you to design and execute multi-waypoint GPS missions. Skydio X2 uses AI-enabled path planning algorithms to avoid obstacles. NOTE: Waypoints are created using GPS coordinates. Skydio X2 must have a good GPS signal prior to executing a waypoint mission. - Page 57 Return to Home once the mission is complete. • Photo at Waypoint - Set Skydio X2 to take a photo at each waypoint. Once you’ve created your mission, it is stored on the controller NOTE: If this setting is toggled on, and the drone is in Video and will persist across flights and reboots.
-
Page 58: Orbit Point (Aef Only)
To start orbiting a point of interest, select Orbit Point from the skills menu, then tap on the map view. Fly your Skydio X2 to where the edge of your orbit will be, then long press on the map and select Set Focus Point. -
Page 59: Zoom
FLYING SKYDIO X2 ZOOM Zoom Digital Zoom with Color and Thermal Cameras When flying your Skydio X2, you have the ability to digitally zoom in up to 16x with your color camera, or up to 8x with your thermal camera. - Page 60 FLYING SKYDIO X2 ZOOM Superzoom (AEF Only) You can zoom out to an equirectangular view of your drone’s surroundings. Skydio X2 uses its six, 4k navigation cameras to create this omnidirectional view in real-time, allowing you to maximize your in-flight situational awareness.
- Page 61 You may also pinch-to-zoom on the controller touch screen. NOTE: If Skydio X2’s feed is already zoomed in, you will first need to zoom out to 1x before you can zoom out again to Superzoom. Tap on the zoom indicator at the top of the screen to quickly snap back to 1x zoom (MIN).
-
Page 62: Returning
RETURNING Returning When you’re ready to return home, tap the Return to Home button in the app or on the Skydio Enterprise Controller: NOTE: Prior to tapping the Return to Home button, make sure no obstacles (e.g., people, animals, etc.) have moved into the... - Page 63 RETURNING Return Height & Behavior Any time a return is triggered, either by the pilot or an emergency procedure, Skydio X2 will first ascend to a specified height before returning. You can customize this return height in the Drone Settings menu.
-
Page 64: Gps Vs Visual Return (Aef Only)
59 Skydio X2 - User guide © 2021 Skydio, Inc. All rights reserved. RETURNING GPS vs Visual Return (AEF Only) Based on the Return Type you selected in the Drone Settings menu, your Skydio X2 will use either GPS or its vision navigation system to return to the launch location. - Page 65 How does Visual Return work? When the Return Type is set to Vision, and you initiate a return to the Launch Point, Skydio X2 does not require a GPS signal and will use its vision navigation system to return to that point.
-
Page 66: Landing
GPS to return. If you select Controller, Skydio X2 will return using GPS and may not return reliably if flying in a GPS-denied environment. 61 Skydio X2 - User guide © 2021 Skydio, Inc. All rights reserved. LANDING Landing... - Page 67 62 Skydio X2 - User guide © 2021 Skydio, Inc. All rights reserved. LANDING Case landing When you are unable to find a level area to land your Skydio X2, case landing is a great way to...
-
Page 68: Post-Flight Operations
NOTE: To initiate a case landing, the Skydio case must be in view of Skydio X2’s camera while it is landing. A yellow ring will appear around the case in the live video feed to indicate that Skydio X2 has seen the case and will land on it. If you do not see the yellow ring, Skydio X2 will not land on the case and will continue to descend straight down. -
Page 69: Reviewing And Offloading Encrypted Edia
3. Import your media NOTE: If using a Windows computer, your Skydio X2 will mount (just like a hard drive) to your desktop. You can also look for it under Devices. If on a Mac, you can use the Photos app or the Image Capture app to transfer your footage to your desired location (both apps are included with any current Mac, or are available from the macOS App Store). - Page 70 X2 or begin a new flight, after which you will need to reinsert the security key to decrypt your media again. 65 Skydio X2 - User guide © 2021 Skydio, Inc. All rights reserved. POST-FLIGHT OPERATIONS REVIEWING AND OFFLOADING ENCRYPTED MEDIA On your computer (cont.)
-
Page 71: Disassembly
NOTE: If using a Windows computer, your Skydio X2 will mount (just like a hard drive) to your desktop. You can also look for it under Devices. If on a Mac, you can use the Photos app to transfer your footage to your desired location (the Photos app is included with any current Mac, or are available from the macOS App Store). - Page 72 To power off the Skydio Enterprise Controller, press and hold the power button for three seconds, then select the Power Off button. 67 Skydio X2 - User guide © 2021 Skydio, Inc. All rights reserved. POST-FLIGHT OPERATIONS DISASSEMBLY Step 2 - Fold and lock antennas...
- Page 73 68 Skydio X2 - User guide © 2021 Skydio, Inc. All rights reserved. POST-FLIGHT OPERATIONS DISASSEMBLY Step 3 - Fold arms...
-
Page 74: Gps Night Flight
69 Skydio X2 - User guide © 2021 Skydio, Inc. All rights reserved. GPS NIGHT FLIGHT GPS Night Flight Enable GPS Night Flight when flying in low-light conditions. When in this mode, Skydio X2 will... -
Page 75: How To Fly In Gps Night Flight Mode Safety
GPS sensors, instead of its vision system, to navigate. NOTE: Skydio X2 will notify you in the app if the environment is too dark to fly using the vision navigation system and will prompt you to fly using GPS Night Flight. - Page 76 GPS Night flight. d. Navigate back to the Fly screen (continue to next page...) 71 Skydio X2 - User guide © 2021 Skydio, Inc. All rights reserved. GPS NIGHT FLIGHT HOW TO FLY IN GPS NIGHT FLIGHT MODE...
- Page 77 When another calibration is needed, you will be prompted by the app. (continue to next page...) 72 Skydio X2 - User guide © 2021 Skydio, Inc. All rights reserved. GPS NIGHT FLIGHT HOW TO FLY IN GPS NIGHT FLIGHT MODE...
- Page 78 Step 4 - Launch Skydio X2 Launch X2 by holding the Launch button in the app or on the Skydio Enterprise Controller. After taking off, the drone will automatically rotate 360° to establish heading.
-
Page 79: Hand Launching And Landing
Hand launching and landing WARNING: Launching and landing of the Skydio X2 drone from your hand is an advanced maneuver only to be used when it is necessary, and it is advised that you do so only if you are an experienced pilot and you cannot find a clear flat spot to take off or... -
Page 80: Hand Launching
Hand launching CAUTION: High risk of injury. To avoid injury stay away from and do not touch rotating propellers when they are spinning. Skydio does not recommend launching the drone while holding the drone in your hand. WARNING: Exercise extreme care to avoid injury if the drone takes off from your hand. NEVER hand launch your X2 when in GPS Night Flight mode, as it may cause severe injury.
Need help?
Do you have a question about the X2D and is the answer not in the manual?
Questions and answers