
Related Manuals for Proactive PROTEKT 600


Summary of Contents for Proactive PROTEKT 600
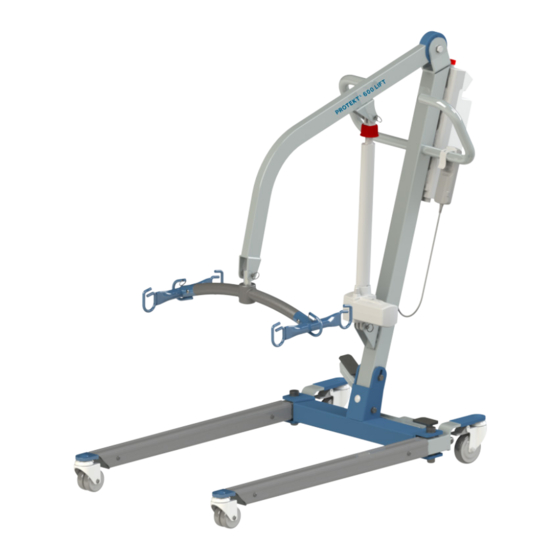
- Page 1 PROTEKT 600 LIFT ® POWER PATIENT LIFT MODEL: 33600 OWNER’S MANUAL 270 Washington Street Mount Vernon, NY 10553 855-237-7622 www.proactivemedical.com...
- Page 2 If the merchandise is received damaged or is missing components, contact the shipping company immediately and file a claim. For further assistance, contact your local dealer or Proactive Medical Products at the following: Proactive Medical Products...
-
Page 3: Features Chart
FEATURES CHART: Easy Tools Screw Driver 2920 PACIFIC DRIVE UNLESS OTHERWISE SPECIFIED: NORCROSS, GA 30071 ALL DIMENSIONS IN MM DRAWN BY: DATE: 9/8/2017 6-30 PART NUMBER: 30-120 DaTong Wrench PROPRIETARY AND CONFIDENTIAL 120-400 THE INFORMATION CONTAINED IN THIS MATERIAL: DESCRIPTION: DRAWING IS THE SOLE PROPERTY OF BESTCARE LLC. -
Page 4: Specifications And Options
SPECIFICATIONS & OPTIONS Specifications of Control Unit Input Voltage 220-240VAC 50Hz / 110-120VAC 60Hz Output Voltage 24 VDC Battery Pack 24 VDC 5AH Lift Control Handset and Panel Protection Class IP54 (Protection against dust and splash of water) Sound Level Under Full Load 16 db Sound Level Under No Load 11 db... - Page 5 Diagram of Control Box Control box on/off and emergency stop button Control buttons Battery release clip LCD screen Battery Pack Charger Connector Not Used Lifting actuator connector Hand pendant connector...
-
Page 6: Safety Instructions
SAFETY INSTRUCTIONS The Protekt® 600 Power Patient Lift 33600 reflects innovative state of the art design to increase user mobility. The Protekt® 600 Lift will provide years of service if it is properly maintained as any piece of electrical/mechanical equipment requires. - Page 7 WARNING! Proactive Medical slings are specially designed to be used in conjunction with Proactive lifts. Do not use slings manufactured by other companies with any of Proactive Medical’s equipment. USING OTHER MANUFACTURER’S SLINGS ON THIS EQUIPMENT IS UNSAFE AND MAY RESULT IN SERIOUS INJURY TO USERS AND CAREGIVERS.
- Page 8 600 lbs. is not exceeded. WARNING! Replace any worn parts with only genuine Proactive Medical parts. The patient lift parts are not interchangeable with parts from other patient lift brands. Using other patient lift parts on these products is unsafe and may result in serious injury to user and caregiver.
-
Page 9: Installation
Installation Step 1: Remove base from box. Step 2: Insert the mast to the base bracket, and secure it in place by inserting and tightening the long hex head bolt and nut at the top slot hole on the side of the bracket as following. - Page 10 Step 3: Insert and tighten the other long hex head bolt, nut, and washers to the bottom hole on the side of the bracket to secure the mast. Insert the black plastic cover to the nut after the bolt is tightened. Step 4: Reinsert and tighten the carriage bolt to the front slot hole of the bracket, and the mast should be firmly secured to the base.
- Page 11 Step 5: Install the round plastic cover and plastic washers to the boom. Step 6: Install the boom to the mast and align the holes. Then secure it by reinstalling the bolt, washer and nut. Once the screw is tightened using the EZ Tools, reinsert the plastic cap.
- Page 12 Step 8: Secure the upper end of the actuator to the bracket on the boom using a pin and retaining ring as follows. Step 9: Secure the spreader bar to the boom using a pin and retaining ring as follows.
-
Page 13: Power Control Unit
Power Control Unit M5 SCREWS M4 SCREWS 2920 PACIFIC DRIVE UNLESS OTHERWISE SPECIFIED: NORCROSS, GA 30071 ALL DIMENSIONS IN MM DRAWN BY: DATE: 9/27/2017 6-30 PART NUMBER: 30-120... - Page 14 Release Pressed in LCD Display Panel Signs When the emergency stop button is released, the LCD Display Panel will show one of the four signs below. • The sign will display for 5 seconds. • Then the lift will go into standby mode and the sign disappears. •...
- Page 15 Operating Lift: Using Hand Control LED Indicator Lifting * Green = In Use * Blank = Standby Lowering Operating Lift: Using LCD Display Panel...
- Page 16 Warning! - Battery Low and Charging is Needed If the battery needs to be charged, the LCD Display Panel will show a blinking low battery sign shown on the left either when the emergency stop button is released or when a button on the LCD Display Panel is pressed.
-
Page 17: Maintenance & Inspection Check List
MAINTENANCE & INSPECTION CHECK LIST The operator of the lift is to inspect the Protekt® 600 Lift before each use. Check all bolts for tightness. Make sure the base can be easily widened, and that all lift parts are in place. Make sure all casters turn freely, and that the caster brakes can be engaged. Make certain all necessary items (i.e. -
Page 18: Maintenance Schedule
MAINTENANCE SCHEDULE In the Every 3 Item Monthly Beginning Months Boom & Spreader Bar: - Check connections between 1) Boom and Spreader • • Bar and 2) Boom and Mast for Improper connection, looseness, or wear. • • - Check the Boom for bending and deflection. Mast: •... - Page 19 OPERATING INSTRUCTIONS NOTE: Turn the lift “ON” by turning the red “RESET” button clockwise. Turn the lift “OFF” by pressing down the “RESET” button. Transfer From Bed • User/patient should be in the center of the bed. • Position user onto his/her side by rolling the user towards you. •...
- Page 20 Transfer From Wheelchair • Grasp the sling at each corner of the “U” shape of the commode aperture. • The sling should be fitted with the handle on the back section facing outward. • Help the user lean forward slightly, then slide the sling down between the chair and the user’s back.
- Page 21 Warning! Use ONLY Proactive Medical slings/products with this REPLACEMENT PARTS LP-33600-TA36B-ACT Replacement Actuator f/ Protekt Lift 33600 (600lb Cap.) LP-TBC2-CRDL Battery Charger Cradle ONLY (no plug) f/ Protekt Lift/Stand LP-TBC2-CRDL-PK Battery Charger Cradle Pack (includes plug) f/ Protekt Lift/Stand LP-TC12-BPAK...
- Page 22 Divided Leg Slings Divided leg design is best suited for high level spinal cord injuries or patients where sling removal is more difficult. Support ranges from the upper back to beneath the thighs. Can be positioned with patient seated. Greatly simplifies the use of bathroom facilities.
-
Page 23: Troubleshooting
3. Check charger cable for damage. 4. Replace bad batteries. 5. Contact your dealer if problem persists. WARNING: If you experience a problem with your lift and are unable to service it yourself, contact Proactive Medical or your Proactive authorized distributor. - Page 24 Emergency Lowering Mechanism Contact your dealer immediately if standard troubleshooting techniques do not correct the failure. Do not attempt to lift until all failure and safety issues have been resolved. In case of lift failure, please follow the procedures below to safely lower the user. The Emergency Lowering Device is located at the top of the actuator shaft.
-
Page 25: Limited Warranty
2 Years Electronics/3 Years Frame from the date of purchase by the original purchaser. This warranty shall be voided upon transfer of ownership of this product. Proactive Med- ical agrees to repair or replace this product, at our discretion and at no charge, within the warranty period provided and that Proactive Medical consents the unit is defective. -
Page 26: Warranty
2. Proactive will email the customer a return shipping label to ship the product back to Proactive. 3. Proactive will ship out the proper product to the proper location either same day or as soon as possible. Correct shipping and tracking information will be transmitted to the customer as soon as it is... - Page 27 NOTE...
Need help?
Do you have a question about the PROTEKT 600 and is the answer not in the manual?
Questions and answers
how to charge Protekt 500?