weinor Cassita II Instructions For Assembly
Hide thumbs
Also See for Cassita II:
- Instructions for assembly (47 pages) ,
- Maintenance instructions and directions for use (13 pages)
Table of Contents
Advertisement
Quick Links
Cassita II/ Cassita II LED
Instructions for assembly
Folding arm awning with gear drive or electric drive
Please read these instructions and observe their contents and warnings before commencing any
assembly work. This information is critical to the installation and the proper use of the material.
Follow the assembly steps precisely and observe the tips, notes and recommendations.
Only trained personnel may put the units into operation.
CassitaII/ Cassita II LED
Instructions for assembly
We reserve the right to make technical changes
ENGLISH
Version 10
2021-03-25
Item number
116519-0000
Page 1/46
Advertisement
Table of Contents

Related Manuals for weinor Cassita II


Summary of Contents for weinor Cassita II
- Page 1 Cassita II/ Cassita II LED Instructions for assembly Folding arm awning with gear drive or electric drive ENGLISH Please read these instructions and observe their contents and warnings before commencing any assembly work. This information is critical to the installation and the proper use of the material.
-
Page 2: Table Of Contents
5 Correcting the fabric position by placing a strip of fabric underneath ....32 5.1 System/fabric with border seam, without reinforcement strips ..........32 6 Cassita II Circuit Diagram ..................33 6.1 Cassita II, standard ......................33 Cassita II/ Cassita II LED... - Page 3 13 Handover certificate ....................42 14 Declaration of performance ..................43 15 GB EU Declaration of Conformity Cassita II............44 16 GB EU Declaration of Conformity Cassita II LED ........... 45 Cassita II/ Cassita II LED Instructions for assembly Version 10...
-
Page 4: Notes On Assembly Instructions
The awnings have been approved for export and Germany. CE mark We, weinor GmbH & Co. KG, hereby expressly confirm that the awning complies with the fundamental requirements and other relevant stipulations of the EN standards. weinor GmbH & Co. KG Mathias-Brüggen-Straße... -
Page 5: Depiction
Align the brackets exactly using suitable tools/aids. Symbols used Symbol Explanation Remarks Incorrect Change required settings Correct Leave settings unchanged. Cassita II/ Cassita II LED Instructions for assembly Version 10 2021-03-25 We reserve the right to make technical changes Item number 116519-0000 Page 5/46... -
Page 6: Safety Notes
In accordance with VDE 100 safety regulations, electrical work may only be carried out by an authorised electrician. The installation instructions accompanying the supplied electrical equipment must be observed. Cassita II/ Cassita II LED Instructions for assembly Version 10 2021-03-25... -
Page 7: Transportation
Only use ladders with adequate load-bearing capacity. Anti-fall guards Workers run the risk of falling when working at elevated heights. Suitable anti-fall guards must be used Cassita II/ Cassita II LED Instructions for assembly Version 10 2021-03-25... -
Page 8: Electrical Connection
The awning is a sun protection unit and may only be used for sun protection. Failure to use the product as intended may result in severe danger. Alterations such as attaching items, or conversions not envisaged by weinor may only be carried out with weinor's written consent. -
Page 9: 2.13 Crushing And Cutting Zones
The customer must confirm to the fitter in writing that the awning is the right model and has been installed correctly, indicating the assembly time, and that final acceptance of the awning has taken place during which the safety issues were discussed (see Handover section). Cassita II/ Cassita II LED Instructions for assembly Version 10... -
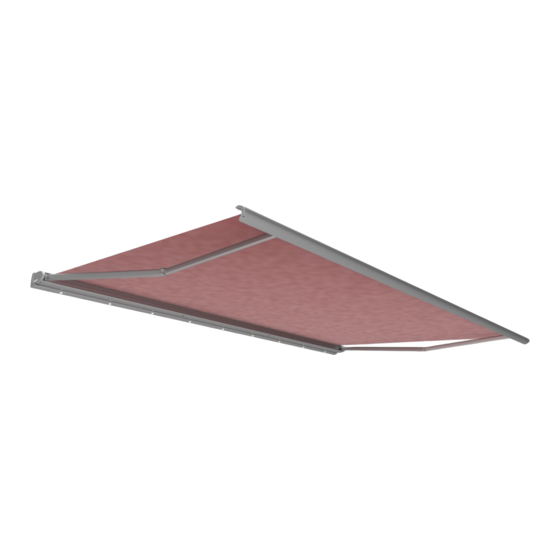
Page 10: Product Description
Product description Schematic diagram Figure 1: Schematic diagram of Cassita II/Cassita II LED Wall bracket Drop profile LongLife arm S Housing floor profile Fabric LED spotlight Cassita II/ Cassita II LED Instructions for assembly Version 10 2021-03-25 We reserve the right to make technical changes... -
Page 11: Assembly
If any deviations are found, which pose a safety risk, do not carry out the assembly work. Fitting the Cassita II under the ceiling requires at least 38 mm of space. The adjusting bracket should be installed flush with the wall bracket as standard (A). -
Page 12: Wall Mounting
The system width (X) of 180 mm equates to the centred spacing of the brackets. Brackets can be indented by 100 mm; align brackets exactly using suitable tools/aids (e.g. mason's cord) and a spirit level. Cassita II/ Cassita II LED Instructions for assembly Version 10... - Page 13 Attach the awning Screw the awning into the bracket stud; the awning must rest on the nose of the wall bracket. Cassita II/ Cassita II LED Instructions for assembly Version 10 2021-03-25 We reserve the right to make technical changes...
- Page 14 Mount the cover profile wall bracket (3) to the wall bracket. Insert the outlet for the motor cable in the cover cap, e.g. with a round file. Cassita II/ Cassita II LED Instructions for assembly Version 10 2021-03-25 We reserve the right to make technical changes...
-
Page 15: Ceiling Installation
A space of at least 25 mm from the back of the wall is needed to be able to install the wall bracket on the ceiling angle without difficulty at a later stage. Cassita II/ Cassita II LED Instructions for assembly... - Page 16 Mark where holes are to be drilled (X) (first the front 2, then the back 2), drill the holes and fit the ceiling angle to the ceiling. Cassita II/ Cassita II LED Instructions for assembly Version 10 2021-03-25 We reserve the right to make technical changes...
- Page 17 (2) to the ceiling angle (1). The wall bracket is in the lower position on the ceiling angle. Fit awning Cassita II/ Cassita II LED Instructions for assembly Version 10 2021-03-25 We reserve the right to make technical changes...
- Page 18 Mount the wall bracket cover profile (3). Insert the outlet for the motor cable in the cover cap, e.g. with a round file. Cassita II/ Cassita II LED Instructions for assembly Version 10 2021-03-25 We reserve the right to make technical changes...
-
Page 19: Ceiling Installation Using Compact Ceiling Angle
Ceiling installation using compact ceiling angle Cassita II/ Cassita II LED Instructions for assembly Version 10 2021-03-25 We reserve the right to make technical changes Item number 116519-0000 Page 19/46... - Page 20 (X), drill the holes and install the compact ceiling angle on the ceiling. Check bracket alignment Check the brackets are aligned flush, and adjust if necessary. Cassita II/ Cassita II LED Instructions for assembly Version 10 2021-03-25 We reserve the right to make technical changes...
- Page 21 (3) must be tightened to 20 Nm using a torque wrench. Mount cover caps (4). Cassita II/ Cassita II LED Instructions for assembly Version 10 2021-03-25 We reserve the right to make technical changes...
-
Page 22: Rafter Bracket Installation
The spacing shown in Figure 2, Minimum dimensions on the rafter bracket, also apply when installing using the mounting plate for the rafter bracket. Figure 2: Minimum dimensions on the rafter bracket Cassita II/ Cassita II LED Instructions for assembly Version 10... -
Page 23: Fitting The Rafter Bracket Without A Mounting Plate
As you do this, ensure that you do not bend the teeth on the plate dowels. Fit the rafter bracket to the rafter. Cassita II/ Cassita II LED Instructions for assembly Version 10 2021-03-25 We reserve the right to make technical changes... - Page 24 Attach the awning See Section 4.2.1, point 3 Mount the clamp parts on the wall See Section 4.2.1, point 4 bracket Cassita II/ Cassita II LED Instructions for assembly Version 10 2021-03-25 We reserve the right to make technical changes...
-
Page 25: Fit The Rafter Bracket With Mounting Plate
Attach the awning See Section 4.2.1, point 3 Mount the clamp parts on the wall See Section 4.2.1, point 4 bracket Cassita II/ Cassita II LED Instructions for assembly Version 10 2021-03-25 We reserve the right to make technical changes... -
Page 26: Variations Of Rafter Assemblies
Figure 3: Standard rafter assembly with rafter bracket and mounting plate Cassette width Rafter spacing Figure 4: Standard rafter assembly with rafter bracket without mounting plate Cassita II/ Cassita II LED Instructions for assembly Version 10 2021-03-25 We reserve the right to make technical changes... - Page 27 Figure 5: Special rafter assembly version replacing rafter bracket and mounting plate Cassette width Rafter spacing Figure 6: Special rafter assembly version replacing rafter bracket without mounting plate Cassita II/ Cassita II LED Instructions for assembly Version 10 2021-03-25 We reserve the right to make technical changes...
-
Page 28: Assembling The Light Bar
See Section 4.2.1, point 4 bracket Mount wall bracket cover caps and See Section 4.2.1, point 5 wall bracket cover profile Cassita II/ Cassita II LED Instructions for assembly Version 10 2021-03-25 We reserve the right to make technical changes... -
Page 29: Installing The Receiver Box
Affix the receiver box to the wall bracket using the self-tapping screw (3). Mount the wall bracket cover profile (4) to the wall bracket. Cassita II/ Cassita II LED Instructions for assembly Version 10 2021-03-25 We reserve the right to make technical changes... -
Page 30: Setting The Angle Of Inclination
Turn clockwise to reduce the angle Turn anti-clockwise to increase • the angle Set all arms to the same position. Cassita II/ Cassita II LED Instructions for assembly Version 10 2021-03-25 We reserve the right to make technical changes Item number... -
Page 31: Setting The Projection In An Awning With Gear Drive
For this reason, the interlocking must be disengaged by retracting the awning 1 to 2 cm. Gear drive: the maximum gradient is 25° Cassita II/ Cassita II LED Instructions for assembly Version 10... -
Page 32: Correcting The Fabric Position By Placing A Strip Of Fabric Underneath
Retract the awning and visibly check the spacing! * Note on product illustrations: Product illustrations are examples (product neutral) Cassita II/ Cassita II LED Instructions for assembly Version 10 2021-03-25 We reserve the right to make technical changes... -
Page 33: Cassita Ii Circuit Diagram
Cassita II, standard Pole separation of the power supply shall be provided on site On site Input lead Figure 7: Circuit diagram for Cassita II, standard Cassita II/ Cassita II LED Instructions for assembly Version 10 2021-03-25 We reserve the right to make technical changes... -
Page 34: Cassita Ii Mit Biconnect Radio Control
2 = L1 black 3 = L2 brown 3 = L2 brown PE = Earthing PE = Earthing Figure 8: Circuit diagram for Cassita II with BiConnect Cassita II LED, standard Pole separation of the power supply shall be provided on site... -
Page 35: Cassita Ii Led With Biconnect Radio Control
3 = L2 brown 3 = L2 brown PE = Earthing PE = Earthing Figure 10: Circuit diagram for Cassita II LED with BiConnect Cassita II with Hirschmann connection assembly Assignment for a 3-wire cable Assignment for a 3-wire cable... -
Page 36: Adjusting The Arm Position
Slacken the drop profile support bracket Slide the arms symmetrically • Refit the drop profile support • bracket Cassita II/ Cassita II LED Instructions for assembly Version 10 2021-03-25 We reserve the right to make technical changes Item number 116519-0000... -
Page 37: Electrical Connection
Do not exceed the maximum permissible awning projection. The centre joint may only be opened far enough to ensure that the high-tech belt is no longer visible. Cassita II/ Cassita II LED Instructions for assembly Version 10 2021-03-25... - Page 38 The cassette must close when the awning is retracted. Re-set if necessary. If a larger angle of inclination is set, it may be necessary to re-set the end positions for the motor. Cassita II/ Cassita II LED Instructions for assembly Version 10 2021-03-25...
-
Page 39: Test That The Unit Is Working Correctly
The position of the awning when • opened and retracted That the awning housing closes • properly Cassita II/ Cassita II LED Instructions for assembly Version 10 2021-03-25 We reserve the right to make technical changes Item number 116519-0000... -
Page 40: Troubleshooting
(handover certificate). Cassita II/ Cassita II LED Instructions for assembly Version 10... -
Page 41: Disassembly And Disposal
A suitably qualified company should be engaged to perform this task. Although this product does not contain any materials which pose a risk or danger to the environment, the awning parts should nevertheless be disposed of properly. Cassita II/ Cassita II LED Instructions for assembly Version 10... -
Page 42: Handover Certificate
Warranty documents Miscellaneous: Die Montage erfolgte durch: Name Stunden Uhrzeit Uhrzeit Signature of fitter Signature of customer Cassita II/ Cassita II LED Instructions for assembly Version 10 2021-03-25 We reserve the right to make technical changes Item number 116519-0000 Page 42/46... -
Page 43: Declaration Of Performance
GmbH & Co. KG Mathias-Brüggen-Str. 110 50829 Cologne, Germany Date/ Signature: Cologne, 1 July 2013 ppa. Karl-Heinz Stawski Cassita II/ Cassita II LED Instructions for assembly Version 10 2021-03-25 We reserve the right to make technical changes Item number... -
Page 44: Eu Declaration Of Conformity Cassita Ii
Chargé de la documentation Produkt | Produkttyp | Baujahr Cassita II | Gelenkarmmarkise mit Motorantrieb ab | Product | Producttype | Bouwjaar Cassita II | Knikarmzonnescherm met motoraandrijving vanaf | from | Product | Product type | Year Cassita II | Folding arm awning with motor drive à... -
Page 45: Eu Declaration Of Conformity Cassita Ii Led
Produkt | Produkttyp | Baujahr Cassita II LED | Gelenkarmmarkise mit Motorantrieb und integrierter LED Beleuchtung ab | vanaf | Product | Producttype | Bouwjaar Cassita II LED | Knikarmzonnescherm met motoraandrijving en from | geïntegreerde ledverlichting à partir de | 04/2016... - Page 46 Cassita II/ Cassita II LED Montageanleitung weinor GmbH & Co. KG Mathias-Brüggen-Straße 110 50829 Cologne (Germany) weinor.com Cassita II/ Cassita II LED Instructions for assembly Version 10 2021-03-25 We reserve the right to make technical changes Item number 116519-0000 Seite 46/46...
Need help?
Do you have a question about the Cassita II and is the answer not in the manual?
Questions and answers