
Related Manuals for Excel TS2501


Summary of Contents for Excel TS2501
- Page 1 Original operating instructions Excel 250mm Table Saw Model: TS2501 2020 Danger! Read all safety regulations and instructions. Keep all safety regulations and instructions in a safe place for future use.
-
Page 2: Table Of Contents
Table of contents 1. Safety regulations................................3 2. Additional Safety Instructions For Table Saws.......................4 3. Safety Instructions For The Handling Of Saw Blades..................4. Layout and items supplied............................8 5. Proper use..................................9 6. Technical data................................9 7. Before starting the equipment..........................10 8. ASSEMBLY& ADJUSTMENTS..........................11 9. -
Page 3: Safety Regulations
WARNING - To reduce the risk of injury, user must read instruction manual. Caution! Wear ear-muffs. The impact of noise can cause damage to hearing. Caution! Wear a breathing mask. Dust which is injurious to health can be generated when working on wood and other materials. Never use the device to work on any materials containing asbestos! Caution! Wear safety goggles. - Page 4 Electrical safety power source and/or battery pack, picking up or carrying the tool. Carrying power tools with your Power tool plugs must match the outlet. finger on the switch or energizing power tools that Never modify the plug in any way. Do not use have the switch on invites accidents.
-
Page 5: Saws
power tool. Power tools are dangerous in the hands cutting operation. For through-cutting operations of untrained users. where the saw blade cuts completely through the thickness of the workpiece, the guard and other safety Maintain power tools. Check devices help reduce the risk of injury. misalignment binding moving... - Page 6 Feed the workpiece into the saw blade or edge, causing loss of control, saw blade binding and cutter only against the direction of rotation. kickback. Feeding the workpiece in the same direction that the Feed workpiece at an even pace. Do not saw blade is rotating above the table may result in the bend or twist the workpiece.
- Page 7 Pressing the workpiece being cut off against the saw 4) Table saw operating procedure warnings blade will create a binding condition and kickback. Turn off the table saw and disconnect the power cord when removing the table insert, Align the fence to be parallel with the saw changing the saw blade or making adjustments to blade.
-
Page 8: Safety Instructions For The Handling Of Saw Blades
Make sure that the saw blade is installed to Only use the supplied saw blade for rotate in the proper direction. Do not use grinding sawing operations in wood, materials similar to wheels, wire brushes, or abrasive wheels on a wood, plastics and non-ferrous metals (except for table saw. -
Page 9: Layout And Items Supplied
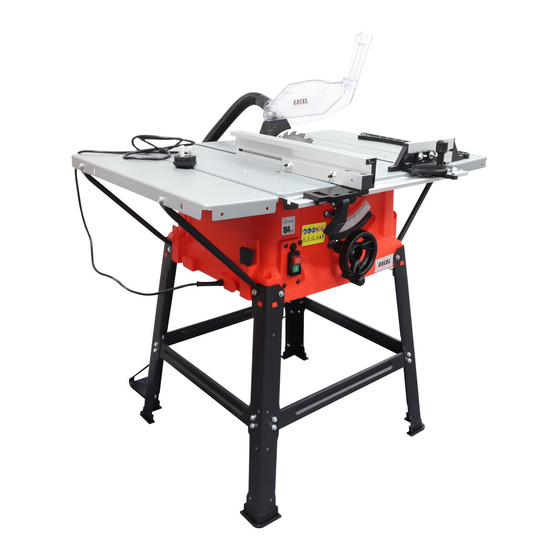
• Check to see if all items are supplied. Inspect 4. Layout and items supplied the equipment and accessories for transport 4.1 Layout 1.Switch 2. Bevel locking 3.Bevel scale 4.Height/ Bevel adjusting handwheel 5.Scale 6.Width extension table 7.Mitre gauge 8.Mitre guide rail 9.Blade guard 10.Riving knife 11.Rip fence... -
Page 10: Proper Use
instructions and the operating instructions to be Handle... found in this manual. Miter Gauge... All persons who use and service the equipment Rip Fence....have to be acquainted with these operating instructions and must be informed about the Locking Lever....equipment‘s potential hazards. -
Page 11: Before Starting The Equipment
• Adapt your working style to suit the appliance. Cutting height max...... 85 mm / 90° • Do not overload the appliance..........65 mm / 45° • Have the Tilting saw blade ...... infinite 0 - 45° appliance serviced Extractor socket ....... - Page 12 It must be possible for the saw blade to run...
-
Page 13: Assembly& Adjustments
freely. • When working with wood that has been processed before, watch out for foreign bodies such as nails or screws etc. • Before you actuate the On/Off switch, make sure that the saw blade is correctly fitted and that the machine’s moving parts run smoothly. - Page 14 • Unlock the release lever by pulling it up. Grasp • Pull the riving knife up until the internal pins are riving knife and pull it towards the right side of engaged and the riving knife is above the saw the saw to release the riving knife from the blade.
- Page 15 Assembling the table extension • Use the To replace the blade • Unplug the saw. screws, nuts and washers to fasten the table width extensions loosely to the saw table. Screw supports loosely onto the saw housing and onto the table width extensions. •...
- Page 16 while pushing the closed end wrench (left side) to the back of the saw. Remove the nut. Unlock release locking lever and remove •...
-
Page 17: Using The Saw
the blade. To install a standard blade: • Place the new blade on the arbor shaft ( the teeth must point down toward the front of the saw to work properly). • Place the blade washer and the blade nut over the arbor shaft. - Page 18 • Turn the saw on. gauge groove. When making a beveled cross • Position the workpiece fl at on the table with cut (the blade tilted in relation to the table) the the edge flush against the rip fence. Let the miter gauge should be located in the groove on blade build up to full speed before feeding the the right so that the blade is tilted away from the...
-
Page 19: Replacing The Power Cable
hand farthest from the blade should be placed on the workpiece. • When the cut is made, turn the saw off. Wait for the blade to come to a complete stop before removing the workpiece. 9.7. Making a bevel cross cut •... -
Page 20: Storage
11. Cleaning, maintenance and 12. Storage Wrench and blade storage Insert Blade and ordering of spare parts wrench into the holes on the side of the table saw, tighten screws securely. Danger! The push stick and power cable have on board Always pull out the mains power plug before star-ting any cleaning work.
Need help?
Do you have a question about the TS2501 and is the answer not in the manual?
Questions and answers