Table of Contents
Advertisement
Quick Links
Advertisement
Table of Contents

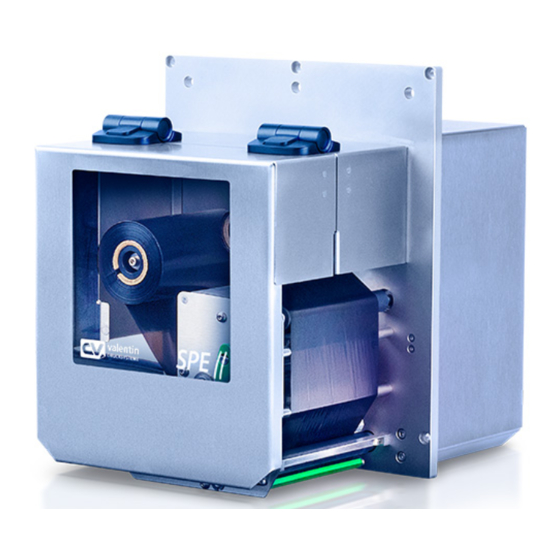
Related Manuals for Carl Valentin SPE II


Summary of Contents for Carl Valentin SPE II
- Page 1 SPE II Service Instructions...
- Page 2 It must not be concluded from the missing labelling that it is not a registered brand or a registered trademark. Carl Valentin printing systems comply with the following safety guidelines: Low-Voltage Directive (2014/35/EU)
-
Page 3: Table Of Contents
SPE II Table of Contents Table of Contents Notes on this Document ............5 User Notes ................5 Instructions ................5 Cross References ..............6 Safety Instructions ..............7 General Safety Instructions ............. 7 ... - Page 4 Desktop Enclosure .............. 102 Wiring Plans – Mechanics ..........103 16.1 SPE II 106/12, 106/24, 108/12, 162/12 ....... 103 16.2 SPE II 107/12, 160/12 ............105 Layout Diagrams – Electronics ........107 ...
-
Page 5: Notes On This Document
SPE II Error! Use the Home tab to apply Überschrift 1 to the text that you want to appear here. Notes on this Document 1.1 User Notes This service manual is intended for qualified service and maintenance staff. This manual contains information about the electronics and the mechanical part of the printing system. -
Page 6: Cross References
Error! Use the Home tab to apply Überschrift SPE II 1 to the text that you want to appear here. 1.3 Cross References References to specific items in a figure are marked with letters. They Drawings are identified with parentheses in the text, e.g. (A). If no figure number is provided, letters in the text always refer to the graphic directly above the text. -
Page 7: Safety Instructions
SPE II Error! Use the Home tab to apply Überschrift 1 to the text that you want to appear here. Safety Instructions 2.1 General Safety Instructions Workplace and Keep the area around the device clean during and after method of working maintenance. - Page 8 Error! Use the Home tab to apply Überschrift SPE II 1 to the text that you want to appear here. Protective equipment WARNING! Risk of injury in case of missing or faulty protective equipment. After performing maintenance work, attach all safety equipment (covers, safety precautions, ground cables etc.).
- Page 9 SPE II Error! Use the Home tab to apply Überschrift 1 to the text that you want to appear here. Operating personnel must be trained by the operator on the basis of the operating manual. Depending on use, ensure that clothing, hair, jewellery and similar personal items do not contact the exposed rotating parts and/or the moving parts.
-
Page 10: Safety Handling When Working With Electricity
Error! Use the Home tab to apply Überschrift SPE II 1 to the text that you want to appear here. 2.2 Safety Handling When Working With Electricity Qualifications of The following work may only be performed by instructed and... -
Page 11: Connector Pin Assignment
3.1 Print Mechanics Right type Left type Figure 1 Figure 2 Winder connection CAUTION! The printing system can be damaged by non- compliant winders. Attach only winders of Carl Valentin. Connecting cable connection print mechanics – control unit 03.21 Service Instructions... -
Page 12: Control Unit (Panel Enclosure)
Error! Use the Home tab to apply Überschrift SPE II 1 to the text that you want to appear here. 3.2 Control Unit (Panel Enclosure) 1 - LED green Lighting = Speed 100 MBit Off = Speed 10 MBit 2 - LED orange Lighting = Connection active –Flashing = Data transfer... -
Page 13: Control Unit (Desktop Enclosure)
SPE II Error! Use the Home tab to apply Überschrift 1 to the text that you want to appear here. 3.3 Control Unit (Desktop Enclosure) Figure 4 USB host for USB keyboard and USB stick Touch panel Power switch Slot for CF card Connecting cable connection print mechanics –... - Page 14 Error! Use the Home tab to apply Überschrift SPE II 1 to the text that you want to appear here. Service Instructions 03.21...
-
Page 15: Cleaning
SPE II Error! Use the Home tab to apply Überschrift 1 to the text that you want to appear here. Cleaning DANGER! Risk of death by electric shock! Before opening the housing cover, disconnect the label printer from the mains supply and wait for a moment until the power supply unit has discharged. -
Page 16: General Cleaning
Error! Use the Home tab to apply Überschrift SPE II 1 to the text that you want to appear here. WARNING! Risk of fire by easily inflammable label soluble! When using label soluble, dust must be completely removed from the printing system and cleaned. -
Page 17: Pressure Roller
SPE II Error! Use the Home tab to apply Überschrift 1 to the text that you want to appear here. 4.3 Pressure Roller A soiled pressure roller can lead to a reduced print quality and can affect transport of material. -
Page 18: Printhead
Error! Use the Home tab to apply Überschrift SPE II 1 to the text that you want to appear here. 4.4 Printhead Printing can cause accumulation of dirt at printhead e.g. by colour particles of transfer ribbon, and therefore it is necessary to clean the printhead in regular periods depending on operating hours, environmental effects such as dust etc. -
Page 19: Clean The Label Photocell
SPE II Error! Use the Home tab to apply Überschrift 1 to the text that you want to appear here. 4.5 Clean the Label Photocell CAUTION! Label photocell can be damaged! Do not use sharp or hard objects or solvents to clean the label photocell. - Page 20 Error! Use the Home tab to apply Überschrift SPE II 1 to the text that you want to appear here. Service Instructions 03.21...
-
Page 21: Electronics - Panel Enclosure (Replacing Components)
SPE II Error! Use the Home tab to apply Überschrift 1 to the text that you want to appear here. Electronics – Panel Enclosure (Replacing Components) DANGER! Risk of death via electric shock! Before opening the housing cover, disconnect the label printer from the mains supply and wait for a moment until the power supply unit has discharged. -
Page 22: Input/Output Board
Error! Use the Home tab to apply Überschrift 1 to SPE II the text that you want to appear here. 5.2 Input/Output Board NOTICE! The inputs/outputs can be tested in the Service Functions / I/O status. In case of an active input, the position corresponding to this input changes to 1. -
Page 23: Distributor Board
SPE II Error! Use the Home tab to apply Überschrift 1 to the text that you want to appear here. 5.3 Distributor Board Figure 11 Removing the 1. Remove the control unit from the electrical outlet. distributor board 2. Unscrew four screws at the rear and remove the front plate (see chapter 5.1, page 21). -
Page 24: Cpu Pcb
Error! Use the Home tab to apply Überschrift 1 to SPE II the text that you want to appear here. 5.4 CPU PCB Figure 12 Removing the NOTICE! CPU PCB Save the configuration onto a CF card. 1. Unplug the control unit from the electrical outlet. - Page 25 SPE II Error! Use the Home tab to apply Überschrift 1 to the text that you want to appear here. Installing the 1. If not available, move the cover of the CF card slot (C) from the old CPU to the new CPU.
-
Page 26: Battery
Error! Use the Home tab to apply Überschrift 1 to SPE II the text that you want to appear here. 5.5 Battery DANGER! Danger of explosion due to improper replacement of the battery! Use non-conductive tools. Pay attention to polarity. -
Page 27: Power Supply
SPE II Error! Use the Home tab to apply Überschrift 1 to the text that you want to appear here. 5.6 Power Supply Figure 14 Remove the power 1. Unplug the control unit from the electrical outlet. supply 2. Unscrew four screws at the rear and remove the front plate (see chapter 5.1, page 21). -
Page 28: Hmi Components
Error! Use the Home tab to apply Überschrift 1 to SPE II the text that you want to appear here. 5.7 HMI Components Figure 15 Removing HMI 1. Unplug the control unit from the electrical outlet. components 2. Unscrew four screws at the rear and remove the front plate (see chapter 5.1, page 21). - Page 29 SPE II Error! Use the Home tab to apply Überschrift 1 to the text that you want to appear here. Installing HMI 1. Place the connection board (D) for the transparent keyboard, tighten the screws and plug in the connection cable (C).
- Page 30 Error! Use the Home tab to apply Überschrift 1 to SPE II the text that you want to appear here. Service Instructions 03.21...
-
Page 31: Electronics - Desktop Enclosure (Replacing Components)31
SPE II Error! Use the Home tab to apply Überschrift 1 to the text that you want to appear here. Electronics – Desktop Enclosure (Replacing Components) DANGER! Risk of death via electric shock! Before opening the housing cover, disconnect the device from the mains supply and wait for a moment until the power supply unit has discharged. -
Page 32: Input/Output Board
Error! Use the Home tab to apply Überschrift 1 to the text SPE II that you want to appear here. 6.2 Input/Output Board NOTICE! The inputs/outputs can be tested in the Service Functions / I/O status. In case of an active input, the position corresponding to this input changes to 1. -
Page 33: Distributor Board
SPE II Error! Use the Home tab to apply Überschrift 1 to the text that you want to appear here. 6.3 Distributor Board Figure 18 1. Unplug the control unit from the electrical outlet. Removing the distributor board 2. Unscrew the four screws (B) and remove the control unit cover. -
Page 34: Cpu Pcb
Error! Use the Home tab to apply Überschrift 1 to the text SPE II that you want to appear here. 6.4 CPU PCB Figure 19 Removing the NOTICE! CPU PCB Save the configuration onto a CF card. 1. Unplug the control unit from the electrical outlet. - Page 35 SPE II Error! Use the Home tab to apply Überschrift 1 to the text that you want to appear here. Installing the 1. If not available, move the cover of the CF card slot (E) from the old CPU to the new CPU.
-
Page 36: Battery
Error! Use the Home tab to apply Überschrift 1 to the text SPE II that you want to appear here. 6.5 Battery DANGER! Danger of explosion due to improper replacement of the battery! Use non-conductive tools. Pay attention to polarity. -
Page 37: Power Supply
SPE II Error! Use the Home tab to apply Überschrift 1 to the text that you want to appear here. 6.6 Power Supply Figure 21 Removing the power 1. Unplug the control unit from the electrical outlet. supply 2. Unscrew the four screws (D) and remove the control unit cover. -
Page 38: Hmi Components
Error! Use the Home tab to apply Überschrift 1 to the text SPE II that you want to appear here. 6.7 HMI Components Figure 22 Removing HMI 1. Unplug the control unit from the electrical outlet. components 2. Unscrew the four screws (D) and remove the control unit cover. - Page 39 SPE II Error! Use the Home tab to apply Überschrift 1 to the text that you want to appear here. Installing HMI 1. Place the seal (G) into the depression and carefully place the new graphic module (I) onto it.
- Page 40 Error! Use the Home tab to apply Überschrift 1 to the text SPE II that you want to appear here. Service Instructions 03.21...
-
Page 41: Retrofit With Options
SPE II Error! Use the Home tab to apply Überschrift 1 to the text that you want to appear here. Retrofit with Options 7.1 Protective Cover for the Control Unit (Panel Enclosure) NOTICE! By mounting the optional protective cover, the protection class IP 65 according to DIN EN 60529 is achieved for the control unit of SPE II. - Page 42 Error! Use the Home tab to apply Überschrift 1 to SPE II the text that you want to appear here. 1. Successively remove the four screws (C) on the back on the control unit (A), slide on the sealing rings (B) and screw in the screws (C) again.
- Page 43 SPE II Error! Use the Home tab to apply Überschrift 1 to the text that you want to appear here. NOTICE! Check that all cables are safely enclosed by the grommets (M) so that no water or dust can enter. Too large grommets and loose cables lead to entering of impurities into the case.
- Page 44 Error! Use the Home tab to apply Überschrift 1 to SPE II the text that you want to appear here. Service Instructions 03.21...
-
Page 45: Mechanics - Flat Type (Replacing Components)
SPE II Error! Use the Home tab to apply Überschrift 1 to the text that you want to appear here. Mechanics – Flat Type (Replacing Components) DANGER! Risk of death via electric shock! Before opening the housing cover, disconnect the device from the mains supply and wait for a moment until the power supply unit has discharged. -
Page 46: Printhead
Error! Use the Home tab to apply Überschrift 1 to SPE II the text that you want to appear here. 8.2 Printhead Figure 26 Remove the printhead 1. Remove labels and transfer ribbon from the printing system. 2. When the printhead is closed, loosen the screws (C). -
Page 47: Adjust The Print Position
SPE II Error! Use the Home tab to apply Überschrift 1 to the text that you want to appear here. 8.3 Adjust the Print Position On the Home menu screen, tap Functions > Service Functions > Print Optimization. Indication of value in 1/100 mm. -
Page 48: Pressure Roller
Error! Use the Home tab to apply Überschrift 1 to SPE II the text that you want to appear here. 8.4 Pressure Roller Figure 27 1. Remove labels and transfer ribbon from the printing system. Remove the pressure roller 2. Turn the lever (A) counter clockwise to lift up the printhead. -
Page 49: Label Photocell
SPE II Error! Use the Home tab to apply Überschrift 1 to the text that you want to appear here. 8.5 Label Photocell NOTICE! Soiling of the label photocell can also cause malfunctions. Before replacing the label photocell, check whether it is soiled and clean it if necessary (see chapter 4.5, page 19). -
Page 50: Distributor Board
Error! Use the Home tab to apply Überschrift 1 to SPE II the text that you want to appear here. 8.6 Distributor Board Figure 29 Remove the distributor 1. Unplug the control unit from the electrical outlet. board 2. Disconnect all interface cables from the rear of the printing system. -
Page 51: Power Electronics
SPE II Error! Use the Home tab to apply Überschrift 1 to the text that you want to appear here. 8.7 Power Electronics Figure 30 Remove the power 1. Unplug the control unit from the electrical outlet. electronics 2. Disconnect all interface cables from the rear of the printing system. - Page 52 Error! Use the Home tab to apply Überschrift 1 to SPE II the text that you want to appear here. Service Instructions 03.21...
-
Page 53: Mechanics - Corner Type (Replacing Components)
SPE II Error! Use the Home tab to apply Überschrift 1 to the text that you want to appear here. Mechanics – Corner Type (Replacing Components) DANGER! Risk of death via electric shock! Before opening the housing cover, disconnect the device from the mains supply and wait for a moment until the power supply unit has discharged. -
Page 54: Printhead
Error! Use the Home tab to apply Überschrift 1 to SPE II the text that you want to appear here. 9.2 Printhead Figure 32 Remove the printhead 1. Remove labels and transfer ribbon from the printing system. 2. When the printhead is closed, loosen the hex (Allen) screws (C). -
Page 55: Adjust The Print Position
SPE II Error! Use the Home tab to apply Überschrift 1 to the text that you want to appear here. 9.3 Adjust the Print Position On the Home menu screen, tap Functions > Service Functions > Print Optimization. Indication of value in 1/100 mm. -
Page 56: Pressure Roller
Error! Use the Home tab to apply Überschrift 1 to SPE II the text that you want to appear here. 9.4 Pressure Roller Figure 33 Remove the pressure 1. Remove labels and transfer ribbon from the printing system. roller 2. Turn the lever (A) counter clockwise to lift up the printhead. -
Page 57: Label Photocell
SPE II Error! Use the Home tab to apply Überschrift 1 to the text that you want to appear here. 9.5 Label Photocell NOTICE! Soiling of the label photocell can also cause malfunctions. Before replacing the label photocell, check whether it is soiled and clean it if necessary (see chapter 4.5, page 19). -
Page 58: Distributor Board
Error! Use the Home tab to apply Überschrift 1 to SPE II the text that you want to appear here. 9.6 Distributor Board Figure 35 Remove the distributor 1. Unplug the control unit from the electrical outlet. board 2. Disconnect all interface cables from the rear of the printing system. -
Page 59: Motor Additional Board
SPE II Error! Use the Home tab to apply Überschrift 1 to the text that you want to appear here. 9.7 Motor Additional Board Figure 36 Remove the motor 1. Unplug the control unit from the electrical outlet. additional board 2. -
Page 60: Power Electronics
Error! Use the Home tab to apply Überschrift 1 to SPE II the text that you want to appear here. 9.8 Power Electronics Figure 37 Remove the power 1. Unplug the control unit from the electrical outlet. electronics 2. Disconnect all interface cables from the rear of the printing system. -
Page 61: Adjustments, Settings And Alignments - Flat Type
SPE II Error! Use the Home tab to apply Überschrift 1 to the text that you want to appear here. 10 Adjustments, Settings and Alignments – Flat Type DANGER! Risk of death via electric shock! Before opening the housing cover, disconnect the label printer from the mains supply and wait for a moment until the power supply unit has discharged. -
Page 62: Printhead Position
Error! Use the Home tab to apply Überschrift 1 to SPE II the text that you want to appear here. 10.2 Printhead Position Figure 38 Complete the following printhead settings to achieve the best possible print image: Align the heating line with the highest point of the pressure roller. -
Page 63: Parallelism
SPE II Error! Use the Home tab to apply Überschrift 1 to the text that you want to appear here. 10.3 Parallelism An important characteristic for a high quality print is the parallelism of the focal line of the thermal printhead to the pressure roll. Because of... -
Page 64: Pressure Balance Right/Left
Error! Use the Home tab to apply Überschrift 1 to SPE II the text that you want to appear here. 10.4 Pressure Balance Right/Left After adjusting parallelism and no even strong pressure exists over the complete print width, by means of a plate (B) you can set the... -
Page 65: Pressure
(see table) result in the factory settings. Printhead Scale value SPE II 106, 108, 162 SPE II 107, 160 NOTICE! It is important that the knurled button which is coated with protective lacquer is not removed from the pressure screw as otherwise the above mentioned settings are faulty. -
Page 66: Transfer Ribbon Feed Path
Error! Use the Home tab to apply Überschrift 1 to SPE II the text that you want to appear here. 10.6 Transfer Ribbon Feed Path Adjust the transfer ribbon feed path by changing the head contact pressure. Increasing the head contact pressure with the screws (A or B) shifts the ribbon feed path in the corresponding direction. -
Page 67: Ribbon Rewinder/Unwinder
SPE II Error! Use the Home tab to apply Überschrift 1 to the text that you want to appear here. 10.7 Ribbon Rewinder/Unwinder Figure 43 Due to the many different transfer ribbon variants regarding roller width, length and qualities it is necessary to provide the possibility to set transfer ribbon tension. -
Page 68: Head Photocell
Error! Use the Home tab to apply Überschrift 1 to SPE II the text that you want to appear here. 10.8 Head Photocell The head photocell prevents printing from occurring when the printhead is open. Figure 44 1. Unplug the control unit from the electrical outlet. -
Page 69: Adjustments, Settings And Alignments - Corner Type
SPE II Error! Use the Home tab to apply Überschrift 1 to the text that you want to appear here. 11 Adjustments, Settings and Alignments – Corner Type DANGER! Risk of death via electric shock! Before opening the housing cover, disconnect the label printer from the mains supply and wait for a moment until the power supply unit has discharged. -
Page 70: Printhead Position
Error! Use the Home tab to apply Überschrift 1 to SPE II the text that you want to appear here. 11.2 Printhead Position Figure 45 Complete the following printhead settings to achieve the best possible print image: Align the heating line with the highest point of the pressure roller. -
Page 71: Parallelism
SPE II Error! Use the Home tab to apply Überschrift 1 to the text that you want to appear here. 11.3 Parallelism An important characteristic for a high quality print is the parallelism of the focal line of the thermal printhead to the pressure roll. Because of... -
Page 72: Pressure Balance Right/Left
Error! Use the Home tab to apply Überschrift 1 to SPE II the text that you want to appear here. 11.4 Pressure Balance Right/Left After adjusting parallelism and no even strong pressure exists over the complete print width, by means of a plate (B) you can set the... -
Page 73: Pressure
SPE II Error! Use the Home tab to apply Überschrift 1 to the text that you want to appear here. 11.5 Pressure Increasing the head contact pressure leads to an improvement of the print image density on the corresponding side and to a shifting of the ribbon feed path in the corresponding direction. -
Page 74: Ribbon Rewinder/Unwinder
Error! Use the Home tab to apply Überschrift 1 to SPE II the text that you want to appear here. 11.6 Ribbon Rewinder/Unwinder Figure 49 Due to the many different transfer ribbon variants regarding roller width, length, and qualities it is necessary to provide the possibility to set transfer ribbon tension. -
Page 75: Head Photocell
SPE II Error! Use the Home tab to apply Überschrift 1 to the text that you want to appear here. 11.7 Head Photocell The head photocell prevents printing from occurring when the printhead is open. Figure 50 1. Unplug the control unit from the electrical outlet. -
Page 76: Pressure Curve (Ribbon Save)
Error! Use the Home tab to apply Überschrift 1 to SPE II the text that you want to appear here. 11.8 Pressure Curve (Ribbon Save) If the ribbon save function is activated and the printhead is not enough lifted up from the label material, then the pressure curve is to be adjusted anew. - Page 77 SPE II Error! Use the Home tab to apply Überschrift 1 to the text that you want to appear here. The sketch (see Figure 52) shows from behind the shaft of ribbon save motor (H) with pressure curve (C) and disc (B). The bearing ring (D) with the attached sole plate (E) is underneath.
-
Page 78: Supporting Bar (Ribbon Save)
Error! Use the Home tab to apply Überschrift 1 to SPE II the text that you want to appear here. 11.9 Supporting Bar (Ribbon Save) Figure 53 If the transfer ribbon save function is active and a paper jam occurs or if the print position onto the label is incorrect, this could be traced back to an inadequate adjustment of the supporting bar (B). -
Page 79: Oil And Lubricate
SPE II Error! Use the Home tab to apply Überschrift 1 to the text that you want to appear here. 12 Oil and Lubricate NOTICE! Make sure when oiling and greasing that no lubricants deposit on photocells, electronic components, circuit boards, printhead and rolls. - Page 80 Error! Use the Home tab to apply Überschrift 1 to SPE II the text that you want to appear here. Figure 55 In case that dust or other dirt is deposit you have to clean the lubrication at first with alcohol.
-
Page 81: Error Correction
SPE II Error! Use the Home tab to apply Überschrift 1 to the text that you want to appear here. 13 Error correction Error message Cause Remedy Line too high Line rises up completely or Move line down (increase Y partly over the upper edge of value). - Page 82 Error! Use the Home tab to apply Überschrift 1 to SPE II the text that you want to appear here. Error message Cause Remedy COM OVERRUN Loss of data at serial interface Check baud rate. (RS-232). Check cable (printing system and PC).
- Page 83 SPE II Error! Use the Home tab to apply Überschrift 1 to the text that you want to appear here. Error message Cause Remedy Printhead Printhead temperature is too Reduce contrast. temperature high. Change printhead. Defective printhead sensing device. Cutter error With cut an error occurred.
- Page 84 Error! Use the Home tab to apply Überschrift 1 to SPE II the text that you want to appear here. Error message Cause Remedy Length command Invalid length of the received Check data sent. command statement. Check connection PC - printing system.
- Page 85 SPE II Error! Use the Home tab to apply Überschrift 1 to the text that you want to appear here. Error message Cause Remedy Invalid graphic file The selected file does not Check file name. contain graphic data. Directory not empty...
- Page 86 Error! Use the Home tab to apply Überschrift 1 to SPE II the text that you want to appear here. Error message Cause Remedy Page selection A page which is not available is Check the defined pages. selected. Undefined page The page is not defined.
- Page 87 SPE II Error! Use the Home tab to apply Überschrift 1 to the text that you want to appear here. Error message Cause Remedy RFID no label RFID unit cannot recognize a Displace RFID unit or use an label. offset.
- Page 88 Error! Use the Home tab to apply Überschrift 1 to SPE II the text that you want to appear here. Error message Cause Remedy Load software Error when programming Please contact your printhead FPGA printhead-FPGA. responsible distributor. Upper position Option applicator: Check input signals / compressed-air supply.
- Page 89 SPE II Error! Use the Home tab to apply Überschrift 1 to the text that you want to appear here. Error message Cause Remedy Left position Option applicator: Check LEFT final position switch for correct function and Left final position switch is not position.
- Page 90 Error! Use the Home tab to apply Überschrift 1 to SPE II the text that you want to appear here. Error message Cause Remedy Print asynchronous Settings of label size and gap Check correct loading of label size are not correct.
- Page 91 SPE II Error! Use the Home tab to apply Überschrift 1 to the text that you want to appear here. Error message Cause Remedy Printhead short Electrical short at the printhead. Check the used printhead. circuit Please contact your distributor.
- Page 92 Error! Use the Home tab to apply Überschrift 1 to SPE II the text that you want to appear here. Service Instructions 03.21...
-
Page 93: Control Inputs And Control Outputs
SPE II Error! Use the Home tab to apply Überschrift 1 to the text that you want to appear here. 14 Control Inputs and Control Outputs By means of a maximum of 16 control inputs and outputs which, in the... - Page 94 Error! Use the Home tab to apply Überschrift SPE II 1 to the text that you want to appear here. Figure 56 Service Instructions 03.21...
- Page 95 SPE II Error! Use the Home tab to apply Überschrift 1 to the text that you want to appear here. Configuration of D-Sub socket Figure 57 Cable identification white brown green yellow grey pink blue black violet grey-pink red-blue white-green...
- Page 96 Error! Use the Home tab to apply Überschrift SPE II 1 to the text that you want to appear here. Port 1 to Port 16 = Assignment for I/O Profile Std_Label Identification Description / Function Port 1 Print start (Input)
- Page 97 SPE II Error! Use the Home tab to apply Überschrift 1 to the text that you want to appear here. Port 1 to Port 16 = Assignment for I/O Profile StdFileSelLabel Identification Description / Function Port 1 Print start and cut (Input)
- Page 98 Error! Use the Home tab to apply Überschrift SPE II 1 to the text that you want to appear here. Technical data Plug Connector Type D-Sub connector High Density 26-pin. / connector Manufacturer W+P-Products Reference number 110-26-2-1-20 Output Voltages (connected with GND-PE)
- Page 99 SPE II Error! Use the Home tab to apply Überschrift 1 to the text that you want to appear here. Example 1 Device connection to a machine with S7-300 SPS. Figure 58 Example 2 Device connection to a operating panel.
- Page 100 Error! Use the Home tab to apply Überschrift SPE II 1 to the text that you want to appear here. Example 3 Device connection version if 'Option: 2. LED'. Figure 60 When connecting a reed contact with a control input, the contact must Precautions have a switching capacity of min.
- Page 101 SPE II Error! Use the Home tab to apply Überschrift 1 to the text that you want to appear here. 03.21 Serviceanleitung...
-
Page 103: Wiring Plans - Electronics
SPE II Error! Use the Home tab to apply Überschrift 1 to the text that you want to appear here. 15 Wiring Plans – Electronics 15.1 Panel Enclosure Figure 61 03.21 Service Instructions... -
Page 104: Desktop Enclosure
Error! Use the Home tab to apply Überschrift SPE II 1 to the text that you want to appear here. 15.2 Desktop Enclosure Figure 62 Service Instructions 03.21... -
Page 105: Spe Ii 107/12, 160/12
SPE II Error! Use the Home tab to apply Überschrift 1 to the text that you want to appear here. 16 Wiring Plans – Mechanics 16.1 SPE II 106/12, 106/24, 108/12, 162/12 Left Version Figure 63 03.21 Service Instructions... - Page 106 Error! Use the Home tab to apply Überschrift SPE II 1 to the text that you want to appear here. Right version Figure 64 Service Instructions 03.21...
- Page 107 SPE II Error! Use the Home tab to apply Überschrift 1 to the text that you want to appear here. 16.2 SPE II 107/12, 160/12 Left version Figure 65 03.21 Serviceanleitung...
- Page 108 Error! Use the Home tab to apply Überschrift SPE II 1 to the text that you want to appear here. Right version Figure 66 Service Instructions 03.21...
-
Page 109: Layout Diagrams - Electronics
SPE II Error! Use the Home tab to apply Überschrift 1 to the text that you want to appear here. 17 Layout Diagrams – Electronics 17.1 CPU Figure 67 03.21 Service Instructions... -
Page 110: Input/Output Board
Error! Use the Home tab to apply Überschrift SPE II 1 to the text that you want to appear here. 17.2 Input/Output Board Figure 68 17.3 Distributor Board Figure 69 Service Instructions 03.21... -
Page 111: Power Electronics
SPE II Error! Use the Home tab to apply Überschrift 1 to the text that you want to appear here. 17.4 Power Electronics Figure 70 03.21 Serviceanleitung... - Page 112 Error! Use the Home tab to apply Überschrift SPE II 1 to the text that you want to appear here. Service Instructions 03.21...
-
Page 113: Layout Diagrams - Mechanics
SPE II Error! Use the Home tab to apply Überschrift 1 to the text that you want to appear here. 18 Layout Diagrams – Mechanics 18.1 Distributor Board Figure 71 03.21 Service Instructions... -
Page 114: Power Electronics
Error! Use the Home tab to apply Überschrift SPE II 1 to the text that you want to appear here. 18.2 Power Electronics Figure 72 Service Instructions 03.21... -
Page 115: Environmentally-Friendly Disposal
It may only be organised, used and disposed of by the manufacturer. Valentin products accordingly labelled can therefore be returned to Carl Valentin GmbH. This way, you can be sure your old equipment will be disposed of correctly. - Page 116 Error! Use the Home tab to apply Überschrift SPE II 1 to the text that you want to appear here. Service Instructions 03.21...
-
Page 117: Index
SPE II Error! Use the Home tab to apply Überschrift 1 to the text that you want to appear here. 20 Index A adjustments, settings, alignments (Corner Type) head photocell ................75 parallelism ..................71 pressure ..................73 pressure balance ................72 pressure curve (ribbon save) ............ - Page 118 Error! Use the Home tab to apply Überschrift SPE II 1 to the text that you want to appear here. transfer ribbon rewinder, adjusting ..........74 transfer ribbon unwinder, adjusting ..........74 CPU (electronics), layout diagram ........... 107 CPU PCB replacing components (desktop enclosure) ......
- Page 119 SPE II Error! Use the Home tab to apply Überschrift 1 to the text that you want to appear here. replacing components (panel enclosure) ........22 instructions ................... 5 L label photocell cleaning ..................19 replacing (Corner Type) ..............57 replacing (Flat Type) ...............
- Page 120 (desktop enclosure) ........... 102 control unit (panel enclosure) ............101 mechanics (left version) SPE II 106/12 ................103 SPE II 106/24 ................103 SPE II 107/12 ................105 SPE II 108/12 ................103 SPE II 160/12 ................105 SPE II 162/12 ................
- Page 122 Carl Valentin GmbH Neckarstraße 78 – 86 u. 94 . 78056 Villingen-Schwenningen Phone +49 7720 9712-0 . Fax +49 7720 9712-9901 info@carl-valentin.de . www.carl-valentin.de...
Need help?
Do you have a question about the SPE II and is the answer not in the manual?
Questions and answers