Sign In
Upload
Download
Table of Contents
Contents
Add to my manuals
Delete from my manuals
Share
URL of this page:
HTML Link:
Bookmark this page
Add
Manual will be automatically added to "My Manuals"
Print this page
×
Bookmark added
×
Added to my manuals
Manuals
Brands
Dahua Manuals
Switch
DH-PFS3206-4P-96
User manual
Dahua DH-PFS3206-4P-96 User Manual
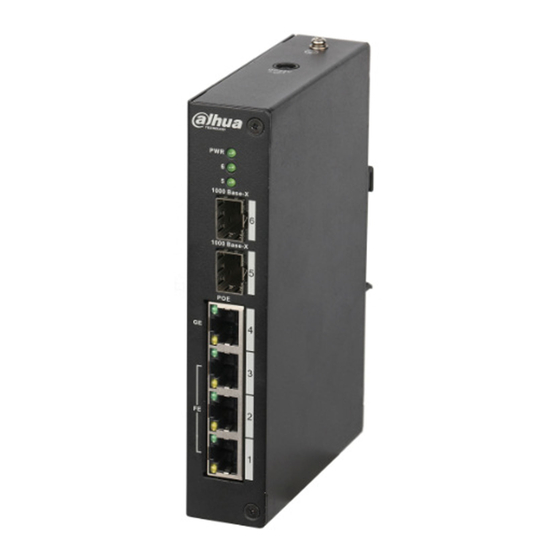
Dual optical port 4-port poe switch
Hide thumbs
1
2
Table Of Contents
3
4
5
6
7
8
9
10
11
12
13
14
15
16
17
18
19
page
of
19
Go
/
19
Contents
Table of Contents
Bookmarks
Table of Contents
Table of Contents
Product Overview
Features
Typical Application
Cascading Mode
Ring Network Mode
Device Structure
4-Port Poe Switch
Front Panel
Upper Cover
Poe Power Supply
WEB Client Operation
Login
Device Info
System Settings
System Info
Network Config
Software Upgrade
Change Password
Restore Default
System Reboot
Device Management
Ring Config
802.1Q VLAN Config
Poe
Port Management
Port Mirroring Config
SNMP Function
Installation Guide
Advertisement
Quick Links
1
Table of Contents
2
Login
3
Web Client Operation
4
Network Config
5
Restore Default
6
Installation Guide
Download this manual
Dahua Dual Optical Port 4-Port PoE Switch
User's Manual
V1.0.2
DAHUA VISION TECHNOLOGY CO., LTD.
Table of
Contents
Previous
Page
Next
Page
1
2
3
4
5
Advertisement
Table of Contents
Need help?
Do you have a question about the DH-PFS3206-4P-96 and is the answer not in the manual?
Ask a question
Questions and answers
Related Manuals for Dahua DH-PFS3206-4P-96
Switch Dahua DH-PFS3206-4P-120 User Manual
Dual optical port 4-port poe switch (19 pages)
Switch Dahua DH-PFS3211-8GT-120 Quick Start Manual
4/8-port unmanaged hardened switch (17 pages)
Switch Dahua DH-PFS3008-8GT-96 User Manual
8-port gigabit poe switch (6 pages)
Switch Dahua DH-PFS3006-4ET-60 User Manual
6-port 10/100mbps unmanaged desktop switch with 4 poe ports (10 pages)
Switch Dahua DH-PFS3010-8ET-96 Quick Start Manual
Ethernet switch (4/8-port unmanaged desktop switch) (13 pages)
Switch Dahua DH-PFS3009-8ET-96 Quick Start Manual
4&8-port unmanaged desktop switch (17 pages)
Switch Dahua DH-PFS3005-5ET-L Quick Start Manual
100/1000 mbps unmanaged desktop switch (13 pages)
Switch Dahua DH-PFS3008-8ET-L Quick Start Manual
100/1000 mbps unmanaged desktop switch (13 pages)
Switch Dahua DH-PFS3005-5GT-L Quick Start Manual
100/1000 mbps unmanaged desktop switch (13 pages)
Switch Dahua DH-PFS3008-8GT-L Quick Start Manual
100/1000 mbps unmanaged desktop switch (13 pages)
Switch Dahua DH-PFS3006-4GT-60 Quick Start Manual
Ethernet switch (4/8-port unmanaged desktop switch) (13 pages)
Switch Dahua DH-PFS3009-8ET-65 User Manual
(7 pages)
Switch Dahua DH-PFS3110-8ET-96 Quick Start Manual
4/8-port unmanaged hardened switch (17 pages)
Switch Dahua DH-PFS3125-24ET-190 User Manual
24-port 10/100 mbps + 1-port gigabit combo base-t sfp multi-mode poe switch (16 pages)
Switch Dahua DH-PFS3010-8ET-65 User Manual
10-port fast ethernet switch with 8-port poe (11 pages)
Switch Dahua DH-PFS3005-5GT Quick Start Manual
Ethernet switch (5-port & 8-port unmanaged switch with metal housing) (12 pages)
This manual is also suitable for:
Dh-pfs4206-4p-96
Dh-pfs3206-4p-120
Dh-pfs4206-4p-120
Table of Contents
Print
Rename the bookmark
Delete bookmark?
Delete from my manuals?
Login
Sign In
OR
Sign in with Facebook
Sign in with Google
Upload manual
Upload from disk
Upload from URL


Need help?
Do you have a question about the DH-PFS3206-4P-96 and is the answer not in the manual?
Questions and answers