Table of Contents
Advertisement
Advertisement
Table of Contents

Related Manuals for ABB KPM KB2


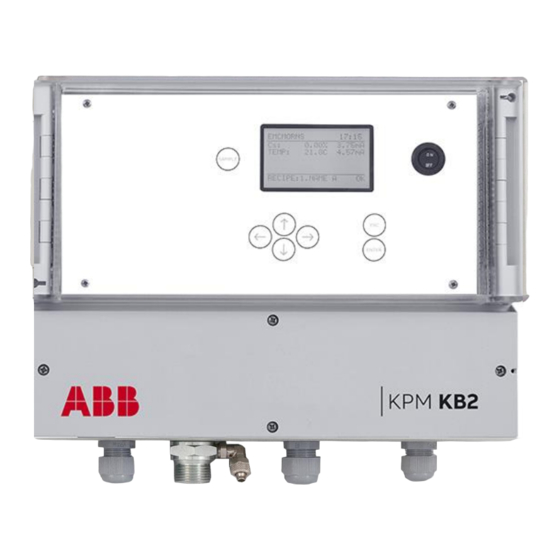
Summary of Contents for ABB KPM KB2
- Page 1 — KPM KB2 Sheet Break Detector Quick Guide...
- Page 2 However, should any errors be detected, ABB would gratefully appreciate being informed of them. In case of errors in this document, ABB shall not be liable for incidental or consequential damages in connection with or arising from such errors.
-
Page 3: Quick Start-Up Guide
Quick start-up guide This quick guide leads the way to install start-up and configure parameters in the normal cases. 1. Preparing installation Install fiber optic cable inside conduit. This is easier done when temperature is cool and conduit is straight on the floor. In new devices this cable is installed. NOTE DO NOT PULL FIBER OPTIC CABLE STRONGLY. -
Page 4: Start-Up And Tuning
When the web (paper) is on press "SAMPLE" and store signals as "Paper level". Perform "Calculate Auto-Limit" to find the best break detection signal. Select the signal suggested by KPM KB2 by pressing right arrow and "ENTER". Activate the break alarm relay by selecting operating mode ("Configuration" -› "Mode"):... - Page 5 — KPM KB2 Sheet Break Detector Instruction manual V1.8...
-
Page 7: Table Of Contents
Cleaning the sensor ....................29 Appendix 1: Quick start-up guide ..................30 Appendix 2: Spare parts ....................32 Appendix 3: KB model selection ..................34 Appendix 4: Technical specifications ................35 Appendix 5: Settings and variables .................. 36 January 2019 KPM KB2 Man W41100099V1.8... -
Page 8: Description
Purging air helps also to keep the sensor head temperature lower in high temperature applications. KPM KB2 requires clean instrument air at 0.5 – 3.0 bar (7 - 40 psi), the rotameter or pressure regulator can be used for the easy detection of airflow. -
Page 9: Sensor Unit Installation
Operating principle The KPM KB2 operates on a proven, non-contact reflection principle. The light source can be either RGB LED (red, green, blue) or IR LED (infrared). The optical sensor is placed above or under the web. Applications include paper or board webs, wires or felts. Thanks to the unique RGB detection method the color of the product or the felt has no effect on the measurement reliability. -
Page 10: Installation
Please contact ABB Oy, KPM for more information. Delivery limits Manufacturer supplied components: KPM KB2 sensor head tube (2 pipes) with position memory, 1 ea. Mounting clamps, 2 ea. Fiber optic cable (6 m/20", 9 m/30" or 12 m/40"), 1 ea. -
Page 11: Sensor Head Installation
The display, conduit, sensor head and mounting clamps are delivered separately and are mounted together at customer site (see Fig. 2.2). Fig. 2.2. KPM KB2 delivery. The sensor head tube is delivered in 2 pieces which are mounted together at customer site (see Fig. - Page 12 Make the installation as follows: 1) Remove plastic support and plastic tube. They are preventing fiber optic cable from bending during transportation (Fig. 2.4). Fig. 2.4. Sensor head with plastic support and plastic tube. 2) Insert the free fiber optic cable through the second part of sensor head (Fig. 2.5). Fig.
- Page 13 Fig. 2.10. PosiEye adapter. NOTE There is several lengths of the PosiEye Tube, with the longest tubes, the sensor head adapter needs to be flipped around so that it goes inside the PosiEye tube. January 2019 KPM KB2 Man W41100099V1.8...
-
Page 14: Fiber Optic Cable Installation
7) Connect fiber optic cable to the display unit, see paragraph 2.4. 8) Slide the sensor tube through the mounting clamps. Rotate the eyes into a position towards the web and semi-tighten the clamps. Final adjustment is done with the help of the signal level display after the unit is powered up. - Page 15 9. Connect the instrument air 0.5 - 3.0 bar (7 - 40 psi) to the air inlet connector (point C) at the end of the flexible conduit outside the display unit housing. Fig. 2.15. Connecting cables to optical unit. January 2019 KPM KB2 Man W41100099V1.8...
-
Page 16: Wiring
The terminals for the electrical and fiber optic cables are located under the bottom cover of the display unit. 3.1.1 KPM KB2 with 110 – 230 VAC + power supply The layout of the KPM KB2 110 – 230 VAC measuring board is shown in Fig. 3.1. - + - + - + Red/IR Green Blue... -
Page 17: Kb +24 Vdc + Power Supply
If power is lost or turned off the "Alarm Out Off" is OPEN. "Alarm Out On" works in the opposite way. There is 2 parallel Alarm Relays, Alarm Out 1 and Alarm out 2 which are working simultaneously. Fig. 3.3. KPM KB2 +24 VDC. Wiring of Power Supply, Break relay and Maintenance alarm January 2019 KPM KB2 Man W41100099V1.8... - Page 18 Fig. 3.4. Fiber optic cable and optional 4-20 mA connections. Analog outputs are active and KPM KB2 feeds 15 V to the current loop. Analog outputs are isolated, but not from each other, and they all use the same filtering time.
-
Page 19: Operation And Configuration
Enter: Accept data and input changes. Sample: Averages the measured values. After sampling the program asks if the values will be stored for Break or Paper Reference values or deleted. Fig. 4.2. Main display and main menu. January 2019 KPM KB2 Man W41100099V1.8... -
Page 20: Menu Structure
Menu structure Configuration Set-up Maintenance Parameters... -
Page 21: Configuration
Auto-limit sets the signal type for break detection, detection level and direction, when performed. Auto-alarm sets the alarm signal and alarm limits, when performed. Fig. 4.4. Setting reference values for break levels. KPM KB2 records all the signal levels in BREAK/PAPER situations and stores them as reference values. ... - Page 22 KPM KB2 also suggests the best signal for break detection and puts them in a ranking list. Normally the best signal is chosen for break detection by having it in display and pressing right arrow and then "ENTER".
- Page 23 Alarm settings: KPM KB2 can alarm in situations, where the signal level is very low (signal below Low alarm limit), very high (signal above High alarm limit) or when signal drifts a lot. Drift alarm limit and Drift alarm direction (falling/rising) can be determined. Ambient light is normally always: In use.
- Page 24 KPM KB2 can detect break also in situations where ambient light level is very high. This special application may be used for example in case, where KPM KB2 is installed very close to an IR-dryer, which causes too high ambient light (over 80 %). It is possible to eliminate too high ambient light giving alarm.
-
Page 25: Set-Up
You can set the outputs to go to 22.5 or 3.5 mA, or to freeze to the last good number, or to continue to show the measured values although they may be wrong (mode No eff(ect)). January 2019 KPM KB2 Man W41100099V1.8... -
Page 26: Maintenance
Maintenance In "Maintenance" section you can find device identification, measured signal values, errors, data logging and event logging. On-line signals: Fig. 4.12. On-line signals, pages 1 and 2. Fig. 4.13. On-line signals, pages 3 and 4. Fig. 4.14. On-line signals, page 5. You can monitor measured and calculated signals for troubleshooting. - Page 27 Press "ENTER" for more information of the break. "+" indicates time when the break took place, and "-" when paper is back again. The quantity of breaks recoded during the total length of break (inside 5 minutes) is shown in parenthesis. Fig. 4.17. Event log. January 2019 KPM KB2 Man W41100099V1.8...
- Page 28 Check alarms: List of maintenance alarms, which are active at the moment. The number of alarms is shown in the brackets. This menu is used for troubleshooting and may contain a help menu how to fix problem. Plus indicates time when alarm has occurred. Fig.
- Page 29 Requires always password (633 or 601). Factory setting values are set during the initial setting and there is no need for customer to change them. Please contact ABB OY, KPM for more information. Fig. 4.20. Factory settings. Clear event log: Clears the event log.
-
Page 30: Parameters
USB comm(unication) mode: Select communication port mode: ScrShot/Normal. Analog output trim: KPM KB2 sends in the edit mode 4 and 20 mA in turn to the selected analog output. With S (gain) and Z (zero offset) the output can be trimmed to correspond 20 mA (gain) and 4 mA (zero). -
Page 31: Start-Up
7 calculated combinations thereof. The highest rated signal normally gives the best performance. 2. Select the 1st displayed signal for break detection with arrow right and "ENTER". KPM KB2 sets the break trigger level (Detection limit) to the mid-point (50 % value) between the "Break"-on/"Paper"- on levels of the selected signal. -
Page 32: Examples
Auto-limit calculation results: 1. G (green light gives the highest difference), 125/24=5.2 (paper- to-break "Ratio"), 24 (green level on "Break"), 125 (green level on "Paper"). KPM KB2 selects green light for break detection and sets the trigger point to 74 (= (125+24) /2). Alarm settings: Same way as above in chapter "Open draw". -
Page 33: Maintenance
Maintenance Regular maintenance KPM KB2 does not require any regular maintenance. Built-in self-diagnostics monitors internal signals and raises alarm flag in case of a malfunction or certain signals reach alarm limits. Alarms Alarm name Possible cause Action Check cleaning Sensor eyelet holes blocked. - Page 34 "Drift Alarm" goes on when signal level drops below "Cleaning alarm DRIFT" (here limit = 80 which is 70 % from break (10) to Paper (110). "Detection limit" is set to 60 (50 % value between paper and break). KPM KB2 informs break whenever signal drops below 60.
-
Page 35: Cleaning The Sensor
5. Wipe the lenses clean with soft fabrics or paper and reinstall. 6. Eyes must be centered over the holes in the pipe. Fig. 6.2. Dismantling the sensor housing. Fiber-optic cable head Fig. 6.3. Fiber optic cable head. January 2019 KPM KB2 Man W41100099V1.8... -
Page 36: Appendix 1: Quick Start-Up Guide
Appendix 1: Quick start-up guide This quick guide leads the way to install start-up and configure parameters in the normal cases. 1. Preparing installation Install fiber optic cable inside conduit. This is easier done when temperature is cool and conduit is ... - Page 37 When the web (paper) is on press "SAMPLE" and store signals as "Paper level". Perform "Calculate Auto-Limit" to find the best break detection signal. Select the signal suggested by KPM KB2 by pressing right arrow and "ENTER". Activate the break alarm relay by selecting operating mode ("Configuration" -› "Mode"): "Detect enabled".
-
Page 38: Appendix 2: Spare Parts
Appendix 2: Spare parts KPM KB2 Sensor Head Assembly 2000018 Set screw 2. 2000033 Lock ring 3. 2000205 Screw M 4x14 4. Fiber optic cable 315001 Fiber optic cable 6 m 315002 Fiber optic cable 9 m 315003 Fiber optic cable 12 m 5. - Page 39 KPM KB2 Display unit 1. A41100152V1.0 Measuring board 24 VDC A41100032V1.0 Measuring board 110 – 230 VAC 2. A41100021V1.1 KB Analog board 3. E31140033V1.0 KB Display plate assembly 300002 Graphic display board A41100027V1.0 Keyboard KB-KC7 A41100102V1.0 Display Unit 90 – 264 VAC A41100200V1.0...
-
Page 40: Appendix 3: Kb Model Selection
Appendix 3: KPM KB2 model selection SHEET BREAK DETECTORS Type Order Code Description KB/6 Sheet Break Detector, 6 meters (20ft) Fiber Optic Cable, 1,5m Sensor Head rod KB2 Display Unit, 85...264VAC, 2 x RELAY outputs included KB/6 Sheet Break Detector, 6 meters (20ft) Fiber Optic Cable,... -
Page 41: Appendix 4: Technical Specifications
Electronics Unit 323 x 237 x 70 mm (12,7 x 9,3 x 2,8”), 3 kg (6,6 lbs) and weight Sensor head Ø 33 mm (1”1/4) AISI 316, pipe 1500 mm (59”) long, 4 kg (9 lbs) January 2019 KPM KB2 Man W41100099V1.8... -
Page 42: Appendix 5: Settings And Variables
Appendix 5: Settings and variables Parameters: Mode: Detect Enabled or Maintenance Light source: RGB or IR Selected signal: Detect limit: Direction: Break < Det.Limit or Break > Det. Limit Alarm signal: Low alarm limit: High alarm limit: Drift Alarm: Drift Alarm limit: Drift Alarm direction: Configuration Autolimit&Autoalarm... - Page 43 In the European Union Please contact your local ABB representative who will inform you about the take-back of the product. Small products (and small amounts) might be taken back by your local collection facilities.
- Page 44 — ABB Oy, KPM Kettukalliontie 9 E, 87100 Kajaani, Finland +358 10 548 7600 www.prokajaani.com fi-kpm@abb.com...
Need help?
Do you have a question about the KPM KB2 and is the answer not in the manual?
Questions and answers