Subscribe to Our Youtube Channel
Summary of Contents for Soleus Air KC-15U
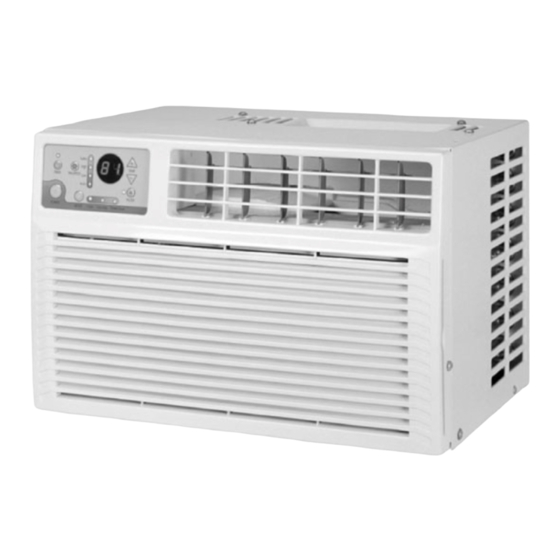
- Page 1 Window Air Conditioner OWNER’S MANUAL Models KC-15U, KC-18U, KC-25U, KC-32U and KC-35U...
-
Page 2: Table Of Contents
INSTALLATION REQUIREMENTS…………………………………3 Tools and Parts……………………………………………………. 3 Location Requirements…………………………………………….4 Electrical Requirements……………………………………………4 INSTALLATION INSTRUCTIONS…………………………………...5 Unpack the Air Conditions…………………………………………5 Prepare Air Conditioner for Installation…………………………..5 Position the Air Conditioner……………………………………….6 Complete Installation………………………………………………7 AIR CONDITIONER USE……………………………………………8 Starting Your Air Conditioner—Digital Control………………….8 Starting Your Air Conditioner—Rotary Control………………..10 TABLE OF CONTENTS Changing Air Direction……………………………………………11... -
Page 3: Air Conditioner Safety
WARNING: To reduce the risk of fire, electrical shock or injury when using your air conditioner, follow these basic precautions: Plug into a grounded 3 prong outlet. Do not remove ground prong. -
Page 4: Location Requirements
Failure to follow these instructions can result in death, fire, or electrical shock. The electrical ratings for your air conditioner are listed on the model and serial number label. The model and serial number label is located behind the front panel above the coil area. -
Page 5: Installation Instructions
• Prepare Air Conditioner for Installation 1. Locate provided bags of screws. 2. Place the top channel on top of the air conditioner, lining up the holes in top channel with the holes on top of air conditioner. 3. Using 2 - #8 x 3/8" pan-head screws, attach top channel to air conditioner. -
Page 6: Position The Air Conditioner
5. While the right-hand curtain is still extended, insert screw in the bottom slot of the curtain. Using #8 x 3/8" pan-head screw, screw the curtain to the bottom hole in the air conditioner cabinet. 6. Slide the curtain housing into the channels as far as it will go. -
Page 7: Complete Installation
1. Center air conditioner in window. Check that lower rail of air conditioner is behind and against back side of windowsill. Lower window sash to hold cabinet in place. NOTE: Your model may differ from the one shown. A. Window sash B. -
Page 8: Air Conditioner Use
• Do not try to operate your air conditioner in the cooling mode when outside temperature is below 65°F (18°C). The inside evaporator coil will freeze up, and the air conditioner will operate properly. - Page 9 1 to 24 hours. 3. Press TIMER again or wait 10 seconds. Indicator light will remain on. To set the Timer to turn on the air conditioner, keeping previous settings: 1. Turn off air conditioner. 2. Press TIMER. Indicator light will flash.
-
Page 10: Starting Your Air Conditioner-Rotary Control
1º until it reaches 64°F (18°C). To set Timer for a 1- to 24-hour delay before air conditioner is turned off (air conditioner must be On): 1. Press TIMER. Indicator light on air conditioner control panel will flash. -
Page 11: Changing Air Direction
Fan Speed Set FAN SPEED to the desired setting. When the air conditioner is operating at Low Cool, High Cool (on some models), Med Cool (on some models) or Turbo Cool (on some models), the fan circulates air continuously. Turbo Cool (on some models)—for maximum cooling High Cool (on some models)—for normal to maximum... -
Page 12: Air Conditioner Care
Your new air conditioner is designed to give you many years of dependable service. This section tells you how to clean and care for your air conditioner properly. Call your local authorized dealer for an annual checkup. Remember… the cost of this service call is your responsibility. -
Page 13: Troubleshooting
You can solve many common air conditioner problems easily, saving you the cost of a service call. Try the suggestions below to see whether you can solve your problem without outside help. Air conditioner will not operate • The power supply cord is unplugged. Plug into grounded 3-prong outlet. - Page 14 WARRANTY One Year Limited Warranty Soleus International Inc. warrants the accompanying Soleus Air Window Air Conditioner (KC-15U, KC-18U, KC-25U, KC-32U, or KC-35U) to be free of defects in material and workmanship for the applications specified in its operation instruction for a period of ONE (1) year from the date of original retail purchase in the United States.


Need help?
Do you have a question about the KC-15U and is the answer not in the manual?
Questions and answers