
Subscribe to Our Youtube Channel
Related Manuals for HOMCOM 820-276


Summary of Contents for HOMCOM 820-276
- Page 1 INcjd092_UK 820-276_820-267_820-265V70 Electric Oil Heater Instructions IMPORTANT, RETAIN FOR FUTURE REFERENCE: READ CAREFULLY ASSEMBLY & INSTRUCTION MANUAL...
- Page 2 INSTRUCTIONS Thank you for choosing our oil heater, please read the instruction carefully before use and save it for future reference Product Characteristic ◆ The electric oil heater manufactured by our company uses tubular elements as the heat source, high-efficiency permanent heat-conducting oil as the medium, dissipates heat through the heat sink, and uses air circulation to increase the room temperature.
- Page 3 Figure 2 Castor Board Installation Diagram 1.CHECK BEFORE START: (1)Power line should not be damaged, fracture phenomena; (2) Please make sure the parameters required by your power and heater nameplate before use make sure that the power outlet current rating meets the requirements and has a safety ground, or should replace the outlet.
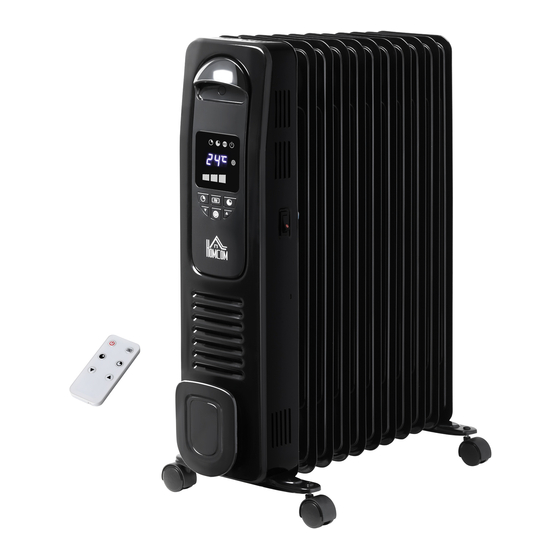
- Page 4 1.Plug in the power cord and turn on the main mechanical switch: the power icon light is on and the product goes into standby 2.ON/OFF: It acts as a switch. After shutdown, the machine remembers the state before shutdown without power off (timer function does not remember) 3、▲/▼:...
- Page 5 SUPPLEMENTARY EXPLANATION: 1.When the machine is in the reservation state, it is not displayed except for the reserva- tion mark and time content. If you press the "mode" key, the corresponding mode is displayed. At this time, you can use the mode key or ▲ / ▼ key to select the mode. If there is no such operation for 5 seconds, the mode icon will go out again.
- Page 6 IMPORTANT NOTES 1.Read all instructions before using the heater. 2.To prevent overheating, Do not cover the heater. 3.the heater can not be located immediately below an electrical outlet or electrical outlet. 4.The heater is not suitable in humid environments, such as bathrooms and water or to the place susceptible to washout, and should prevent water droplets from entering or splash- ing into the control box.
- Page 7 22.When using the heater, do not frequent switching windows and doors, it will affect the heating effect. 23.Do not use the heater outdoors. 24.Keep the product specification, not discarded. Electrical schematic diagram Switch Thermal Link Indicator Light Fall Switch Power Plug Heater 1 Heater 2 Non-adjustable thermostat...
Need help?
Do you have a question about the 820-276 and is the answer not in the manual?
Questions and answers
Hi, the appointment/timer section of the manual makes zero sense. Please clearly explain how to set the heater to come on at a specific time and how to turn off. Be very specific about which button to press first, what comes next and which button to finish etc. A video would be helpful.
Press the reservation (or timer) button to enter the time setting mode. The reservation lamp (or timer lamp) will flash. Adjust the time using the add and subtract keys. The setting will automatically confirm after 5 seconds of no operation or can be confirmed immediately by pressing the reservation (or timer) button again. The reservation lamp (or timing lamp) will stay on continuously after confirmation. You can set both scheduled power-on and power-off times, with the first confirmed setting taking priority. The maximum timer setting is 24 hours, and setting it to 0 hours disables the timer.
This answer is automatically generated